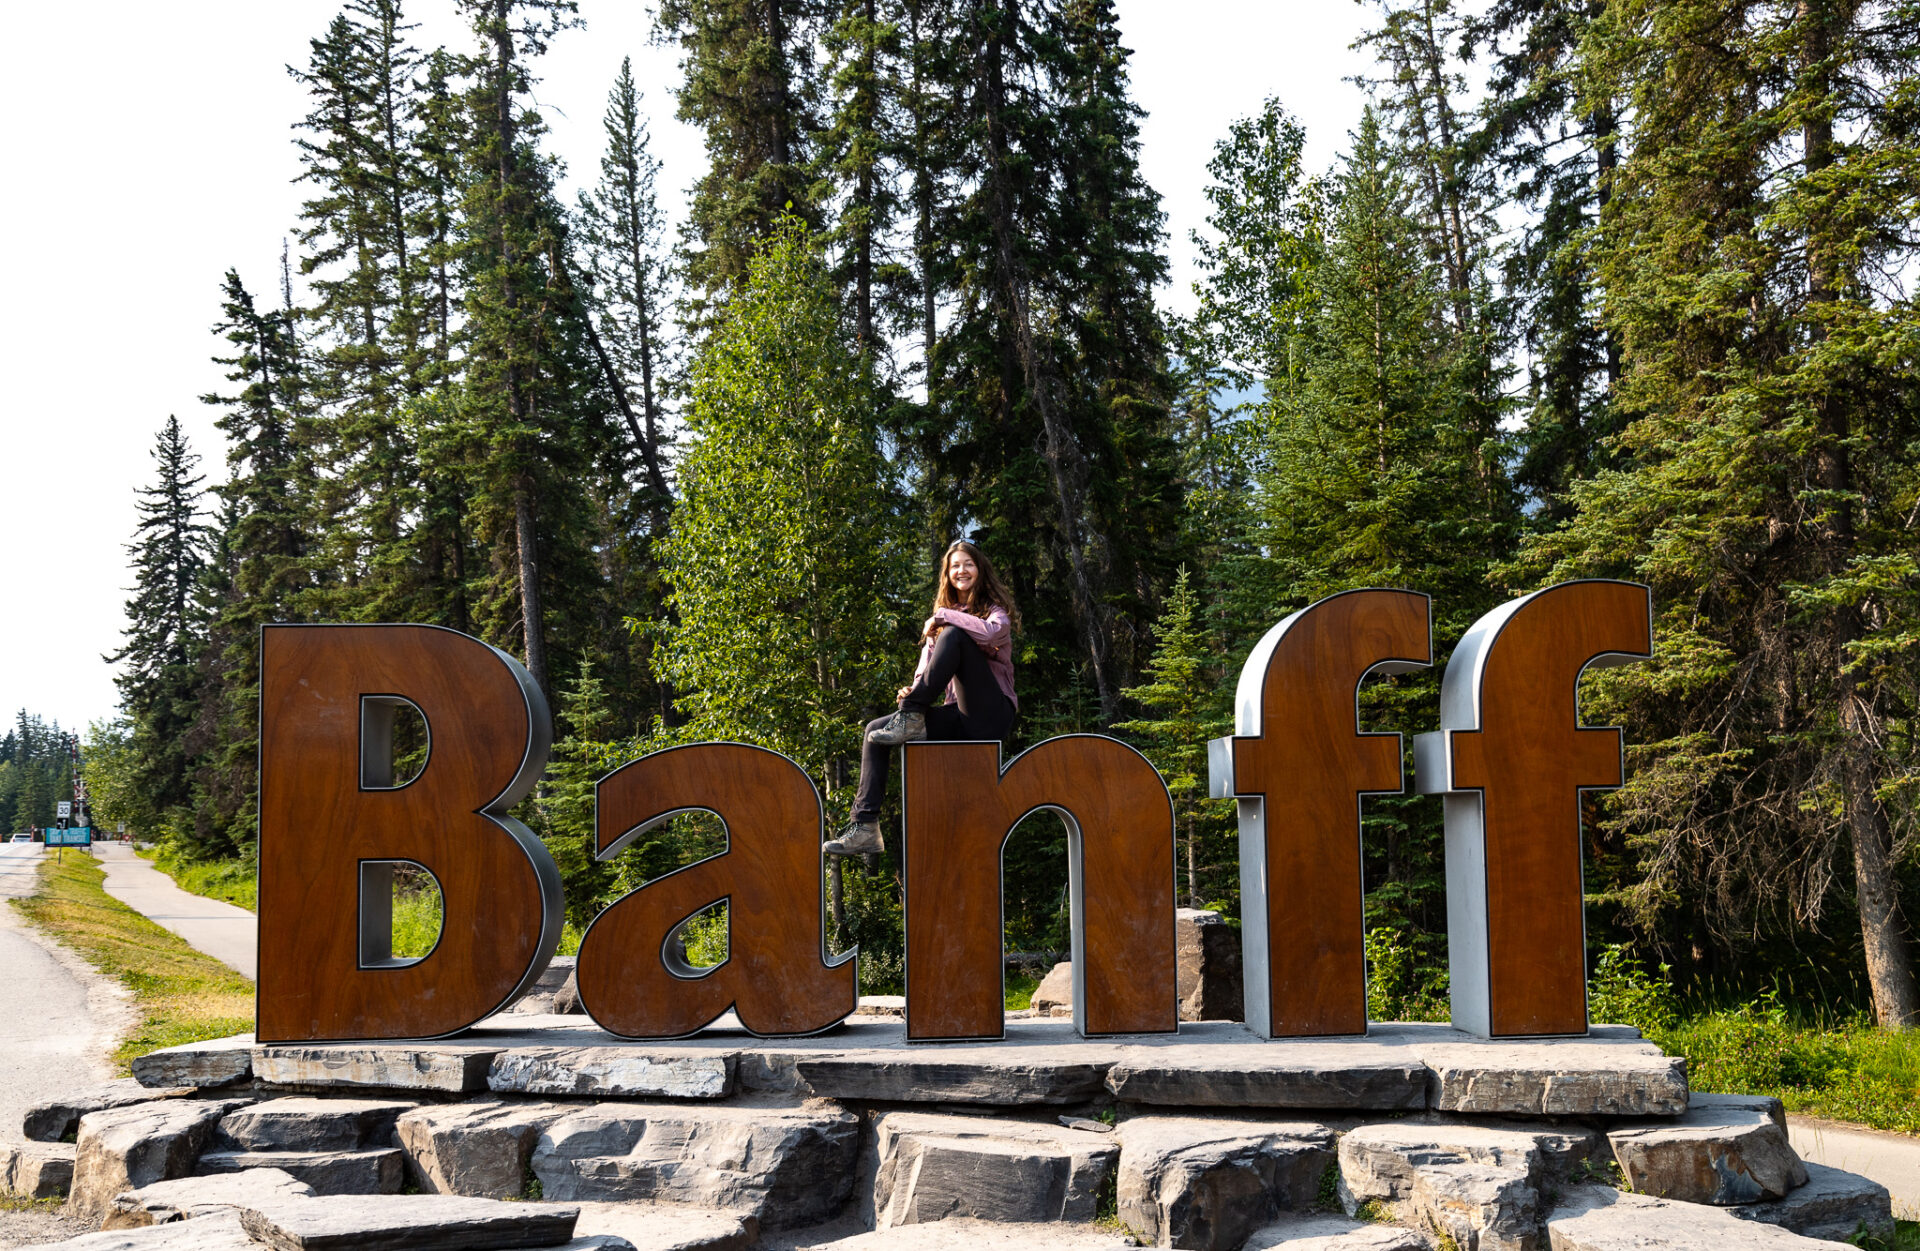
Sulphur Mountain Traverse Route: An Off-the-Beaten Path Hike in Banff
Many of you know the famous Sulphur Mountain in Banff, but have you ever heard of the Sulphur Mountain Traverse Route? This off the beaten path hike in Banff National Park is sure to impress even the most experienced of hikers.
This is a more advanced and lengthy hike in Banff that features incredible views of the Spray River between Banff and Canmore. You’ll be hiking along the multiple Sulphur peaks with insane views of both Rundle Mountain (hiker’s left) and the Sundance Range (hiker’s right).
There’s a bit of scrambling involved so this hike can also be considered one of the many Banff Scrambles! For more of my scrambling trail guides, pop over to this page.
A quick reminder – Banff is a National Park which means you’ll need a Park’s Pass for each day you’ll be in the Park. Buy these at the Park gates, online, or at the town’s visitor centre.
Without further ado, let’s go hiking!
Skip Ahead:
- How to get to the Sulphur Mountain Traverse Route
- About the Sulphur Mountain Traverse Route
- Hiking the Sulphur Mountain Traverse Route
- Essential hiking gear for Banff
- What to wear hiking in Banff
- Tips for a successful hike
- Best places to stay in Banff
I have affiliate links in this post which means when you book a hotel or purchase a product, I may make a small commission ~ at no additional cost to you (full disclosure). These funds go back into The Holistic Backpacker and help me create more free content like this!
Thank you for supporting my work!
Related Content
- 50+ Things to do in Banff in summer
- Discover more Banff trail guides
- Complete guide to the Icefields Parkway
- Step-by-step guide for planning a trip to Banff
- What to wear hiking in Banff
- Hiking gear guide for Banff
How To Get To The Sulphur Mountain Traverse Route
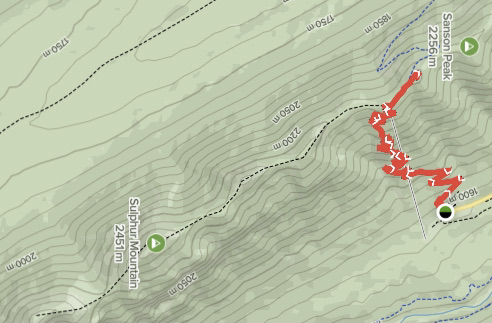
Below I’ve marked the Sulphur Mountain trailhead, the Sulphur Mountain Traverse Route trailhead as well as the true Sulphur summit.
Something exceptionally great about this off the beaten path hike in Banff is that you don’t need a car to get to the trailhead! Sulphur Mountain is located right in the town of Banff and can be accessed via the $2 Roam bus (route 1).

Best Banff Car Rentals
Most of Banff’s remote trailheads and attractions are inaccessible via public transportation. I 100% recommend renting a car to make the most of your time in the Rockies.
My favourite rental tool is this site as it compares all the local car rental shops to find you the best rate.
Actually I recommend taking the bus because parking at the gondola can be a bit wild.
The Sulphur Mountain trailhead is located in the upper parking lot near the Banff Upper Hot Springs. From here you can either hike up the Sulphur Mountain trail OR take the Banff Gondola. You can read more about my experience working at the Banff Gondola here.
Honestly, hiking both the Sulphur Mountain trail and the Sulphur Mountain Traverse Route would be a massive day. I’d recommend taking the gondola (that’s what I did) before setting off to the true Sulphur Mountain summit.
More: Sulphur Mountain trail guide
About The Sulphur Mountain Traverse Route
I didn’t track this hike, so I don’t have specifics. However generally this is what you can expect in terms of length, elevation, etc (not including the Sulphur Mountain trail).
- Distance: 10km
- Elevation gain: unknown, but probably around the 900-1000m mark
- Rated: hard
- Route Type: out & back
- Estimated time: 3-5hrs
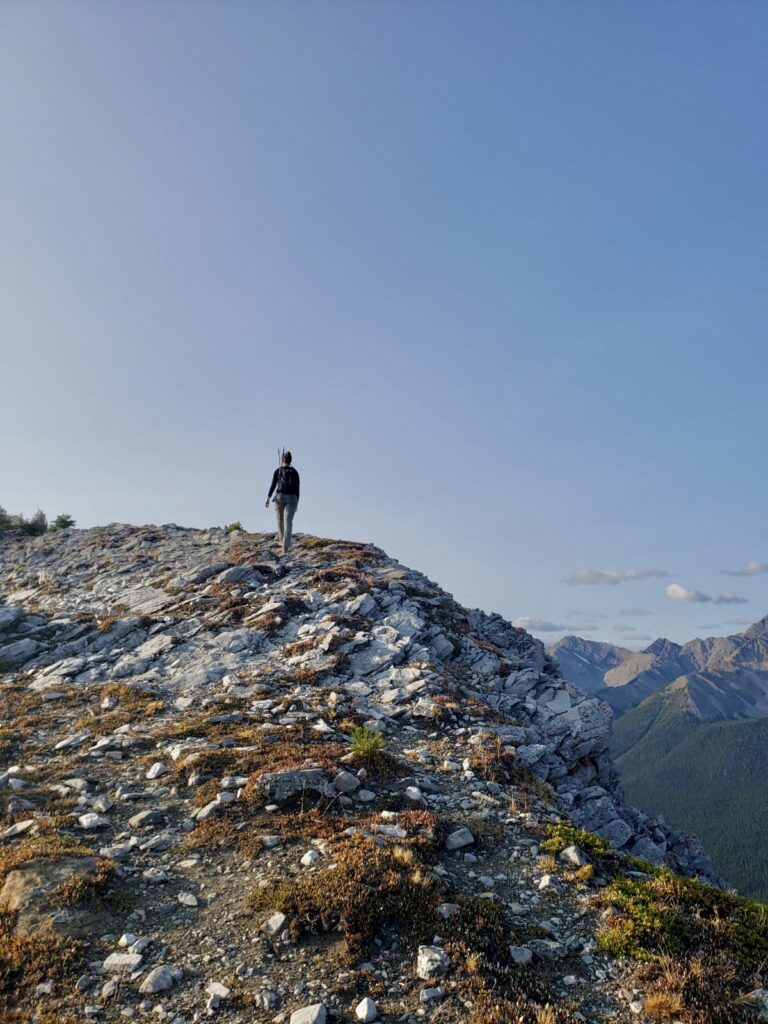
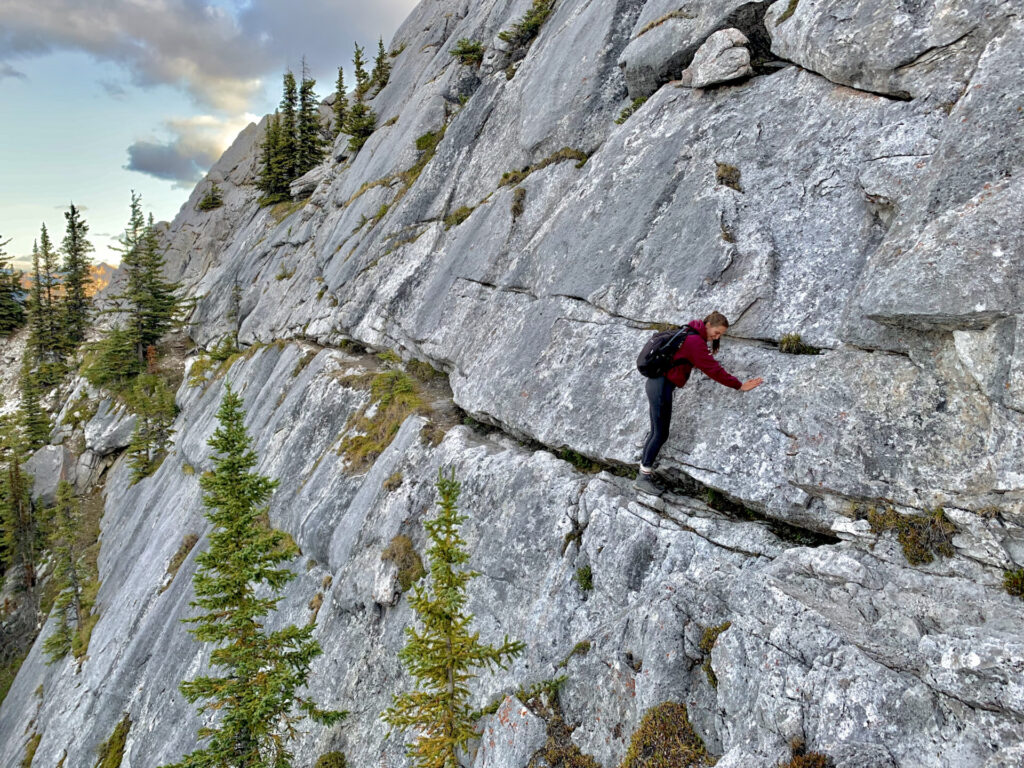
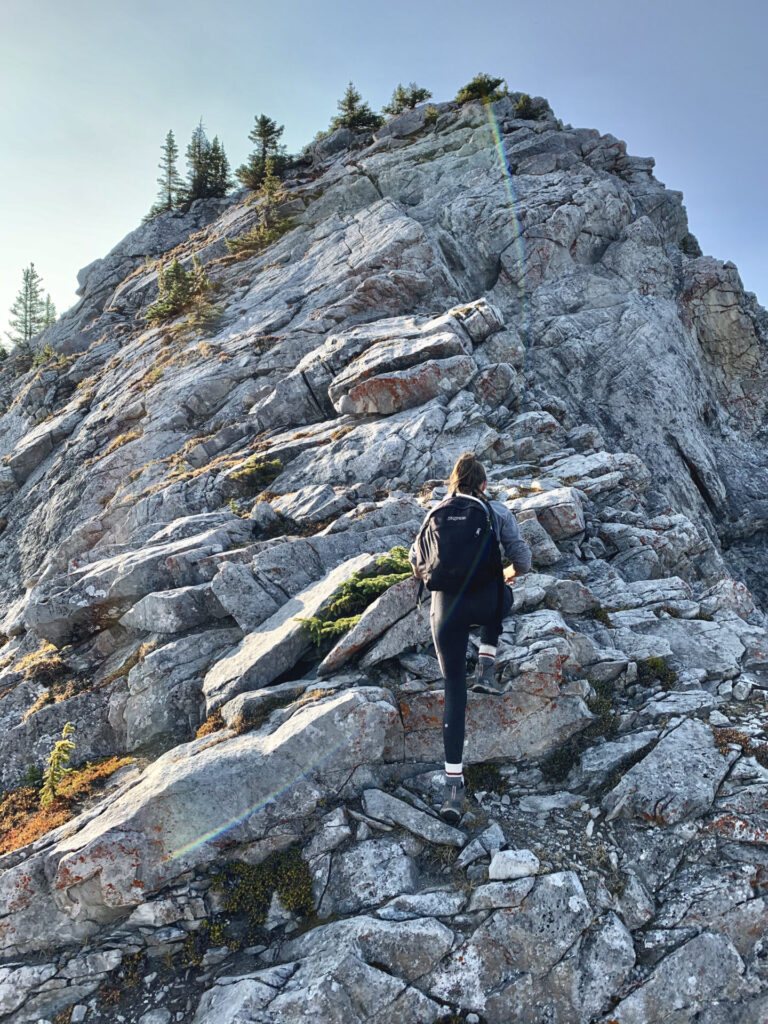
The Sulphur Mountain Traverse Route is a low traffic (expect to be the only one on the trail), diverse, and technical hike that features scrambling and requires route finding. You’ll be traversing the Sulphur Mountain ridge over a series of peaks to reach the true Sulphur summit (4th peak). You can expect scrambling and a few small scree/loose rock sections along the way.
There’s limited (if any) cell service on the ridge, so taking a satellite communication device, like the Garmin inReach Mini, might be a good idea for safety reasons.
My hiking partner and I messed up BIG (as per usual) and made some serious detours in the wrong direction. As you’re hiking the Sulphur Mountain Traverse Route, ensure you stay as close to the top of the ridge as possible. There are “trails” (animal trails) that lead you off path – DO NOT follow these!
I would only recommend completing this off the beaten path hike in Banff if you’re an experienced hiker OR if you’re hiking with someone experienced. This is a beautiful hike though, so if you have the necessary skills add the Sulphur Mountain Traverse Route to your Banff bucket list.
Looking for More Banff Adventures?
Banff is an adventurer’s & view seeker’s paradise. If you’re planning a trip to this gorgeous Canadian Park, you can start with this step-by-step guide designed to help you plan the perfect Banff itinerary.
Alternatively, check out this page with all my Banff resources.
Banff Hiking Resources
On this page you can find all my Banff trail guides. A few signature hikes in Banff are these easy trails, Tunnel Mountain, Sulphur Mountain, Lake Louise, and Johnston Canyon. If you’re only in Banff for a few days, start with those!
A few of my personal favourite hikes in Banff are Mount Bourgeau, Sentinel Pass, Tower of Babel, the Banff Skoki Loop, and the Sulphur Mountain Traverse Route.
More Banff Resources you Might Find Interesting:
Want to continue your Canadian Rockies expedition outside of Banff? Check out my trail guides & travel resources for British Columbia and Kananaskis Country as well as Jasper, Waterton, Yoho, and Kootenay National Parks 🙂
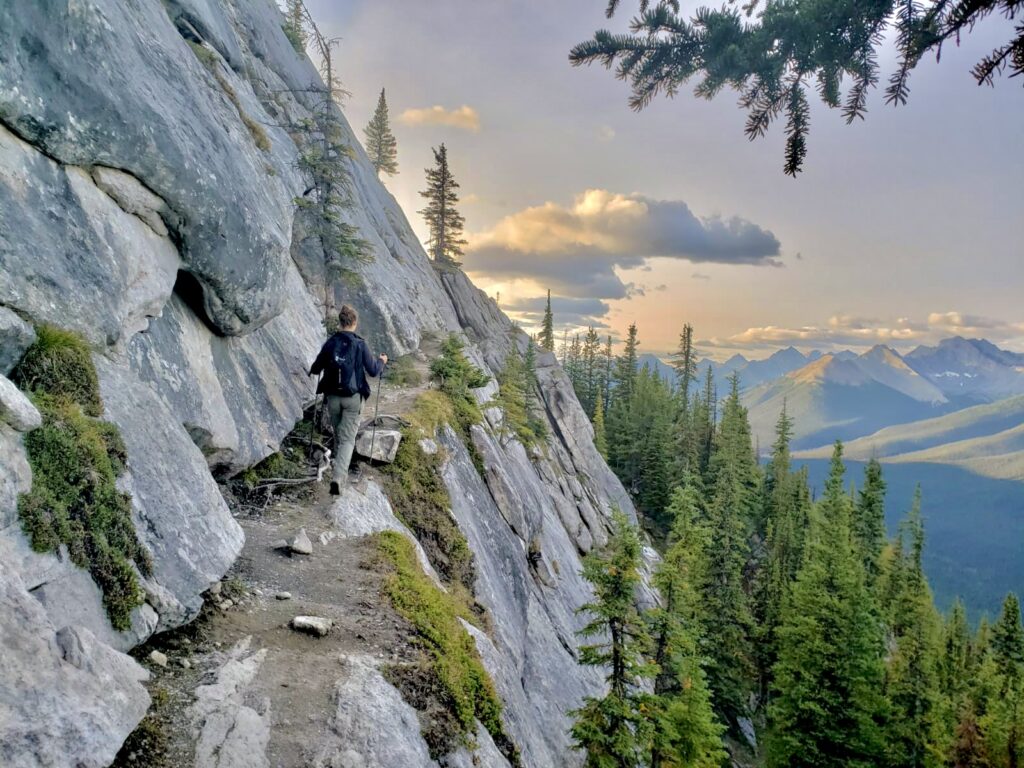
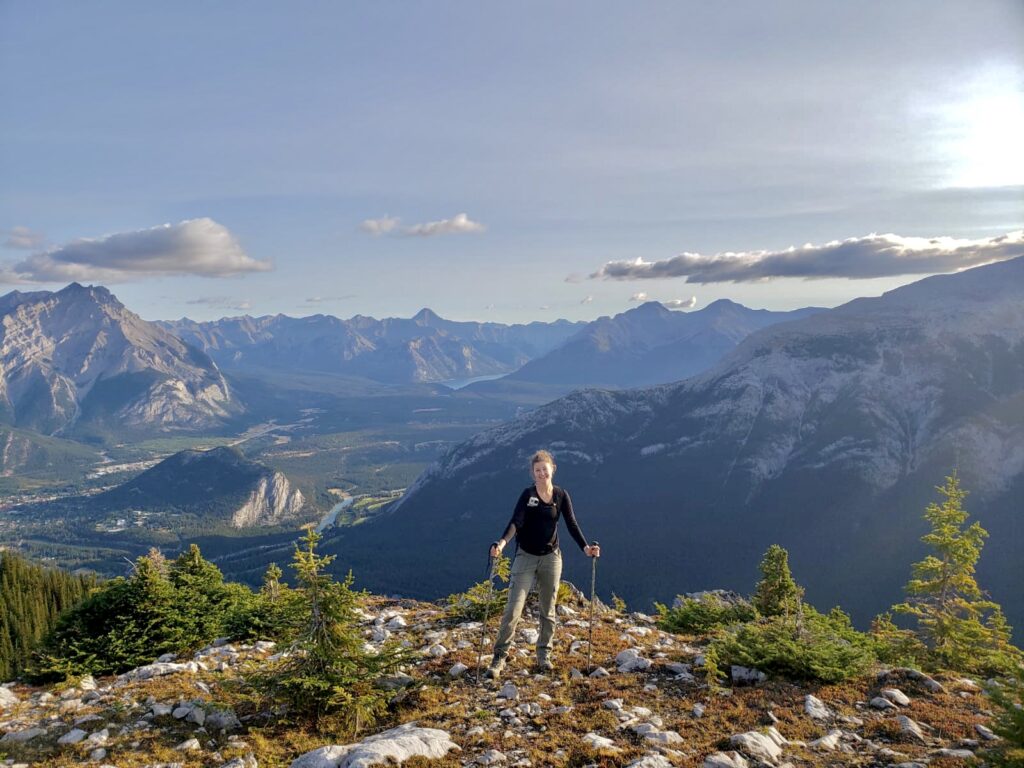
Hiking The Sulphur Mountain Traverse Route
This off the beaten path hike in Banff starts at the top of Sulphur Mountain. Again, you can either hike the Sulphur Mountain trail OR take the Banff Gondola instead of hiking both trails. Once you arrive at the top, you’ll want to go to the wooden helicopter pad to find the next trailhead. If you take the gondola up, go left once you reach the deck and follow the building around.
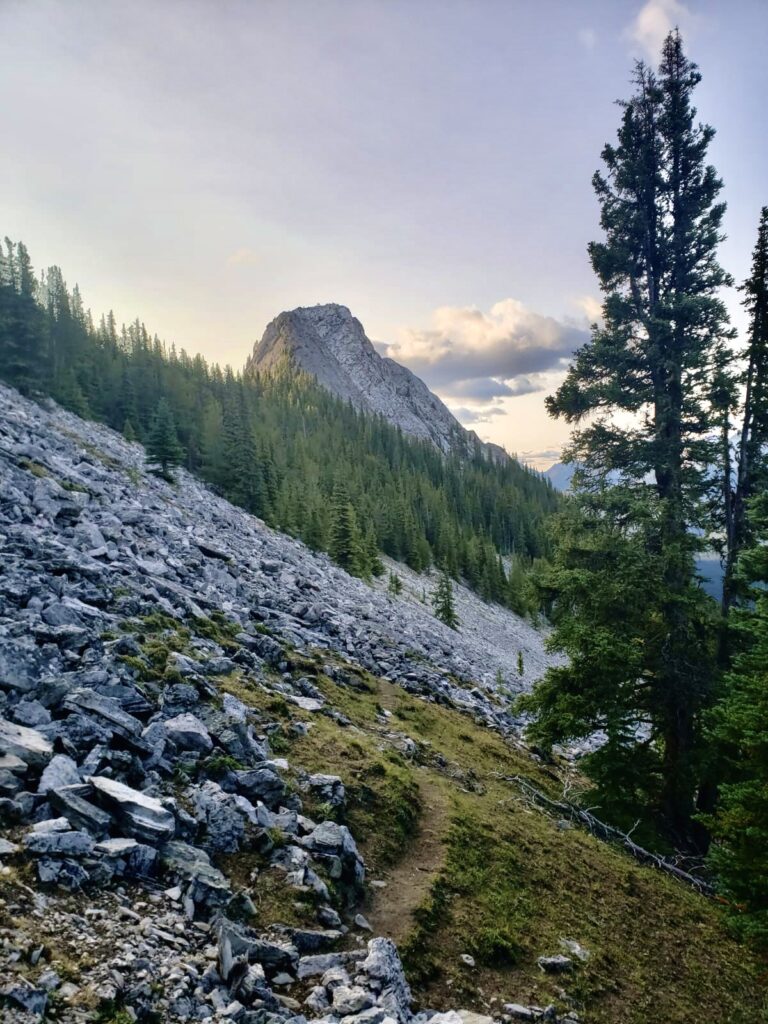
The trailhead will be the small opening in the trees just passed the helicopter pad. The trail initially goes through the trees with minimal views, then opens up quickly to dramatic views complete with rugged peaks, rivers, and steep valleys.
We Done Fckd Up…
Warning – stay as close to the top of the ridge as possible!
Very early on my hiking partner and I took a wrong turn and ended up further down on the right hand side of Sulphur Mountain. We had to traverse dangerous cliff edges and scramble up extremely steep terrain to get back on track!
We also had to endure an unnecessary and unstable scree section on our mission back to the top of the ridge. Stay high and don’t make the same mistake we did!! Besides, the views are all at the top so that’s where you’ll want to be anyways!
Back On Track
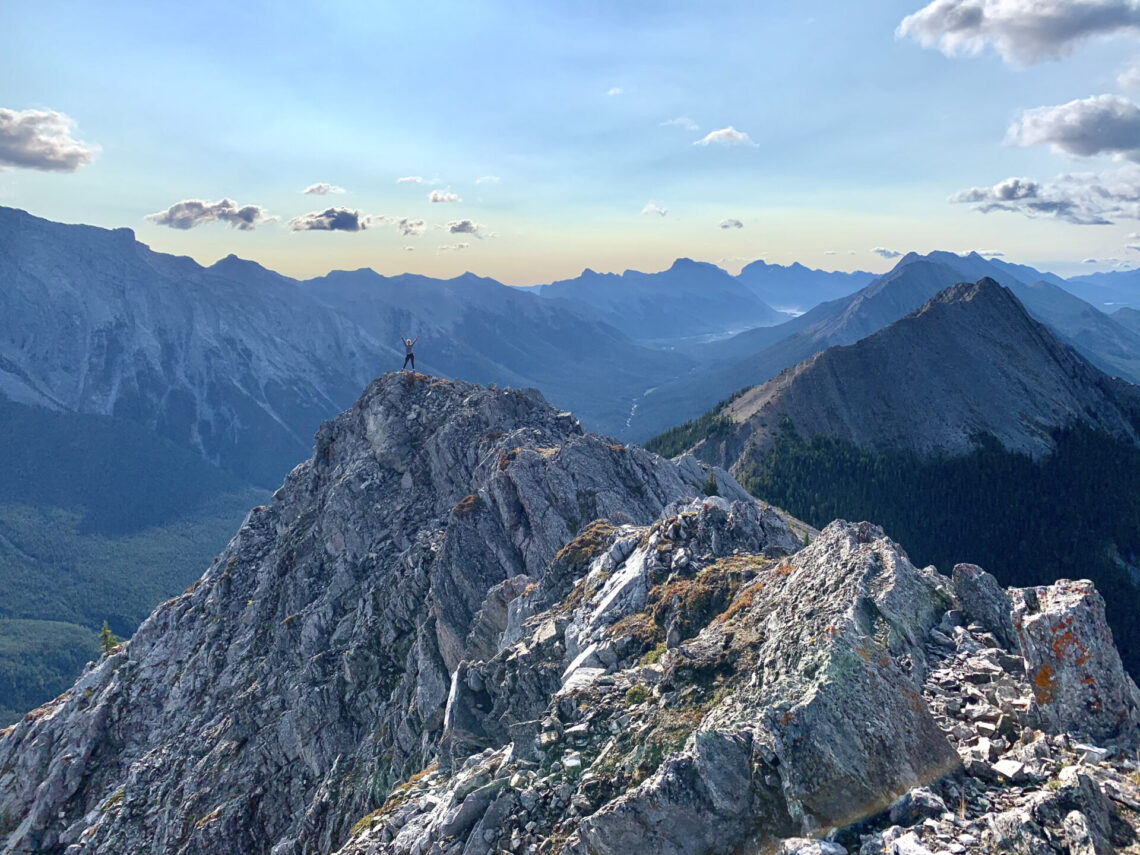
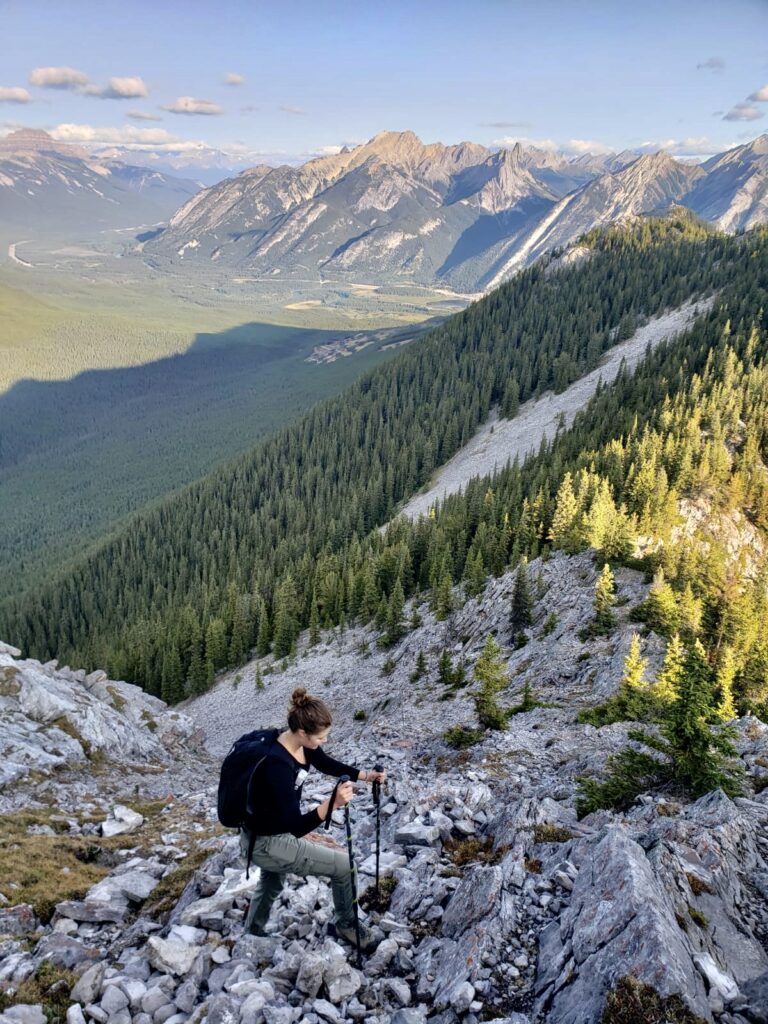
After my hiking partner and I made it back to the ridge, things were much smoother and easy to navigate. The Sulphur Mountain Traverse Route takes you over 3 peaks before you reach the 4th and final peak (the true Sulphur Mountain summit). You can expect to be hiking over a lot of ups and downs which can be tiring but also keeps things interesting. My trekking poles helped me huge as I navigated the peaks!
From the trailhead you’ll quickly and easily make it to the first peak, but after that each peak becomes a little steeper, a little bigger, and a little more technical to climb. No worries though – the views continue to get better as you go which will give you the needed motivation to keep on trekkin’.
2nd Peak & Beyond
There’s a very steep climb to get to the third peak. My partner and I decided to bypass this and stayed low on hiker’s right. This was great because we missed some elevation, however the terrain did turn into a loose rock field which could have been quite dangerous as it was a straight drop to the valley floor below us.
There seemed to be a common theme of “omg is this over yet?” Every time we thought we’d made it to the true summit there ended up being another peak! We had no idea how many peaks there were and we didn’t plan anything; we were very unprepared for this.
4th Peak
The fourth peak was easily the biggest climb and most exhausting slog of the 4. Part of it is hiking, the other part is scrambling and route finding. We found climbing around the right side, then slowly making our way back around to the left was the safest way to ascend.
This part of the hike was the most technical and therefor the most fun!
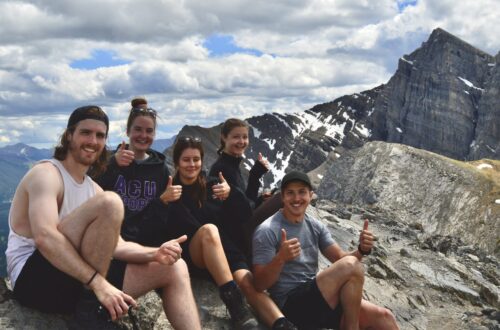
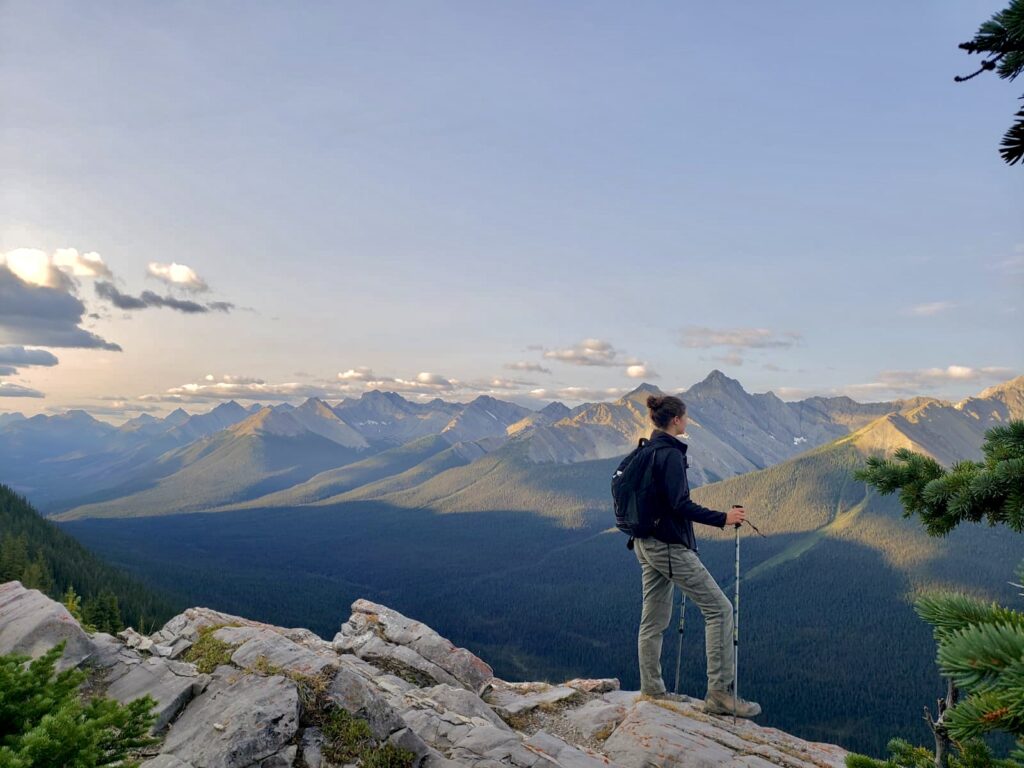
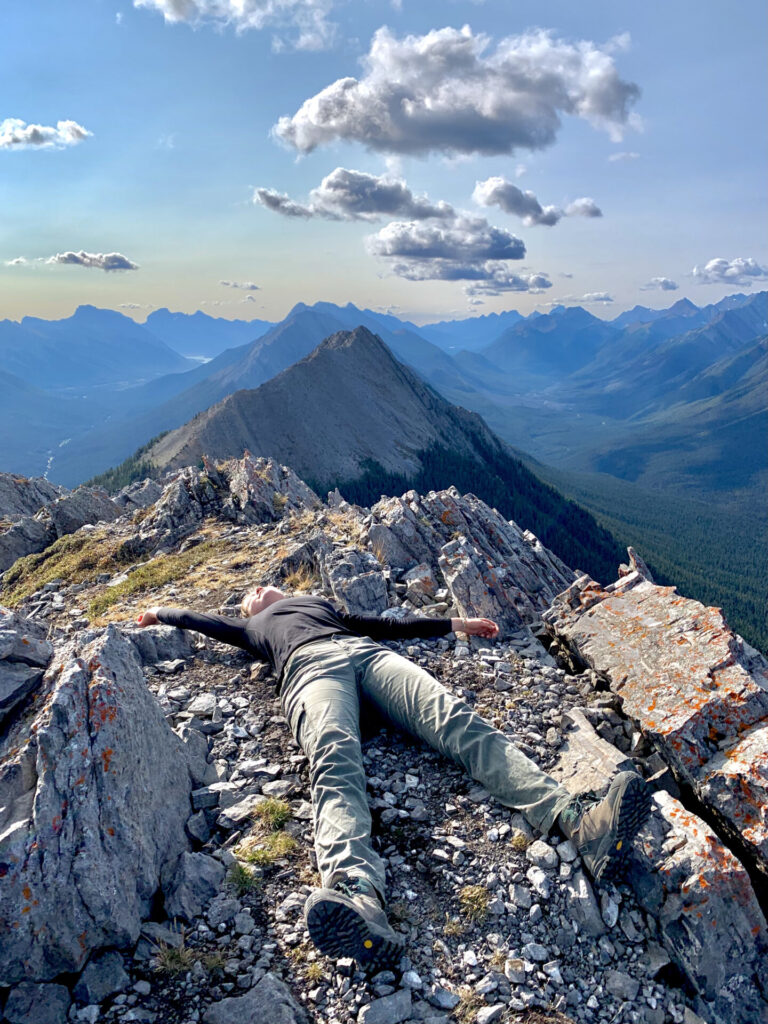
Sulphur Mountain True Summit (4th Peak)
The true summit is the 4th and final peak. No one seems to know whether the 3rd or 4th peak is taller, so the 4th is considered the true Sulphur Mountain summit.
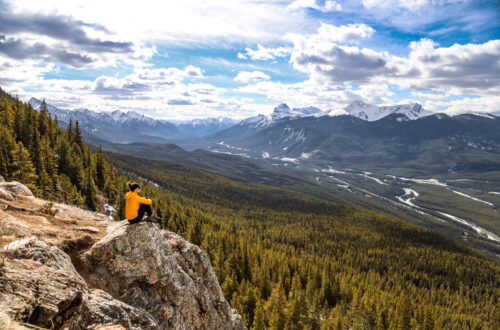
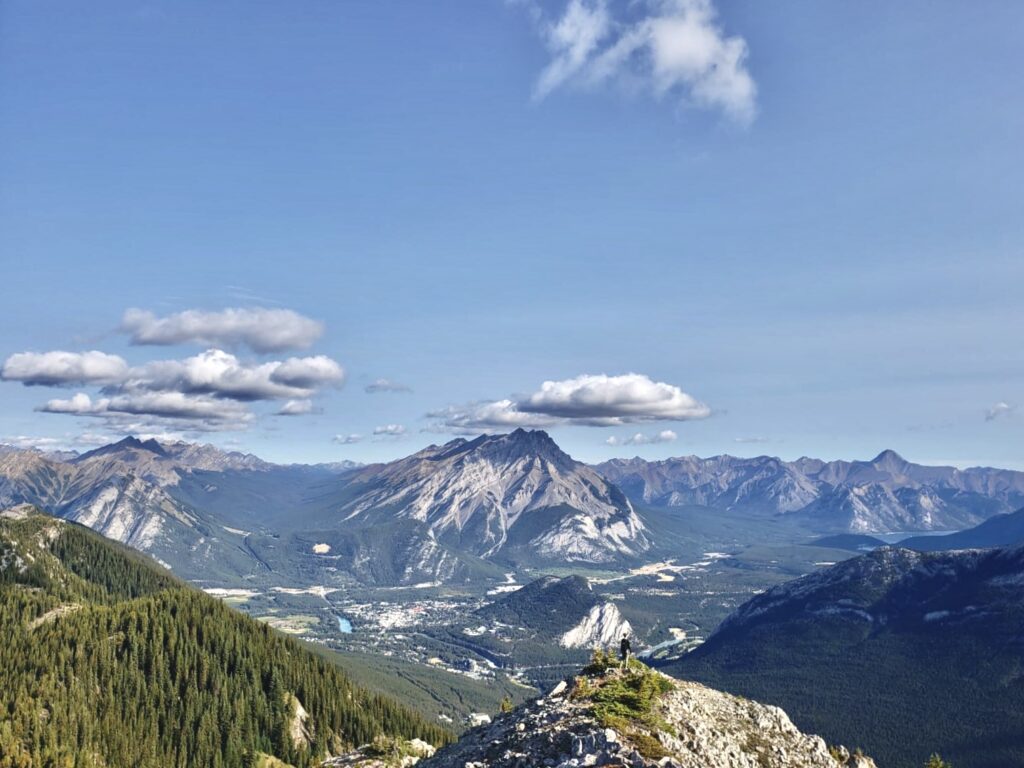
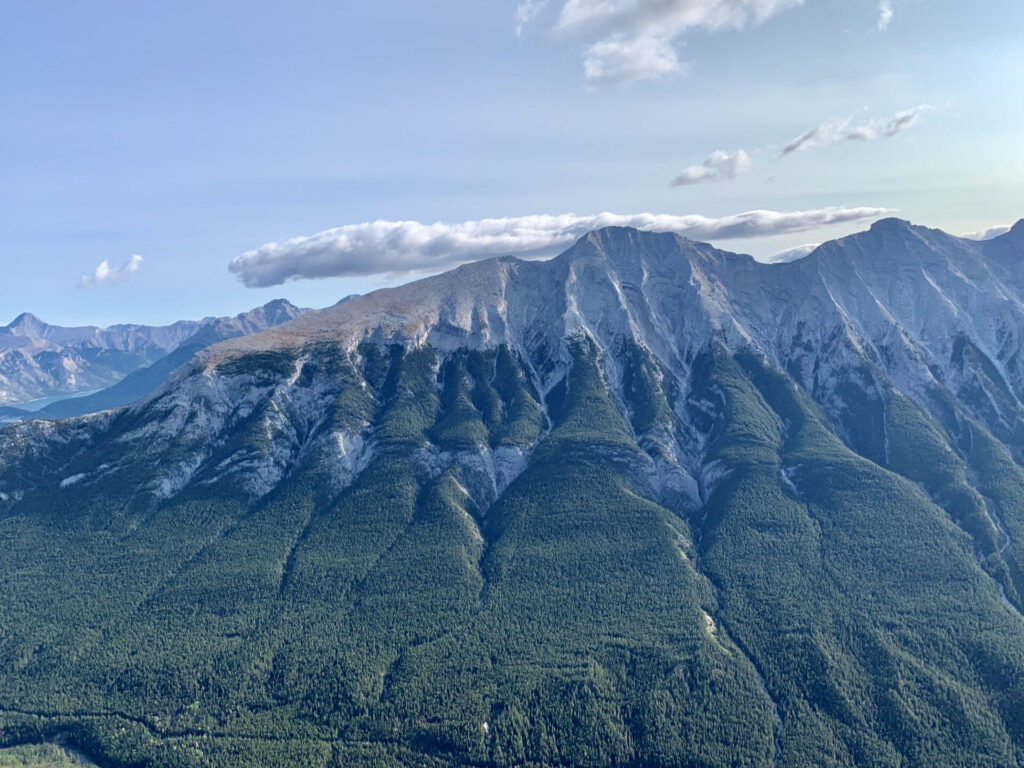
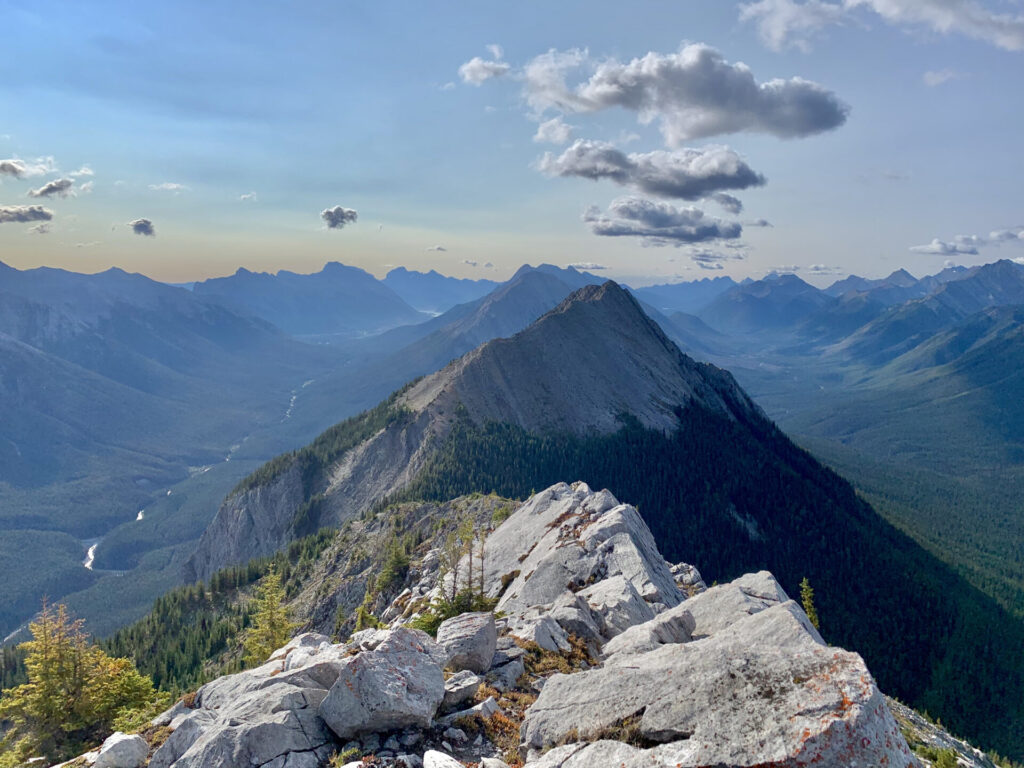
From the Sulphur Mountain summit you’ll have (seriously) endless mountain views in every direction. You’ll be able to see the entirety of Mount Rundle which extends all the way to Canmore. The Spray Valley and the unnamed peaks of the Sundance Range. You’ll even be able to see the mountains that extend into Kananaskis Country!
I’d recommend hiking the Sulphur Mountain Traverse Route on a sunny, warm day with minimal wind. There is absolutely no shelter as you hike, so being exposed to the elements would make for a really long day. One piece of clothing I’d definitely recommend for this hike is a good quality rain coat.
A good quality rain coat will block out the wind, keep you warm, and keep you dry. I use the Eco Precip from Marmot (men’s version) and I absolutely love it. It’s affordable, lightweight, and has tons of fun little features.
Return Hike
You have it easy on most hikes after you’ve reached the summit, however you still have to re-climb the Sulphur peaks to get back to the gondola!
I found climbing down the rocky slabs to be more challenging on the return, however route finding was much easier because I knew where to go! My hiking partner and I took our experience and quickly learned from our mistakes.
The return was also half the amount of time because we didn’t spend our return hike getting lost and constantly rerouting! I had friends that completed this hike a few days before. It took them 3hrs and it took my partner and I almost 5 because we kept messing up!!!

I’m sure after you’ve competed this off the beaten path hike in Banff you’ll head home, have a good meal, and spend the rest of your day relaxing. I on the other hand had to go straight to work at the Banff Gondola!
More: Sulphur Mountain trail guide
Final Thoughts?
This was one of my biggest adventures and one of the most visually striking hikes I’ve done in the Canadian Rockies (although Opal Ridge is right up there with it).
My favourite thing about this hike is that so few people have done it. Most people flock to popular hikes like those at Lake Louise (read my Lake Louise Circuit trail guide here), but most people don’t hike the Sulphur Mountain Traverse Route because there isn’t even a map for it! I can guarantee you you’ll be the only one on this trail.
Connect via socials:
STAY CONNECTED
Sign up for emails to receive a 25% discount on my travel maps.
Taylor ♡
Normally I find all my hikes on Alltrails, however this one doesn’t exist. I only found out about it because I spent a summer working up at the Banff Gondola (read about my experience here).
If you have the necessary route finding and scrambling skills, this off the beaten path hike in Banff National Park is a must!
Next I’ll talk about a few tips for a successful hiking experience on the Traverse Route, essential gear/clothes for hiking in Banff, and the best places to stay in Banff for every budget.
Tips For A Successful Hike
- Bring a satellite communication device for safety
- Take the Banff Gondola up rather than hiking the Sulphur Mountain trail
- Start the trail early – the morning sunlight makes this hike even more picturesque
- If you’re hiking in the afternoon, hop on the Roam bus rather than drive to the trailhead
- Know what to wear hiking in Banff – you’ll be exposed on the ridge and you’ll therefor need proper hiking clothes and hiking gear!
- Budget extra time; it’s easy to get lost on this off the beaten path hike in Banff. You’ll also want time to check out the Sulphur Mountain boardwalk and Sanson’s Peak!
Where to Stay in Banff
From hostels to camping to luxury hotels – Banff has accommodations for everyone. Here are my top recommendations for where to lodge in Banff based on every budget.
I recommend giving this post a read as I’ve listed every Banff hotel worth staying at and organized them by category.
- Hostels – Samesun Banff (best location + bar/restaurant on-site), Banff International Hostel (second best), and HI Banff.
- Budget hotels – Bow View Lodge and High Country Inn.
- Mid-range stays – Banff Park Lodge, Mount Royal, Elk & Avenue, and the Banff Caribou & spa.
- Luxury stays – Fairmont Banff Springs and the Rimrock Resort.
- Cabin retreats: Johnston Canyon Bungalows, Baker Creek, and Castle Mountain Chalets.
- Camping – reservation information can be found here. Ensure you book campsites far in advance as they’re full during summer.
- For those on ski trips: lodge on-mountain at Sunshine Village, stay near Norquay, and see my Lake Louise suggestions below.
Lodging Options Near Banff
Enjoy the nature and activities of Banff National Park, but lodge away from the busy tourist town centre at any of the following:
- Lake Louise – Fairmont Chateau Lake Louise (luxury), Paradise Lodge & Bungalows (500m from the lake), Lake Louise Inn (value stay), HI Lake Louise (hostel).
- Canmore – Malcolm Hotel (luxury), Stoneridge Mountain Resort (condo suites with fully equipped kitchens), Mountain View Inn (budget), Canmore Downtown Hostel & the Canmore Hostel (party hostel).
- Johnston Canyon – Johnston Canyon Lodge & Bungalows, Castle Mountain Chalets, and HI Castle Mountain Hostel.
- Yoho National Park – Emerald Lake Lodge and Cathedral Mountain Lodge.
- Kootenay National Park – Storm Mountain Lodge & Cabins.
- Kananaskis Country – Mount Engadine Lodge and Kananaskis Mountain Lodge (luxury), Crosswaters Resort (mid-range), and HI Kananaskis Wilderness Hostel (budget).
Happy adventuring!
Taylor ♡
Like This Post?
Share with friends or save it for later!

About the Author
HI, I’m Taylor – the voice behind The Holistic Backpacker.
After moving to Banff National Park in 2020 I became an outdoor adventure enthusiast and vowed to never stop exploring.
I now spend my days travelling the world, climbing mountains, and spending nights under the stars in the Canadian Rockies backcountry.
I created The Holistic Backpacker so I could share my adventures and help connect people like you with the same amazing experiences.