
Banff Skoki Loop: 3 Day Banff Backpacking Trail Guide
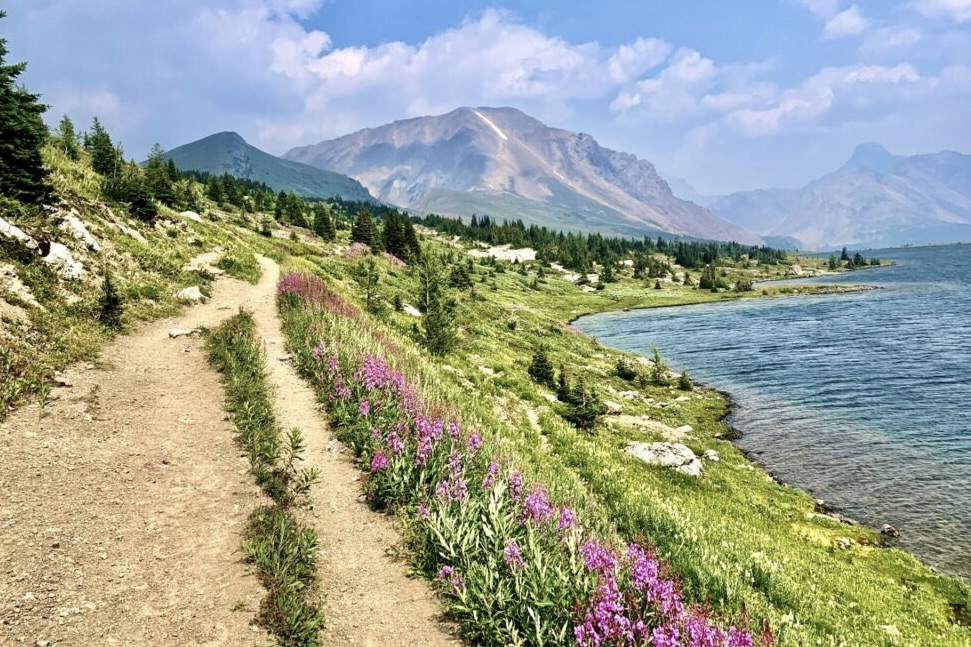
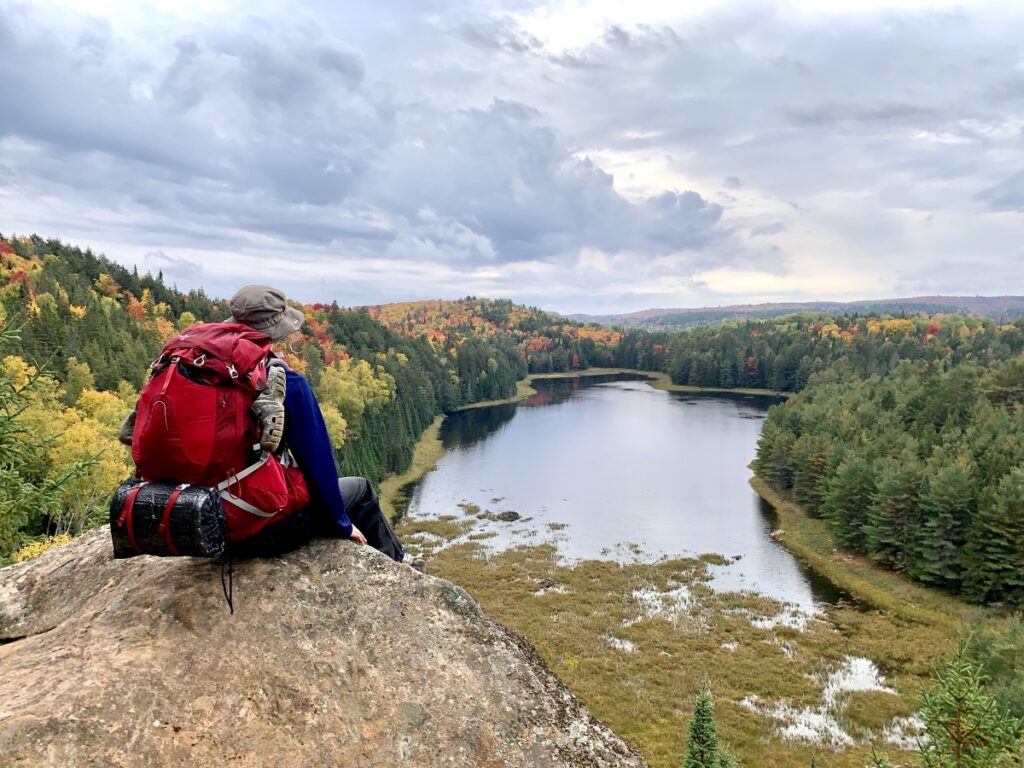
The Banff Skoki Loop was my first (of many) backpacking trips in Banff National Park. To date this is one of the most visually striking backpacking trips I’ve been on in the Canadian Rockies. The Banff Skoki Loop features vibrant alpine lakes, waterfalls, abundant wildlife, and beautiful meadows and valleys – it’s for sure a top contender for best Banff backpacking trail.
Many of you have heard of Lake Louise, but I’m sure you haven’t heard of its neighbours Merlin Lake, Zigadenus Lake, or Myositis Lake. Lucky for you, the Banff Skoki Loop features these lakes and many more! The Banff Skoki Loop backpacking trail is a great hike for those new to backpacking as the trail is fairly mellow and relatively easy to navigate.
In this post I’ll tell you everything you need to know about the Banff Skoki Loop including campground booking information, highlight areas of the trail, campsite order, packing information, and things to watch out for.
Skip Ahead:
- Banff Skoki Loop Planning – Summarized
- How to get to the Banff Skoki Loop
- Favourite backpacking gear
- Where to stay in Lake Louise
- About the Banff Skoki Loop backpacking trail
- How to book campsites for the Banff Skoki Loop
- Backpacking the Banff Skoki Loop
- Canadian Rockies Hiking & Camping Advice
Interactive Banff Map – from a LOCAL
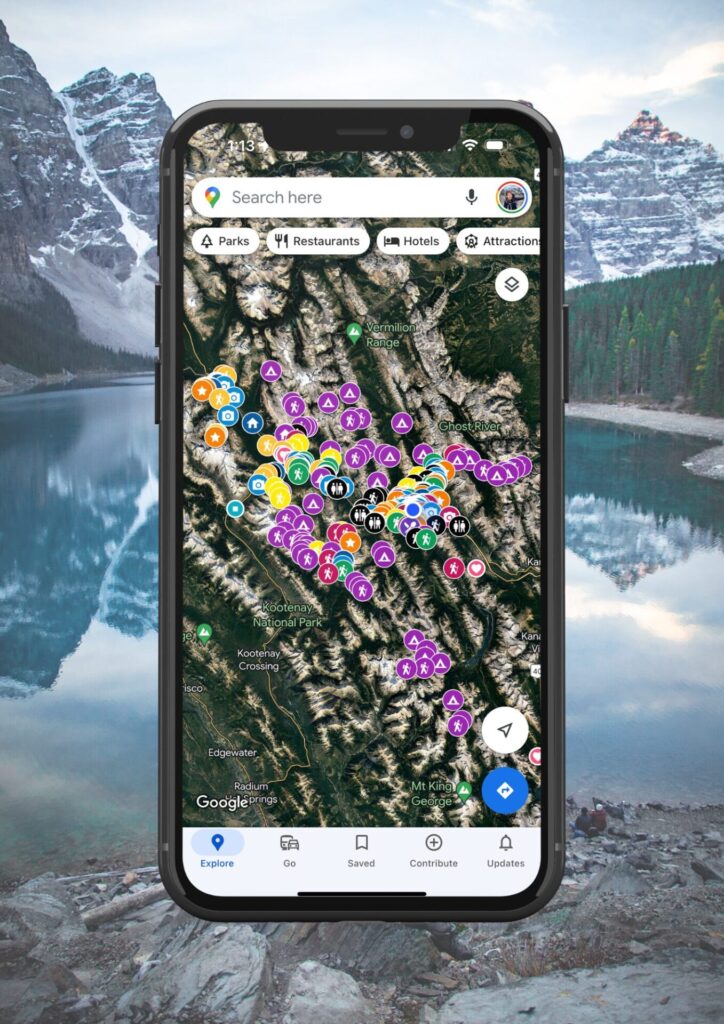
Get my 600+ local Banff recommendations saved to your Google Maps app
I lived in Banff for years & know all the best spots!
Outdoors: 100+ hiking trails, scrambles, backcountry routes, waterfalls & lakes
Planning: lodging, parking, restaurants, public washrooms, transit hubs, shopping & services
Things to do: tours, viewpoints, unique activities, & local secrets
Banff Skoki Loop Planning – Summarized
To ensure you have all the information you need, the following is my quick guide to planning a backpacking route along the Banff Skoki Loop. The rest of this blog post will go into more detail about what’s mentioned below.
Trailhead (aka access point): Fish Creek
Best campsite order: Baker Lake (night 1), Merlin Meadows (night 2) or vice versa.
Campsite reservations: can be made via the Parks Canada Reservation Service. Ensure you book these sites early. It’s recommended to book when the reservation system opens (which is typically some time in February).
Can’t get a reservation? If campsites along the Skoki Loop book out, you can sign up for cancellation notifications via Schnerp. I use this platform frequently and have snagged last minute reservations at even the most popular campgrounds like Lake O’Hara.
Alltrails link – I always recommend downloading the Alltrails map for easier navigation. Each year I purchase the Alltrails+ membership which helps me stay connected and navigate while I’m out on the trail. Alternatively, carry the physical Lake Louise map.
Trail stats:
- Distance: 39.5kms
- Elevation Gain: 1,330m
- Type of Trail: loop
- Rated: moderate
- Time: 3 days, 2 nights
Best Time of Year: mid July to the end of August for wildflowers and milder weather. Snow and cold temperatures linger here until late in the season and snowfall can return as early as the end of August.
Helpful Tips: porcupines are present at Baker Lake – ensure all items (including hiking poles & footwear) are stored INSIDE your tent overnight. Bring a bug suit – the mosquitos (especially at Baker Lake) are plentiful. The Banff Skoki Lodge is located close to Merlin Meadows Campground and makes for a “glamping” experience during the summer/ski tour destination in the winter.
Bear Protection: the Banff Skoki Loop is in grizzly country. Carry bear spray in an accessible location and know how to use it in an encounter.
Book a Guided Tour: if you’re new to backpacking and the process seems a bit unnerving, the Skoki Loop is one of the only backpacking trails in Banff with guided tour options. Going with a tour means your guide will take care of the planning and booking process + has all the local knowledge to ensure your trip is a success. You can book a guided tour here which includes your meals and a tent.
Connect via socials:
STAY CONNECTED
Sign up for emails to receive a 25% discount on my travel maps.
Taylor ♡
How to Get to the Banff Skoki Loop Trailhead
The Banff Skoki Loop trailhead (aka the Fish Creek Trailhead) is located in Lake Louise by the ski resort which is around 2hrs from Calgary (201kms) or 1hr from Golden (85kms). To get here, head East (toward the ski resort) after exiting the Trans Canada Highway. Right before you arrive at the ski resort parking lot, you’ll see a little dirt road off to the right hand side.
This parking lot typically fills up early as this is a popular backpacking route and day hiking area in Banff. I recommend arriving as early as possible to ensure you can find a parking spot.
There are no direct buses to the Fish Creek trailhead, so you’ll have to drive or rent a car. If you’re trying to make it here “backpacker style,” you can take the 8X with Roam Transit from Banff to Lake Louise, then catch the Parks Canada connector shuttle to the ski resort parking lot, then walk approximately 20 minutes to the trailhead. More information about bus routes between Banff-Lake Louise can be found in this post.

Best Banff Car Rentals
Most of Banff’s remote trailheads and attractions are inaccessible via public transportation. I 100% recommend renting a car to make the most of your time in the Rockies.
My favourite rental tool is this site as it compares all the local car rental shops to find you the best rate.
Personal Backpacking Gear Recommendations
I continually keep this post up-to-date with my current backpacking setup and most loved pieces of gear.
Sleep System: I use the Hotcore winter sleeping bag which has a -20 rating (useful in the Rockies during summer). I also use Hotcore’s fleece sleeping bag liner and the Thermarest NeoAir XLite for my sleeping pad. The MSR Hubba Hubba 2P is my go-to tent.
Camp Kitchen: I use the MSR Pocket Rocket Deluxe stove and the RioRand mess kit. I also love Stasher Bags for carrying, rehydrating, and cooking food plus the euroSCRUBBY and this soap for cleanup.
Warmth: I have Raynaud’s disease which means I struggle to stay warm. I wear these -40 socks, wool base layers, Aurora Heat’s reusable fur foot warmers, and fill a Nalgene bottle with boiling water for my sleeping bag. This tends to keep me warm at night.
Extras: 3L Hydrapak for carrying water, the Hydrapak attachable filter and aquatabs to clean water. Dry bags for food storage and to keep clothes/electronics dry. I use the women’s Osprey Aura 65L backpack (Osprey Atoms 65L for men). A lightweight camping pillow for comfort and a bug suit for marshy areas. I also always bring these thin gloves and a toque.
And finally, rain gear. I bring both a rain coat and rain pants as they’re lightweight and make a world of difference if you need an extra layer of warmth or to protect yourself from the elements.
Where to Stay at Moraine & Lake Louise
If you plan to hike at Lake Louise or Moraine Lake, there are plenty of lodging options available nearby. Staying directly in Lake Louise will save you driving the 1.5hrs to and from Banff each day.
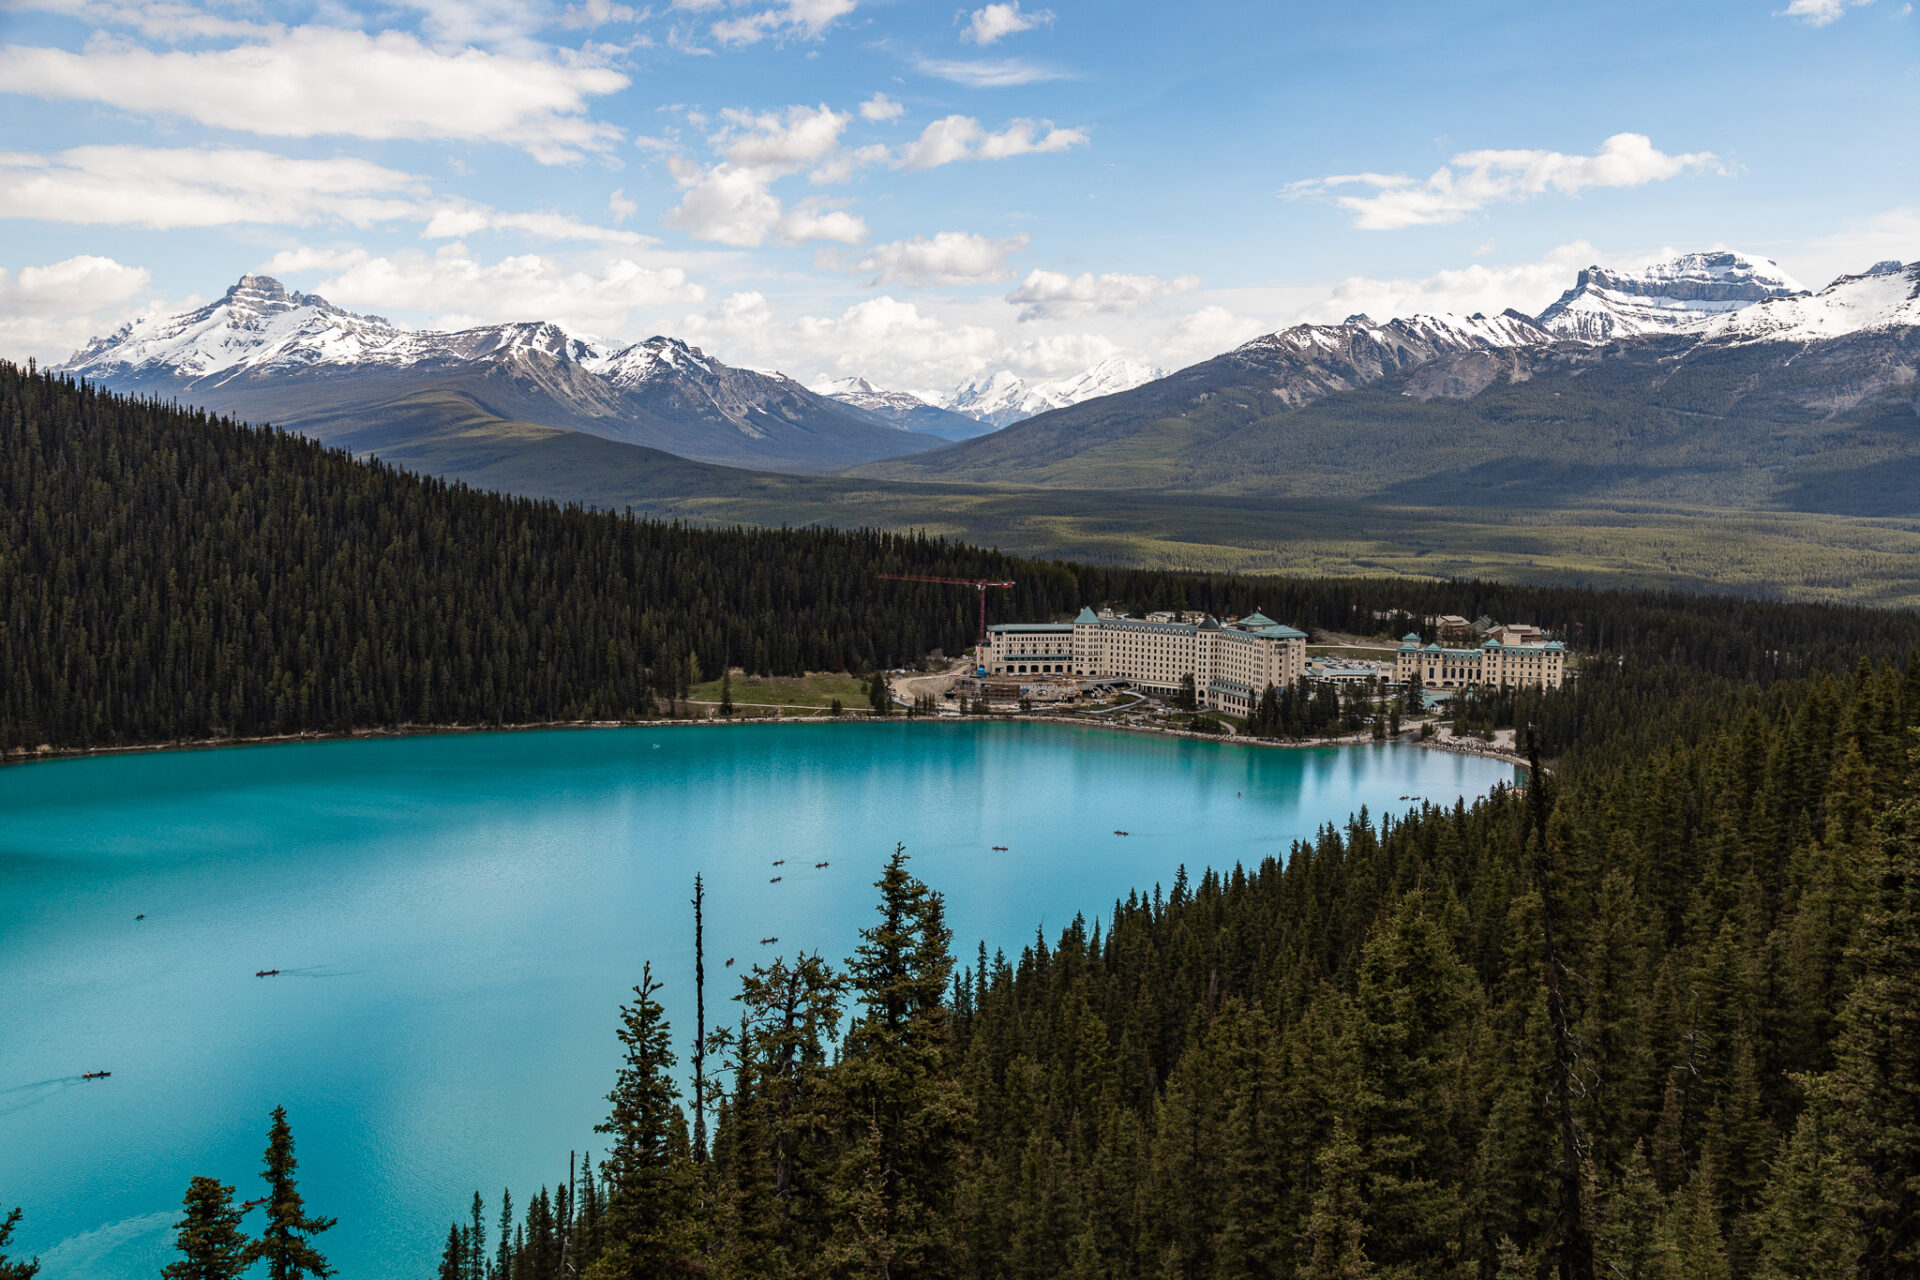
Luxury Stays – the Fairmont Chateau Lake Louise is the most iconic hotel in Banff. Staying here gives you direct access to Lake Louise, local hiking trails, and on-site parking. The Moraine Lake Lodge is a hard-to-book, but beautiful cabin stay located directly next to Moraine Lake. Staying here gives you the ability to drive your own car to the lake, meals are included and so are the pricey canoe rentals. Book this hotel as far in advance as possible.
Mid-range stays – Paradise Lodge & Bungalows is located a mere 500m from Lake Louise, but it comes in at a much lower price point than the Fairmont Chateau. Alternatively, the Lake Louise Inn offers the best value stay in town.
Budget stays – HI Lake Louise is the only hostel in Lake Louise.
Camp – reservation info.
Where to Lodge in Nearby Banff
Budget Hostels – HI Banff, Banff International, and the Samesun Banff (my top pick).
Budget stay – Bow View Lodge and Irwin’s Mountain Inn.
Mid-range stay – Banff Park Lodge, Banff Caribou Lodge & Spa, and the High Country Inn.
Luxury stay – the Fairmont Banff Springs and the RimRock Resort.
Here’s my breakdown of the best Banff hotels, organized by category
About the Banff Skoki Loop
- Distance: 39.9km
- Elevation gain: 1,330m
- Rated: moderate
- Type of trail: loop
- Estimated time: 3 days, 2 nights (13hrs and 15mins of actual hiking time)
- Access point: Fish Creek Trailhead
Physical Lake Louise Area Map (physical version)
The Banff Skoki Loop is a 2-4 day backpacking trail, but it’s usually completed in 3 days, 2 nights. The best time of year to complete the trail is mid July to the end of August as snow and cold temperatures linger here until late in the season. Toward the end of July is also the best time of year to see the many wildflowers in the area.
The Banff Skoki Loop starts out following the Lake Louise Ski Out which makes for a boring start and end to the trail. The Ski Out is around 3.5kms with steady elevation gain throughout, however once you’re through that the trail passes through fields of wildflowers, ventures up a handful of mountain passes, and meanders through forested areas.
The trail itself is relatively easy to follow, however there is one section around Red Deer Lakes which can be fairly difficult to navigate – I talk about this later in the post.
There are ample water sources throughout the loop and you are exposed to the elements for relatively large chunks of time so sun protection and warm layers are recommended. Dogs are permitted on the trail, but they must remain leashed.
Aside from the main trail there are also additional side hikes to spots like Merlin Lake or summit scrambles to Fossil Mountain, Skoki Mountain, etc.
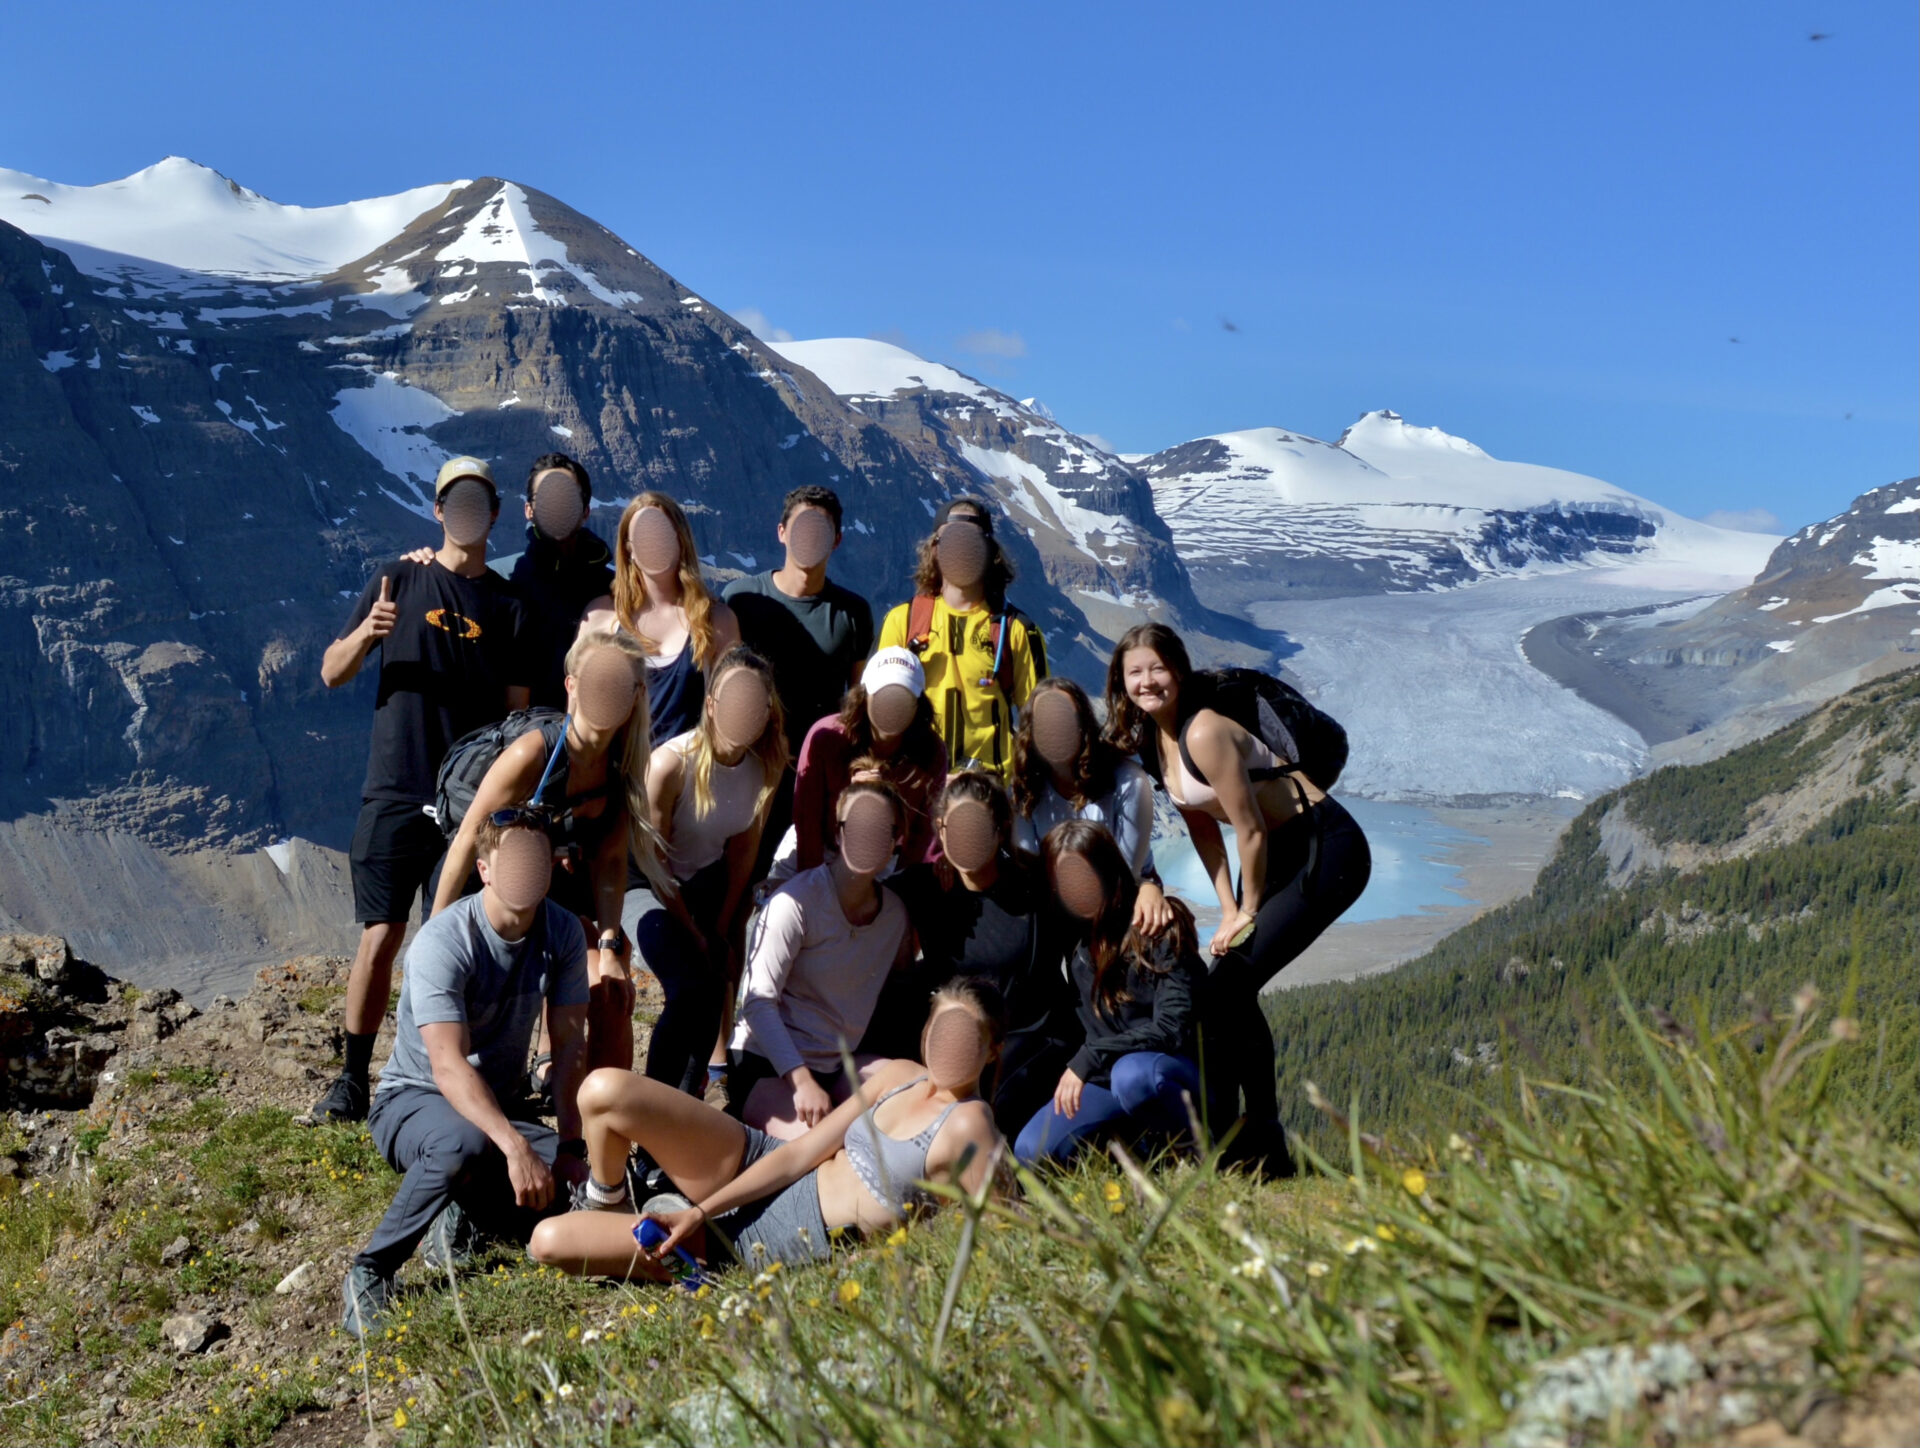
Skoki Loop Guided Tour
For those new to backpacking, consider trying a guided tour. 10 adventures offers a 4 day guided excursion of the Skoki Loop which includes all your meals, your site reservations, and your tent.
How to Book Campsites for the Banff Skoki Loop
In order to backpack the Skoki Loop, you MUST have campsite reservations.

Since the Skoki Loop is one of Banff’s premier backpacking trails, you’ll have to plan your trip in advance. Campsites are booked through the Parks Canada Reservation Service which typically launches in February – if you can, make your summer reservations then to ensure you get the sites you want.
If you don’t want to book online, you can also call the reservation service at 1-877-737-3783 OR 1-519-826-5391 (outside North America).
If you can’t get a reservation, sign up for cancellation notifications via Schnerp. I use this platform frequently and have snagged last minute reservations at even the most popular campgrounds like Lake O’Hara.
To book the campsites, visit this link, filter to the “backcountry” tab, click “backcountry zone,” choose Banff as your park, input “Fish Creek Trailhead” as your access point, then add your party size, tent pads, and dates accordingly.
The ideal campground order is Baker Lake (night 1) and Merlin Meadows (night 2) or vice versa. Aside from these two campgrounds, there are also Red Deer Lakes Campground and Hidden Lake Campground – however I would only utilize these if you’re base camping for lengthy climbing objectives/scramble routes OR if there’s nothing available at Baker and Merlin.
Approximate Campground Distances:
- Fish creek to Baker Lake: 13.9kms
- Baker Lake to Red Deer Lakes: 7kms
- Red Deer Lakes to Merlin Meadows: 5.7kms
- Merlin Meadows to Fish Creek Trailhead: 14kms
The campsites are all equipped with bear poles, tent pads, picnic tables, and outhouses – bring your own toilet paper and a dry bag to hang your food in.
My Favourite Activities in Banff
Banff Gondola – epic views from the top of Sulphur Mountain.
Banff Hop on Hop off – explore the park at your own pace.
Lake Minnewanka Cruise – take a scenic boat ride down the largest lake in Banff.
Moraine Lake sunrise – chartered bus to see alpenglow on Canada’s most beautiful lake.
Norquay via ferrata – epic beginner friendly climbing route across iron bars on Mt Norquay.
Sunshine Meadows Gondola – find wild alpine flowers and hike around pristine alpine lakes.
Click here for a complete list of the Banff tours I recommend:
Backpacking the Banff Skoki Loop
My downloadable Banff & Lake Louise map has every point of interest mentioned below marked with photos and descriptions so you can easily see the layout of the Banff Skoki Loop and plan your trip accordingly.
Interactive Banff Map – from a LOCAL
Get my 600+ local Banff recommendations saved to your Google Maps app
I lived in Banff for years & know all the best spots!
Outdoors: 100+ hiking trails, scrambles, backcountry routes, waterfalls & lakes
Planning: lodging, parking, restaurants, public washrooms, transit hubs, shopping & services
Things to do: tours, viewpoints, unique activities, & local secrets
Day 1: Fish Creek Trailhead to Baker Lake Campground
The first part of the Banff Skoki Loop is the most gruelling. You’ll be hiking up the Lake Louise ski out which is long, steadily gains elevation, and is unfortunately viewless. If you have the opportunity, hitchhike – you can’t drive up, but there’s the occasional car that drives up for work-purposes.
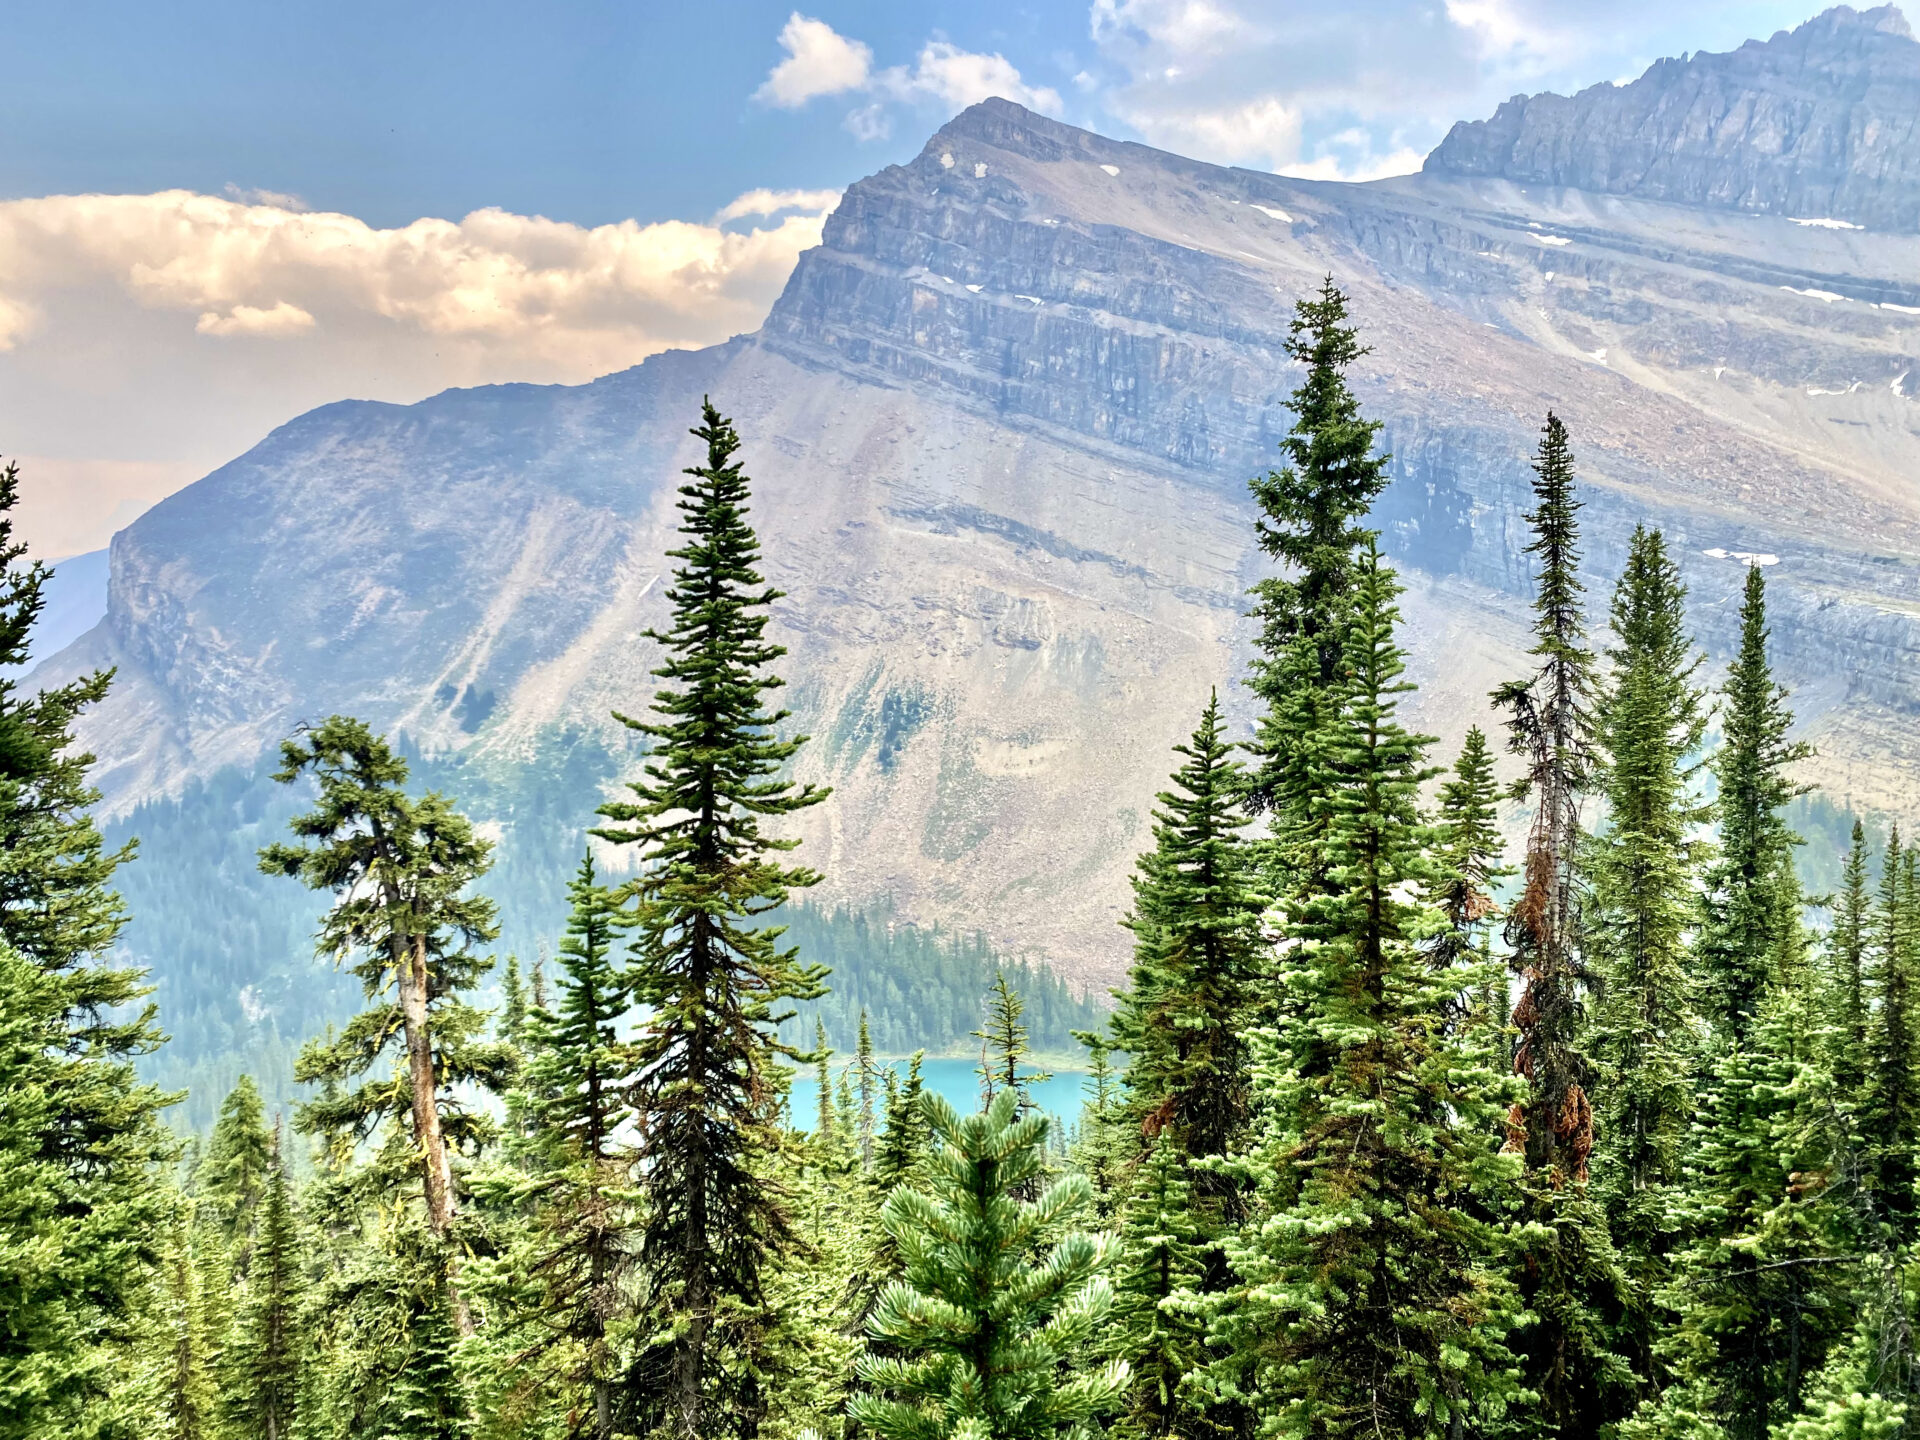
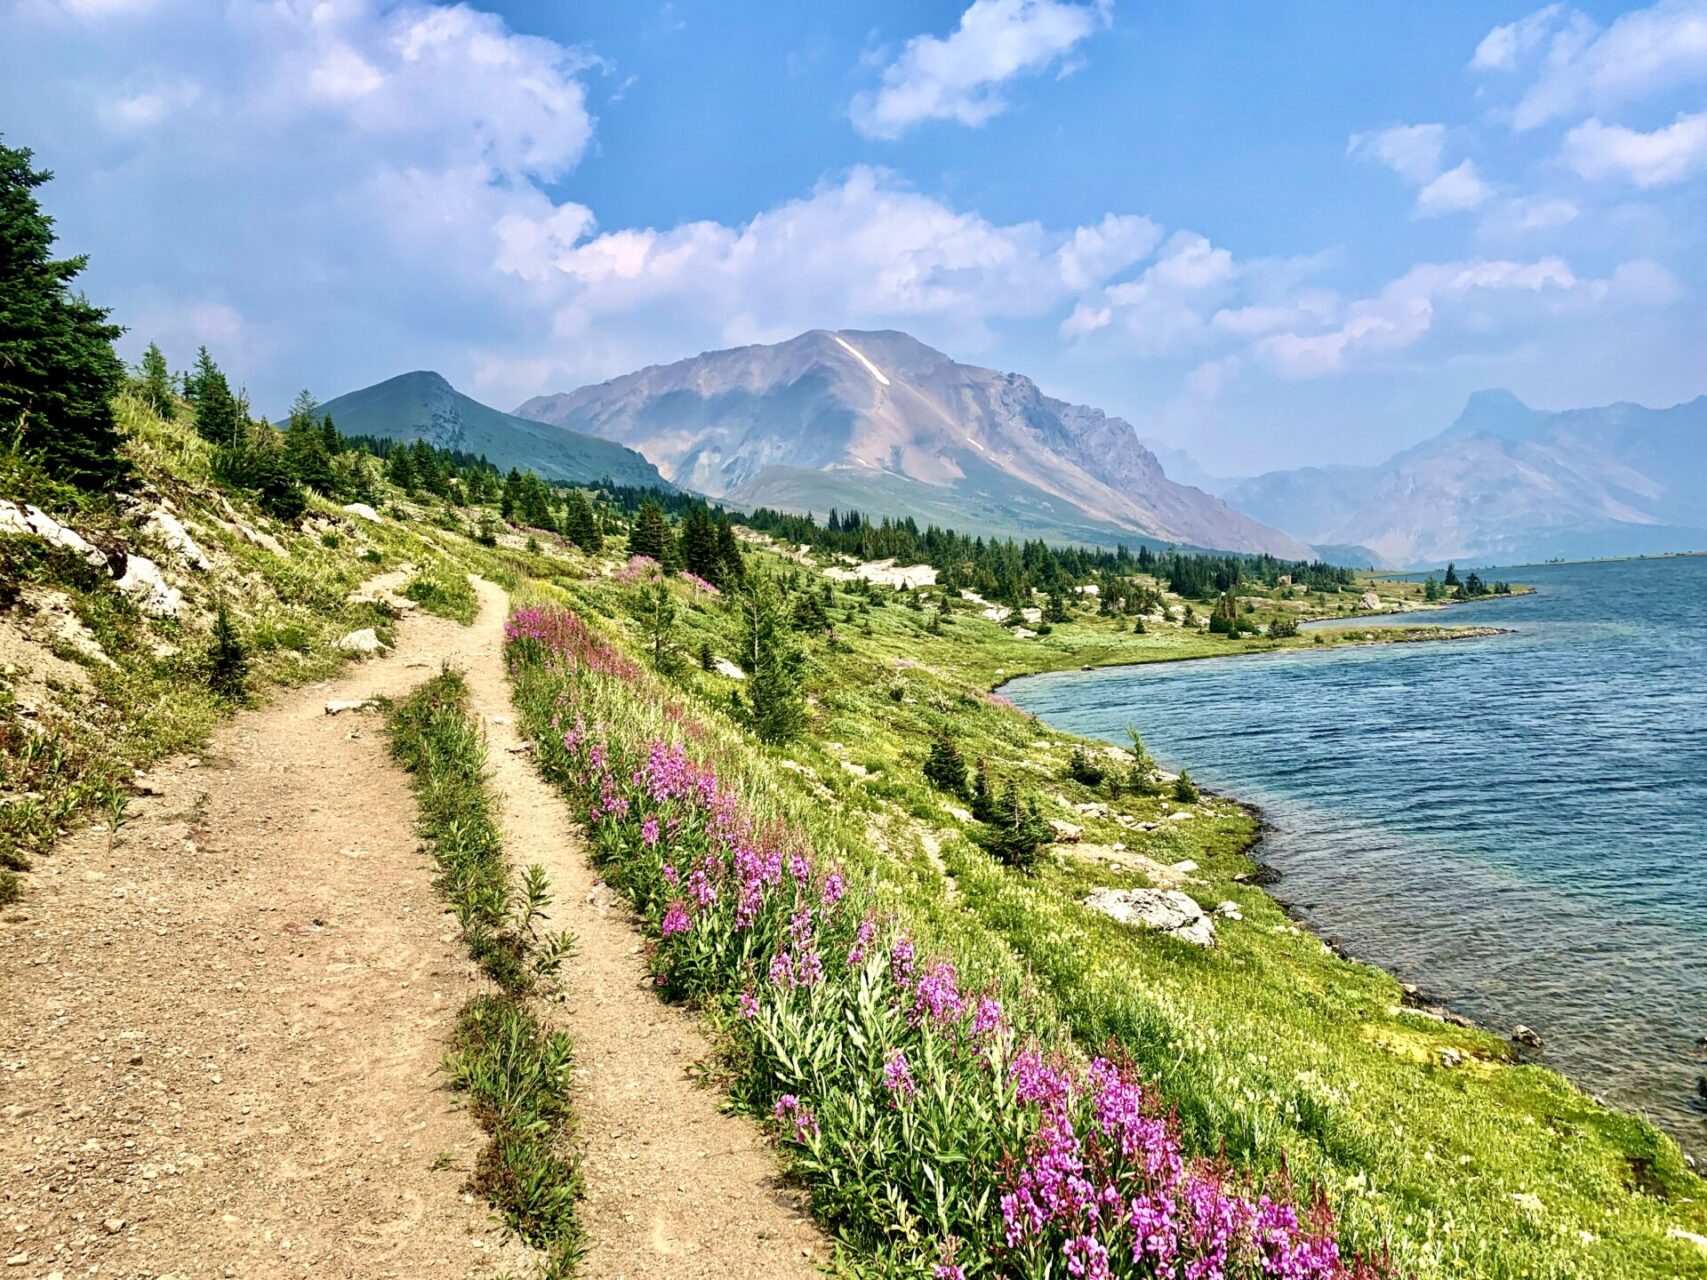
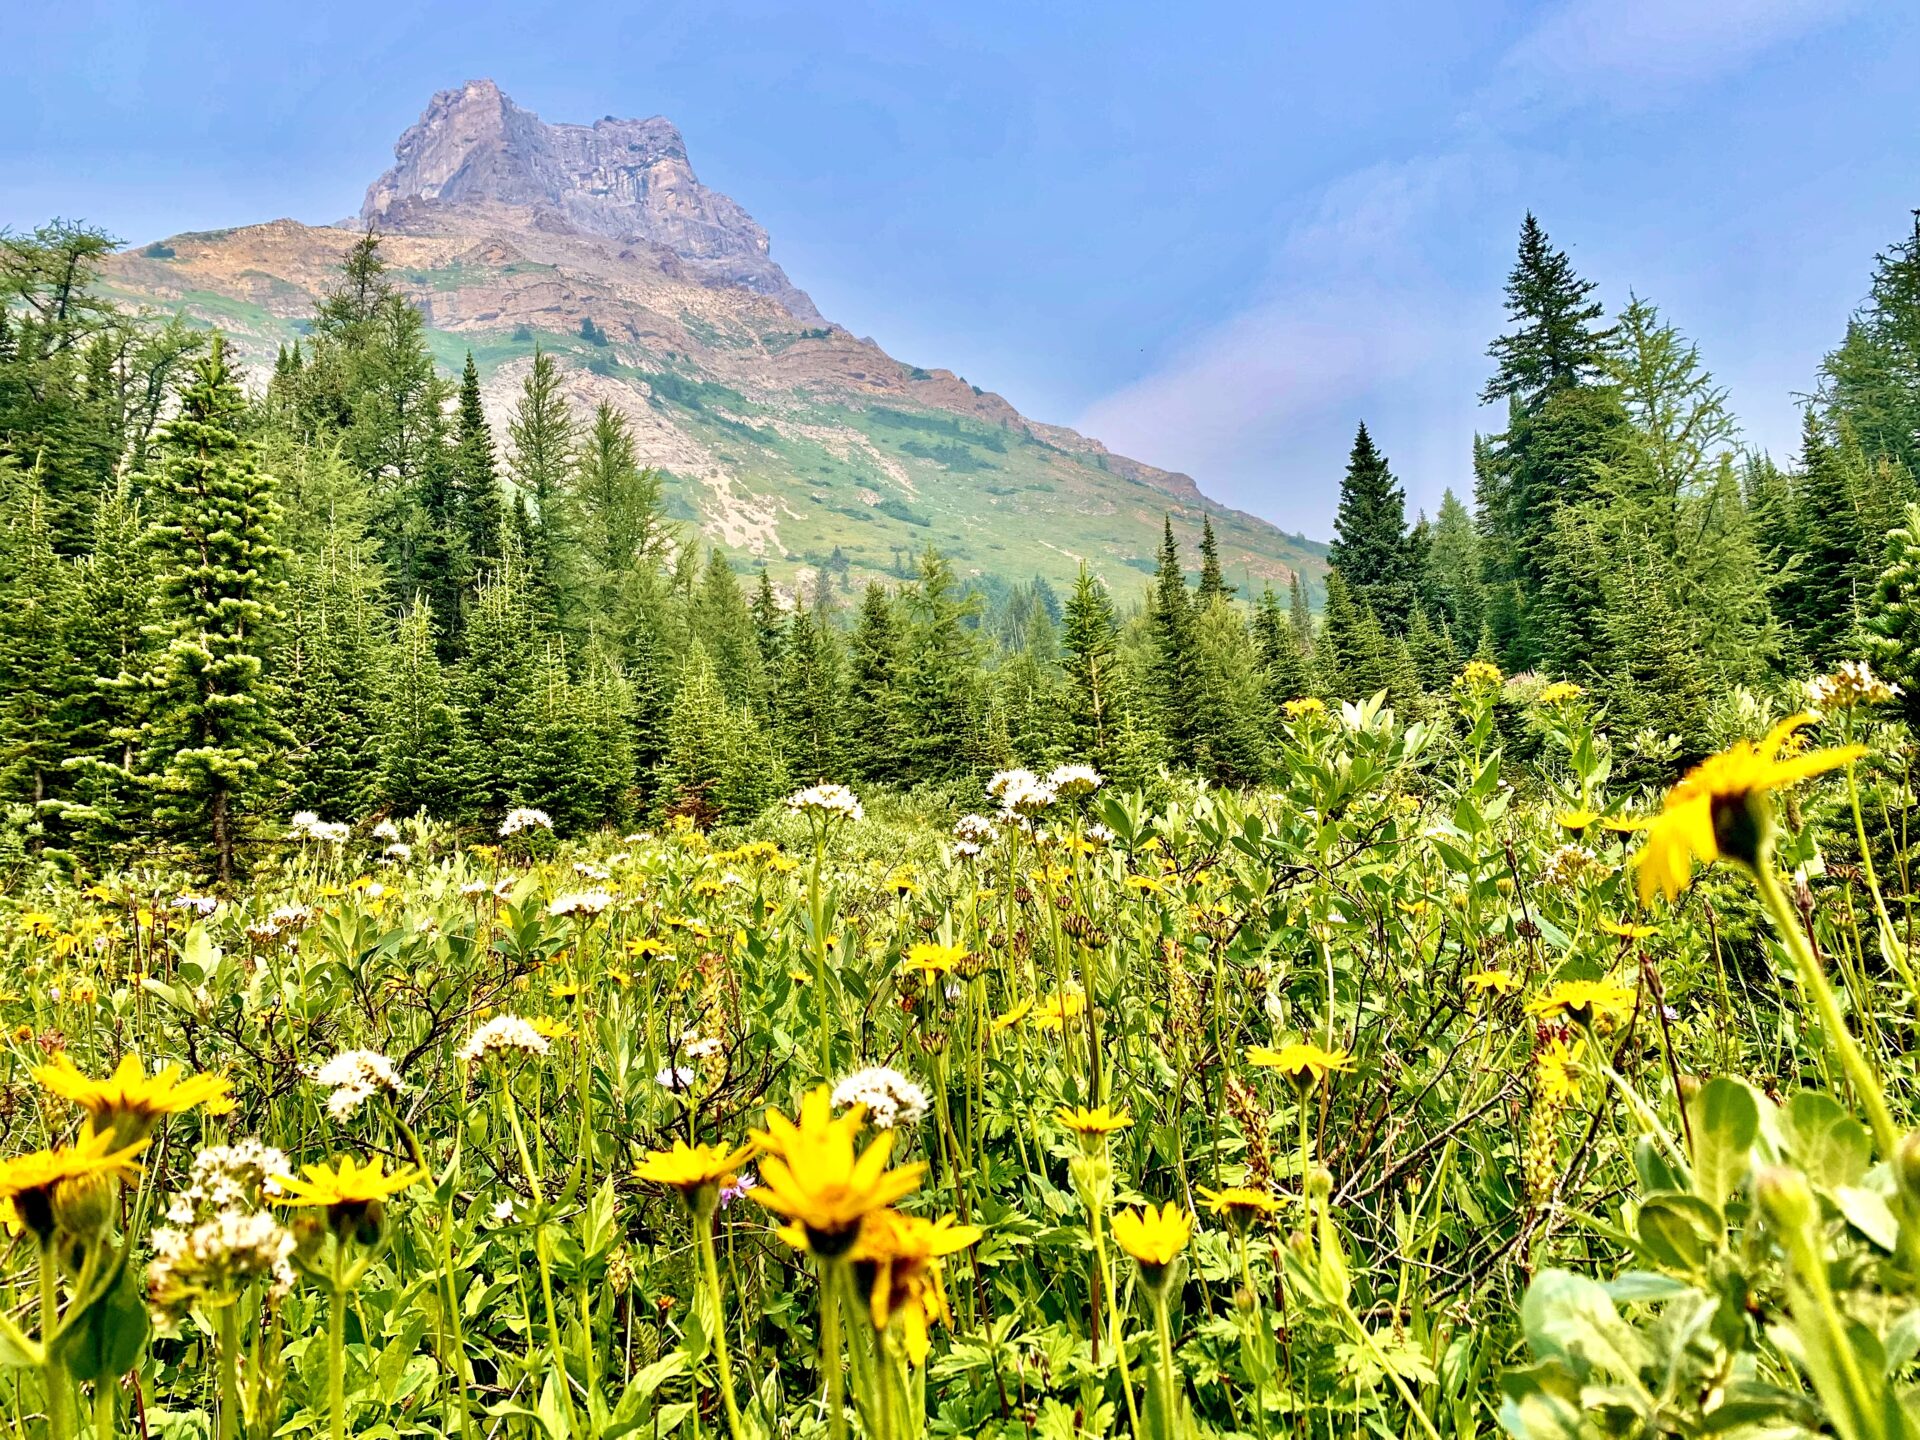
The most exciting part of the ski out is the pen of horses you’ll cross paths with. Once you make it up the ski out (around 3.4km) you’ll pass through a quick forested section then come out into a beautiful valley filled with wildflowers (hike mid July-ish for the flowers) overlooking Redoubt Mountain, Ptarmigan Peak and Pika Peak.
Once you reach the halfway hut (a tiny log cabin) look for signs that say Hidden Lake, then a second sign pointing toward Baker Lake. If you hike the Banff Skoki Loop in the same direction I did you’ll be heading this way first.
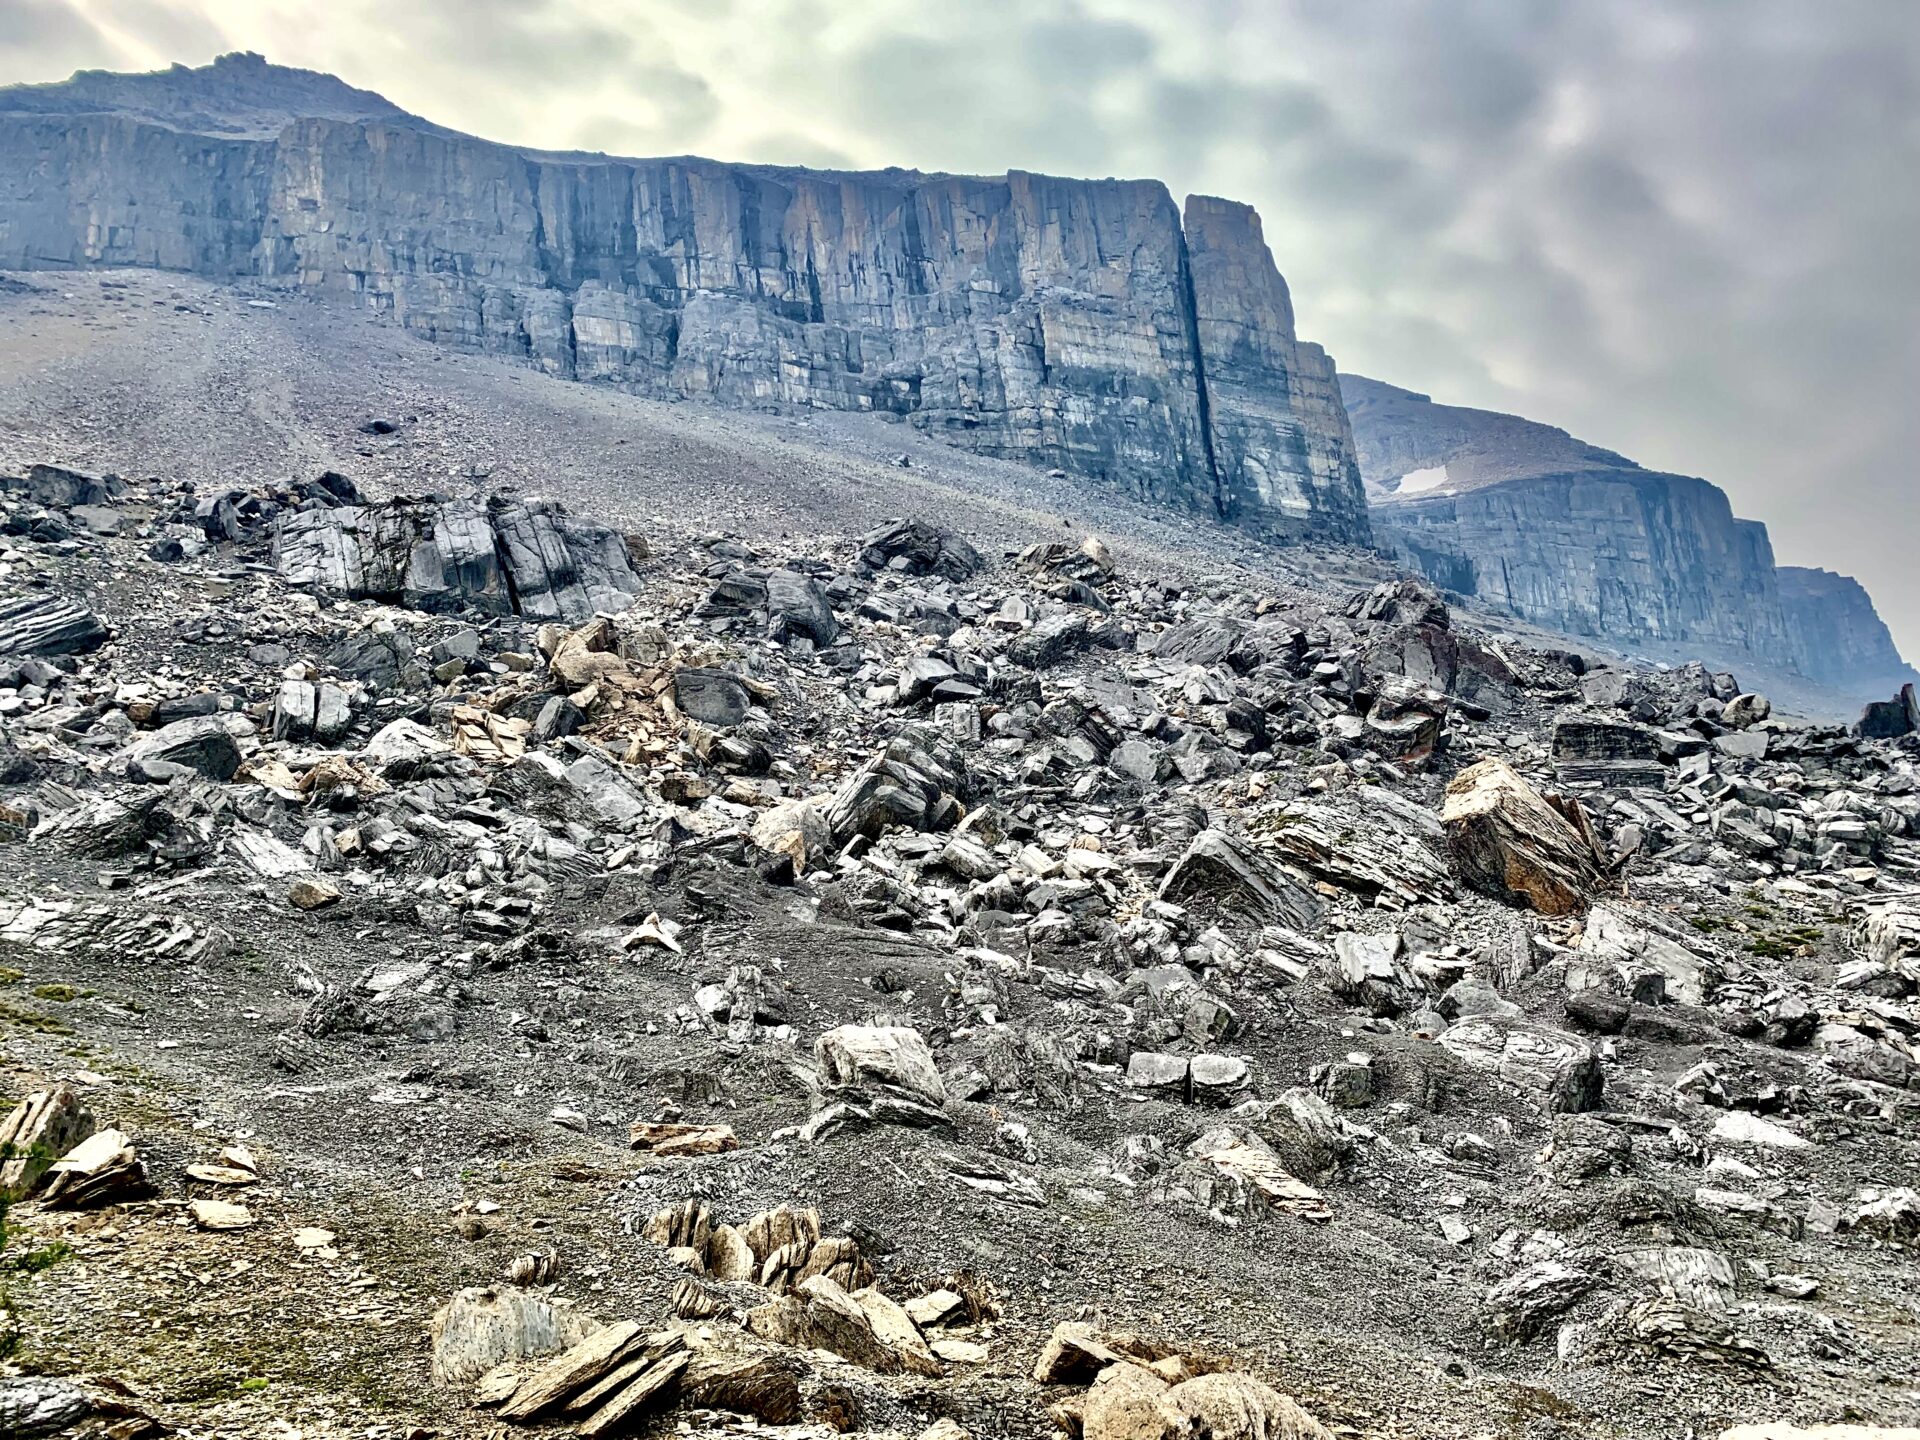
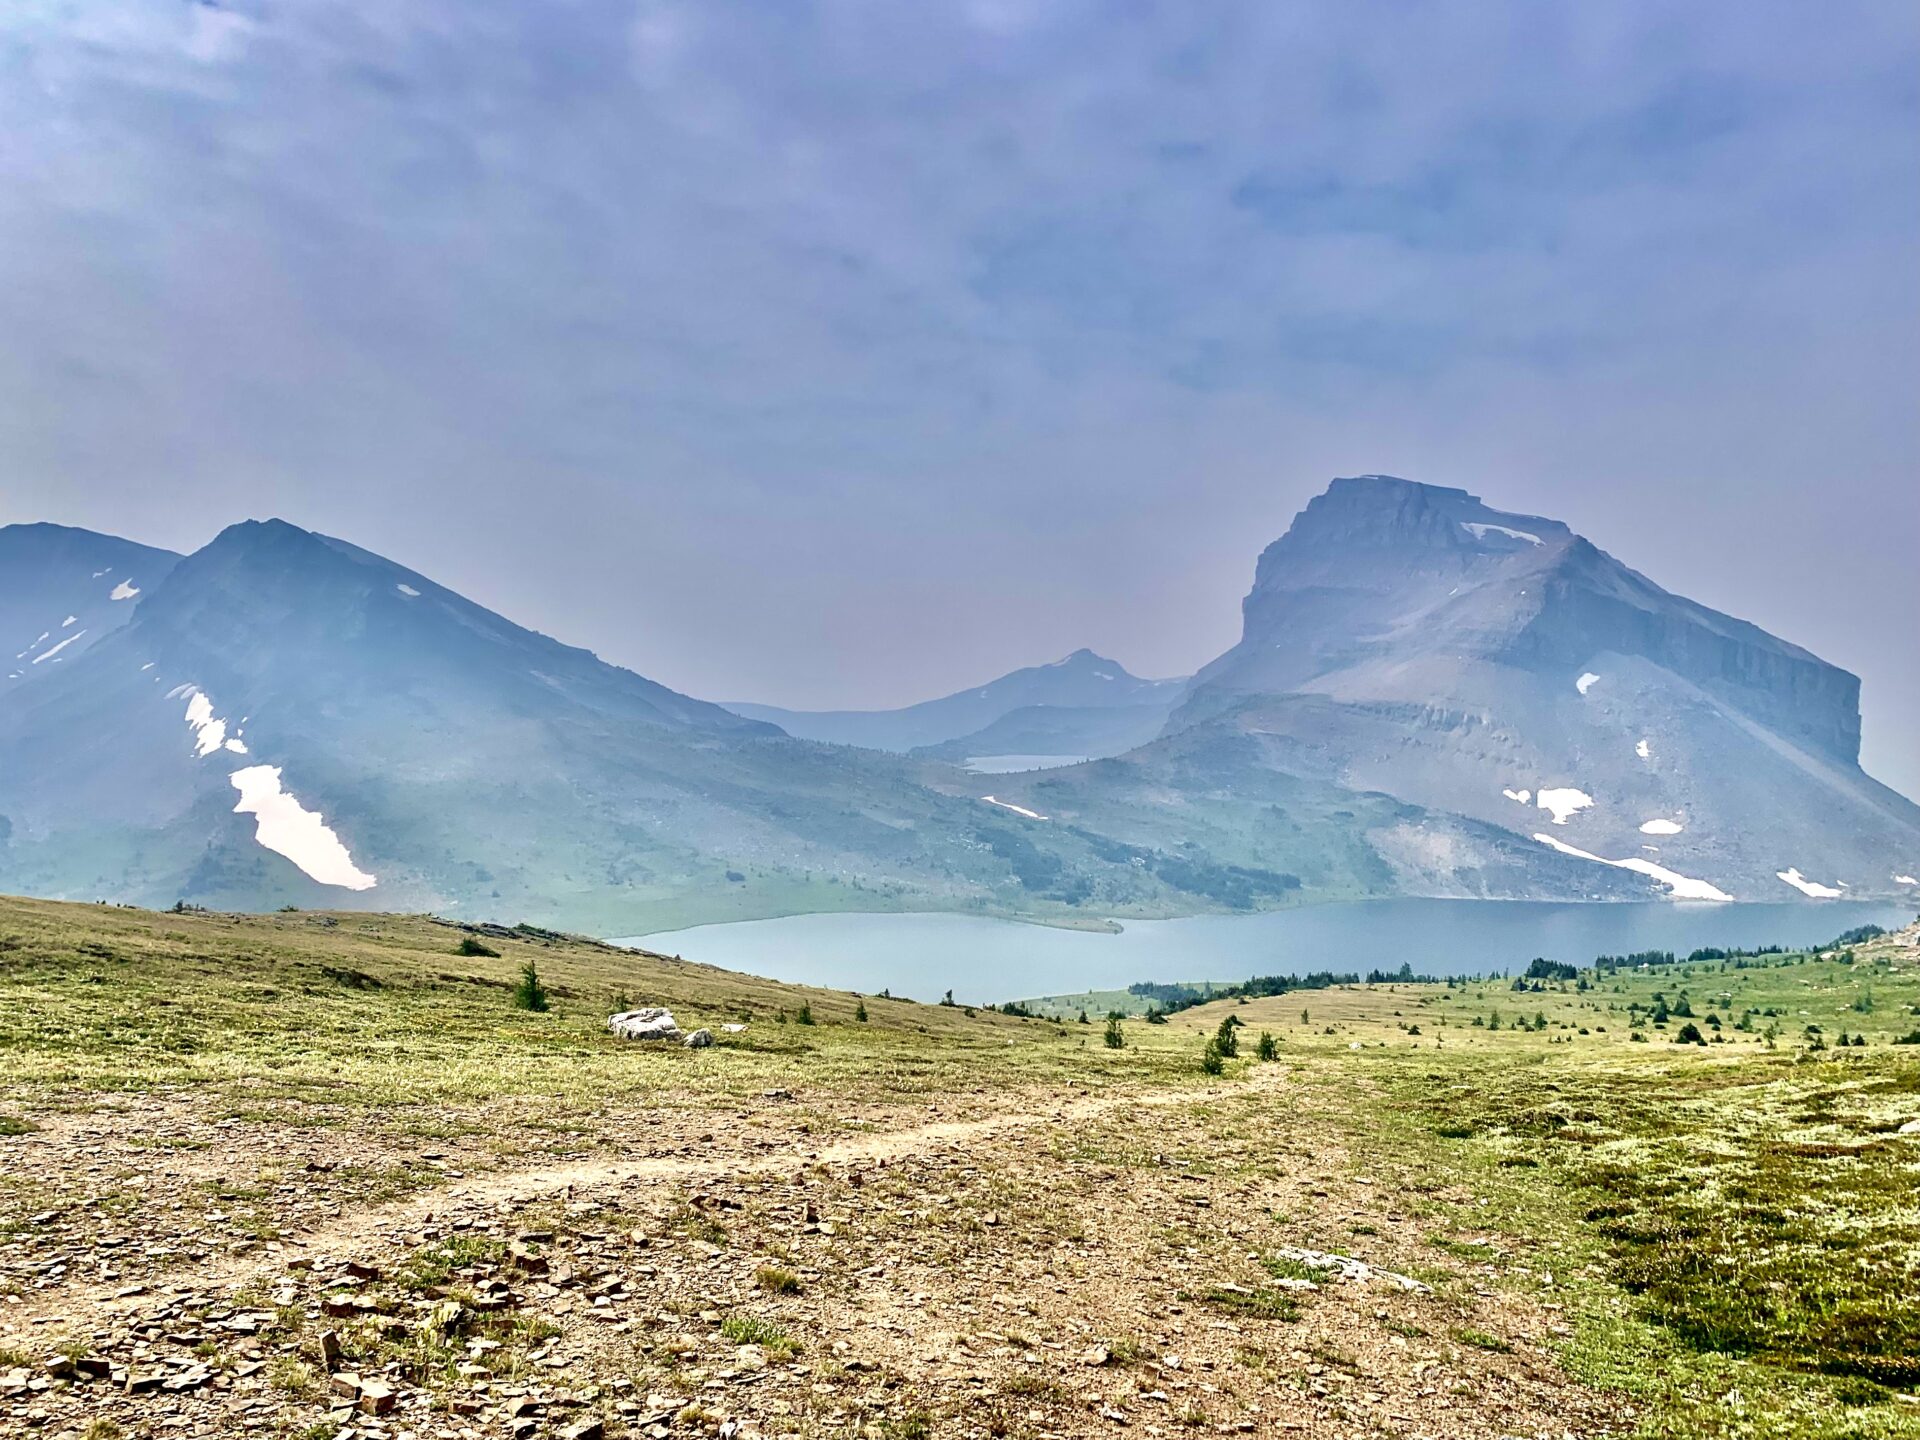
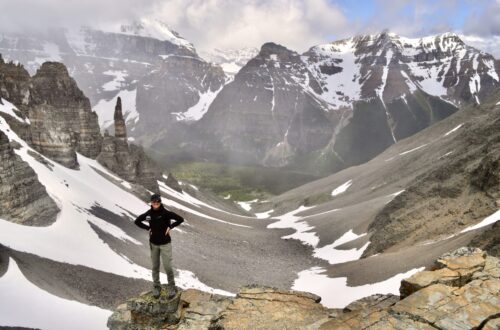
Boulder Pass
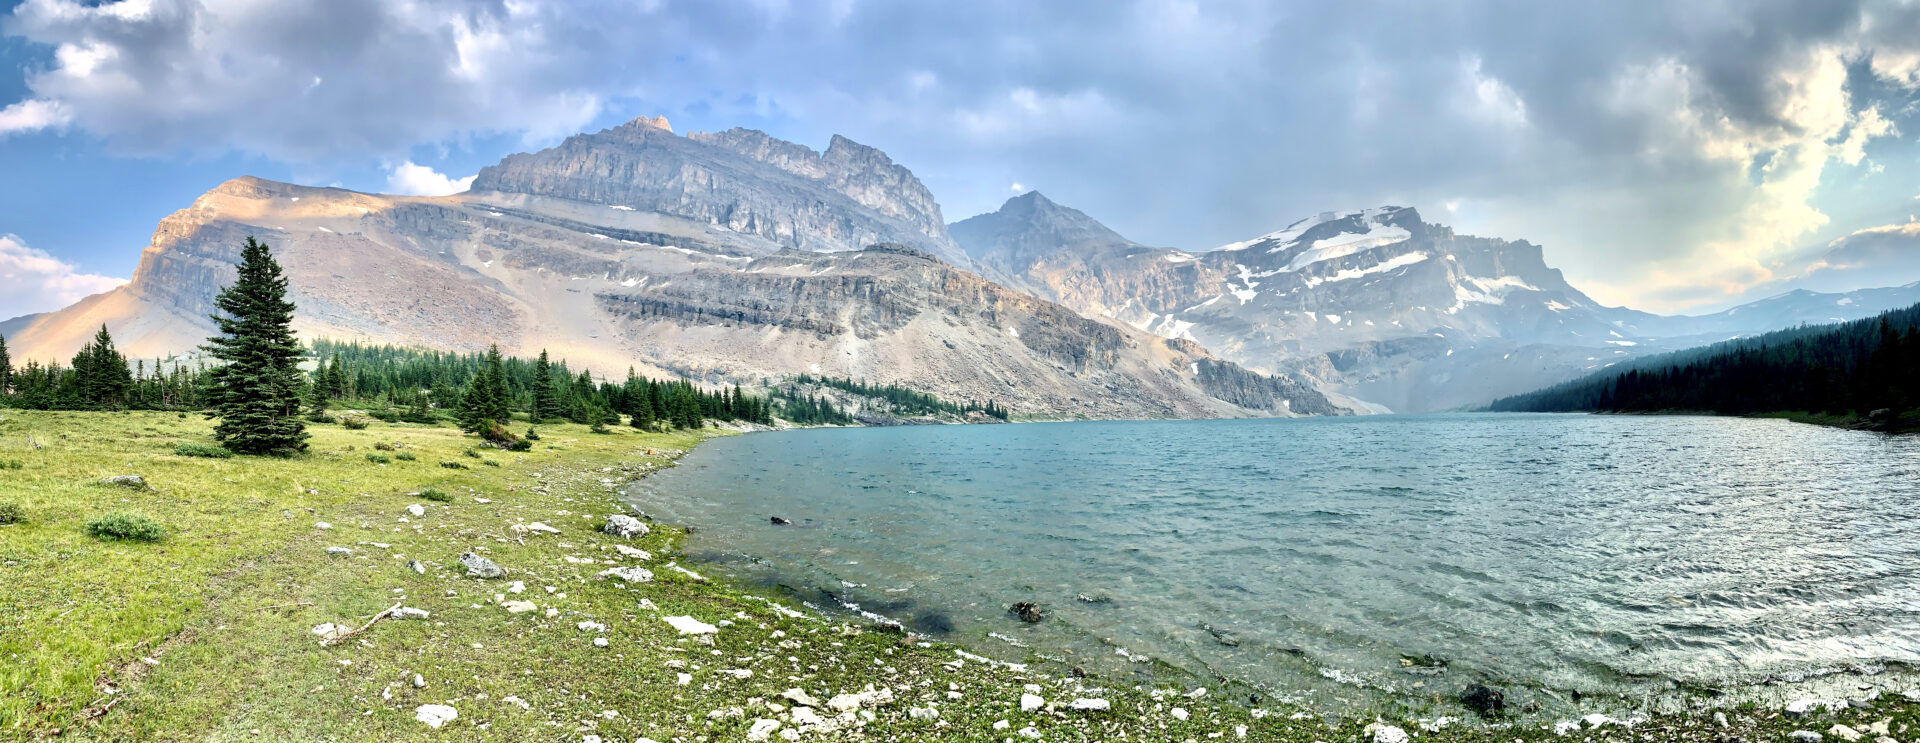
The first notable point of interest on the Banff Skoki Loop is Boulder Pass. Boulder Pass begins right after the Halfway Hut and features a massive field of loose rock backed by Redoubt Mountain which has the most striking flat face.
It’s quick and not overly strenuous to the top of Boulder Pass and at the top of the pass you’ll find views of Ptarmigan Lake. Something to note is that once you cross over the pass the temperature seems to drop and it gets very windy. You’ll often find snow over the pass, even late in the season. Ensure you bring warm layers.
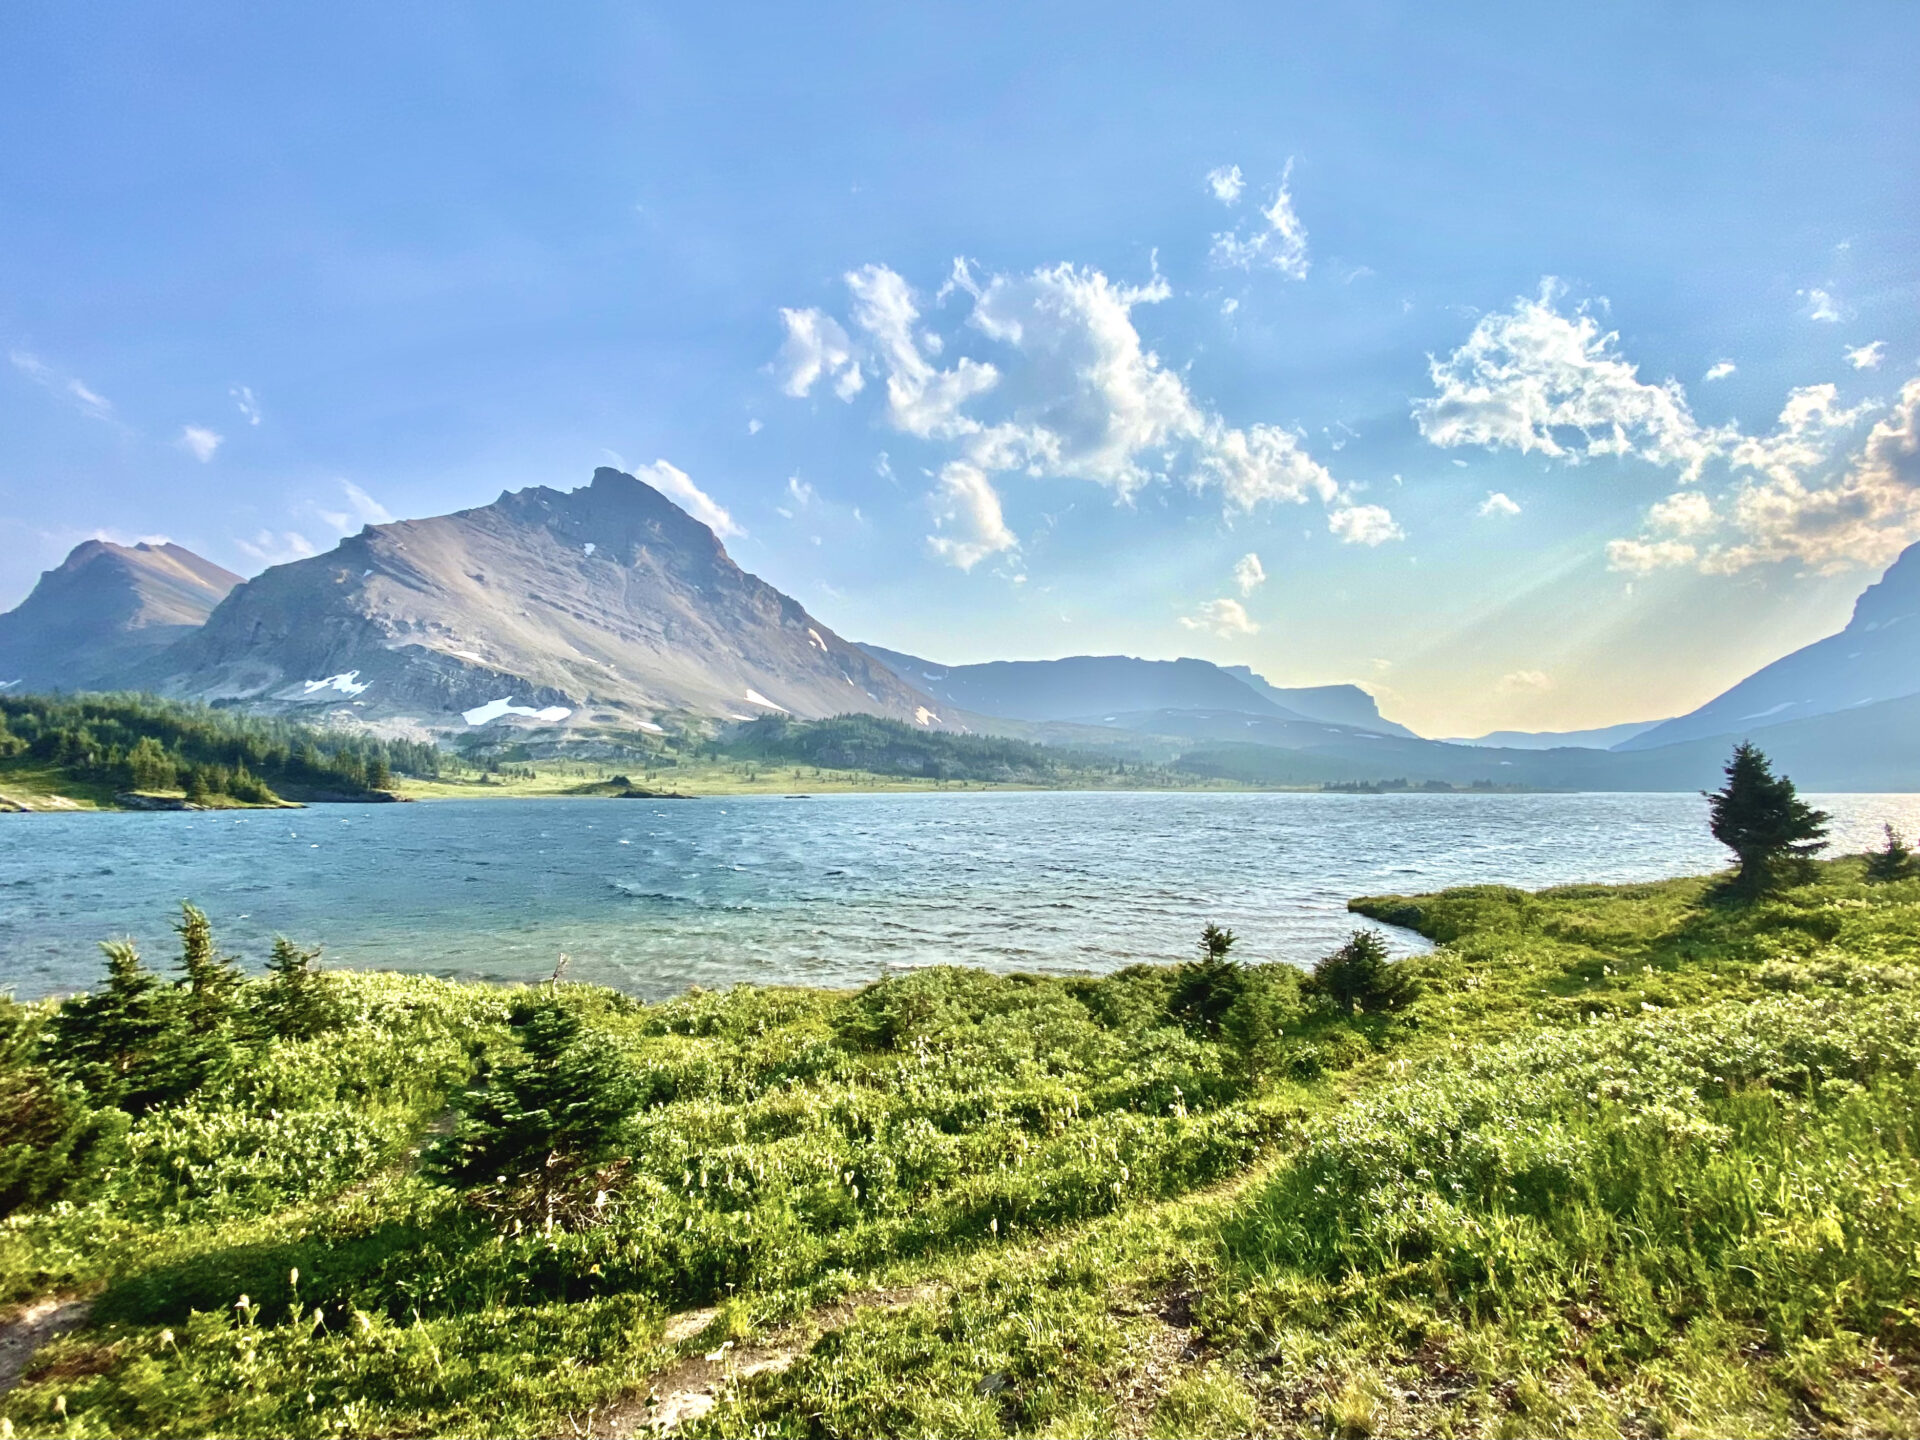
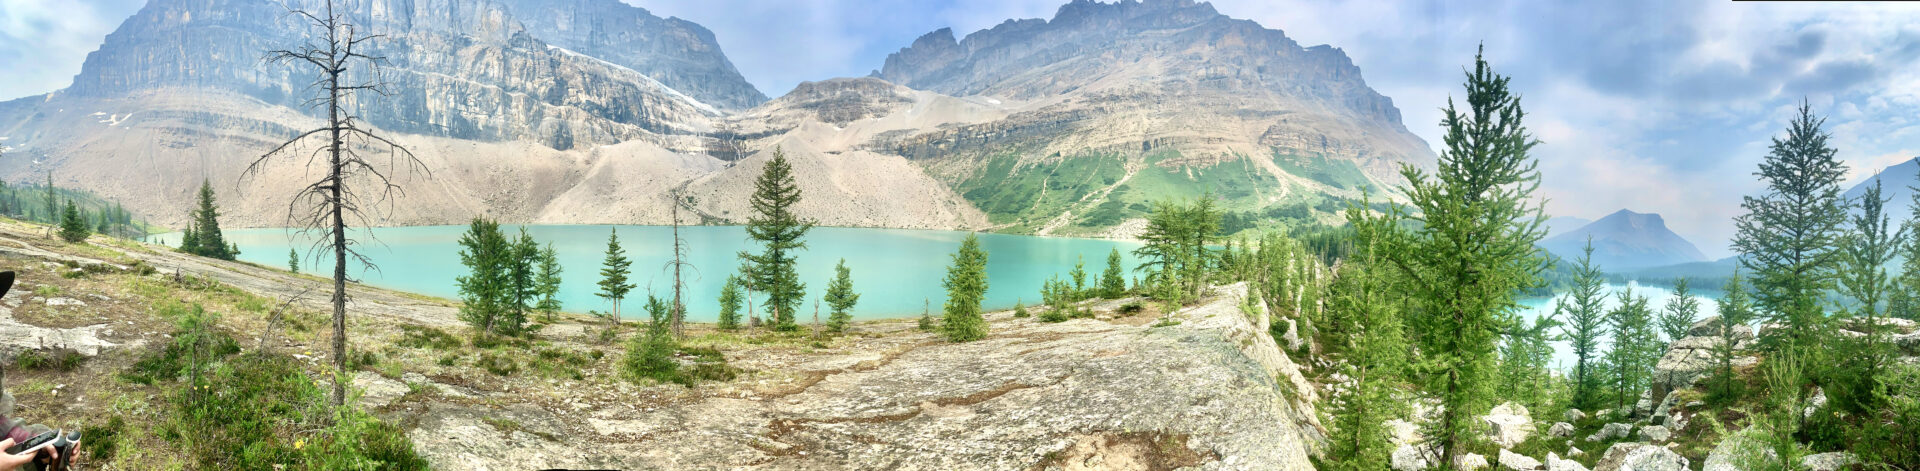
Ptarmigan Lake
Just after Boulder Pass you’ll find Ptarmigan Lake which people often complete as a day hike. After Ptarmigan Lake, it’s typically backpackers only.
The path here criss crosses, splits, and seems to go all over the place – however you’ll want to stick to the path closest to the lake as the higher trail leads to Packers Pass. Look for Baker Lake signs and you should reach it in around 4.5kms.
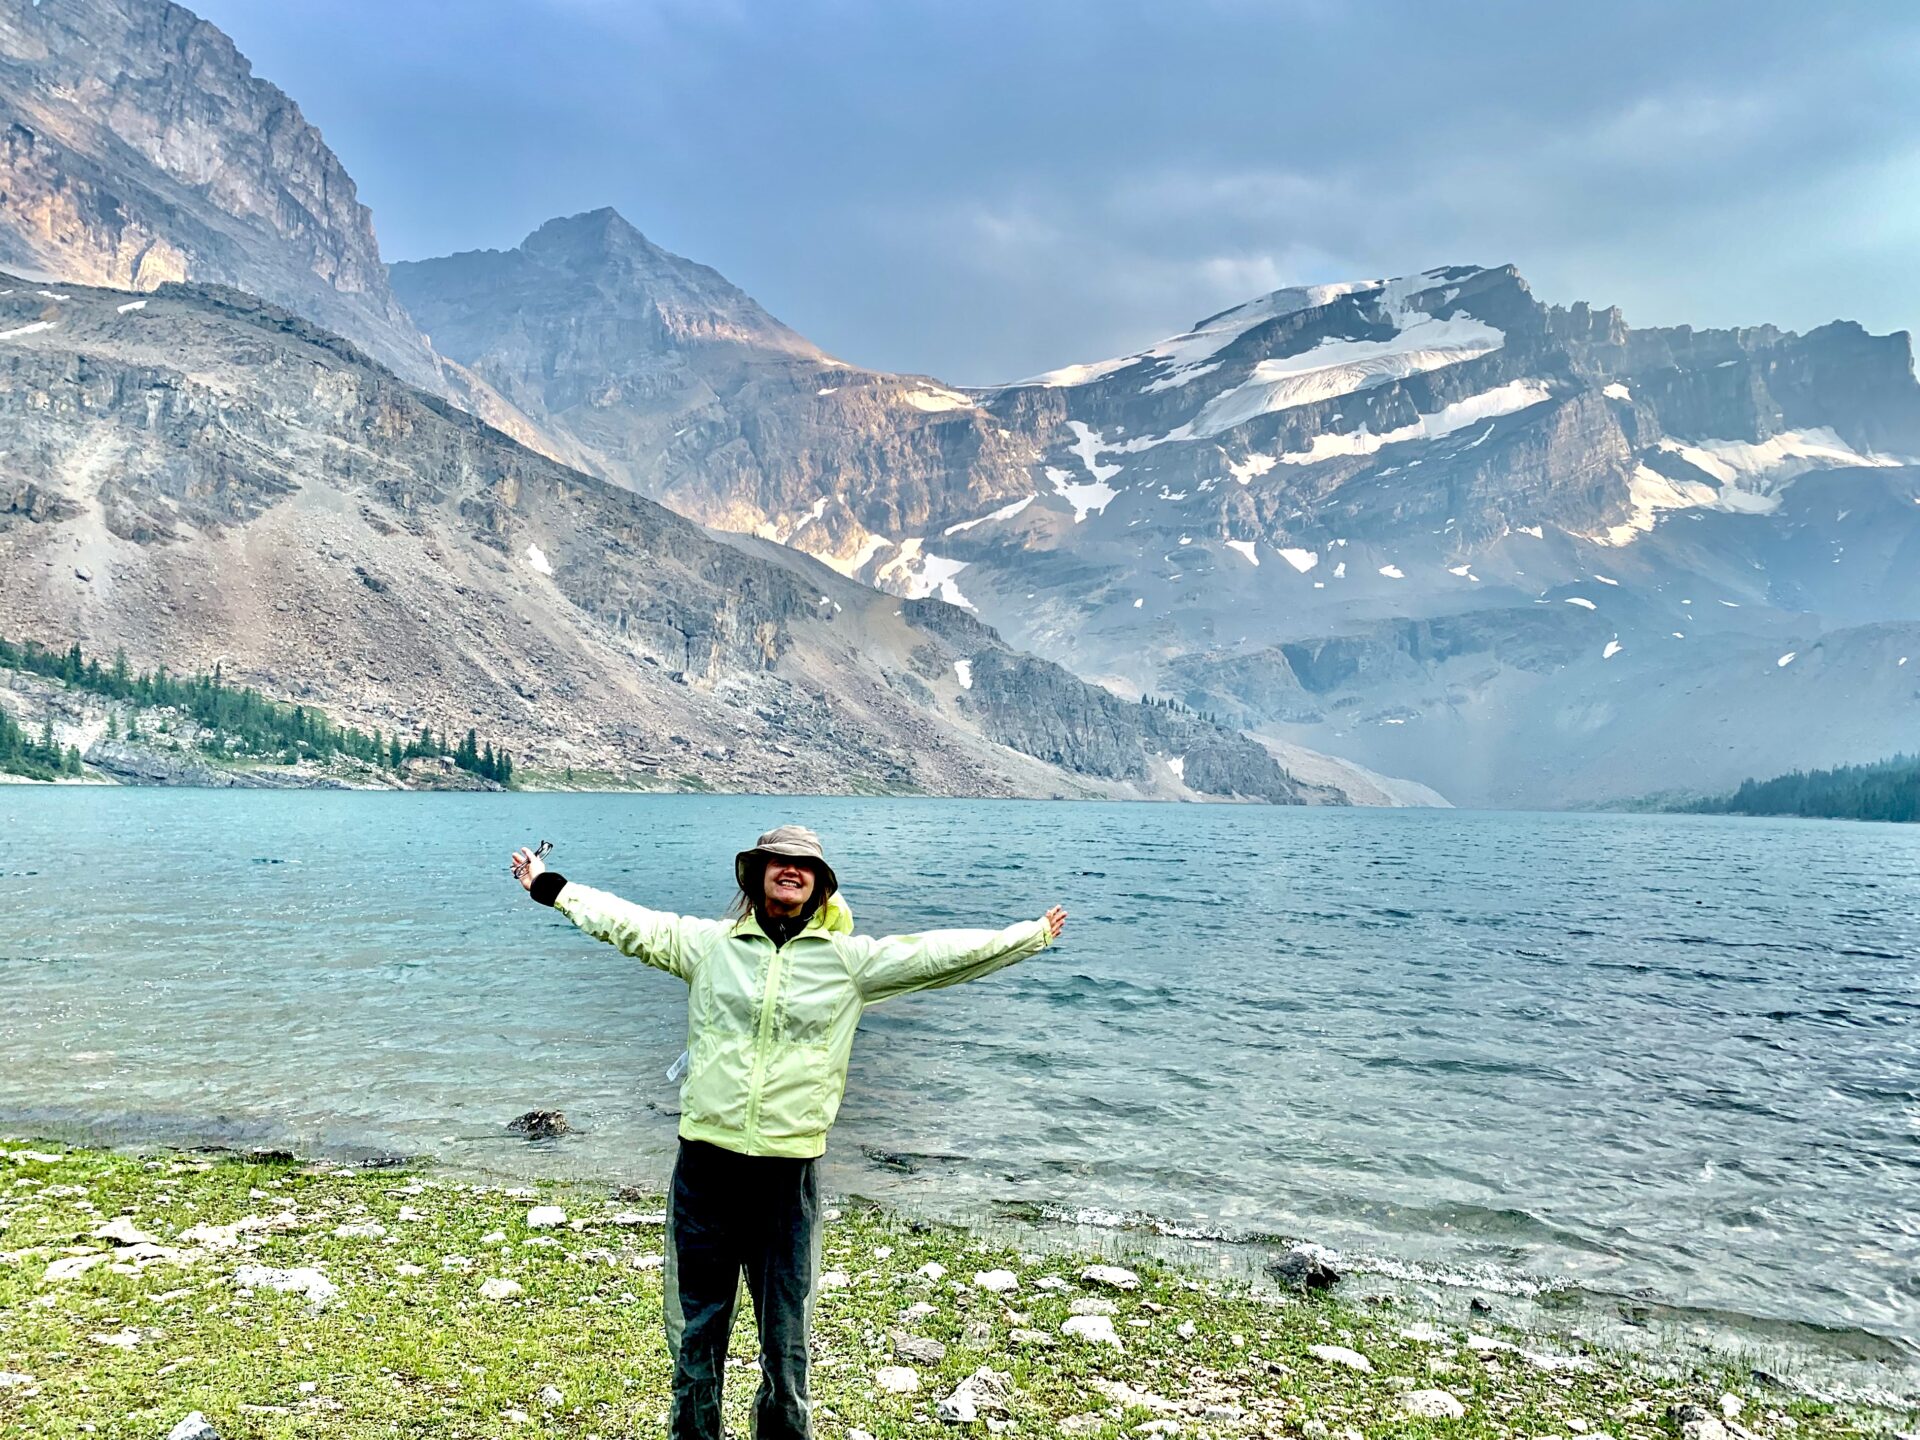
Baker Lake Campground
Baker Lake is easily the prettiest campground on the Skoki trail, however temperatures here are often cold and windy so ensure you have extra layers. This is also a popular spot for porcupines who enjoy munching on hiking poles and footwear. Ensure everything is stored in your tent overnight.
Day 2: Baker Lake Campground to Merlin Meadows Campground
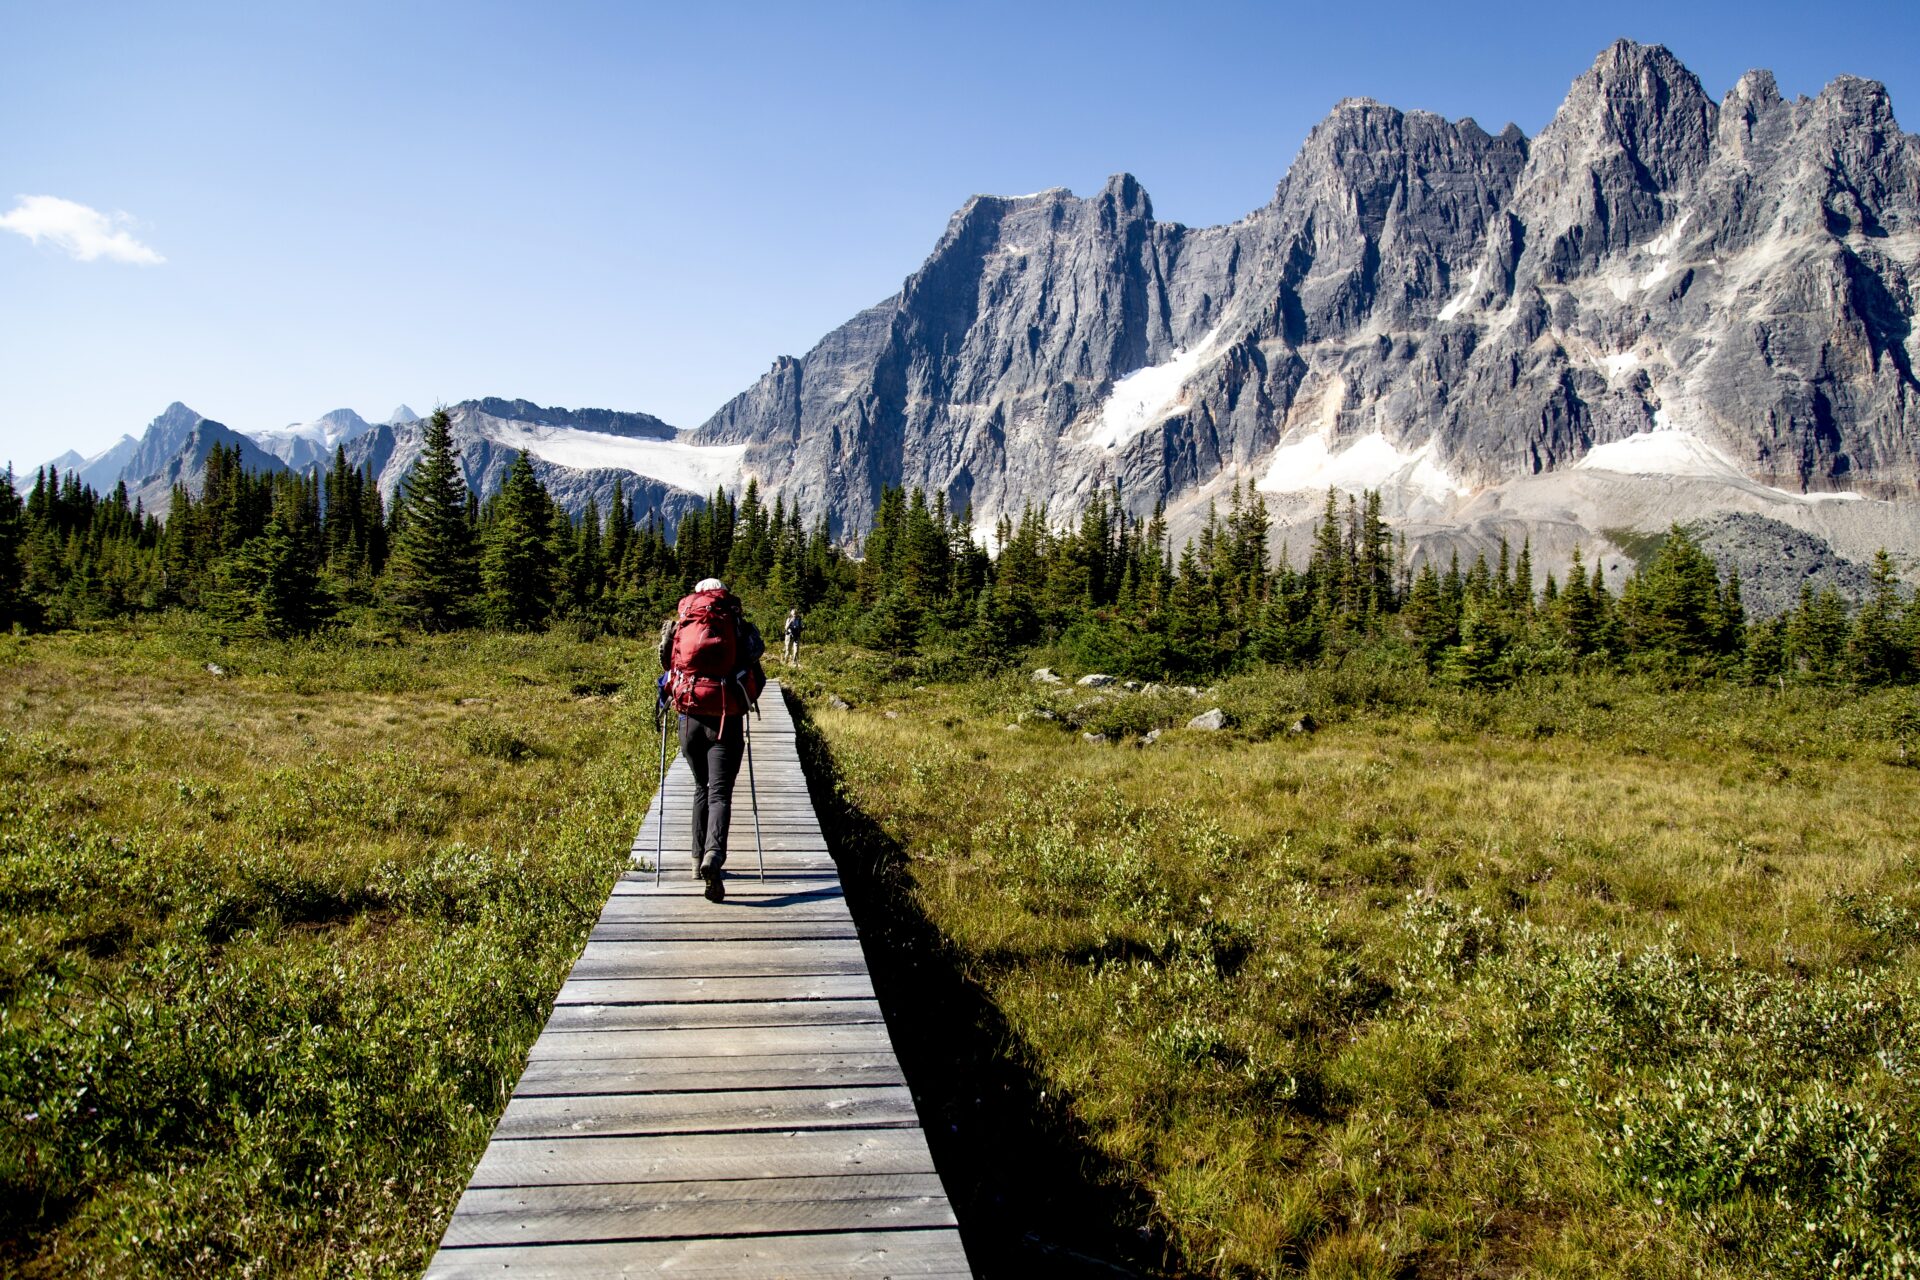
From Baker Lake campground to Merlin Meadows campground you have around 10km of flat terrain – this is by far the easiest day of hiking. You won’t have much shade during this section so make sure you bring sun protection.
On day 2 I experienced some wildfire smoke which disrupted the views, however the Sawback Range is usually visible between Baker Lake-Red Deer Lakes in a wide open valley.
A little more than halfway to Merlin Meadows campground you’ll pass by Red Deer Lakes campground and the trails around here can be a bit confusing. There are various trails and signs directing you to the Skoki Lodge, however unless you’re staying in the lodge, you’re not going this way.
Once you hit the Red Deer Lakes campground, continue West and watch out for small markers here and there. I found having the downloaded Alltrails map during this section was invaluable.
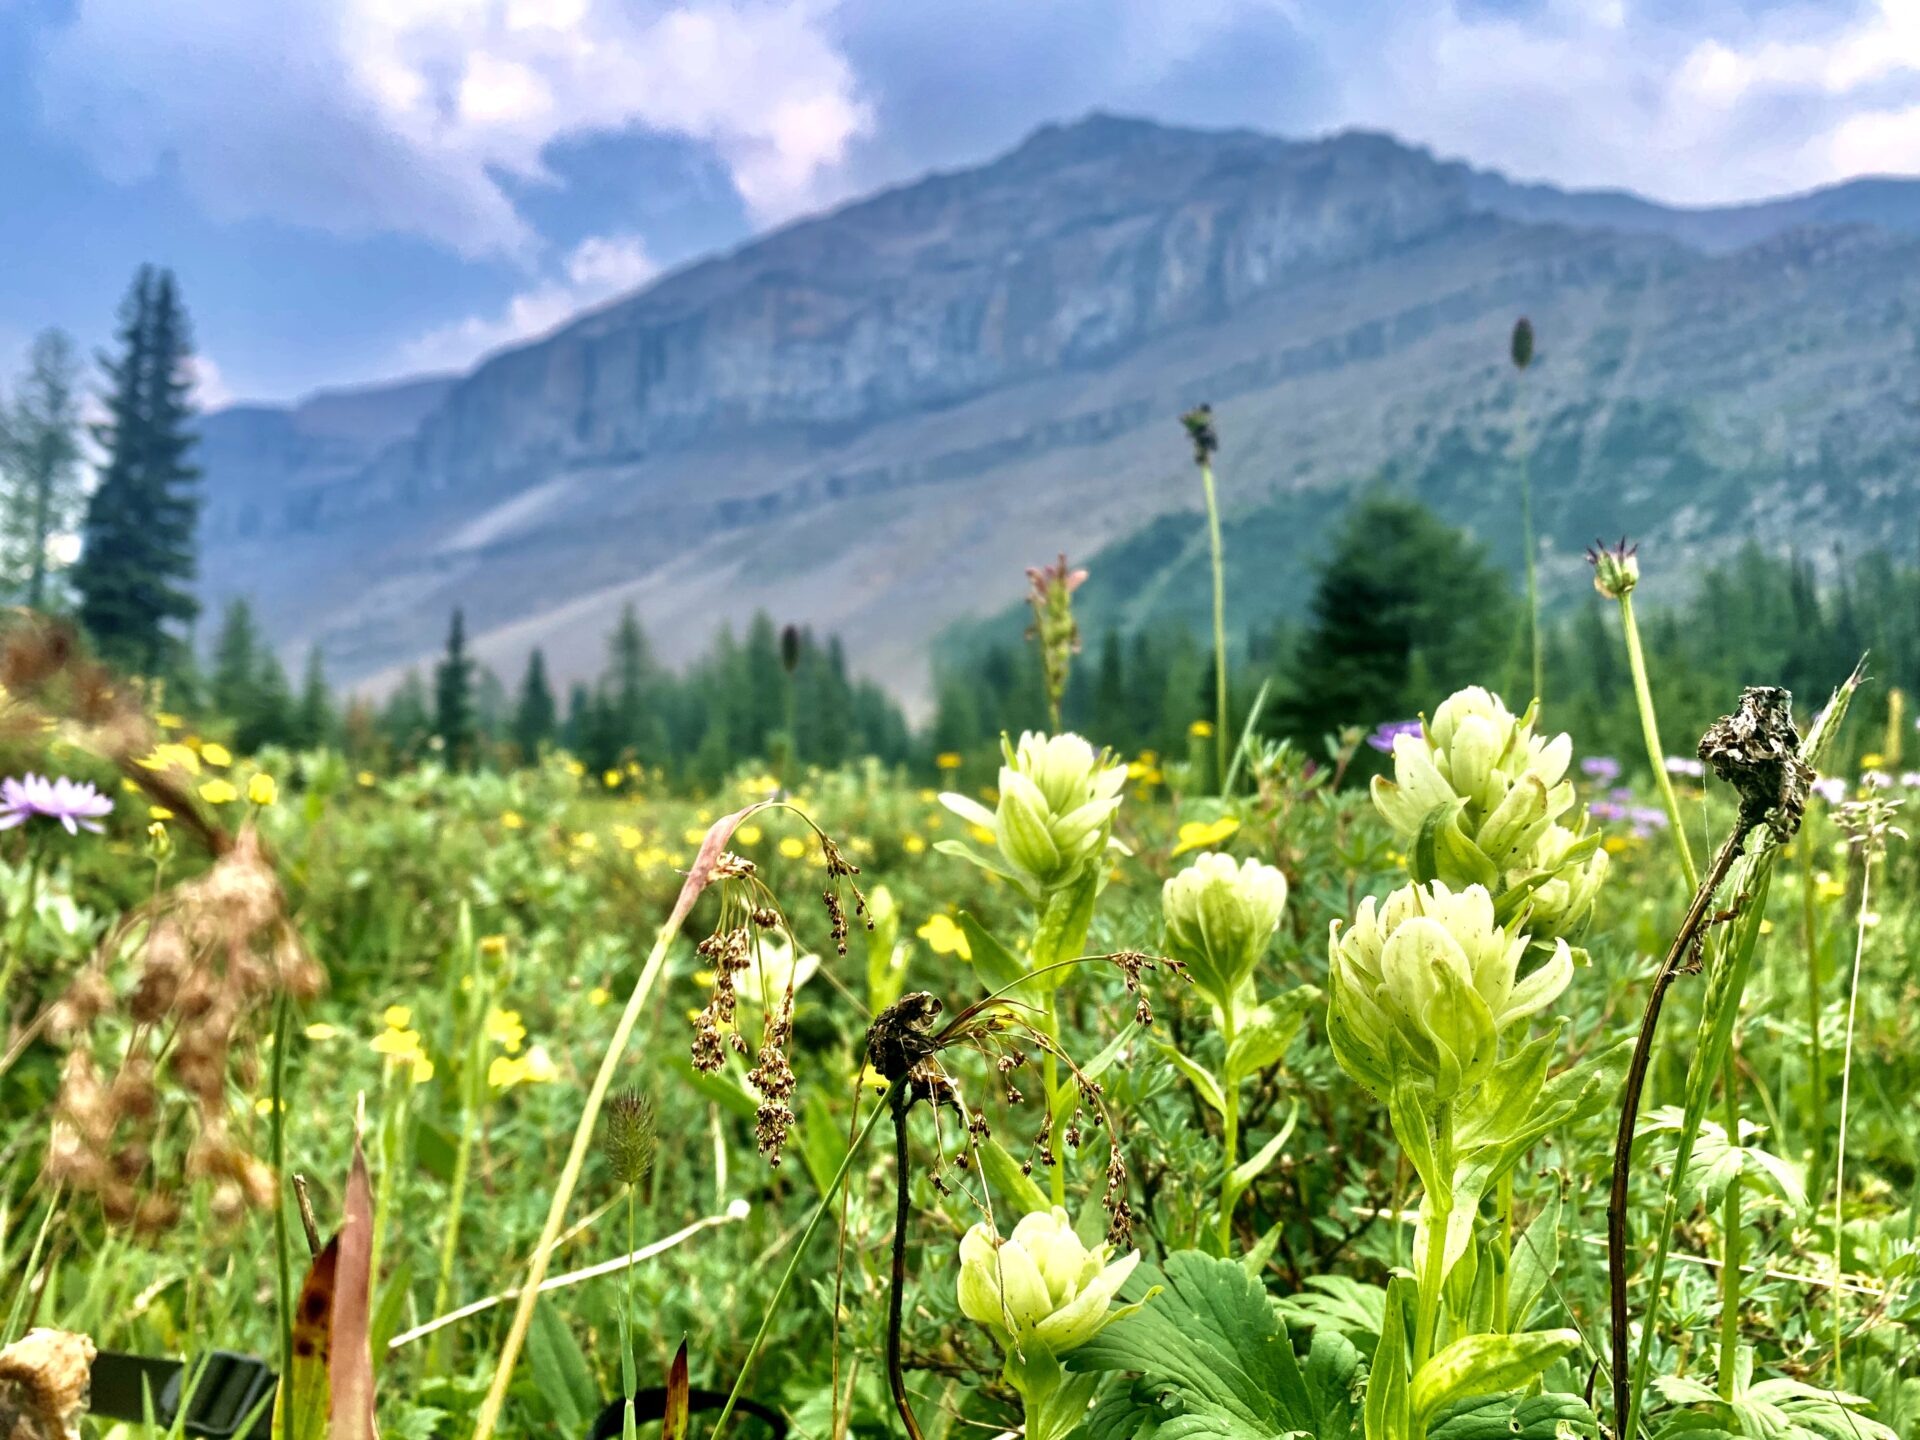
Merlin Meadows Campground

Merlin Meadows is easily the most “magical” meadow I’ve had the pleasure of experiencing. The meadow has beautiful mountain views, wildflowers, and deer prancing around near a flowing stream. The picture above was taken just steps away from the tent pads.
There’s a route up to Merlin Lake from Merlin Meadows Campground which is around 2.5kms one-way with approx. 120m elevation gain. Cross the old rickety “bridge” you would have seen on your way into the campground and follow the lightly treaded path from there.
Day 3: Merlin Meadows Campground Back to the Fish Creek Trailhead
Day 3 was my final and longest (around 14kms) day on the Banff Skoki Loop.
Around 1km from Merlin Meadows you’ll pass the Skoki Lodge. My hiking partner and I thought we could buy some tasty baked goods from the Skoki Lodge, but it turns out the food is reserved for lodgers only.
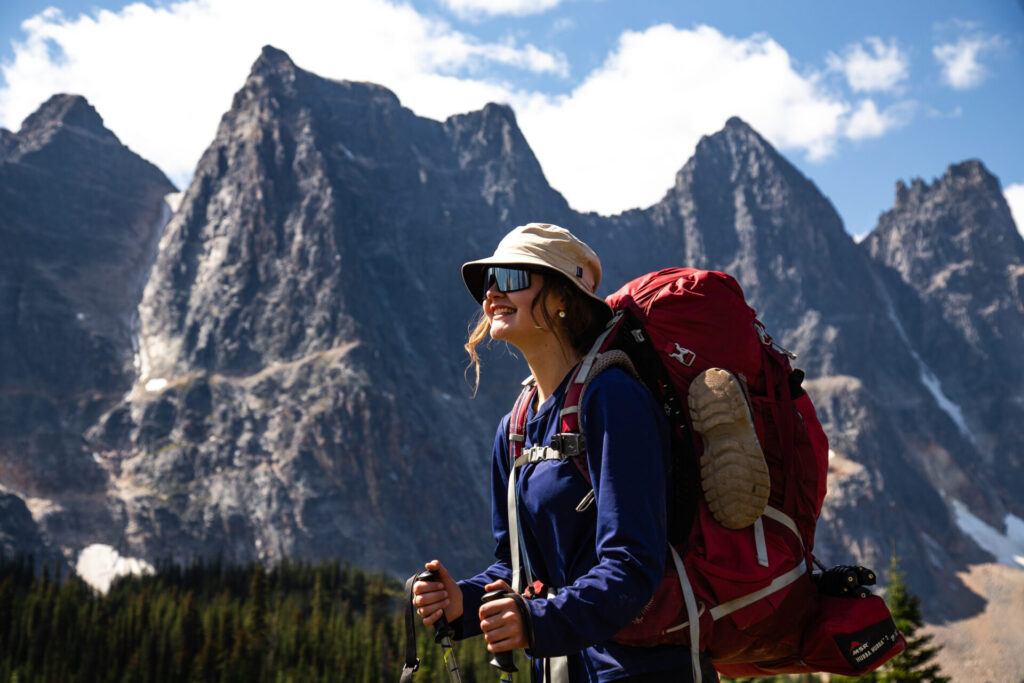
From the lodge you’ll want to walk down toward the creek and keep walking until you find the (literal) fork in the road. Take a left here. You’ll walk through the trees for a short while until you emerge into the mesmerizing Skoki Valley.
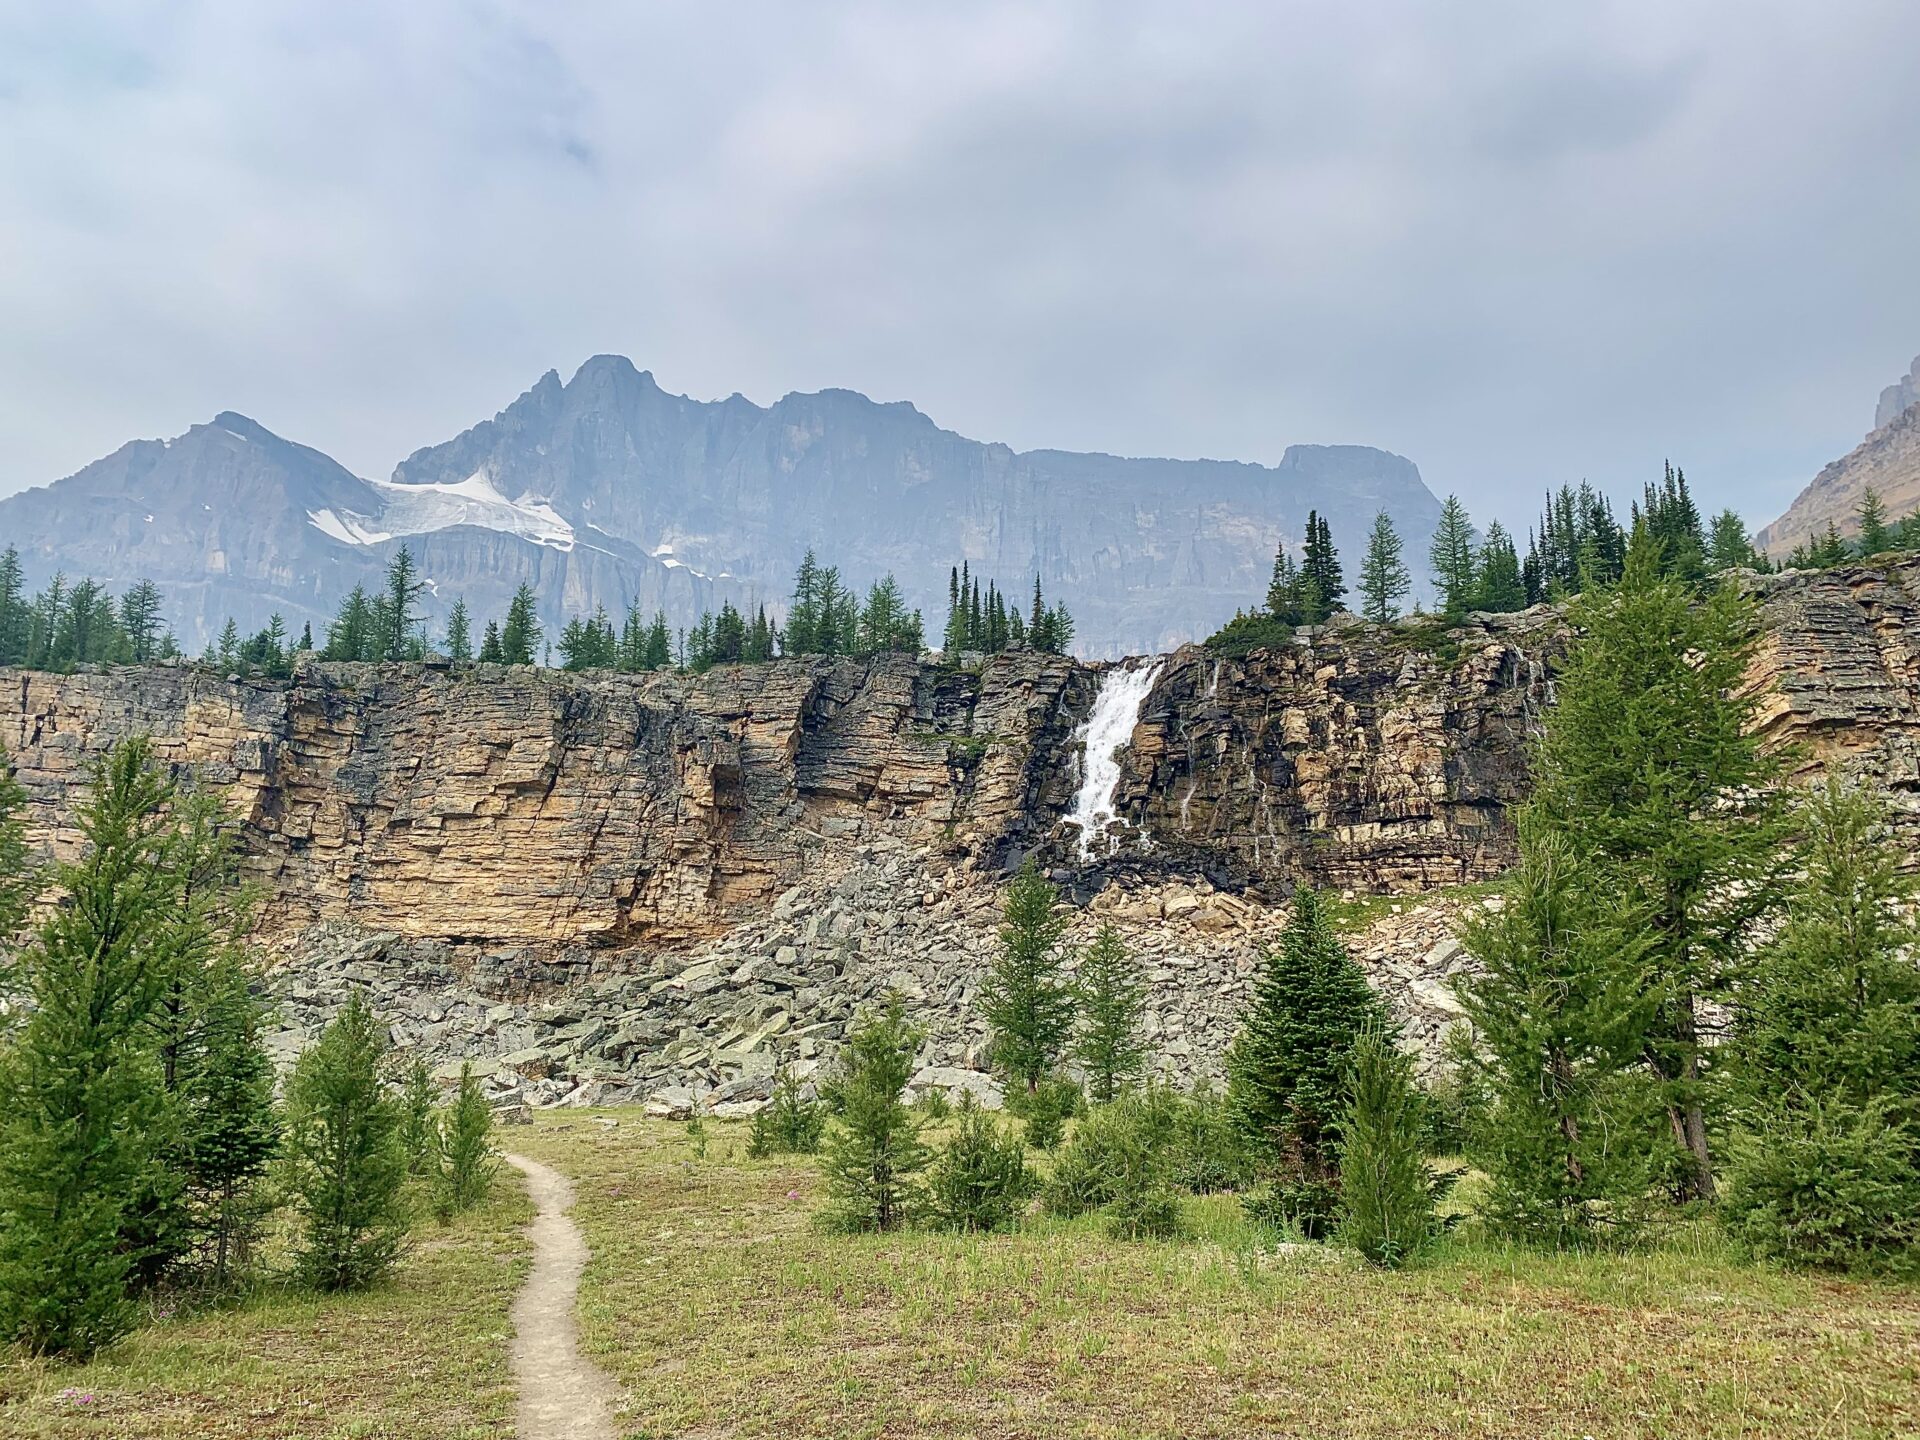
The Skoki Valley is a highlight on the Banff Skoki Loop. Here you’ll walk in between Skoki Mountain and Fossil Mountain to your left and the Wall of Jericho to your right. Early in the season there’ll be a semi-significant river crossing, however later in the season (mid July) it’s a mere tiny stream.
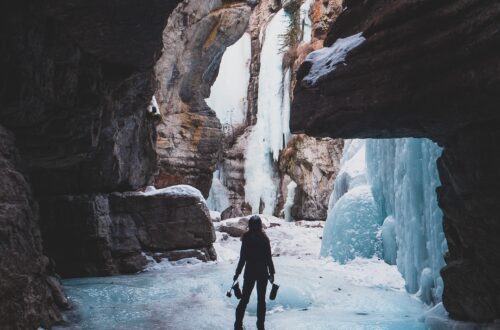
The terrain will switch from packed dirt to loose rock, then you’ll come across the most picture-perfect waterfall. To continue past the waterfall you’ll engage in a brief scramble and actually climb up and through an almost a cave-like section of rock directly next to it.
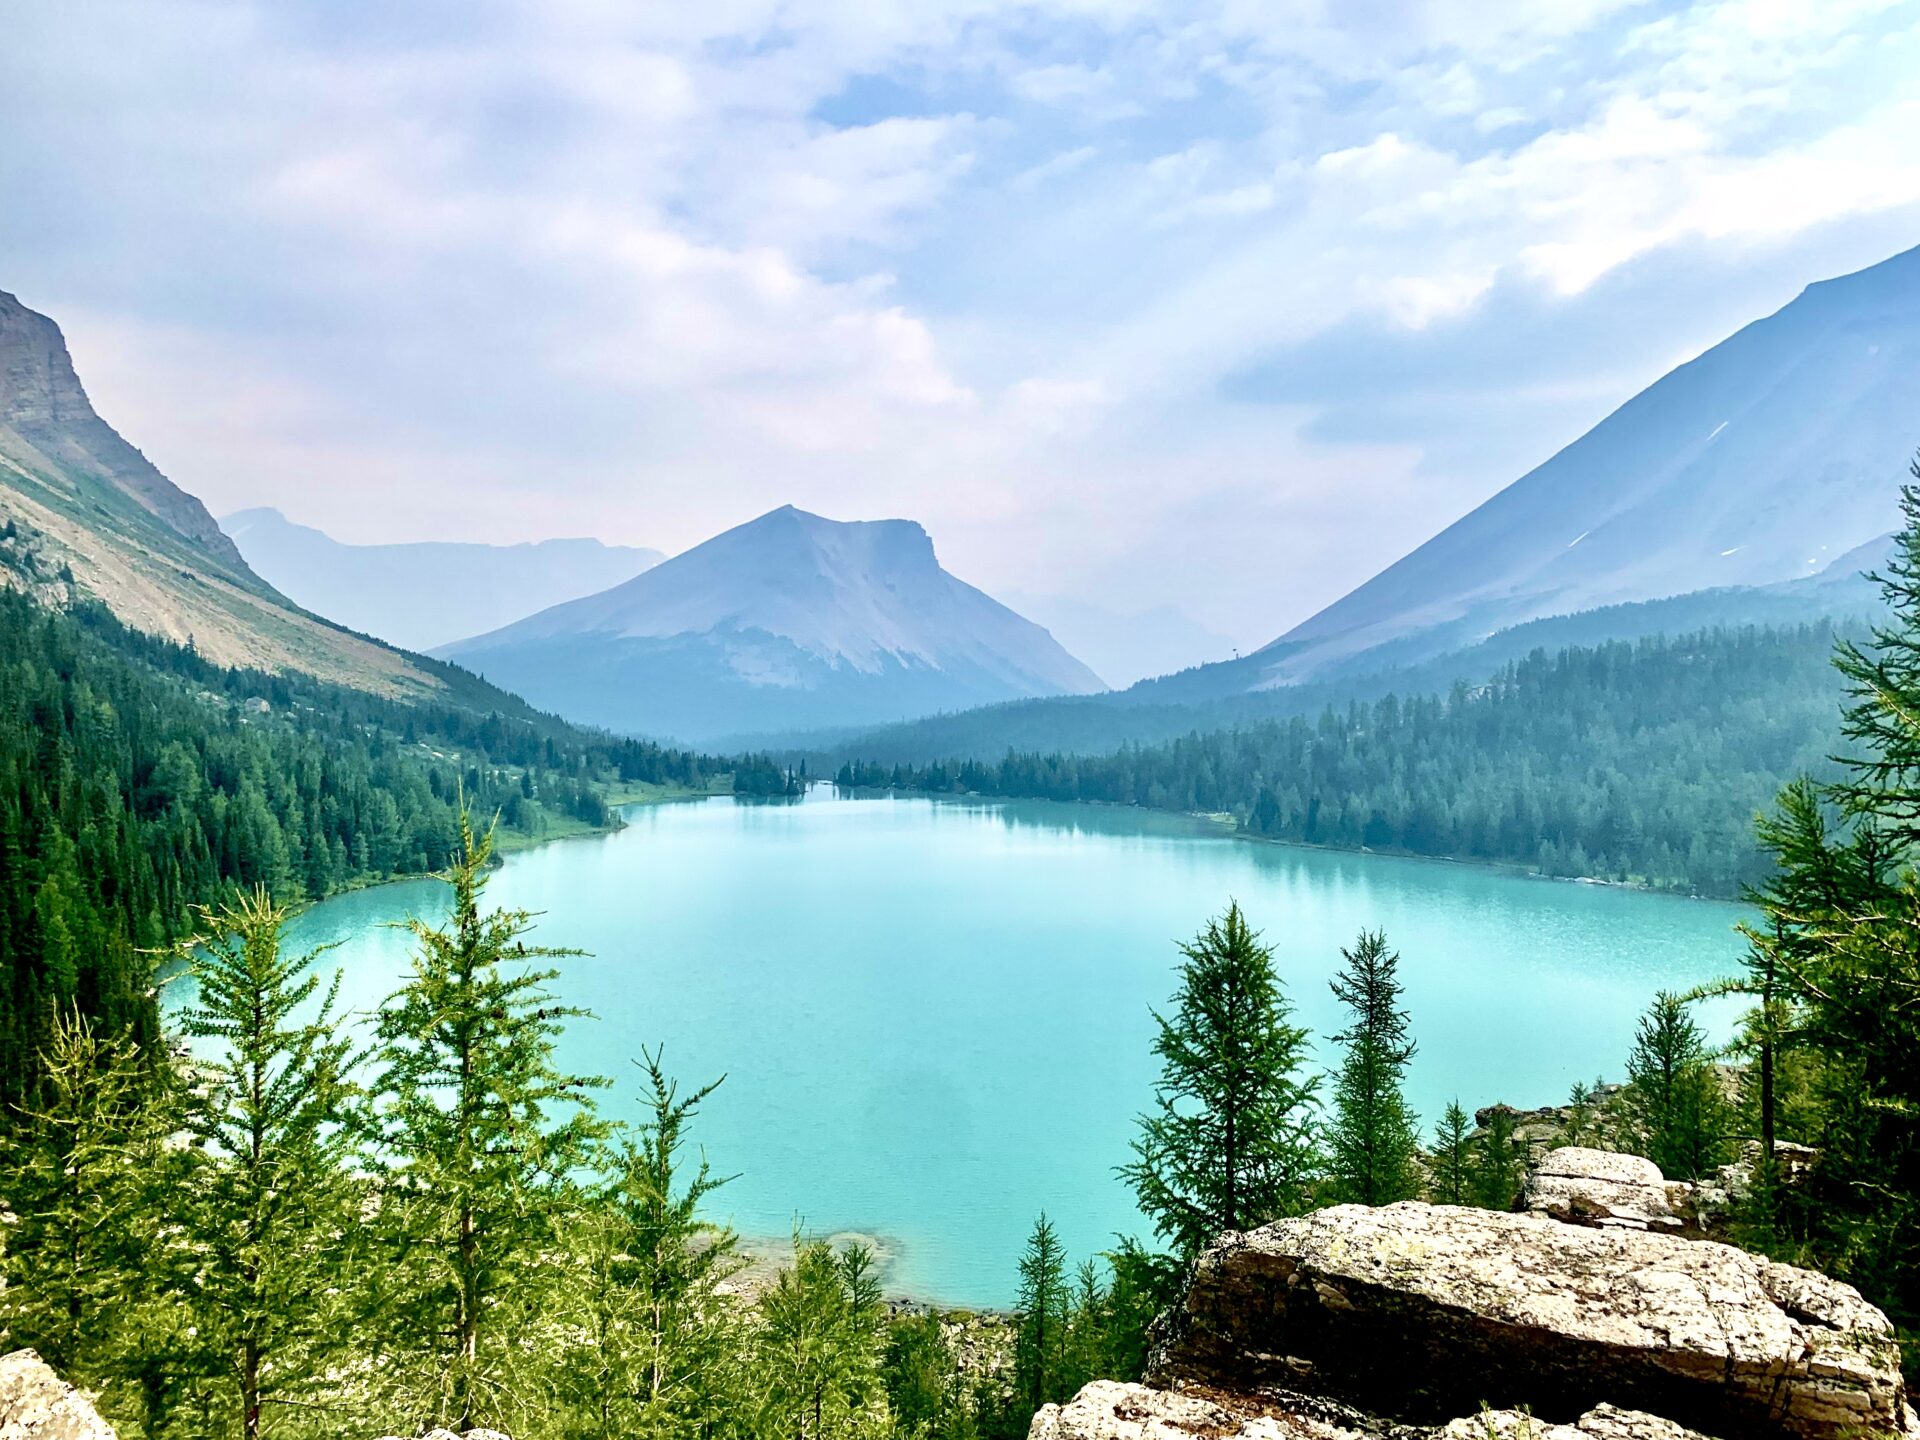
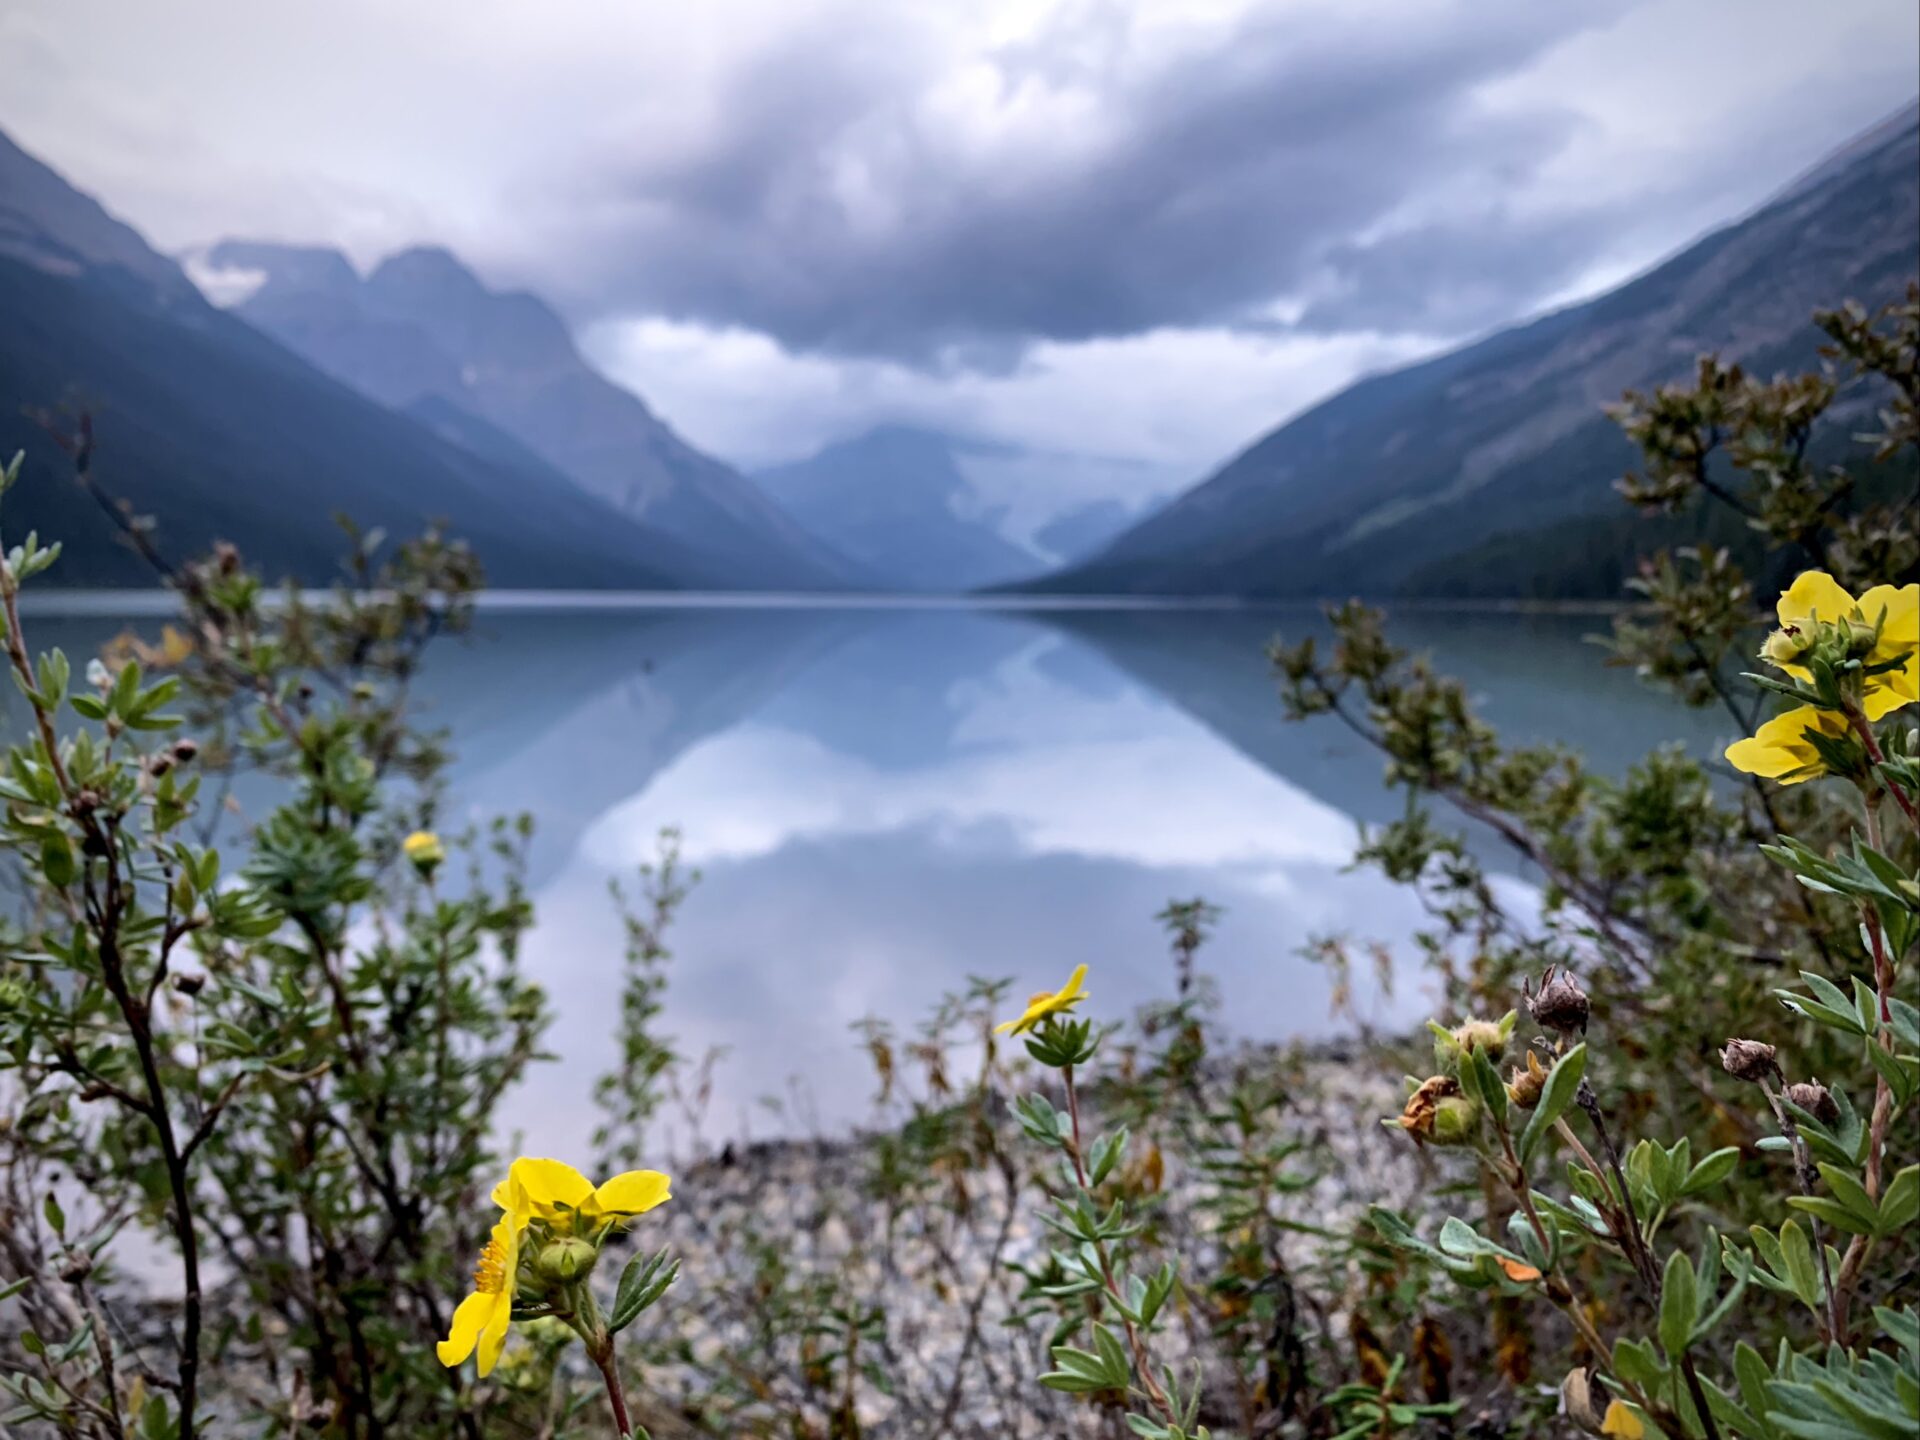
Lakes, Lakes & More Lakes!
After the waterfall you’ll walk along the shore of both Myositis and Zigadenus Lakes – debatably two of the most stunning lakes I’ve come across in the Rockies.

Packers Pass
After a quick rock field and steep uphill grind from Zigadenous Lake, you’ll find yourself on Packers Pass which offers a birds-eye views of Ptarmigan Lake, Redoubt Mountain and Heather Ridge.
Ptarmigan Lake
From Packers Pass you’ll descend and walk along the shore of Ptarmigan Lake back toward Boulder Pass and the Fish Creek Trailhead. After the pass stick to the wide trail off to the right.
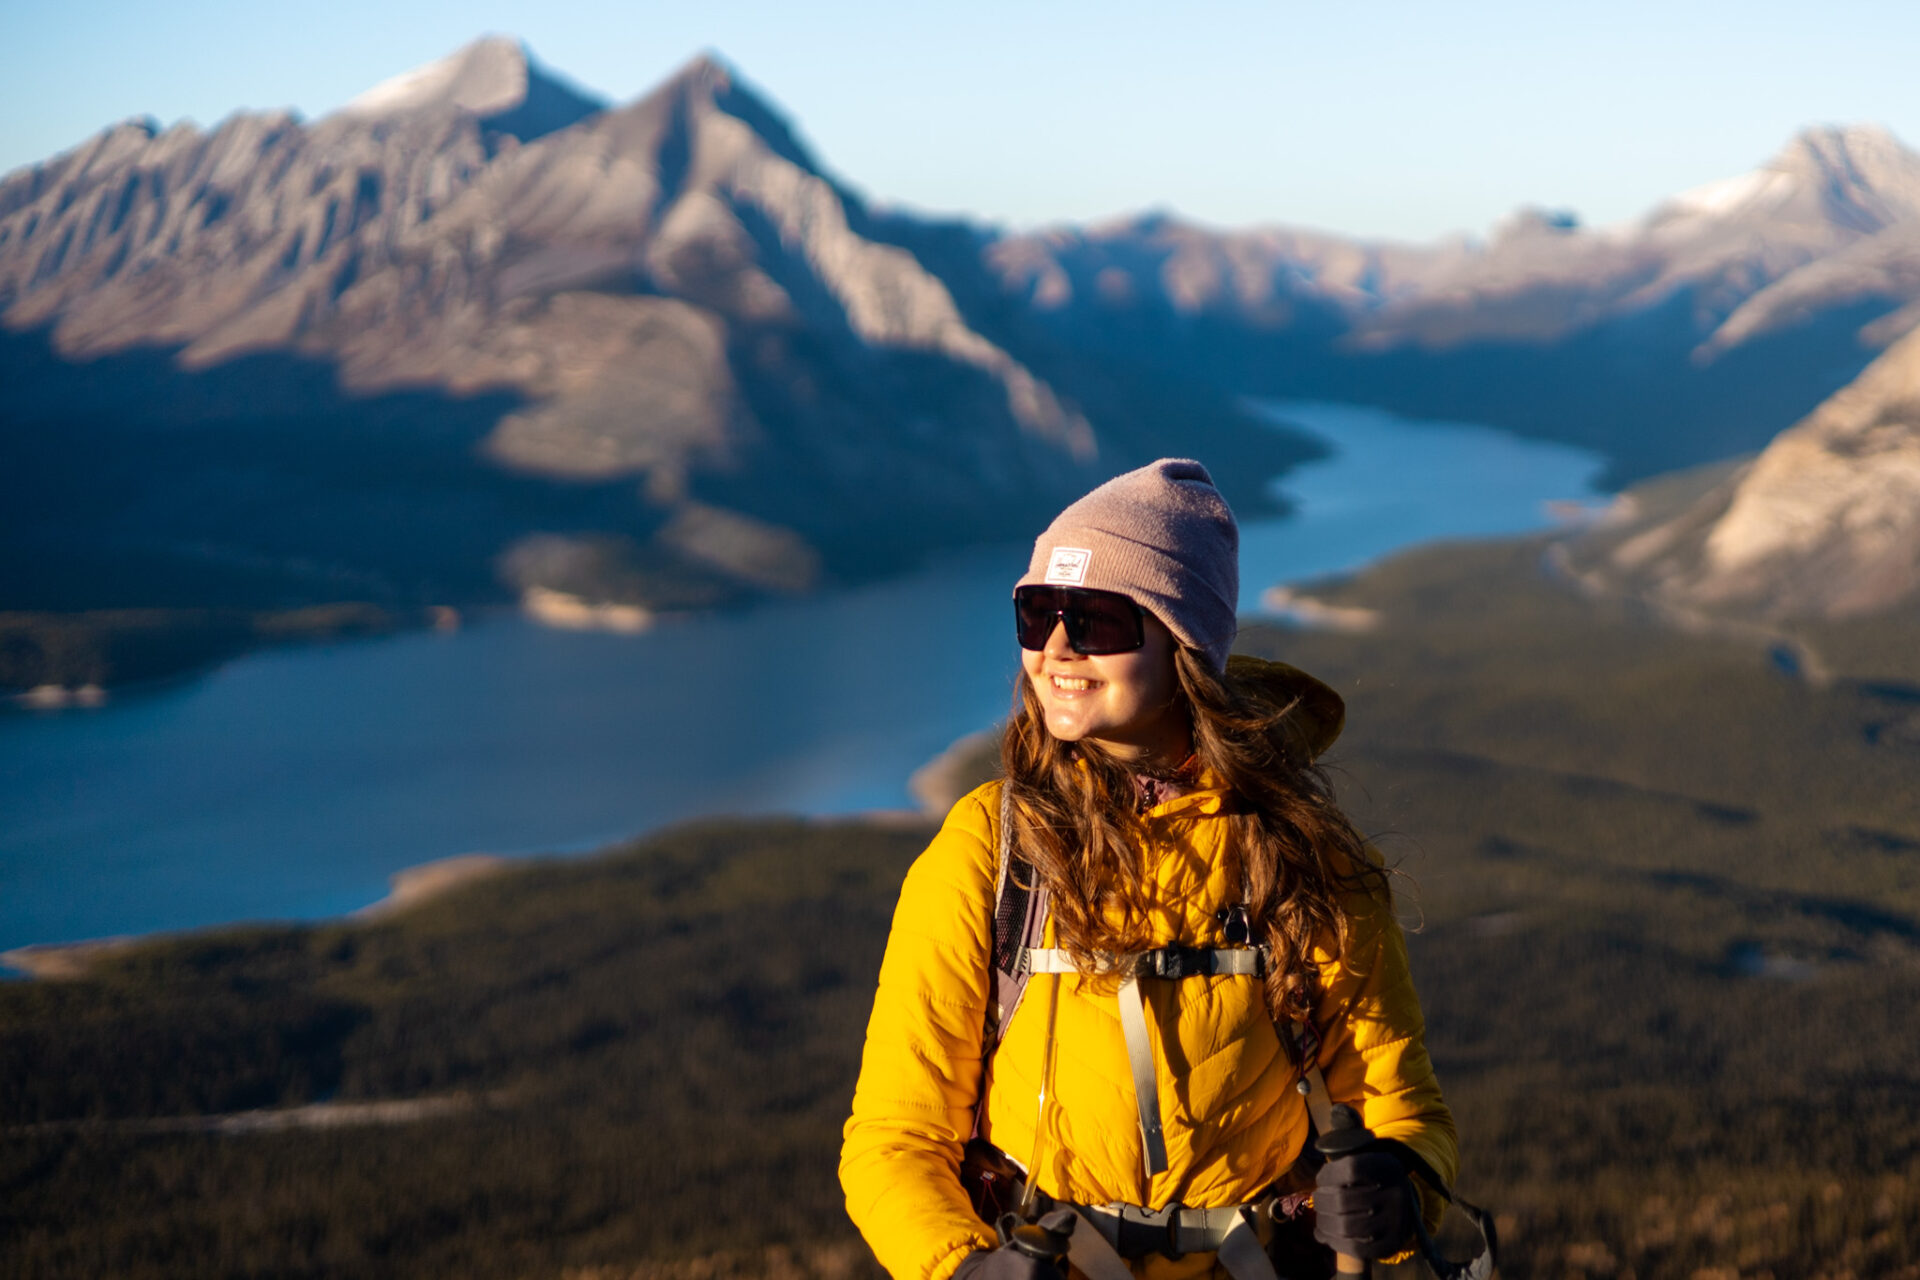
One of the highlights on the way back is that you’ll be able to see the Victoria Glacier which is the famous glacier that sits behind Lake Louise.

Canadian Rockies Hiking Tips
Guides for hikes in: Banff | Jasper | Kananaskis | Kootenay | Waterton | Yoho
Approach: take a conservative approach if you’re new to hiking and ensure you have lots of daylight. Trails here are steep, long, and can have challenging terrain.
Best Time of Year: July to early September is the most reliable for weather and minimal snow. This post outlines each month in Banff.
- Hiking in winter? Stick to easy, well-trafficked trails unless you’re knowledgeable about avalanche terrain. I always check the avalanche bulletin and use both Caltopo and Google Maps satellite view to survey terrain before hiking.
Pets: leashed dogs are allowed on all trails in the Rockies unless otherwise stated.
Safety: tell someone where you’re going and when you plan to return. I always carry the Garmin InReach Mini for additional safety as there’s minimal cell service in the Rockies.
Wildlife: carry bear spray and know how to use it. Here are bear safety tips from Parks Canada.
Maps: I purchase the Alltrails+ membership and download my maps before hiking so I always know where I am.
Helpful Canadian Rockies Hiking Posts:
More of my detailed hiking tips can be found here
Canadian Rockies Camping Tips
Plan to go camping in Banff and the Canadian Rockies? Here are some useful things to know.

Unless you’re on some form of public land – random camping and free car camping is not permitted in the Canadian Rockies. If you do plan to “free” camp in the designated areas, you must purchase the Public Lands Camping Pass.
Camping Reservations: reservation day (when bookings go live) usually occurs in January. Most summer camping reservations must be made then as sites fill up instantly.
- National park camping reservations can be made here and Kananaskis reservations can be made here: backcountry | front country.
- Can’t get a reservation? Sign up for cancellation notifications via Schnerp. I use this resource frequently and have found cancellations at the most popular spots in the Rockies like Lake O’Hara.
When to Camp: most campgrounds close for the winter, however a few remain open year round. July-August is best for backcountry camping. Keep in mind, temperatures are typically very cold at night even during peak summer.
Hut Camping: the Alpine Club of Canada has established alpine huts scattered around the Rockies and beyond. These huts must be booked in advance and cater to backcountry skiers, hikers, and climbers.
Packing advice and my personal gear recommendations can be found in my Backcountry Gear Guide.
and that’s everything you need to know about the Banff Skoki Loop. Enjoy!
Interactive Banff Map – from a LOCAL
Get my 600+ local Banff recommendations saved to your Google Maps app
I lived in Banff for years & know all the best spots!
Outdoors: 100+ hiking trails, scrambles, backcountry routes, waterfalls & lakes
Planning: lodging, parking, restaurants, public washrooms, transit hubs, shopping & services
Things to do: tours, viewpoints, unique activities, & local secrets
Quick Banff Guide
RENT A CAR: I highly recommend renting a car to explore Banff’s remote trailheads and attractions not accessible by public transport. My favourite site to find the best local rental deals is this one.
How to get to Banff: fly into Calgary International Airport. From here, rent a car (what I recommend) or take one of the following shuttles to Banff: On-It (budget) runs during the summer months | Pop-a-Ride is a ride-share program – you can use my Poparide link to save $5 on your first trip | Banff Airporter and Brewster are professional services.
Moraine Lake & Lake Louise: read my guide for how to get there with the new road closures. If you want to see Moraine Lake at sunrise, you can book a shuttle here.
Best Activities in Banff: here are all my recommendations for the best tours, activities, and unique experiences in Banff & beyond.
Lodging & Camping: see my guide which outlines the best hotels in Banff by category. Summer and peak winter visits require advance bookings. Camping reservations must be made on the Parks Canada reservation system which typically opens in January – make your reservations then.
First time visiting Canada? This page outlines all my travel tips for those new to Canada.
When to visit: this post breaks down each month in Banff with average temps and corresponding activities.
Reservations: for activities and restaurants, reservations should be made in advance during summer and holidays. Get Your Guide and Viator are popular tour booking platforms whereas OpenTable is used for restaurants.
Parks Pass: your vehicle needs a parks pass which can be purchased from the East Parks Gates, the Visitor Centre, or online. An annual Discovery Pass is more economical if you’ll be in Canada’s National Parks for more than 7 days in 1 year.
Roam Transit: in Banff, use the local transit service, as much as possible to avoid parking issues in popular places like Lake Louise and Johnston Canyon.
Parking: use the large free lot next to the train station. More town parking info can be found here and parking fees can be paid here.
Wildlife Safety: 11 ways to stay safe from wildlife, bear safety, & bear basics.
My Featured Banff Blogs
Travel Guides
Banff Activities
Interactive Banff Map – from a LOCAL
Get my 600+ local Banff recommendations saved to your Google Maps app
I lived in Banff for years & know all the best spots!
Outdoors: 100+ hiking trails, scrambles, backcountry routes, waterfalls & lakes
Planning: lodging, parking, restaurants, public washrooms, transit hubs, shopping & services
Things to do: tours, viewpoints, unique activities, & local secrets
More Backpacking Trails
Looking to venture further and see more of the backcountry? Click below to discover more backpacking trails in Canada and beyond.
- Glacier Lake Backpacking Trail – Banff National Park
![]()
- What to Pack for Backcountry Camping in Banff & the Canadian Rockies
![]()
- A Guide for Hiking the Highland Backpacking Trail in Algonquin
![]()
Happy adventuring!
Taylor ♡
Like This Post?
Share with friends or save it for later!

About the Author
HI, I’m Taylor – the voice behind The Holistic Backpacker.
After moving to Banff National Park in 2020 I became an outdoor adventure enthusiast and vowed to never stop exploring.
I now spend my days travelling the world, climbing mountains, and spending nights under the stars in the Canadian Rockies backcountry.
I created The Holistic Backpacker so I could share my adventures and help connect people like you with the same amazing experiences.
Happy adventuring!
Taylor ♡
Like This Post?
Share with friends or save it for later!
About the Author
HI, I’m Taylor – the voice behind The Holistic Backpacker.
After moving to Banff National Park in 2020 I became an outdoor adventure enthusiast and vowed to never stop exploring.
I now spend my days travelling the world, climbing mountains, and spending nights under the stars in the Canadian Rockies backcountry.
I created The Holistic Backpacker so I could share my adventures and help connect people like you with the same amazing experiences.

One Comment
Pingback: