Glacier Lake Backpacking Trail – Banff National Park
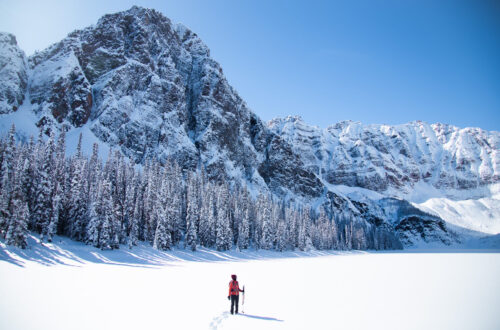
‘Tranquility’ is the word I’d use to describe my Glacier Lake backpacking trip. 
Glacier Lake is the 4th largest lake in Banff National Park, measuring 4.5k long by 1km wide. Its size is impressive and its views are just the same. The lake is surrounded by mountains, glaciers, and a mature forest. The best part? It’s fairly easy to access!
You can day hike to the lake and back in about 4.5 to 6 hours, but I’d highly recommend spending at least one night camping to really appreciate the grand splendour that is the view you get from the campsites along shore.
Now, let’s go backcountry camping!
Skip Ahead:
- Getting to the Glacier Lake backpacking trail
- Where to stay along the Parkway
- Glacier Lake backpacking trail
- Glacier Lake backpacking campsite
- What to pack for Glacier Lake
- What to wear backpacking
- Tips for a successful trip
I have affiliate links in this post which means when you book a hotel or purchase a product, I may make a small commission ~ at no additional cost to you (full disclosure). These funds go back into The Holistic Backpacker and help me create more free content like this!
Thank you for supporting my work!
Interactive Banff Map – from a LOCAL
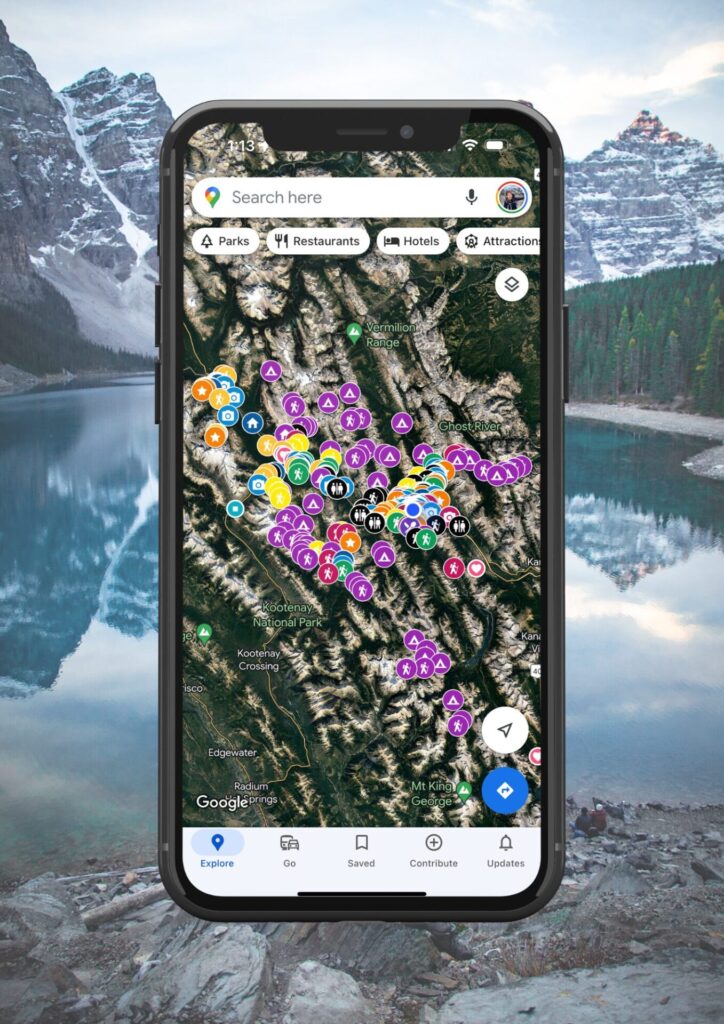
Get my 600+ local Banff recommendations saved to your Google Maps app
I lived in Banff for years & know all the best spots!
Outdoors: 100+ hiking trails, scrambles, backcountry routes, waterfalls & lakes
Planning: lodging, parking, restaurants, public washrooms, transit hubs, shopping & services
Things to do: tours, viewpoints, unique activities, & local secrets
Quick Banff Guide
RENT A CAR: I highly recommend renting a car to explore Banff’s remote trailheads and attractions not accessible by public transport. My favourite site to find the best local rental deals is this one.
How to get to Banff: fly into Calgary International Airport. From here, rent a car (what I recommend) or take one of the following shuttles to Banff: On-It (budget) runs during the summer months | Pop-a-Ride is a ride-share program – you can use my Poparide link to save $5 on your first trip | Banff Airporter and Brewster are professional services.
Moraine Lake & Lake Louise: read my guide for how to get there with the new road closures. If you want to see Moraine Lake at sunrise, you can book a shuttle here.
Best Activities in Banff: here are all my recommendations for the best tours, activities, and unique experiences in Banff & beyond.
Lodging & Camping: see my guide which outlines the best hotels in Banff by category. Summer and peak winter visits require advance bookings. Camping reservations must be made on the Parks Canada reservation system which typically opens in January – make your reservations then.
First time visiting Canada? This page outlines all my travel tips for those new to Canada.
When to visit: this post breaks down each month in Banff with average temps and corresponding activities.
Reservations: for activities and restaurants, reservations should be made in advance during summer and holidays. Get Your Guide and Viator are popular tour booking platforms whereas OpenTable is used for restaurants.
Parks Pass: your vehicle needs a parks pass which can be purchased from the East Parks Gates, the Visitor Centre, or online. An annual Discovery Pass is more economical if you’ll be in Canada’s National Parks for more than 7 days in 1 year.
Roam Transit: in Banff, use the local transit service, as much as possible to avoid parking issues in popular places like Lake Louise and Johnston Canyon.
Parking: use the large free lot next to the train station. More town parking info can be found here and parking fees can be paid here.
Wildlife Safety: 11 ways to stay safe from wildlife, bear safety, & bear basics.
My Featured Banff Blogs
Travel Guides
Banff Activities
Getting To The Glacier Lake Backpacking Trail
Glacier Lake is located along the Icefields Parkway, a highway that connects Banff and Jasper. The trailhead is located just past the Saskatchewan River Crossing if you’re coming from Banff or Red Deer. Conversely, it’ll be located just before the Crossing if you’re coming from Jasper. The trailhead is hard to miss, it has a sign indicating where to turn off from the main highway.
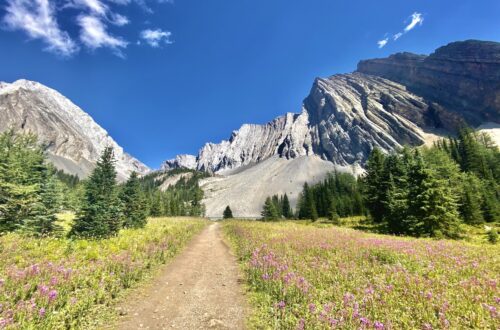
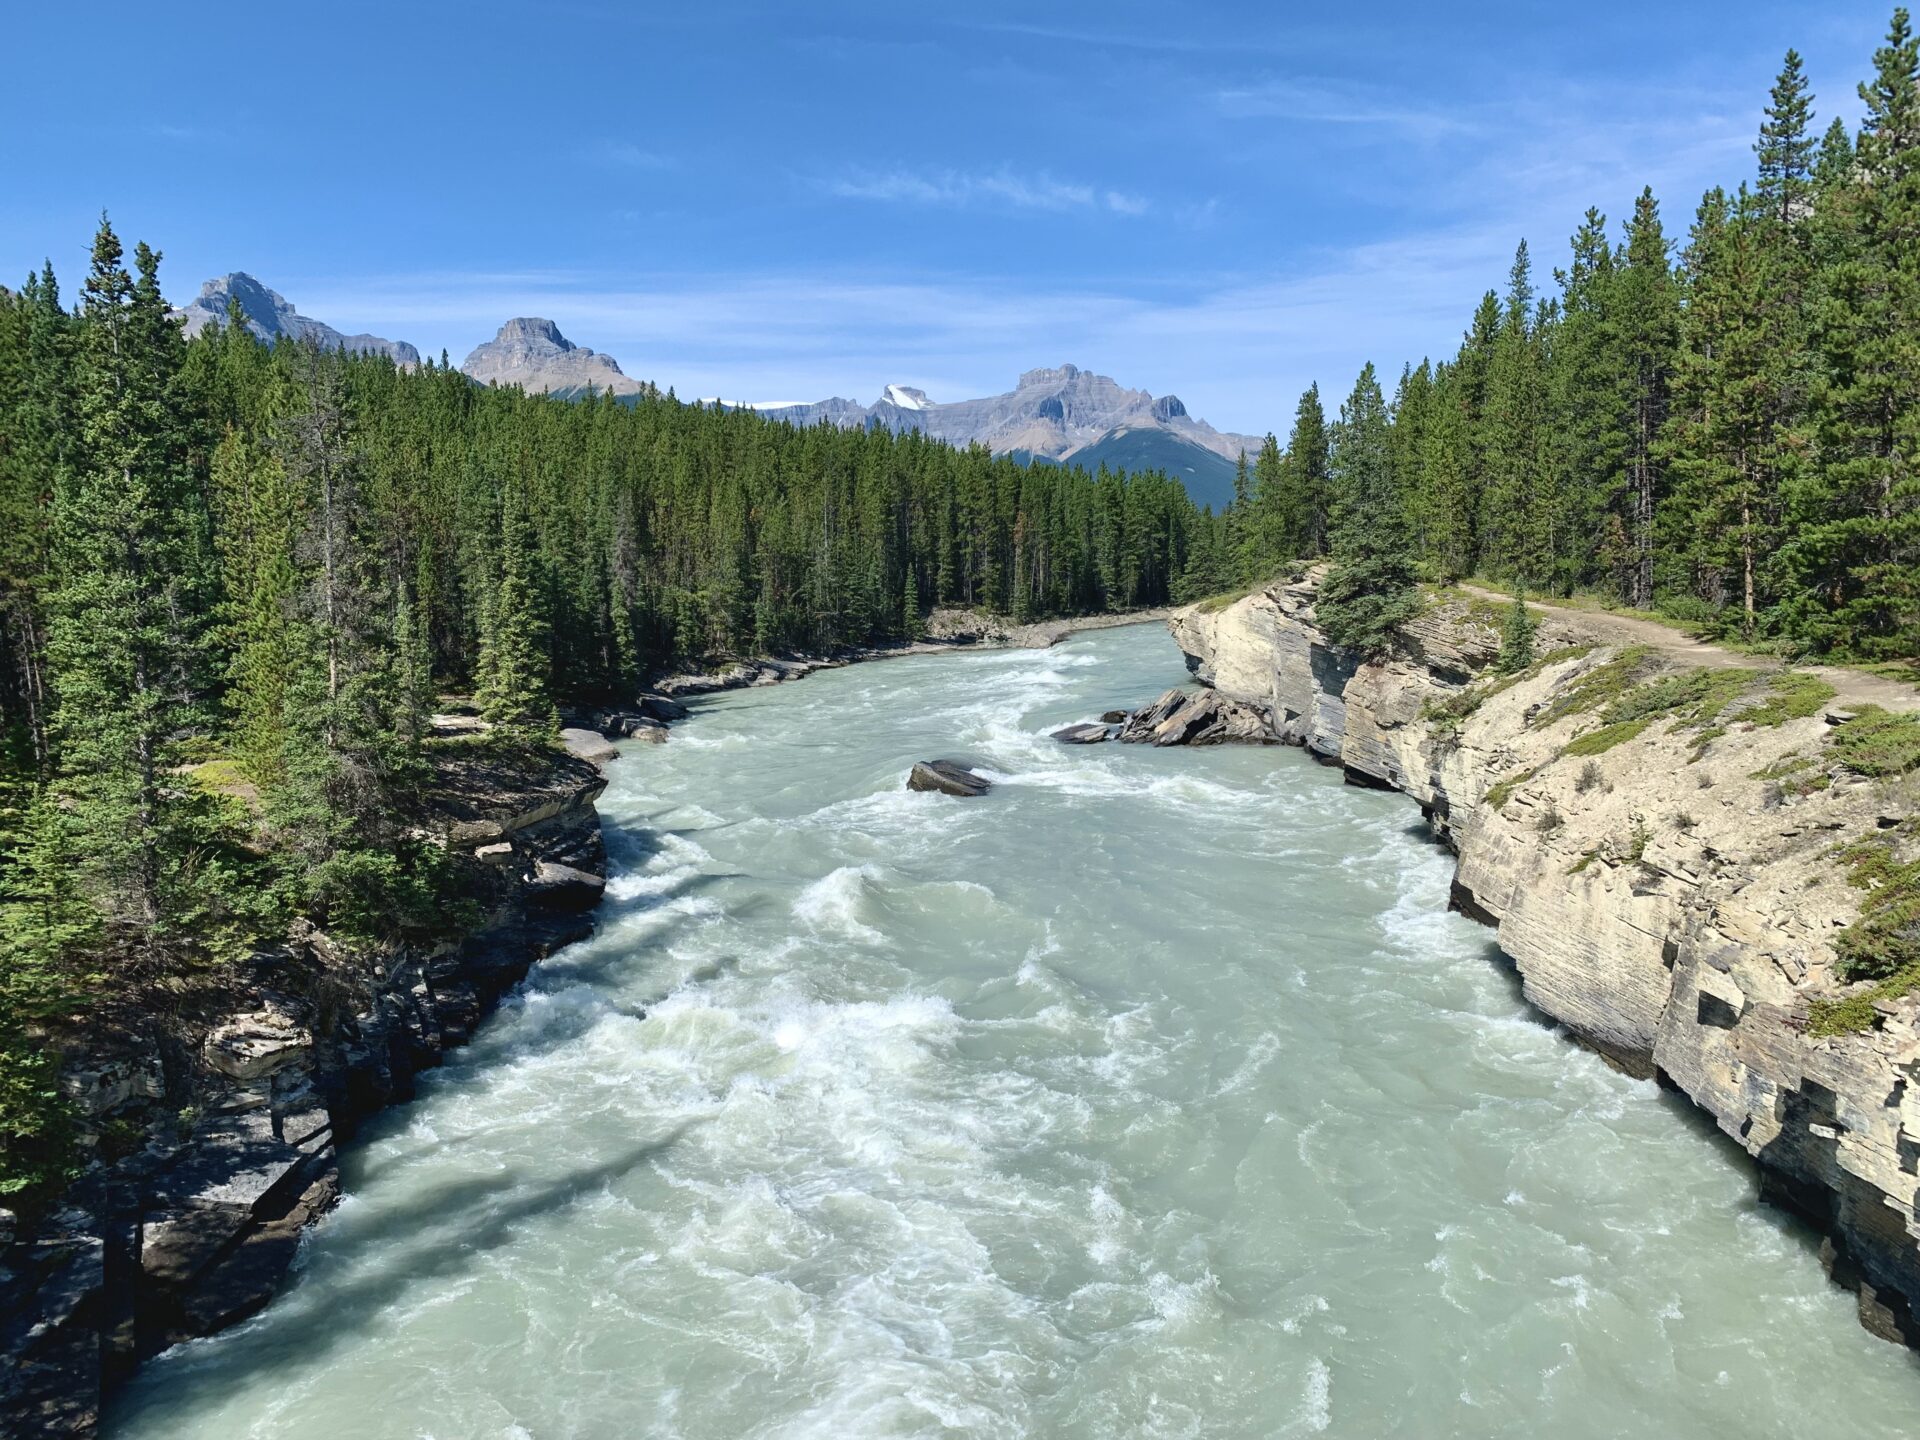
The hike to the lake is fairly quick, so consider doing one of the many beautiful stops along the parkway before hitting the trail. Mistaya Canyon is located 6.4km/8 minutes south of the trailhead; it’s a quick walk and leads to a gorgeous, fast flowing canyon that overlooks a glacier. A great addition to the trip if we’re sticking to the theme of glaciers.
More: here’s my complete guide to exploring the lakes, hiking trails and sights along the Icefields Parkway.
If you’re driving North (from Banff) along the parkway to get to the trailhead, you’ll pass Bow and Waterfowl Lakes. However my favourite place along the way – and the best kept Icefields Parkway secret – is this little dirt-road turn off right by the bridge that crosses the Saskatchewan River. There’s only room for a few cars, but it has the most amazing view of the river, 360 degrees of mountain views, and to top it, a few glaciers in the surrounding area. This spot is one of those “wow” places, and the best part is that no one really knows about it! Keep your eye out because it’s easy to miss, but this place is a great spot to have lunch before starting the hike in, or to have a snack on the way out.
*I’ve added some photos of these pitstops to the pins on the map.

Best Banff Car Rentals
Most of Banff’s remote trailheads and attractions are inaccessible via public transportation. I 100% recommend renting a car to make the most of your time in the Rockies.
My favourite rental tool is this site as it compares all the local car rental shops to find you the best rate.
Where to Stay Along the Parkway
The Icefields Parkway is a long stretch of highway that connects Banff National Park and Jasper National Park. Typically people drive the Parkway in one day and spend the night in Banff or Jasper. The general rule of thumb is you stay in Banff if you’re south of the Columbia Icefields and you stay in Jasper if you’re north of them. Here are the my top recommendations for lodging in Banff and Jasper:
- Banff – Fairmont Banff Springs (luxury), Banff Park Lodge (mid-range), Bow View Lodge (budget), Samesun Banff (hostel.)
- Jasper – Jasper Park Lodge and Pyramid Lake Lodge (luxury). Lobstick Lodge (mid-range), Jasper Gates Resort (budget), HI Jasper & Jasper Downtown Hostel.
If you want to extend your trip along the Parkway, there are a few hotels, hostels, and camping solutions scattered along the Parkway. The following are the best options:
- South of the Columbia Icefields: HI Mosquito Creek, HI Rampart Creek, and HI Athabasca Falls (hostels), The Crossing (at the Saskatchewan River Crossing).
- Columbia Icefields: Glacier View Lodge (luxury).
- North of the Columbia Icefields: Sunwapta Falls Rocky Mountain Lodge.
There are also plenty of reservable and first-come-first-serve campsites along the Parkway. Here’s information regarding the campgrounds on the Banff side of the highay and the Jasper side of the highway.
Glacier Lake Backpacking Trail
- Distance (roundtrip): 16.9km
- Elevation Gain: 870m
- Route Type: Out & Back
- Rating: Moderate
- Estimated Time (Roundtrip): 4.5 – 6.5 hours
This map comes from Alltrails. If you don’t have the app already, make sure you download it on your phone before hitting the trail.
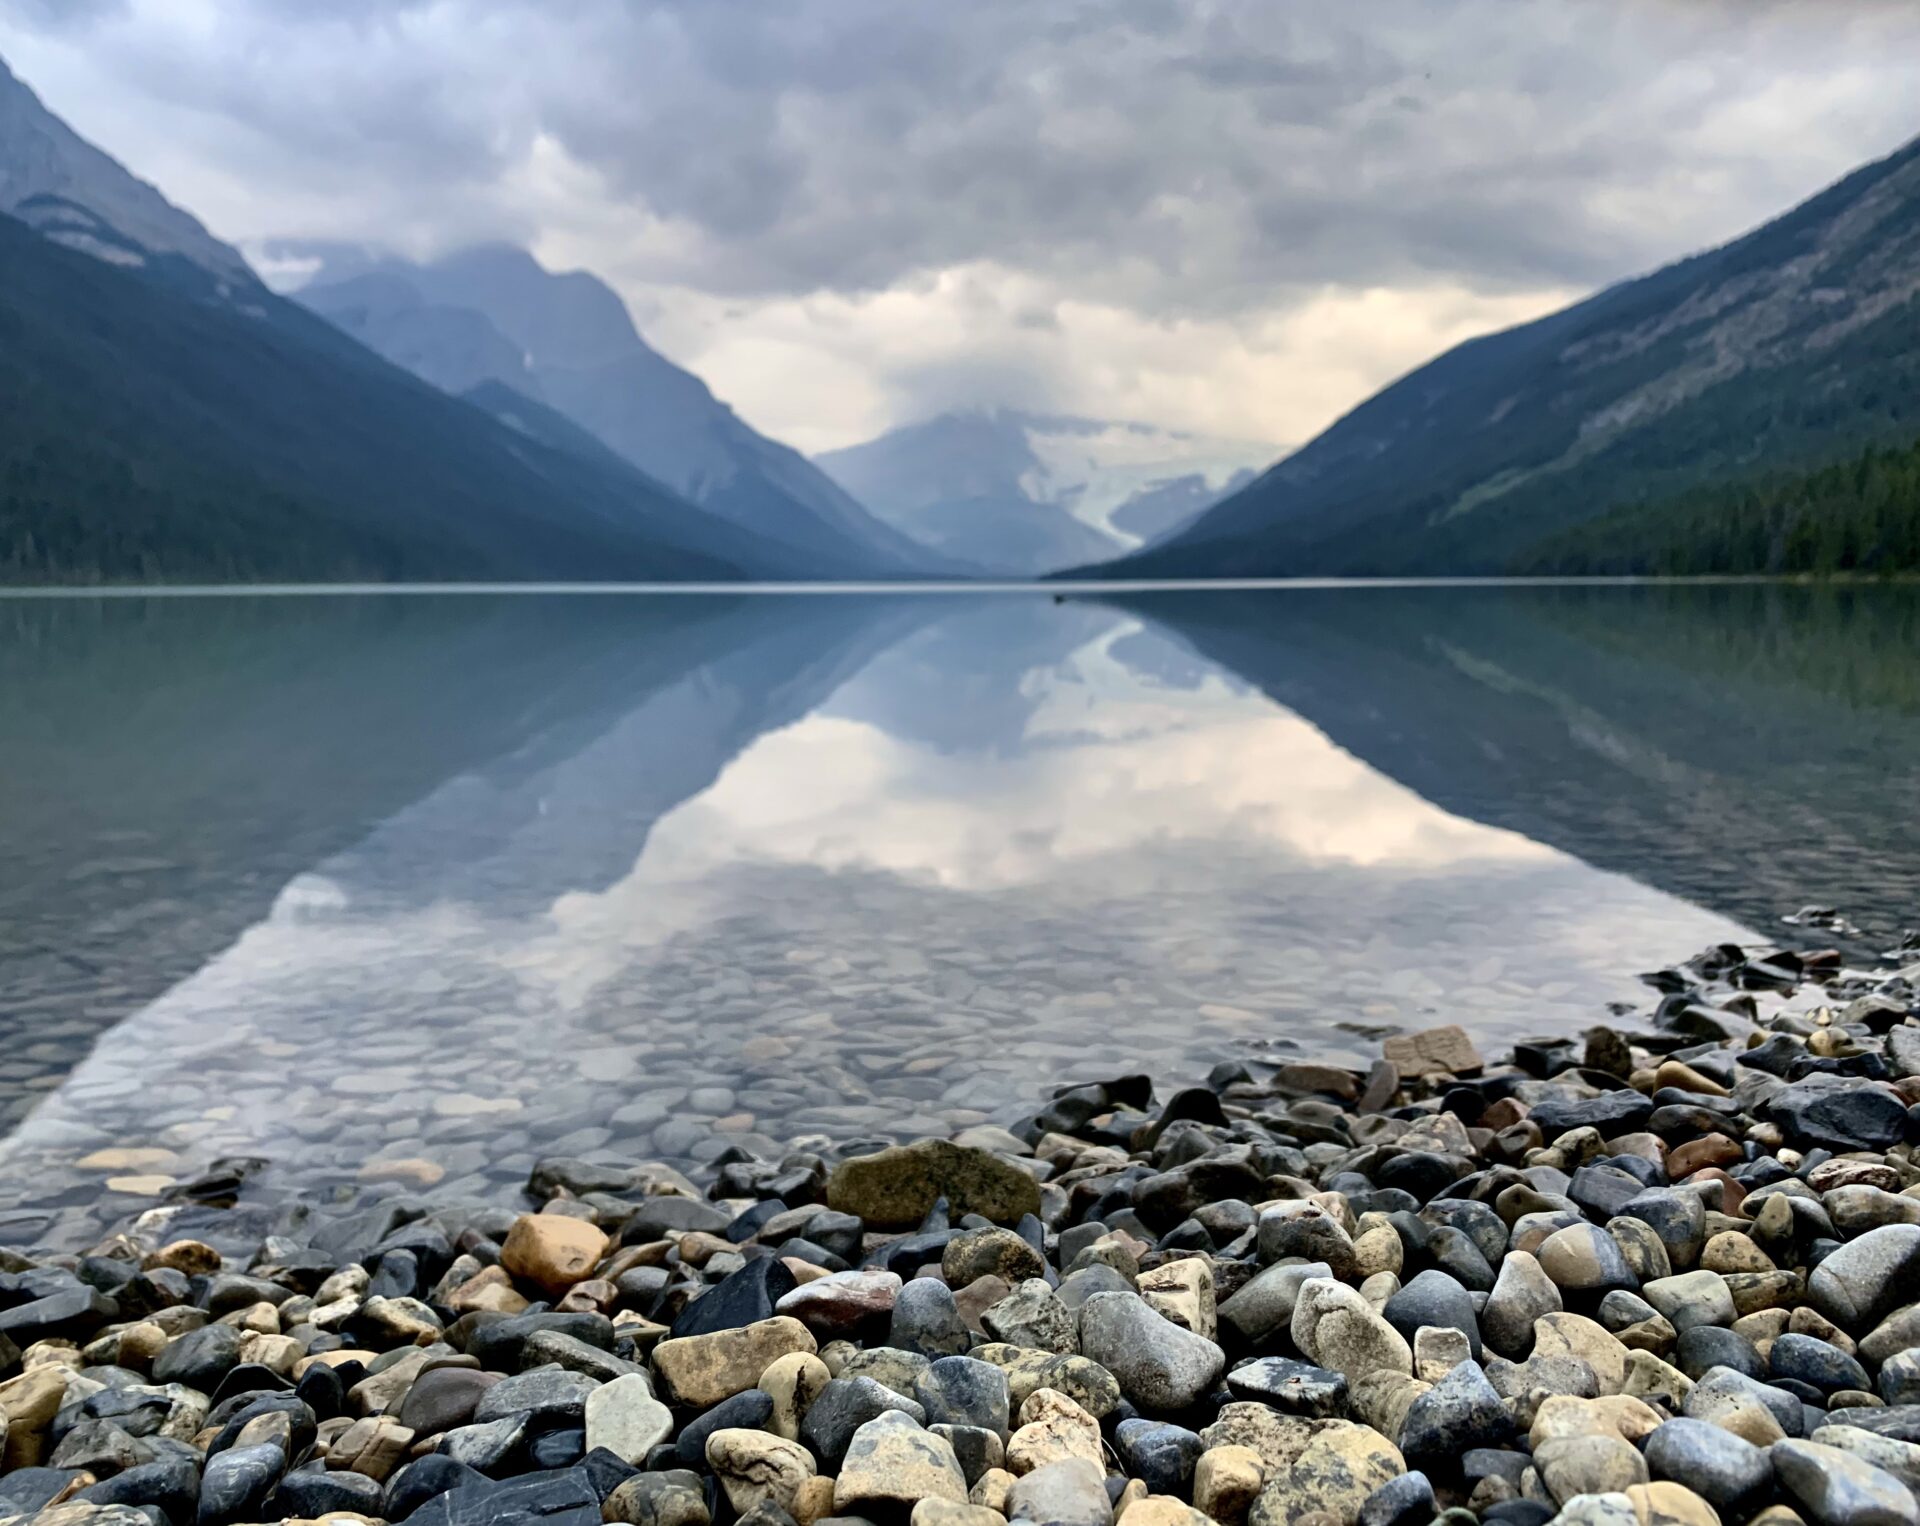
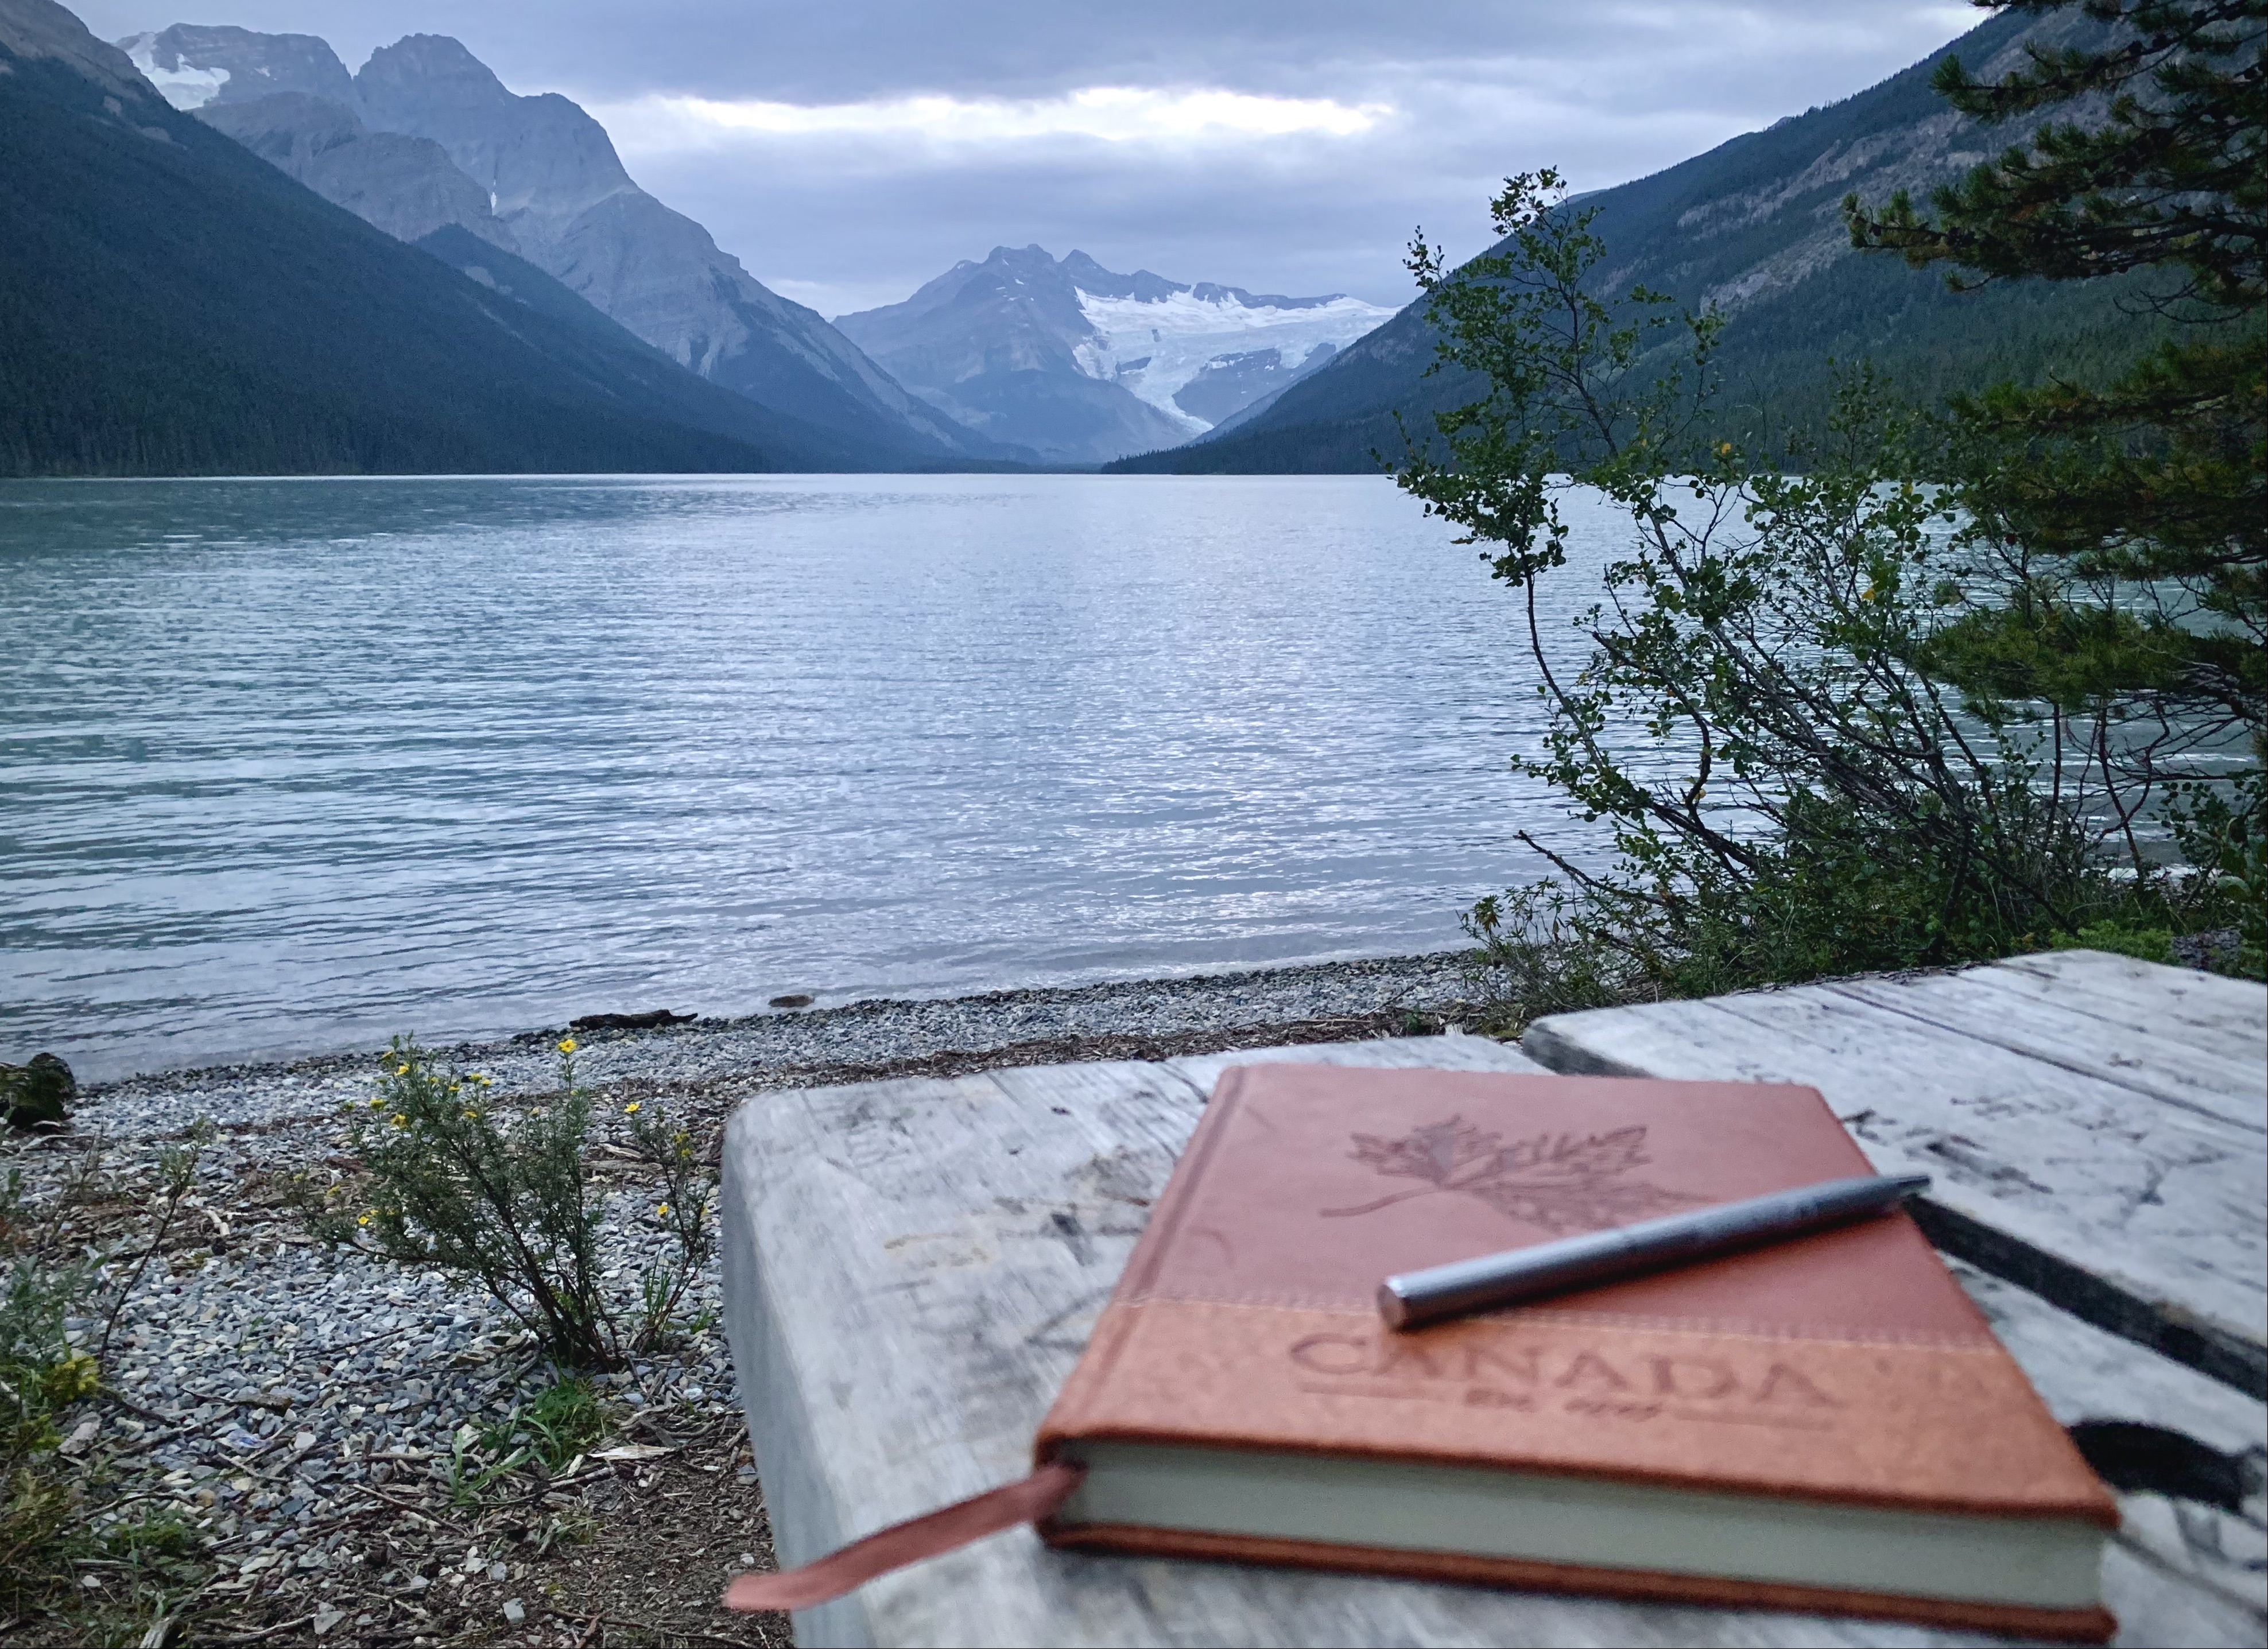
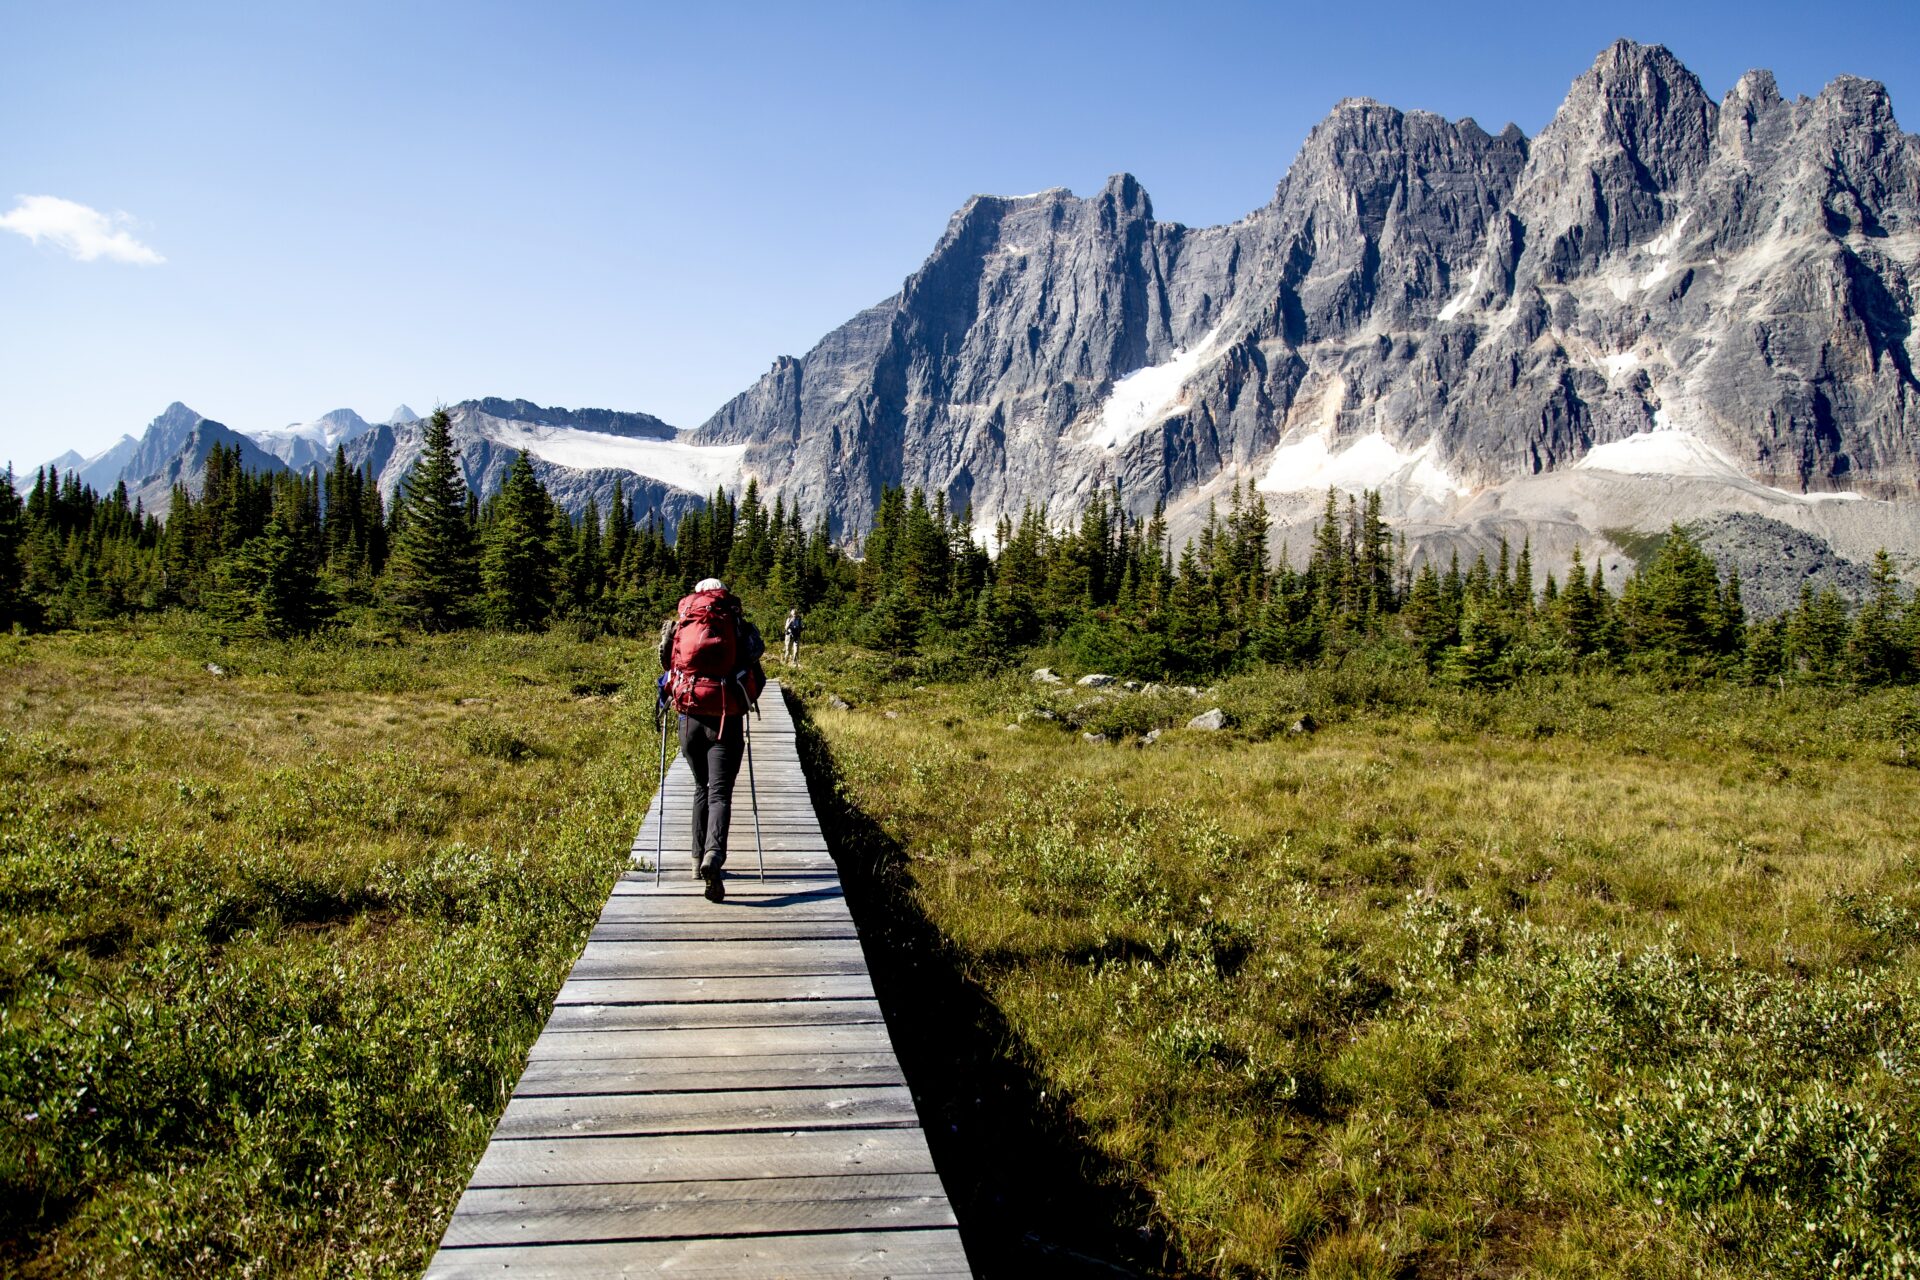
Glacier Lake is rated as moderate and is considered a good trail as an introduction to backcountry camping. The trail is best used from May until September – I completed this hike on August 18/19, 2021 and had relatively warm sunny/cloudy weather both days.
The gals and I completed the trek to the lake in just over 2 hours and the trek back in about 2 hours, granted we were hiking at a relatively fast pace. This hike could easily be done as a day hike, but I do recommend camping for a night so you have more time to really appreciate the views.
The trail is very up & down the whole way and has LOTS of exposed roots. Watch your step! The trail starts out flat and then goes downhill until the bridge that crosses the North Saskatchewan River.
After this the trail has a quick, steep uphill grind and then is mostly flat until you come to the viewpoint for the Howse River Valley. Take a break here and relax on Banff’s classic red Adirondack chairs, the view is spectacular.
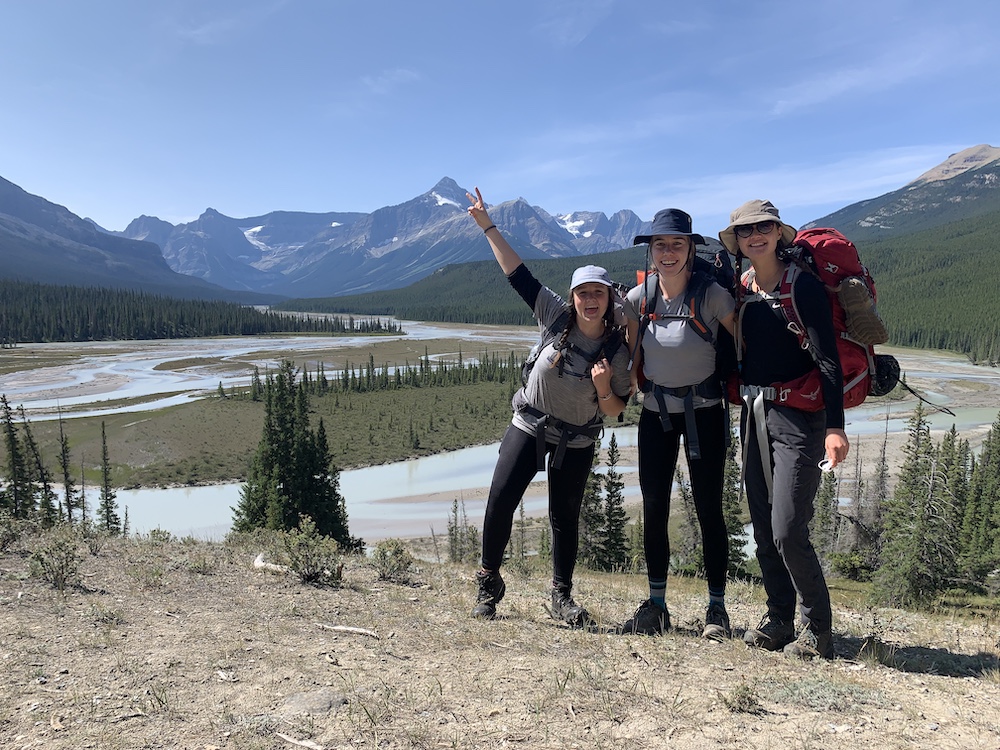
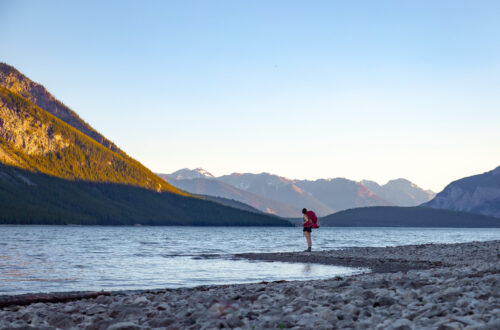
After this the trail turns right, goes downhill briefly, and then is mostly flat for about 1.5km. You will then reach a steady uphill section that stretches about 3km. After about 1.7km of downhill trekking you’ll reach the lake which boasts incredible views of Mount Outram, Division Mountain & Lyell Glacier, and Mount Erasmus. Enjoy the serenity that comes with this place!
Glacier Lake Backpacking Campsites
To camp at Glacier Lake (GL 9) you must have a reservation. Reservations can be made through the Parks Canada reservations site, but be warned this campsite is a popular one. You normally have to book months in advance to get a spot or consistently check back for cancellations. It is well worth the effort!
In order to get here, you must hike. This means not only hiking yourself in, but also hiking in all your gear. Not sure what to pack for a Rocky Mountain backcountry camping trip? Check out my guide for all the essentials – I’ve learned the hard way what to pack and what not to pack!
Also keep in mind that whatever you pack in, you must pack out. Do your part to keep Canadian parks clean & beautiful!
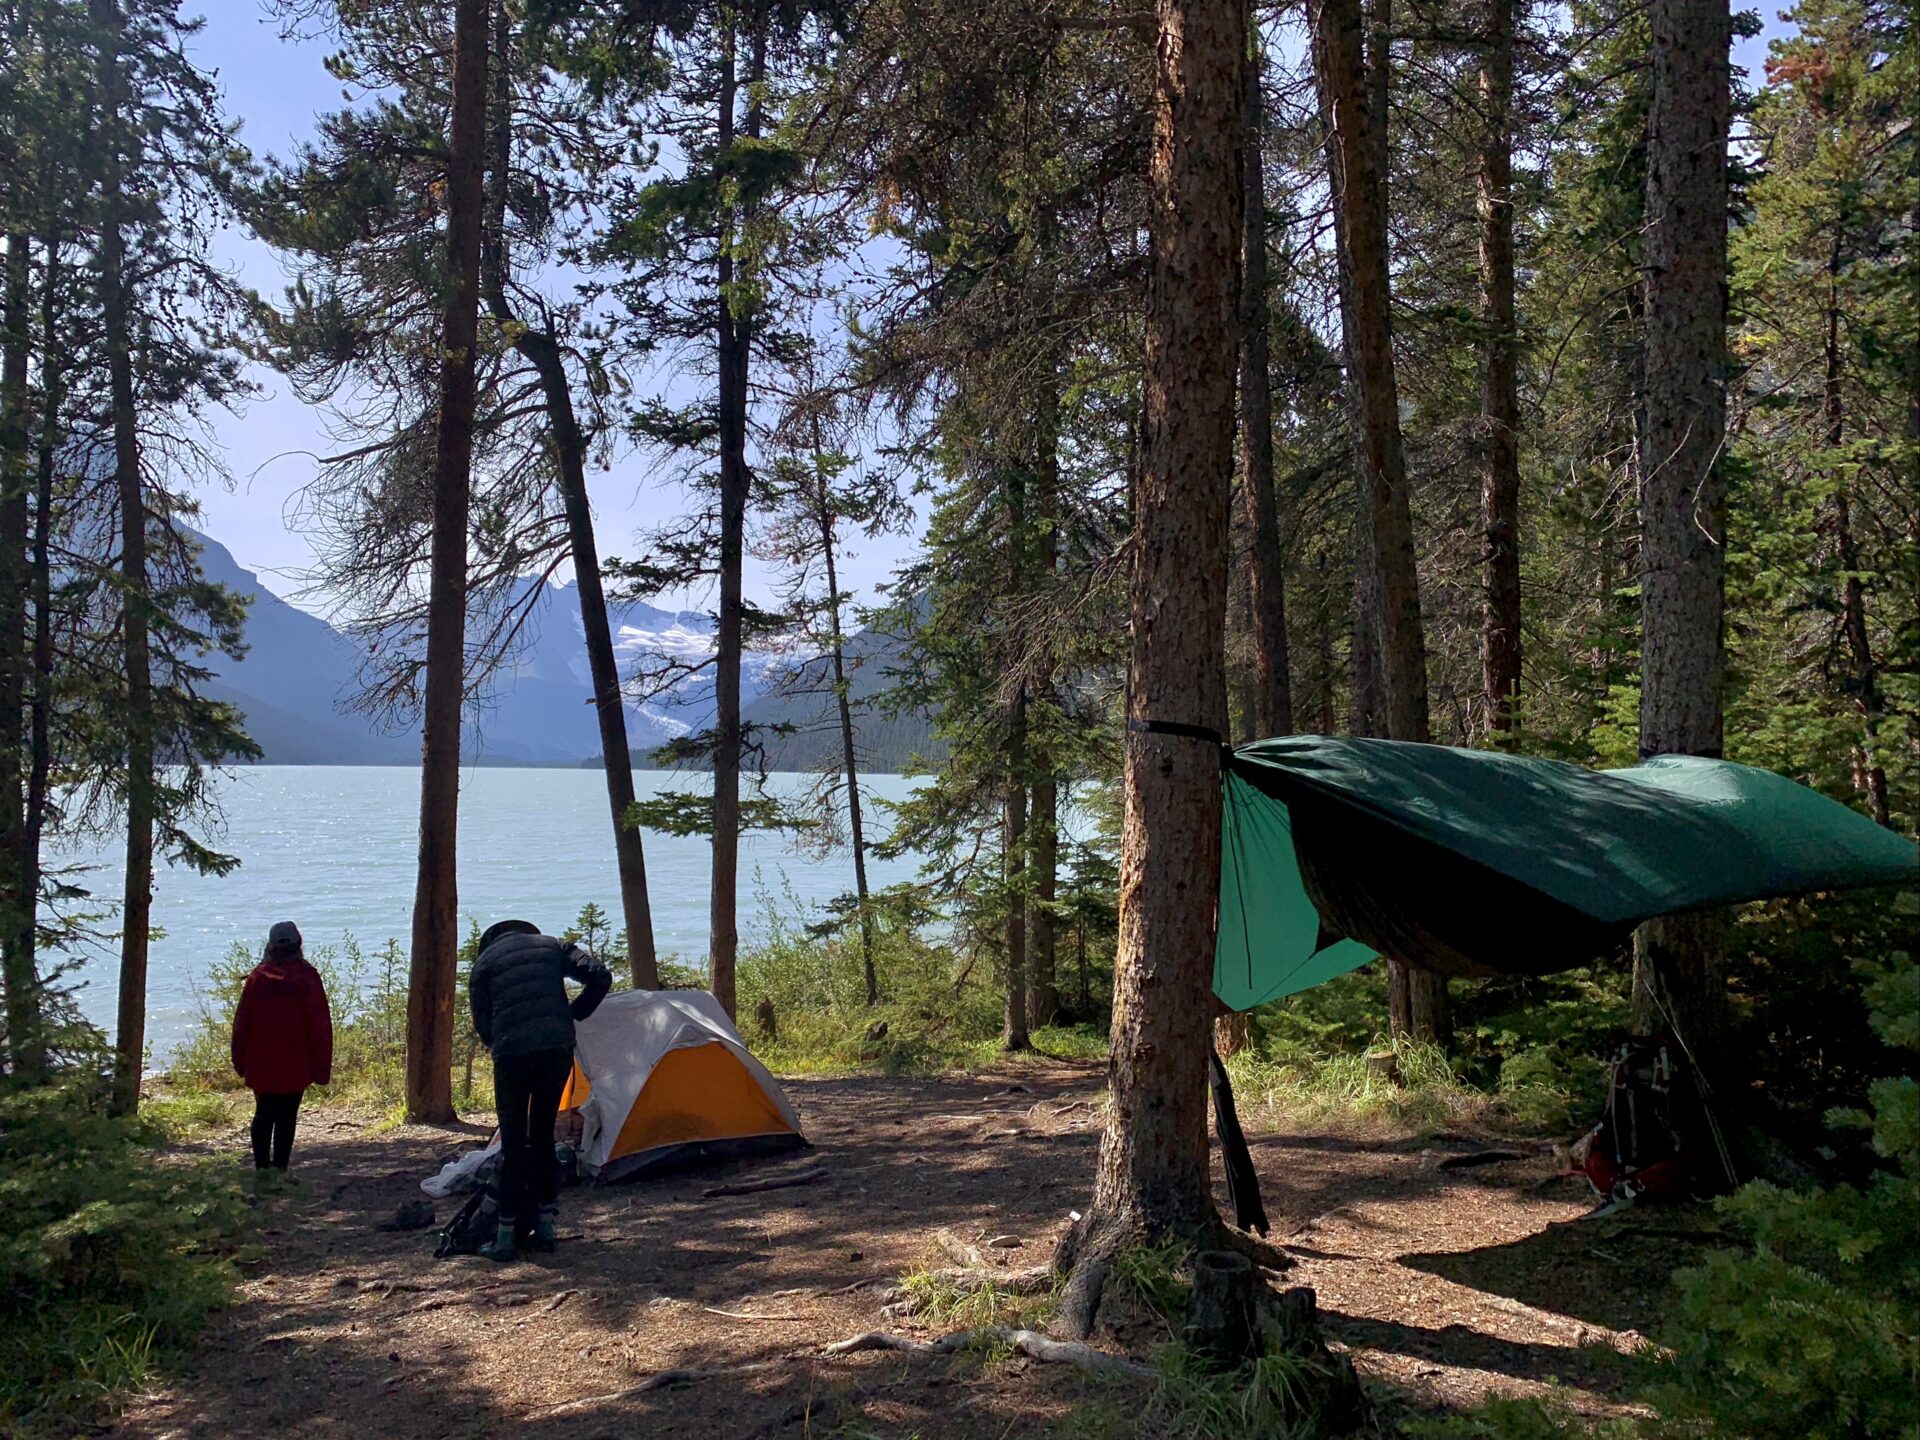
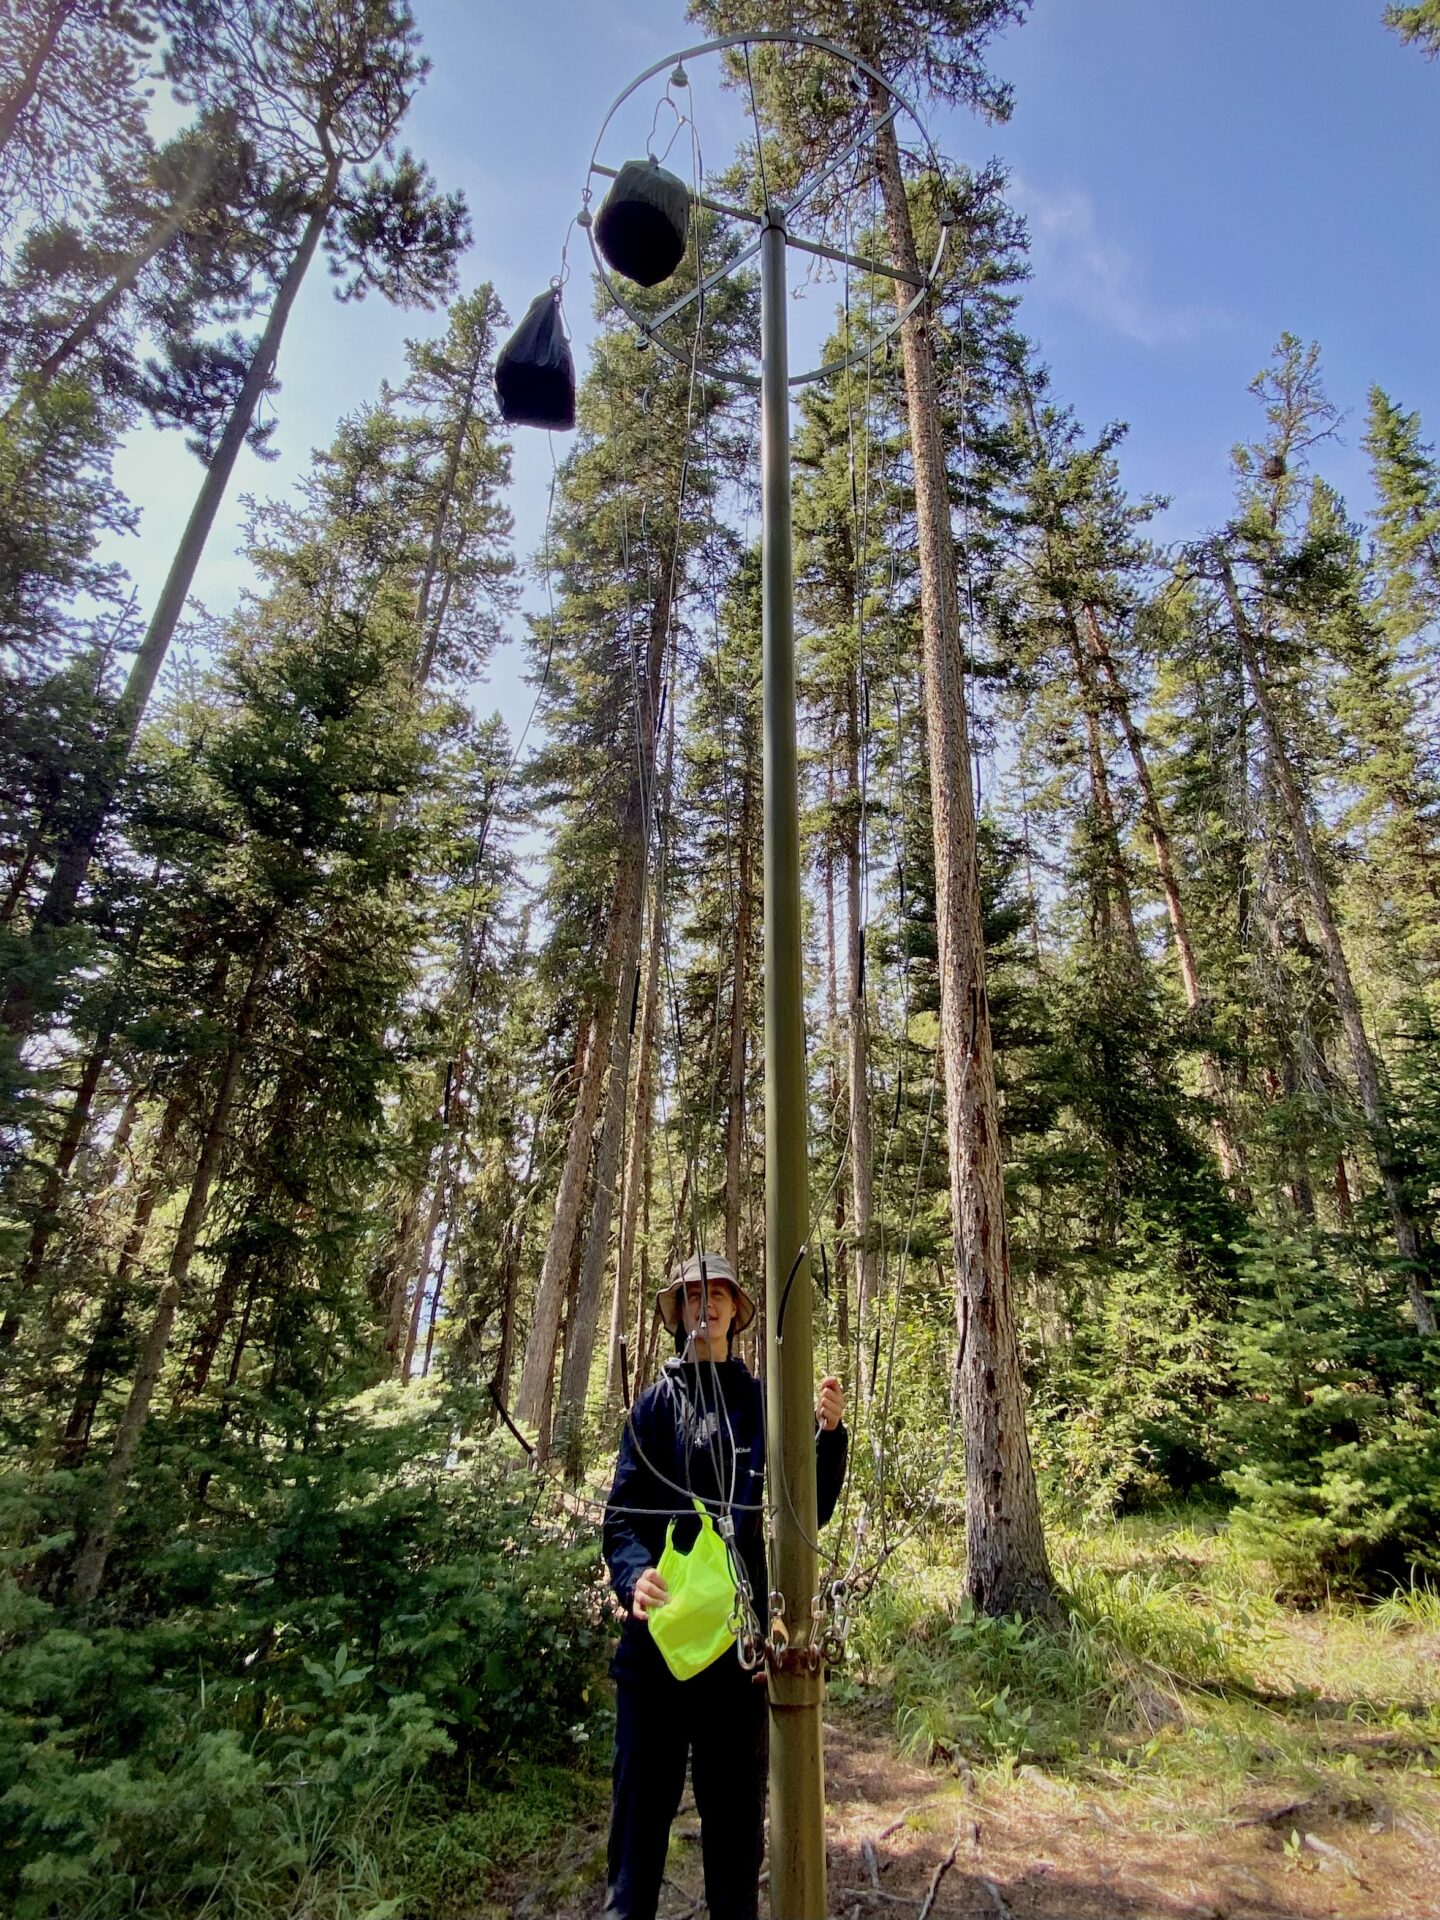
The GL 9 campsite features open tent pads, a communal fire pit, picnic tables with an excellent view of the lake, an outhouse (bring TP), and bear poles. The tent pads themselves aren’t really tent pads and you can pretty much camp wherever you can find flat, open space on the ground. There is a shoreline trail that wraps around the lake, you can follow this which will lead to more flat areas. These spots aren’t technically tent pads, but they are a little more secluded than the main campsite.
Things To Do At The Campsite
If you’re camping more than one night at the lake, consider doing additional hikes. There are a few trails surrounding the campsite, however I was only there for a night and did not have time to explore them. Upon doing some research I’ve come across Glacier River which is located about 1.4km South-East of the campsite, Survey Peak Trail, and the Howse River Valley Viewpoint trail. To find routes for these trails you’ll need to zoom into the Alltrails map for Glacier Lake (see previous map ^) and seek out the dotted lines that lead you to where you want to go. I’d definitely recommend exploring these trails and wish I had the chance to check them out myself. However since I have not hiked these trails, I cannot comment on their quality or ease of use.
The trail I did use while camping here is one that hugs the shoreline (North side) of the lake. I didn’t walk the entire thing, but according to Alltrails it stretches for 9.2km. The section I walked was nice, flat, and is well marked/easy to navigate. We did it just before bed to warm up for the night.
Connect via socials:
STAY CONNECTED
Sign up for emails to receive a 25% discount on my travel maps.
Taylor ♡
Looking for More Banff Adventures?
Banff is an adventurer’s & view seeker’s paradise. If you’re planning a trip to this gorgeous Canadian Park, you can start with this step-by-step guide designed to help you plan the perfect Banff itinerary.
Alternatively, check out this page with all my Banff resources.
Banff Hiking Resources
On this page you can find all my Banff trail guides. A few signature hikes in Banff are these easy trails, Tunnel Mountain, Sulphur Mountain, Lake Louise, and Johnston Canyon. If you’re only in Banff for a few days, start with those!
A few of my personal favourite hikes in Banff are Mount Bourgeau, Sentinel Pass, Tower of Babel, the Banff Skoki Loop, and the Sulphur Mountain Traverse Route.
More Banff Resources you Might Find Interesting:
Want to continue your Canadian Rockies expedition outside of Banff? Check out my trail guides & travel resources for British Columbia and Kananaskis Country as well as Jasper, Waterton, Yoho, and Kootenay National Parks 🙂
Personal Backpacking Gear Recommendations
I continually keep this post up-to-date with my current backpacking setup and most loved pieces of gear.
Sleep System: I use the Hotcore winter sleeping bag which has a -20 rating (useful in the Rockies during summer). I also use Hotcore’s fleece sleeping bag liner and the Thermarest NeoAir XLite for my sleeping pad. The MSR Hubba Hubba 2P is my go-to tent.
Camp Kitchen: I use the MSR Pocket Rocket Deluxe stove and the RioRand mess kit. I also love Stasher Bags for carrying, rehydrating, and cooking food plus the euroSCRUBBY and this soap for cleanup.
Warmth: I have Raynaud’s disease which means I struggle to stay warm. I wear these -40 socks, wool base layers, Aurora Heat’s reusable fur foot warmers, and fill a Nalgene bottle with boiling water for my sleeping bag. This tends to keep me warm at night.
Extras: 3L Hydrapak for carrying water, the Hydrapak attachable filter and aquatabs to clean water. Dry bags for food storage and to keep clothes/electronics dry. I use the women’s Osprey Aura 65L backpack (Osprey Atoms 65L for men). A lightweight camping pillow for comfort and a bug suit for marshy areas. I also always bring these thin gloves and a toque.
And finally, rain gear. I bring both a rain coat and rain pants as they’re lightweight and make a world of difference if you need an extra layer of warmth or to protect yourself from the elements.
Tips for a Successful Trip
- The Saskatchewan River Crossing (located right by the trailhead) has food, clothes, (expensive) gas, and other amenities
- There are no toilets at the trailhead
- Don’t expect any cell service – this applies for the majority of the drive to the trailhead as well
- Insect repellent is a must if you hike this during bug season (alternatively, bring a bug suit)
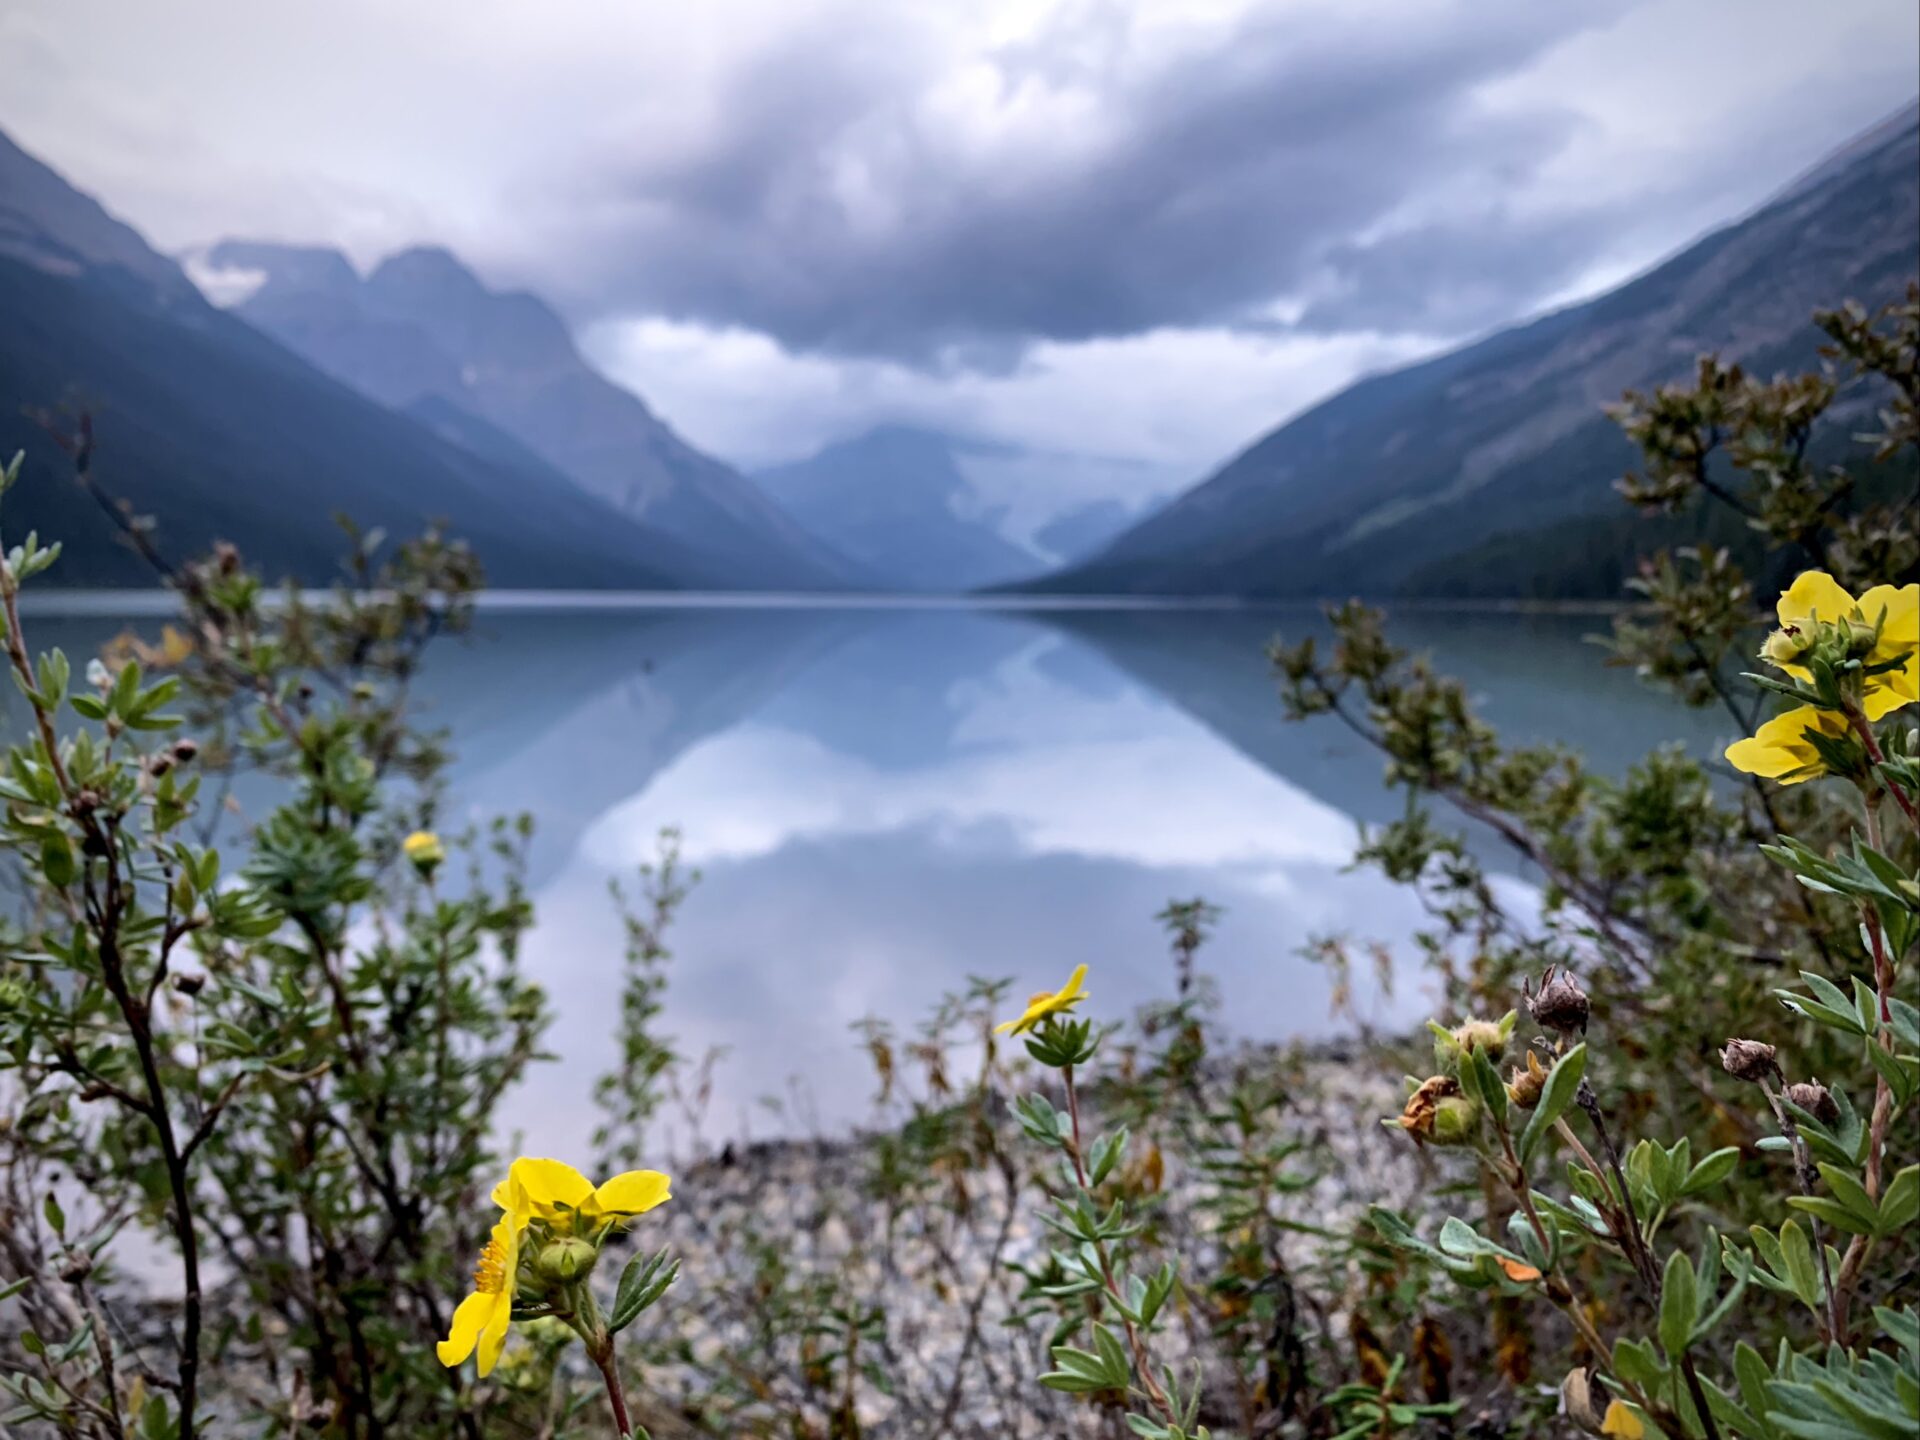
- Bring extra layers – the campsite faces the Lyell Glacier which means if it’s windy you’re getting katabatic winds coming directly at your tent
- Wake up early to catch the incredible glass reflection on the lake – make sure to check sunrise & sunset times before leaving for your hike. If you’re lucky you’ll get some alpenglow too!
- Know what to pack
Happy adventuring!
Taylor ♡
Like This Post?
Share with friends or save it for later!

About the Author
HI, I’m Taylor – the voice behind The Holistic Backpacker.
After moving to Banff National Park in 2020 I became an outdoor adventure enthusiast and vowed to never stop exploring.
I now spend my days travelling the world, climbing mountains, and spending nights under the stars in the Canadian Rockies backcountry.
I created The Holistic Backpacker so I could share my adventures and help connect people like you with the same amazing experiences.