Local’s Guide to Skiing Sunshine Village, Banff
I’ve lived in Banff for years and have done multiple seasons at Sunshine Village. For all Sunshine newcomers, here’s my local’s guide to skiing Sunshine Village complete with the best runs at Sunshine, various terrain areas at Sunshine, the best lift tickets for Sunshine, restaurant options, and more.
There are three ski resorts in Banff: Sunshine Village, Lake Louise, and Norquay. All three ski resorts in Banff offer something a little different and in this guide I’ll highlight Sunshine’s features that make the resort stand out.
If you’re looking for more ski resorts near Banff, I’ve written about the best ski resorts in Alberta in this post.
Skip Ahead:
- About Banff Sunshine Village
- How to get to Sunshine Village in Banff
- Where to stay in Banff
- Best time of year to ski in Banff
- Best lift ticket for Sunshine Village
- Ski & snowboard rentals in Banff
- Sunshine’s Terrain: beginner, intermediate, advanced, park
- Working at Sunshine Village
- Things to do at Banff Sunshine Village
- Ski resorts near Banff
- Skiing Sunshine Village FAQ
I have affiliate links in this post which means when you book a hotel or purchase a product, I may make a small commission ~ at no additional cost to you (full disclosure). These funds go back into The Holistic Backpacker and help me create more free content like this!
Thank you for supporting my work!
Interactive Banff Map – from a LOCAL
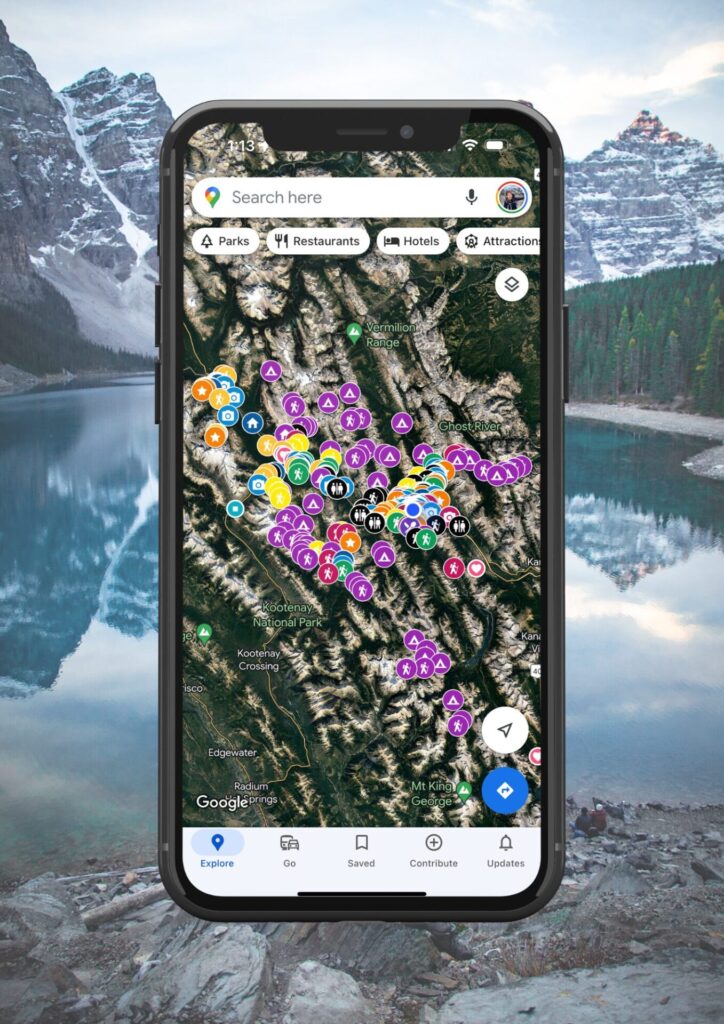
Get my 600+ local Banff recommendations saved to your Google Maps app
I lived in Banff for years & know all the best spots!
Outdoors: 100+ hiking trails, scrambles, backcountry routes, waterfalls & lakes
Planning: lodging, parking, restaurants, public washrooms, transit hubs, shopping & services
Things to do: tours, viewpoints, unique activities, & local secrets
Quick Banff Guide
RENT A CAR: I highly recommend renting a car to explore Banff’s remote trailheads and attractions not accessible by public transport. My favourite site to find the best local rental deals is this one.
How to get to Banff: fly into Calgary International Airport. From here, rent a car (what I recommend) or take one of the following shuttles to Banff: On-It (budget) runs during the summer months | Pop-a-Ride is a ride-share program – you can use my Poparide link to save $5 on your first trip | Banff Airporter and Brewster are professional services.
Moraine Lake & Lake Louise: read my guide for how to get there with the new road closures. If you want to see Moraine Lake at sunrise, you can book a shuttle here.
Best Activities in Banff: here are all my recommendations for the best tours, activities, and unique experiences in Banff & beyond.
Lodging & Camping: see my guide which outlines the best hotels in Banff by category. Summer and peak winter visits require advance bookings. Camping reservations must be made on the Parks Canada reservation system which typically opens in January – make your reservations then.
First time visiting Canada? This page outlines all my travel tips for those new to Canada.
When to visit: this post breaks down each month in Banff with average temps and corresponding activities.
Reservations: for activities and restaurants, reservations should be made in advance during summer and holidays. Get Your Guide and Viator are popular tour booking platforms whereas OpenTable is used for restaurants.
Parks Pass: your vehicle needs a parks pass which can be purchased from the East Parks Gates, the Visitor Centre, or online. An annual Discovery Pass is more economical if you’ll be in Canada’s National Parks for more than 7 days in 1 year.
Roam Transit: in Banff, use the local transit service, as much as possible to avoid parking issues in popular places like Lake Louise and Johnston Canyon.
Parking: use the large free lot next to the train station. More town parking info can be found here and parking fees can be paid here.
Wildlife Safety: 11 ways to stay safe from wildlife, bear safety, & bear basics.
My Featured Banff Blogs
Travel Guides
Banff Activities
About Banff Sunshine Village
Sunshine is one of three ski resorts in Banff National Park along with Lake Louise and Norquay. Sunshine is the second largest resort clocking in over 130 named runs.
You can ski for 7 months at Banff Sunshine (November to May) making this the ski resort with the longest season in Canada. What’s more impressive is that Sunshine is known to have the best snow in Banff + it’s 100% natural – no artificial snow. On average Sunshine Village receives up to 9m (30ft) of snow in a season and has an average of 95 snowfall days.
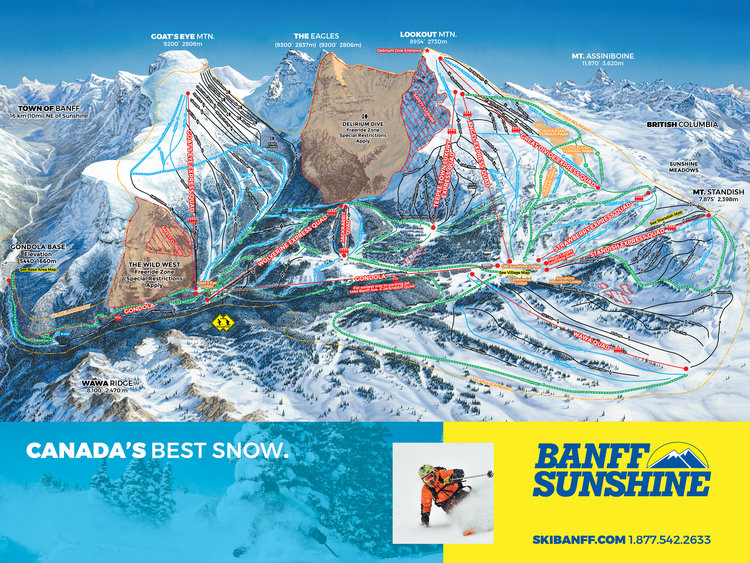
There are 3 skiable mountains at Banff Sunshine Village – Goat’s Eye Mountain, Mt Standish, and Lookout Mountain which covers a skiable area of more than 3,300 acres. Sunshine’s vertical rise is 1,070m (3,510ft) and the longest run is 8kms (5 miles).
If you’re into park skiing, Banff Sunshine also has 6 terrain parks that constantly change through the season. These parks vary in design for children just learning to experts looking to hit big air.
Sunshine has 1 gondola which takes skiers from the base up to Sunshine Village, 2 carpets, 2 quad chairs, 6 high speed quads, and 2 high speed heated bubble quads.
Sunshine Village facts
How to Get to Sunshine Village in Banff
Sunshine Village is located only a 20 minute drive (18kms) from the town of Banff and just over 1.5hrs (160kms) from the Calgary International Airport. This makes Sunshine a very accessible ski resort to travellers.
You can either rent a car (I suggest doing so through this site) or book a shuttle to get to Banff from Calgary. More details about shuttles can be found in this post.
Once you’re in Banff you can access Sunshine via the following:
If you have a car, you can easily drive to Sunshine Village. Just make sure you have a Parks Canada Pass (purchased online or from the visitor centre) as the ski resort lies within the national park. I advise arriving early on weekends and during holidays as the parking lot fills up quickly. If you’re parked far back there’s a parking shuttle.
Sunshine’s free shuttle has multiple pickup and drop off points throughout the town of Banff and runs multiple times per day. You can find Sunshine’s free shuttle here. This is the easiest way to get to Sunshine Village – I lived in town with a car and always opted to take the shuttle over driving.
If you’re coming from Canmore without a car, you’ll first have to make your way to Banff via line 3 with Roam Transit, then use the free shuttle to Sunshine. Line 3 runs frequently and costs $6 one-way. You can pay the fees in exact change, via the Token Transit app, or at pay stations which are located here in Banff and at these three locations in Canmore: 9th Street, Shopper’s Drugmart, and Benchlands Overpass.

Best Banff Car Rentals
Most of Banff’s remote trailheads and attractions are inaccessible via public transportation. I 100% recommend renting a car to make the most of your time in the Rockies.
My favourite rental tool is this site as it compares all the local car rental shops to find you the best rate.
Connect via socials:
STAY CONNECTED
Sign up for emails to receive a 25% discount on my travel maps.
Taylor ♡
Where to Stay in Banff
From hostels to camping to luxury hotels – Banff has accommodations for everyone. Here are my top recommendations for where to lodge in Banff based on every budget.
I recommend giving this post a read as I’ve listed every Banff hotel worth staying at and organized them by category.
- Hostels – Samesun Banff (best location + bar/restaurant on-site), Banff International Hostel (second best), and HI Banff.
- Budget hotels – Bow View Lodge and High Country Inn.
- Mid-range stays – Banff Park Lodge, Mount Royal, Elk & Avenue, and the Banff Caribou & spa.
- Luxury stays – Fairmont Banff Springs and the Rimrock Resort.
- Cabin retreats: Johnston Canyon Bungalows, Baker Creek, and Castle Mountain Chalets.
- Camping – reservation information can be found here. Ensure you book campsites far in advance as they’re full during summer.
- For those on ski trips: lodge on-mountain at Sunshine Village, stay near Norquay, and see my Lake Louise suggestions below.
Lodging Options Near Banff
Enjoy the nature and activities of Banff National Park, but lodge away from the busy tourist town centre at any of the following:
- Lake Louise – Fairmont Chateau Lake Louise (luxury), Paradise Lodge & Bungalows (500m from the lake), Lake Louise Inn (value stay), HI Lake Louise (hostel).
- Canmore – Malcolm Hotel (luxury), Stoneridge Mountain Resort (condo suites with fully equipped kitchens), Mountain View Inn (budget), Canmore Downtown Hostel & the Canmore Hostel (party hostel).
- Johnston Canyon – Johnston Canyon Lodge & Bungalows, Castle Mountain Chalets, and HI Castle Mountain Hostel.
- Yoho National Park – Emerald Lake Lodge and Cathedral Mountain Lodge.
- Kootenay National Park – Storm Mountain Lodge & Cabins.
- Kananaskis Country – Mount Engadine Lodge and Kananaskis Mountain Lodge (luxury), Crosswaters Resort (mid-range), and HI Kananaskis Wilderness Hostel (budget).
Best Time of Year to Ski Banff
Sunshine has the longest ski season in Canada. You can typically ski from the first week of November to the end of May which is almost 7 full months of skiing.
Each month of skiing at Sunshine Village looks a little different. Year-to-year conditions vary, however generally you can rely on the following:
- November is early season and the snow is variable at Sunshine. Sometimes the snow hits early, other times the snow doesn’t get good until the new year.
- December is typically very busy on the slopes at Sunshine Village as it’s the holidays. It’s a great time of year to experience the holiday magic, however if you’re after maximum runs I would suggest waiting until January to ski anywhere in Banff.
- January to March is peak season for skiing at Sunshine Village. This is when you’ll find epic snow and cold temperatures.
- April to May is a great time to ski Sunshine if you’re after spring skiing; warmer temperatures and sunny skies. Mornings are typically icy and afternoons are slushy, but the powder days still come fairly frequently.
Keep in mind the elevation of Banff means skiing at Sunshine Village may be colder than what you’re used to if you’re coming from overseas or other regions of North America. January and February in particular are very cold. Without fail sometime during late January/early February temperatures fall as low as -40 degrees and Sunshine Village typically shuts down for a few days. This happens annually.
To see current conditions at Sunshine Village, see this page which has a snow report, weather info, and live webcams. To stay in the loop you can also sign up for Sunshine’s powder alerts and daily snow reports at the bottom of the page linked above.
Best time of year to ski sunshine village banff
Interactive Banff Map – from a LOCAL
Get my 600+ local Banff recommendations saved to your Google Maps app
I lived in Banff for years & know all the best spots!
Outdoors: 100+ hiking trails, scrambles, backcountry routes, waterfalls & lakes
Planning: lodging, parking, restaurants, public washrooms, transit hubs, shopping & services
Things to do: tours, viewpoints, unique activities, & local secrets
Best Lift Ticket for Sunshine Village
As I previously mentioned there are three ski resorts in Banff: Sunshine Village, Lake Louise, and Norquay. They are all part of SkiBig3 and there are multiple pass options for each resort.
Here’s my breakdown of the best ski resorts and ski passes in Banff.
I previously worked at Sunshine Village in the ticket booth so I’ll outline everything I learned about the lift pass options below.
Sunshine Village Day Passes
The basic Sunshine Village lift ticket can purchased in person at the tickets windows as 1 or multiple day passes. If you’re skiing Sunshine more than 10 days in a season it’s better to buy a season pass. The price for day tickets is honestly very expensive, especially if you’re used to European lift ticket prices.
- To save money on Sunshine Village lift tickets opt to ski midweek, afternoons, or buy a mobile ticket as these are slightly cheaper. More details and pricing for Sunshine’s day passes can be found here.
Alternatively the Sunshine Village Super Card offers a bit of a price break, especially if you buy your Super Card before the season starts. With the Sunshine Super Card you’ll get your 1st, 4th, and 7th day of skiing free – although you do have to pay the price of a lift ticket for the card which doesn’t really make the 1st day “free.” Each paid day of skiing is discounted too – you can see more details about the Super Card here.
For both day tickets and season passes you can also go through SkiBig3 which gives you unlimited access to all three ski resorts in Banff. These tickets are more expensive, however they’re convenient if you’re planning to ski all 3 resorts over a shorter vacation period with no order in mind. I would not recommend SkiBig3 passes if you know exactly what days you’re skiing each resort or if you’re only skiing for 1 day.
Different ski passes for sunshine village banff
Sunshine Village Season & Special Passes
If you plan to ski Sunshine more than 10 days in one season it’s worth it to purchase a season pass. Sunshine’s season passes have various prices for different age ranges, passes for families, and afternoon/midweek passes which come in at a cheaper price point. SkiBig3 also offers a season pass which is convenient if you’re consistently skiing in Banff and like to switch up which resort you’re at. SkiBig3’s season pass also grants you various discounts in town and at other ski resorts in Canada and beyond.
- There’s also a new Rocky Mountain Passport which gives you unlimited skiing at Banff Sunshine, Lake Louise Ski Resort, Mt Norquay, Nakiska, Fernie Alpine Resort, Kimberley Alpine Resort and Marmot Basin.
Sunshine has a Spring Pass which normally goes on sale around April and lasts until end of May. This is a great option if you only like skiing in warmer weather or if you want to get unlimited skiing in for only a couple months.
If you’d like to visit Sunshine Village but don’t plan to ski, you can grab a sightseeing pass at the ticket windows on arrival. The Sunshine Sightseeing Pass allows you to access the mountaintop restaurants, take the Standish chairlift for nice views, or watch your children learn to ski.
The Mountain Collective Pass gives you ski access at resorts around Canada (including Sunshine Village), the USA, and beyond. You get 2 free days + 50% off paid days after that. Try to purchase these passes before the season starts as they’re sold in limited quantities.
The IKON Pass gives you access to ski resorts around the world. The Banff ski resorts are included in this pass – the number of ski days is dependent on the pass level you purchase.
Cheapest lift ticket at sunshine village
Sunshine Village Lift Ticket Discounts
Banff Sunshine’s lift tickets are expensive, but there are a few ways to save money here and there. Discount amounts are always fluctuating, however generally you can find discounts for the following:
- Early season day tickets in November are usually cheaper as only some of Sunshine’s terrain and lifts are open.
- Use your SkiBig3 season pass to get discounts for your friends purchasing day passes
- Military/first responders need to show proof.
- On holidays Banff Sunshine sometimes gives discounts to those who dress up in costume (check with the resort beforehand as this is always changing). Other forms of discounts apply to things like moms on Mother’s Day.
- Student discounts are available for only season passes (including spring passes).
- If you’re friends with a Sunshine employee, they can get you a discounted lift ticket. This must be set up a few days in advance.
Ski & Snowboard Rentals in Banff
Banff is a ski town which means you have plenty of options when it comes to ski and snowboard rentals.
Many people opt to rent equipment when they arrive at Banff Sunshine resort. This is a good option as you don’t need to carry any equipment on the shuttle and you can switch throughout the day if you find your equipment doesn’t fit or is faulty. The downfall to this is waiting in long queues which can eat up your ski time.
You can also rent equipment in the town of Banff from various shops. Ultimate Sports, Backtrax, and Bear Street Outfitters are three common options. If you’re staying at the Fairmont Banff Springs or the Banff Park Lodge these hotels have their own rental shops on-site. The pros to renting off-resort are increased and specialty equipment selection as well as having the ability to pick up equipment the night prior to your first day on the slopes.
If you’re looking to get your gear waxed or tuned, the Tune Shop in Banff’s industrial area does the best job.
Best rental shops for skis banff
Best Terrain at Sunshine: Beginner, Intermediate, Advanced, Park
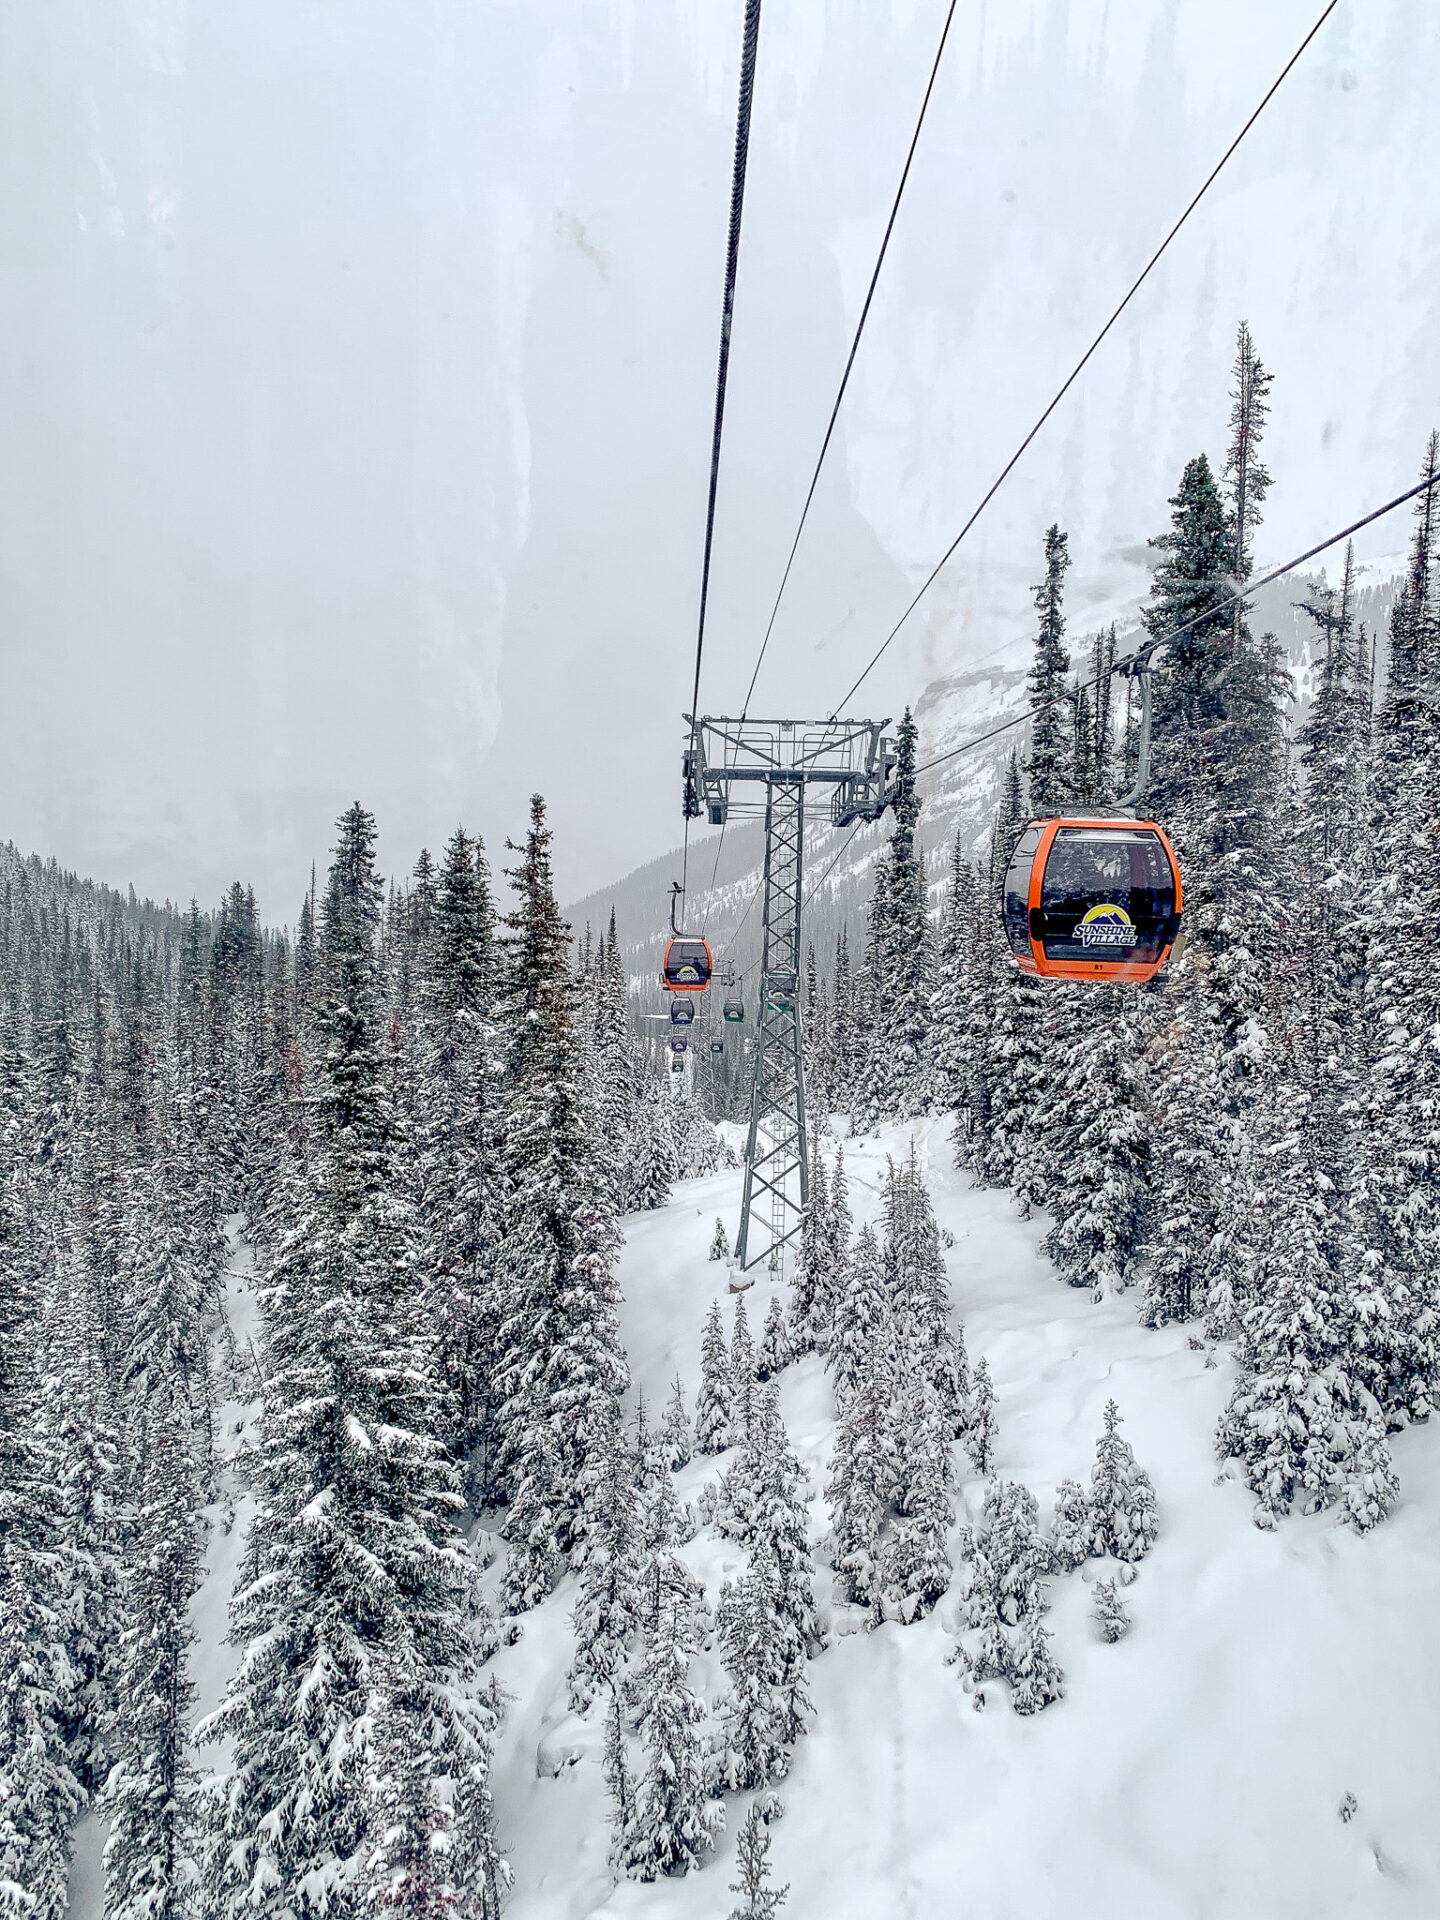
Before you head up to ski Sunshine, keep in mind you have to take a 15 minute, unheated gondola ride up the mountain. Bring your food, layers, water – anything you need for your day of skiing so you don’t have to go all the way down the mountain. You can leave backpacks outside the Sunshine Lodge at the top of the gondola.
Here’s an interactive map of Banff Sunshine Village.
To start, Banff Sunshine has 3 skiable mountains: Goat’s Eye, Lookout Mountain, and Mount Standish. The ski ratings in Canada are: green (easy), blue (moderate), black diamond (difficult), double black diamond (expert). Keep in mind that ratings in Western Canada are often more extreme than what many skiers from Europe or Eastern North America are used to.
Goat’s Eye is accessed via the midway station (the first gondola stop) and is suited for more advanced riders. Goat’s Eye is where Sunshine’s more technical terrain lies – everything on Goat’s Eye is blue+.
Lookout Mountain is a great spot for intermediate riders to find their legs. The heated Angel Quad is located right at the top of the gondola and acts as the perfect lift to access most of the runs on this mountain. To get to the highest point of the resort and access to all runs on Lookout Mountain, take the Great Divide Chair.
Mount Standish is also a great spot for intermediate riders with some advanced tree runs and cliff jumps available. Take the Standish Lift to gain access to all the trails here.
Snowboarders – there are unfortunately quite a few flat areas at Sunshine which can make riding fairly difficult on power and sticky days.
My Favourite Activities in Banff
Banff Gondola – epic views from the top of Sulphur Mountain.
Banff Hop on Hop off – explore the park at your own pace.
Lake Minnewanka Cruise – take a scenic boat ride down the largest lake in Banff.
Moraine Lake sunrise – chartered bus to see alpenglow on Canada’s most beautiful lake.
Norquay via ferrata – epic beginner friendly climbing route across iron bars on Mt Norquay.
Sunshine Meadows Gondola – find wild alpine flowers and hike around pristine alpine lakes.
Click here for a complete list of the Banff tours I recommend:
Banff Sunshine Terrain for Beginners (Green Runs)
20% of Sunshine’s terrain is suited toward beginner skiers and snowboarders.
If you’re brand new to skiing, start at Sunshine’s Strawberry lift. The runs down Strawberry are wide, flat, and not overly steep – this is where everyone goes to learn. There are a couple carpets and very small learning areas as well, however I find these areas are too small and not steep enough to actually pick up any technique.
Once you feel comfortable on Strawberry you can head over to Angel Lift, Wolverine Lift or Wawa as there are many green runs off these chairs. Banff Ave off Wolverine is a great place to learn as it’s wide and flat. Plus there are off-shoots to many blue runs where you can start working up toward intermediate skiing.
Unfortunately for snowboarder almost all green runs at Banff Sunshine have flat spots so it can be tricky to learn.
Sunshine offers lessons for those looking to perfect their skills or learn basic techniques.
Beginner terrain at banff sunshine village
Banff Sunshine Terrain for Intermediate Riders (Blue Runs)
55% of Sunshine’s terrain is for intermediate riders. Once you have the basics down, a total 75% of Sunshine Village will become accessible to you.
Lookout Mountain via Standish Lift has plenty of great blue runs that dip into the trees, have little jumps, and steeper sections. You can easily avoid these obstacles or test them out on easy slopes to practise your skills.
The Great Divide Chair which brings you to the highest part of Lookout Mountain also has wide, blue runs that are nice and long. South Divide into Red 90 is a great run to pick up speed and enjoy incredible views.
Wawa also has a few nice blue runs like Wawa Bowl and Tin Can Alley.
On the more advanced side of intermediate skiing/snowboarding, Goat’s Eye has a few more advanced intermediate runs. Head left off the chairlift, take any of the blue runs down to Sunshine Coast, then take Wildfire down where you’ll meet up again with Sunshine Coast.
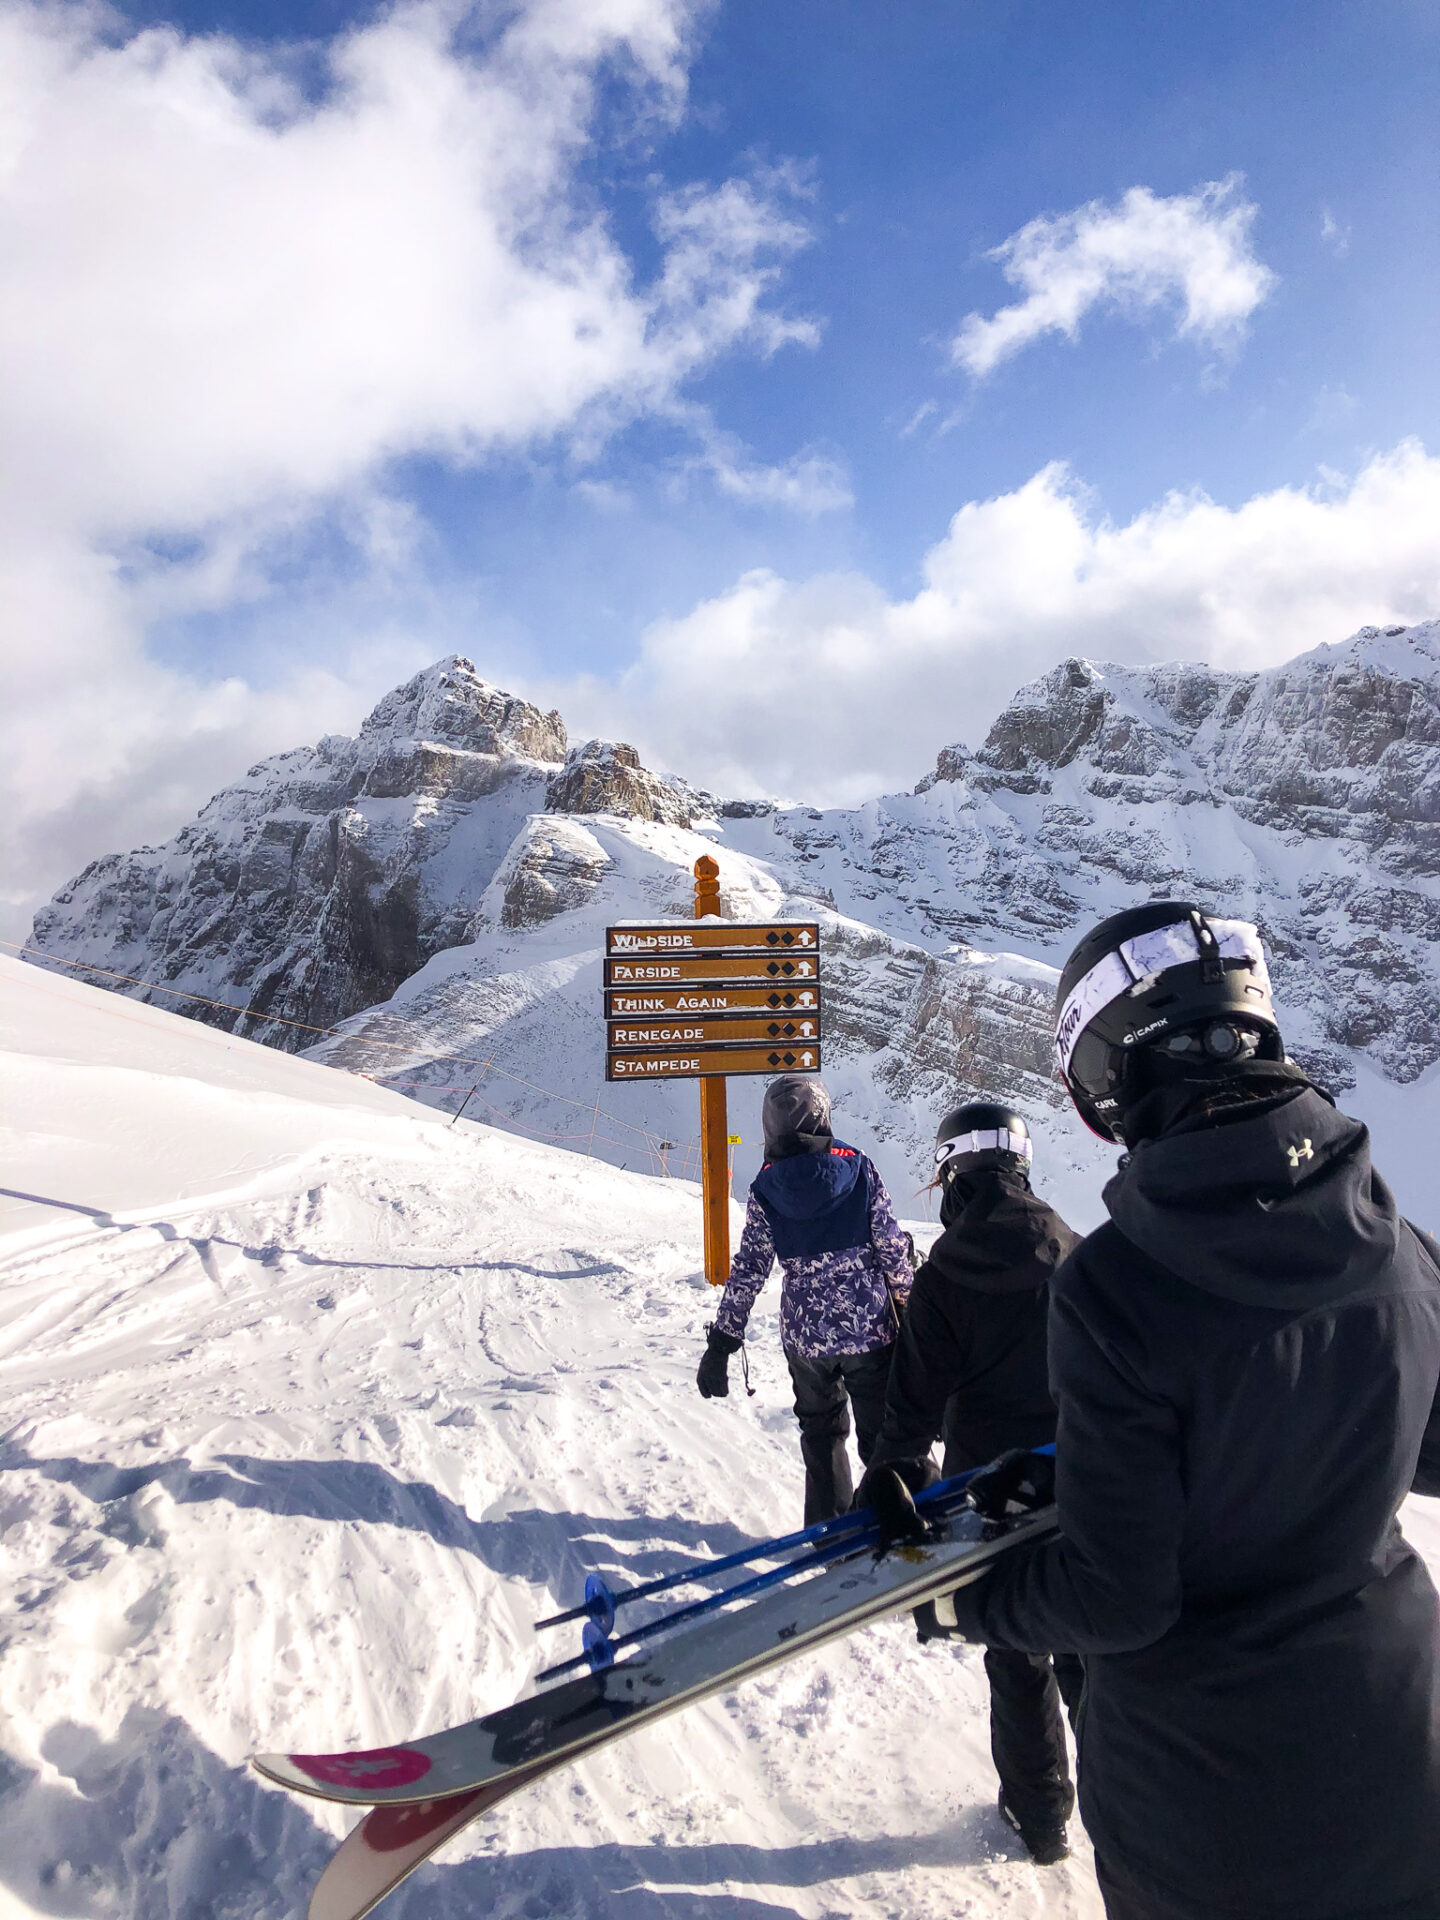
Banff Sunshine Terrain for Advanced Riders (Black Runs)
Advanced riding is when you start to hit the park, enter the trees, hit jumps, or moguls – typically more “off-piste” skiing. The further away from the beaten path, the better.
Goat’s Eye is a Mecca for advanced riding. There are tons of black runs here and you can essentially go wherever you want – but respect the snow fences. The good thing about Canadian skiing is that you can go wherever you want in-bounds at the resort and you’ll always end back at a lift which makes exploring terrain away from the main trails less intimidating. Enjoy the black runs and feel free to enter the trees at literally any point in time.
Up the Teepee Town or Angel Quads take Ecstasy down toward the Shoulder and hit any of the black runs along the way. I find these black trails more challenging as there are a lot of moguls, trees, and various “hazards” over super steep terrain to avoid.
Mount Standish has quite a few black runs as well but these runs can often lead to big cliff drops and tight, tight tree sections. Go with caution while exploring the black runs on Standish.
And finally, Wawa. Wawa has some advanced terrain and some great tree runs. Star Trek is a challenging run full of trees and moguls, but unless you’re equipped with avalanche gear I would’t necessarily go any further than that even though the next set of runs are in-bounds. It’s possible for avalanches to occur here.
Banff sunshine’s advanced ski terrain
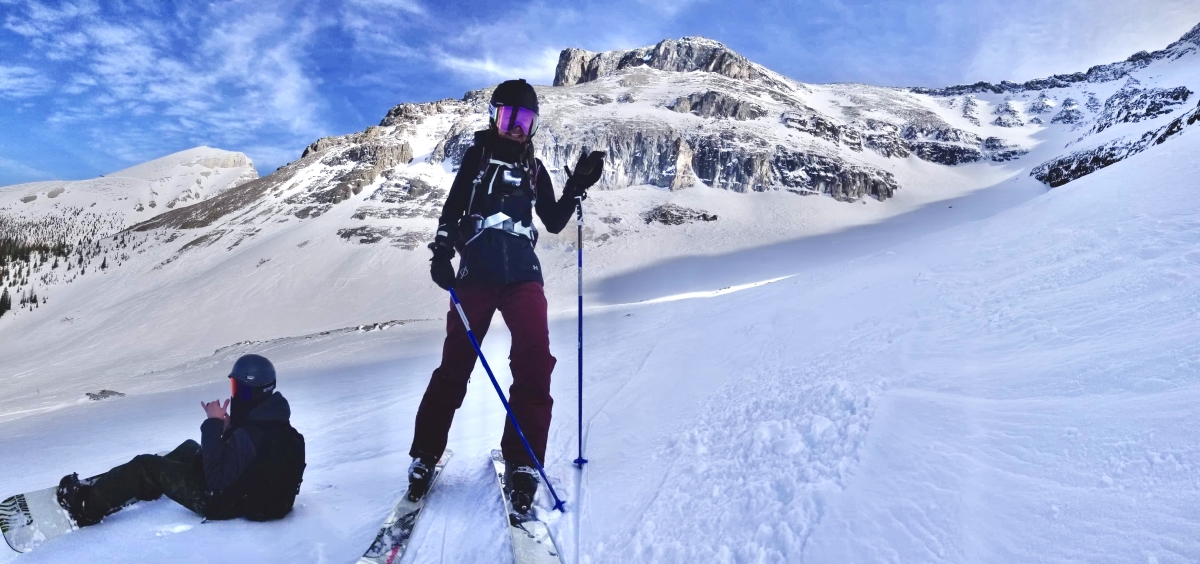
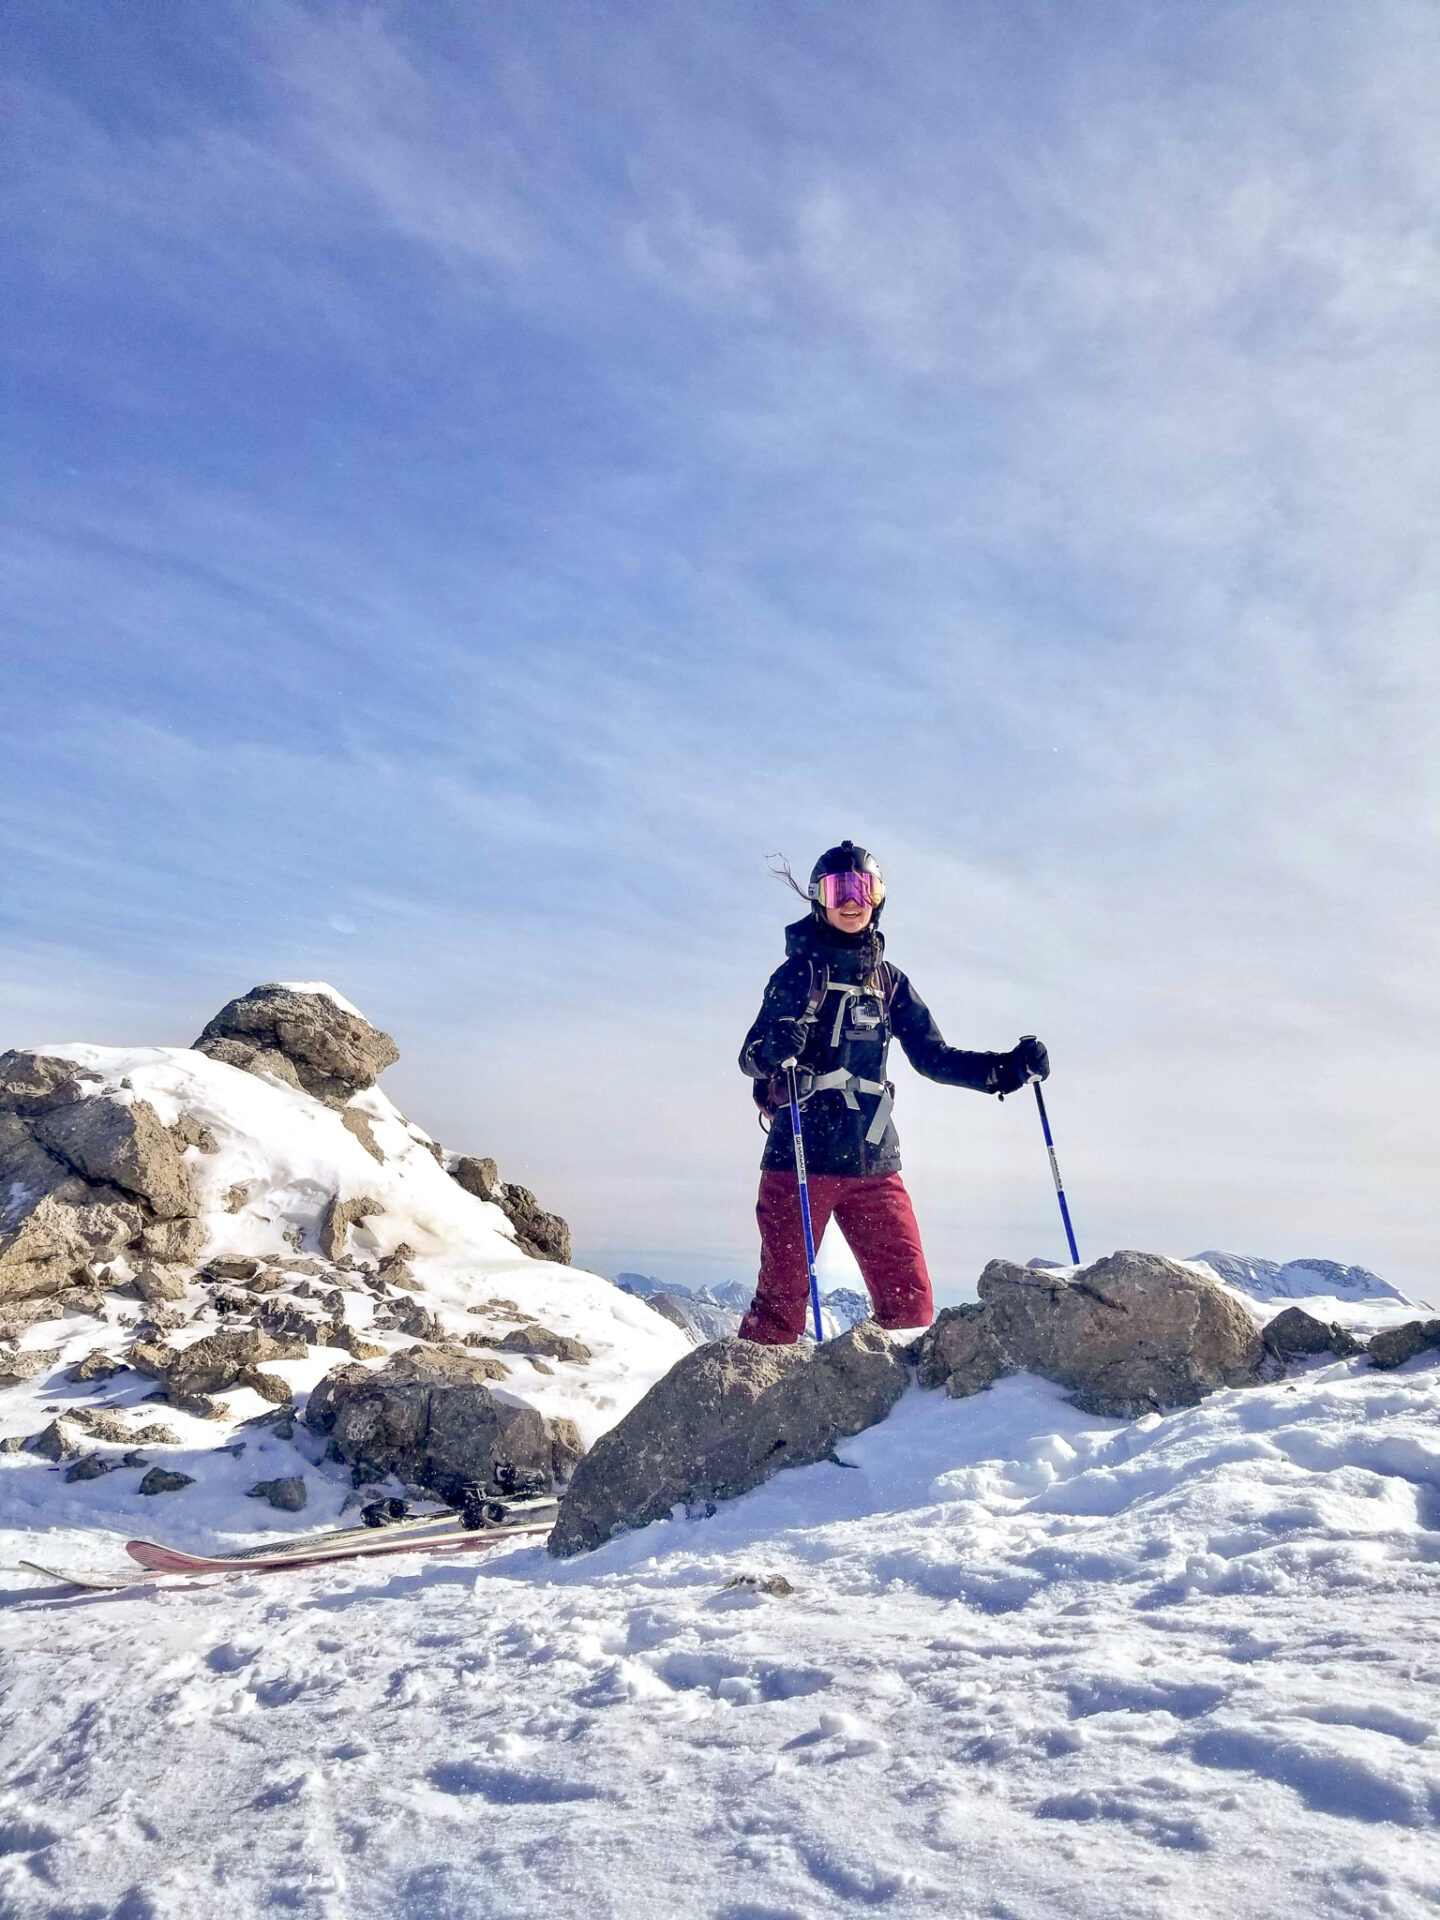
Banff Sunshine Terrain for Experts (Double Black Runs)
Sunshine has a few extreme riding areas which are great for those looking to dip their toes in backcountry without impeding danger. The Sunshine staff bombs expert ski areas for avalanches and the rescue team is stationed at the resort for rescue missions.
For all expert terrain you’re required to ski in at least pairs, have avalanche gear, and preferably avalanche training.
The exception to this is on the South Side Chutes off Goat’s Eye. This area is bombed and avalanche gear is not required, however skiing in pairs is still a good idea because the terrain is steep, the snow is deep, and there are plenty of hazards around.
Advance terrain at sunshine village
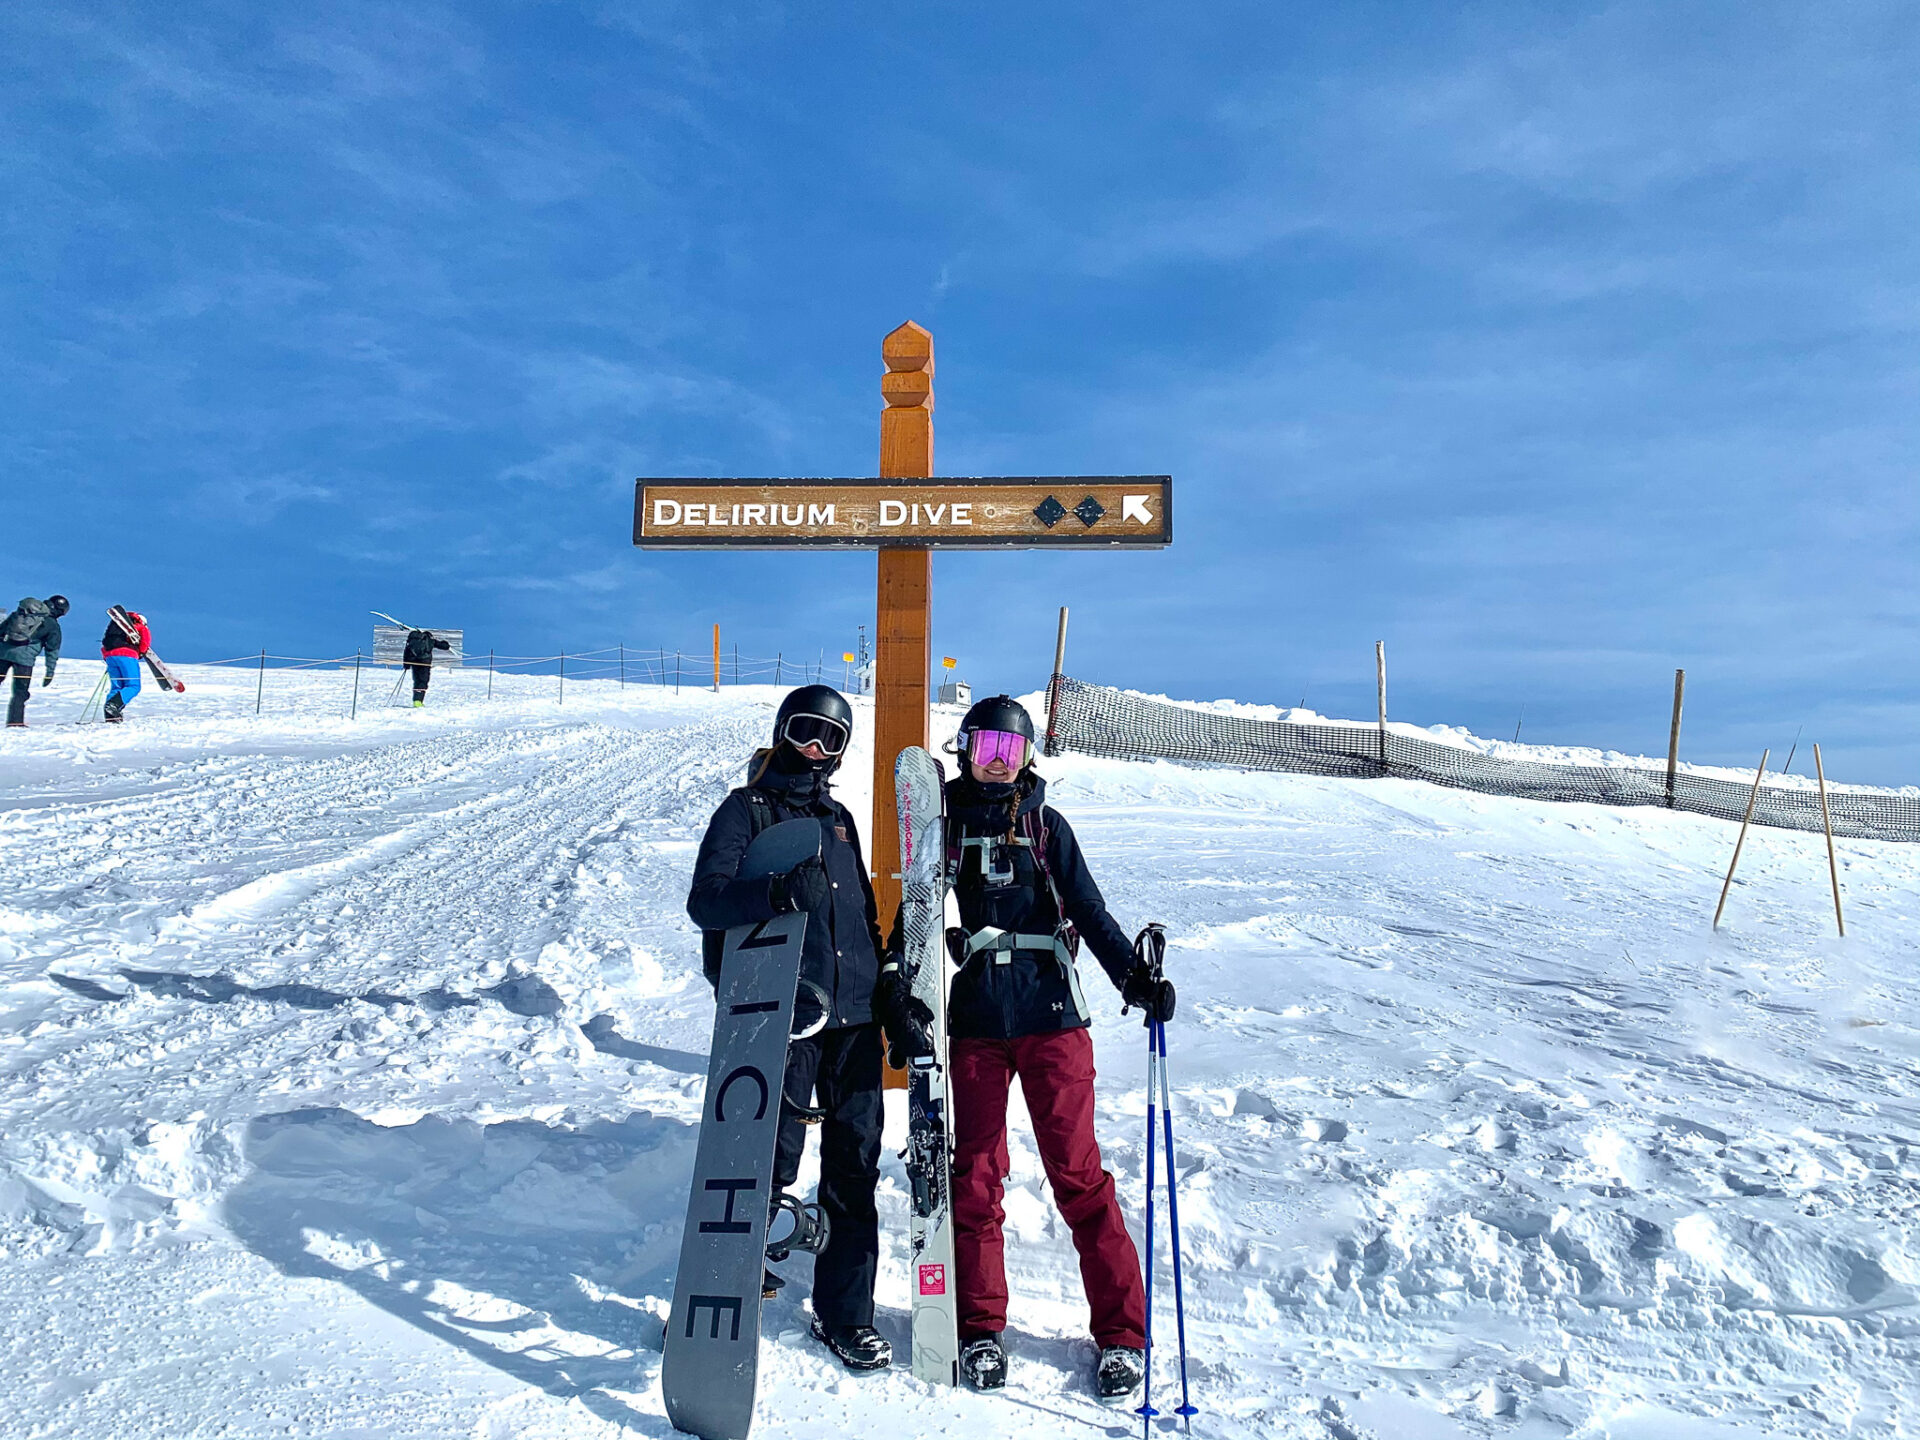
The Delirium Dive is one of North America’s biggest, baddest free-ride zones. You can access the Dive by taking the Great Divide lift and hiking up toward the gate. The gate will give you a green light if your transceiver is successfully turned on and from there you continue to hike up to the drop in points. I personally preferred walking down the stairs – even though it was sketchy in ski boots – toward “Dive Proper” as the entrance was smoother from here.
Wild West is another one of Sunshine’s free-ride zones – one run at Sunshine I have not tried yet. Wild West features some of North America’s most extreme in-bound terrain and is known globally for its steep grade. You can find three major rock-walled couloirs, steep crevices, and a series of cliffs here. You can access Wild West from Goat’s Eye.
Oftentimes locals or those who have been skiing Sunshine for years will wander out of bounds to an area considered “slack country.” Oftentimes this is done at the top of the Wawa lift toward Wawa Ridge. This area is not avalanche bombed and the Sunshine Patrol team is not obligated to perform rescues as the area is not part of the ski resort.
Interactive Banff Map – from a LOCAL
Get my 600+ local Banff recommendations saved to your Google Maps app
I lived in Banff for years & know all the best spots!
Outdoors: 100+ hiking trails, scrambles, backcountry routes, waterfalls & lakes
Planning: lodging, parking, restaurants, public washrooms, transit hubs, shopping & services
Things to do: tours, viewpoints, unique activities, & local secrets
Sunshine Village’s Terrain Parks
Sunshine has terrain parks scattered around the resort and throughout the season the park crew changes features to make them bigger and more advanced. If you’re a park rat, Sunshine will most definitely have something for you.
Beginner – Strawberry has a park section. The first few features are small and will give you a great feeling for what riding a box feels like. Once you’ve mastered that, head on over to the Wolverine lift where you can find slightly larger features, different box styles, and smaller jumps
Intermediate – Grizzly park (accessed via Angel and Divide) has a combination of M to XL jumps, whereas Springhill park (accessed via Angel Express) has a few medium sized jumps. I started hitting bigger jumps here and felt very comfortable and confident – I’m no park skier but this was a great place to push my boundaries. It’s also got some different rail, tube, and box features you can try out.
Advanced – If you’re looking for more advanced boxes, rails, and tubes the bottom half of Strawberry park and Springhill park have you covered. If you’re looking for big air, head on over to the Great Divide park (accessed via Angel and Great Divide).
Here’s a complete overview of the parks from Sunshine.
there are 6 terrain parks at Banff Sunshine village.
Working at Sunshine Village
If you’re looking to make the most out of your ski season in Banff you can opt to work at Sunshine Village. I worked at Sunshine for 1 season and had an epic time.
How to Work at Sunshine Village, Banff | Everything to Know About Living in Banff – From a Local
Benefits of working for Sunshine Village:
- Free season pass
- Discounted staff accommodation – this isn’t available for everyone and the staff accommodation location changes. Sometimes it’s in town, other times it’s on-mountain.
- Reciprocals – for many resorts around Alberta and British Columbia your staff pass grants you discounts and sometimes free passes.
- Ski daily – when I worked in tickets my shift finished early which meant I got to ride daily. Other departments have 2hr ride breaks throughout the week.
- Make friends – almost everyone working at Sunshine is there to ride so it’s super easy to make friends and meet a fun group to ride with.
What it’s like to work at sunshine village banff
Things to Do at Banff Sunshine Village
Aside from skiing there are other things to do at Banff Sunshine Village.
Come hungry – there are a few restaurants, cafes, and grab-n-go food options at the top of the gondola. You can see them all here. At the base of the resort there’s a cafe and small bar in Creekside Lodge.
Come thirsty – although apres isn’t really a thing in Canada, Trappers is the main bar at Banff Sunshine. It’s rustic and overpriced, but their menu is delicious and they have an outdoor patio space.
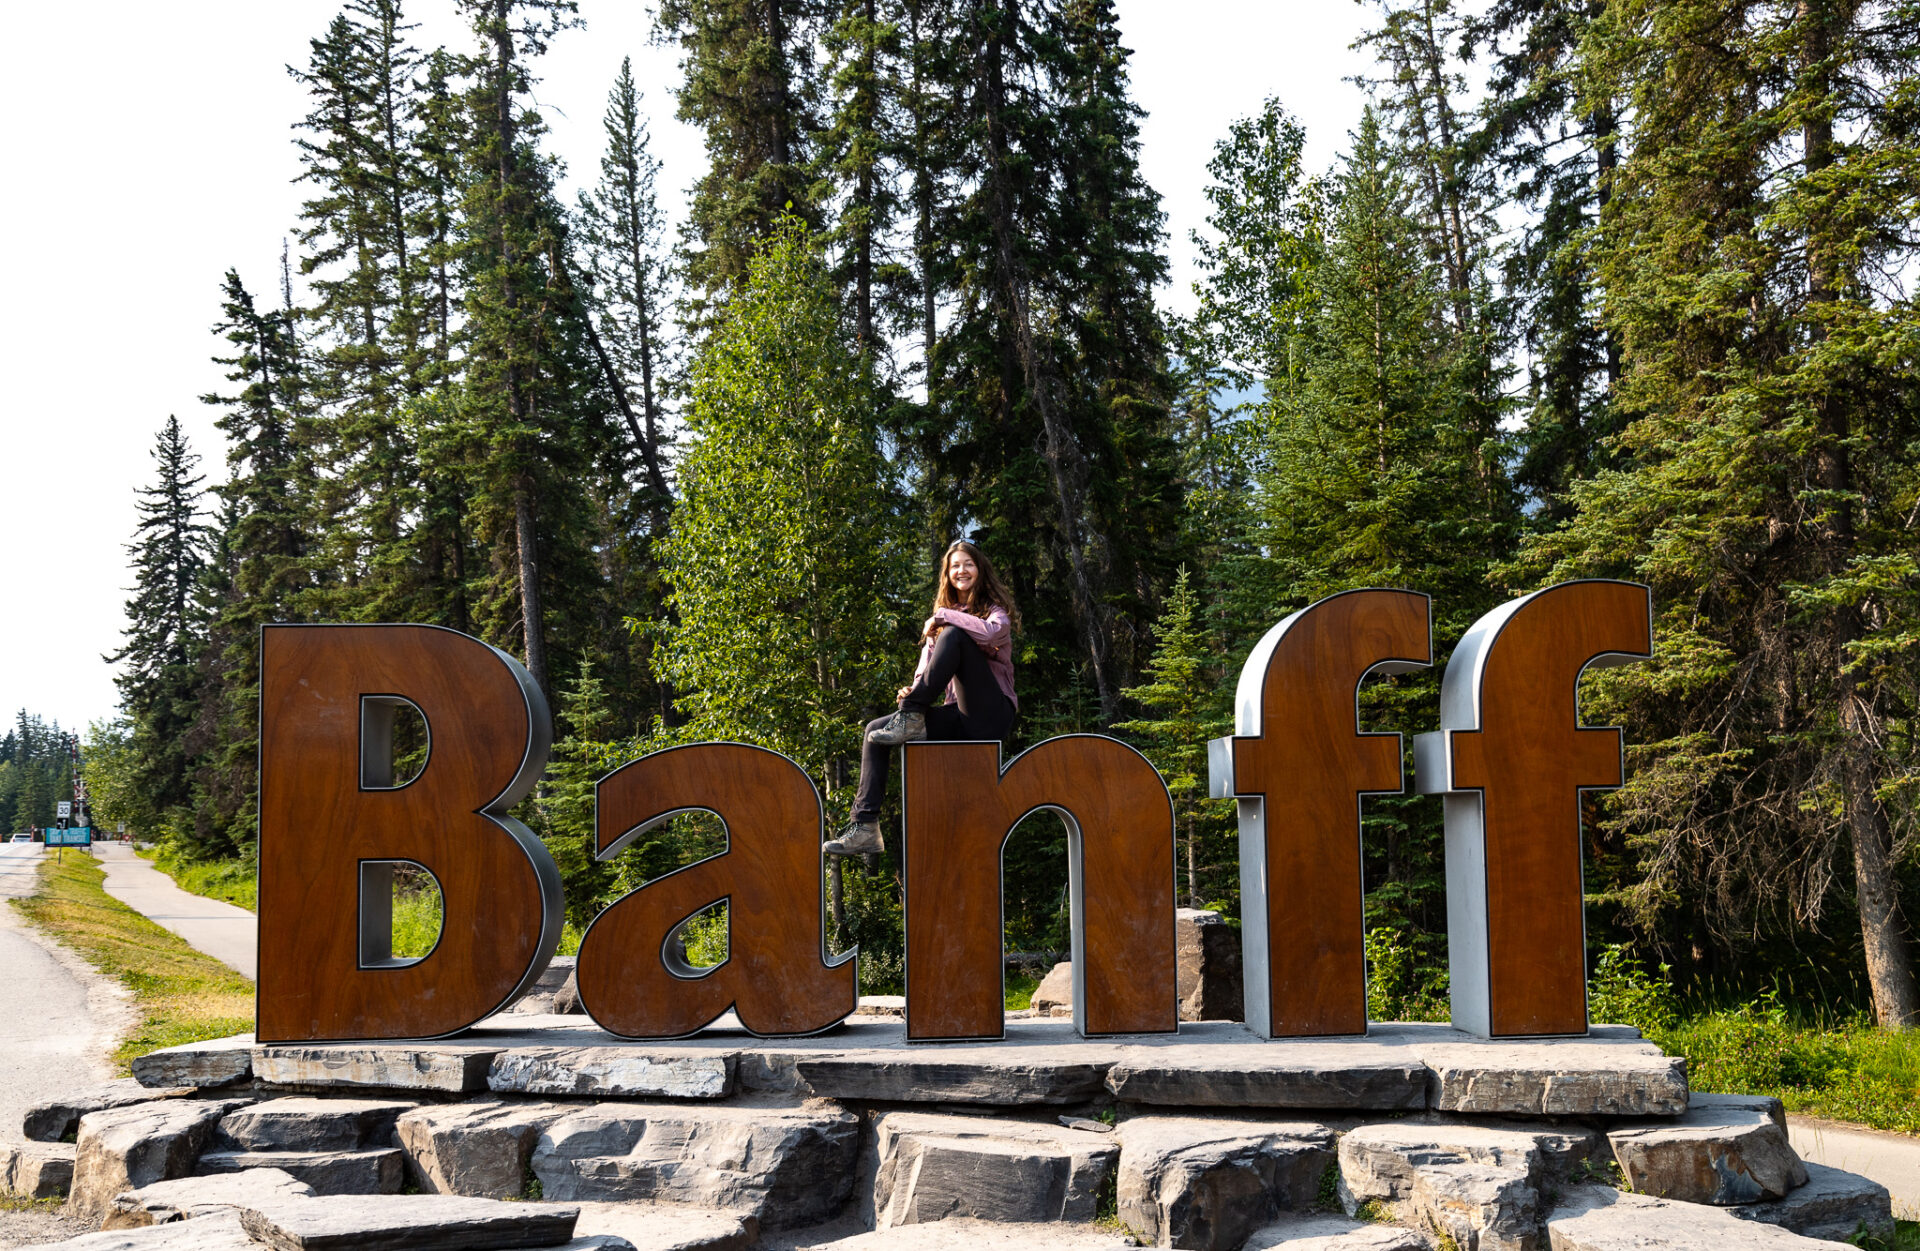
Sightsee – grab a sightseeing pass and take the Standish lift to get your picture taken with the Sunshine Village Sign.
Snowshoeing – there are limited areas available for this. Check in with the ticket office before heading up the mountain.
is the skiing good at banff sunshine
Ski Resorts Near Banff
Looking to extend your Banff ski trip? The following ski resorts are within fairly close proximity to Banff:
- Lake Louise is arguably the best ski resort in Banff for its largest size, advanced terrain, and superior snow. Lake Louise is located 45 minutes from Banff and there’s a free shuttle from the town of Banff.
- Norquay is Banff’s smallest ski resort. It’s located only 10 minutes from the town of Banff and although small, it has some seriously steep runs which are epic on powder days.
- Nakiska is a small resort located about an hour and a half from Banff in Kananaskis Country. People mainly come here as it’s quiet and closer to Calgary.
- Marmot Basin is located in Jasper National Park which is about a 3.5hrs drive north on the Icefields Parkway from Banff. Jasper is one of my favourite resorts in the Rockies – killer snow, smaller crowds, epic terrain.
- Kicking Horse is located in Golden – about 1.5hrs from Banff. Kicking Horse has mostly expert terrain so it’s recommend for serious skiers only. The lift system here isn’t great so long lines and walking seems to take up most of your day here.
Best ski resorts near Banff
Related articles
- SkiBig3 Breakdown – which ski resort and ski pass in Banff is best?
- What it’s like to work at Banff Sunshine Village
- Best ski resorts in Alberta
- Best ski resorts in British Columbia
Skiing Sunshine Village FAQ
Now that we’ve gone over everything there is to know about skiing Banff Sunshine Village, let’s recap some FAQs.
Things to know before skiing sunshine village Banff
How do you get to Sunshine Village?
There are free shuttles from the town of Banff or you can drive. I’ve outlined the options for how to get to Sunshine Village above.
How long is Sunshine Village’s ski season?
Banff Sunshine’s ski season is 7 months. It begins early November and ends late May.
When is the best time of year to ski in Banff?
The best time of year to ski in Banff is from January to March for cold temperatures and snow. For spring skiing April to May is the best time of year to ski in Banff.
How much snow does Sunshine Village get?
Sunshine Village has the best snow in Banff. On average Sunshine gets up to 9m (30ft) of snow during a single season. On average the resort typically sees new snow 95 days in a season.
What ski pass should I get for Sunshine Village?
There are plenty of pass options for Banff Sunshine. I list all these options here.
How can I see current snow/weather conditions at Sunshine?
You can see Sunshine’s current conditions, snow reports, and live webcams here.
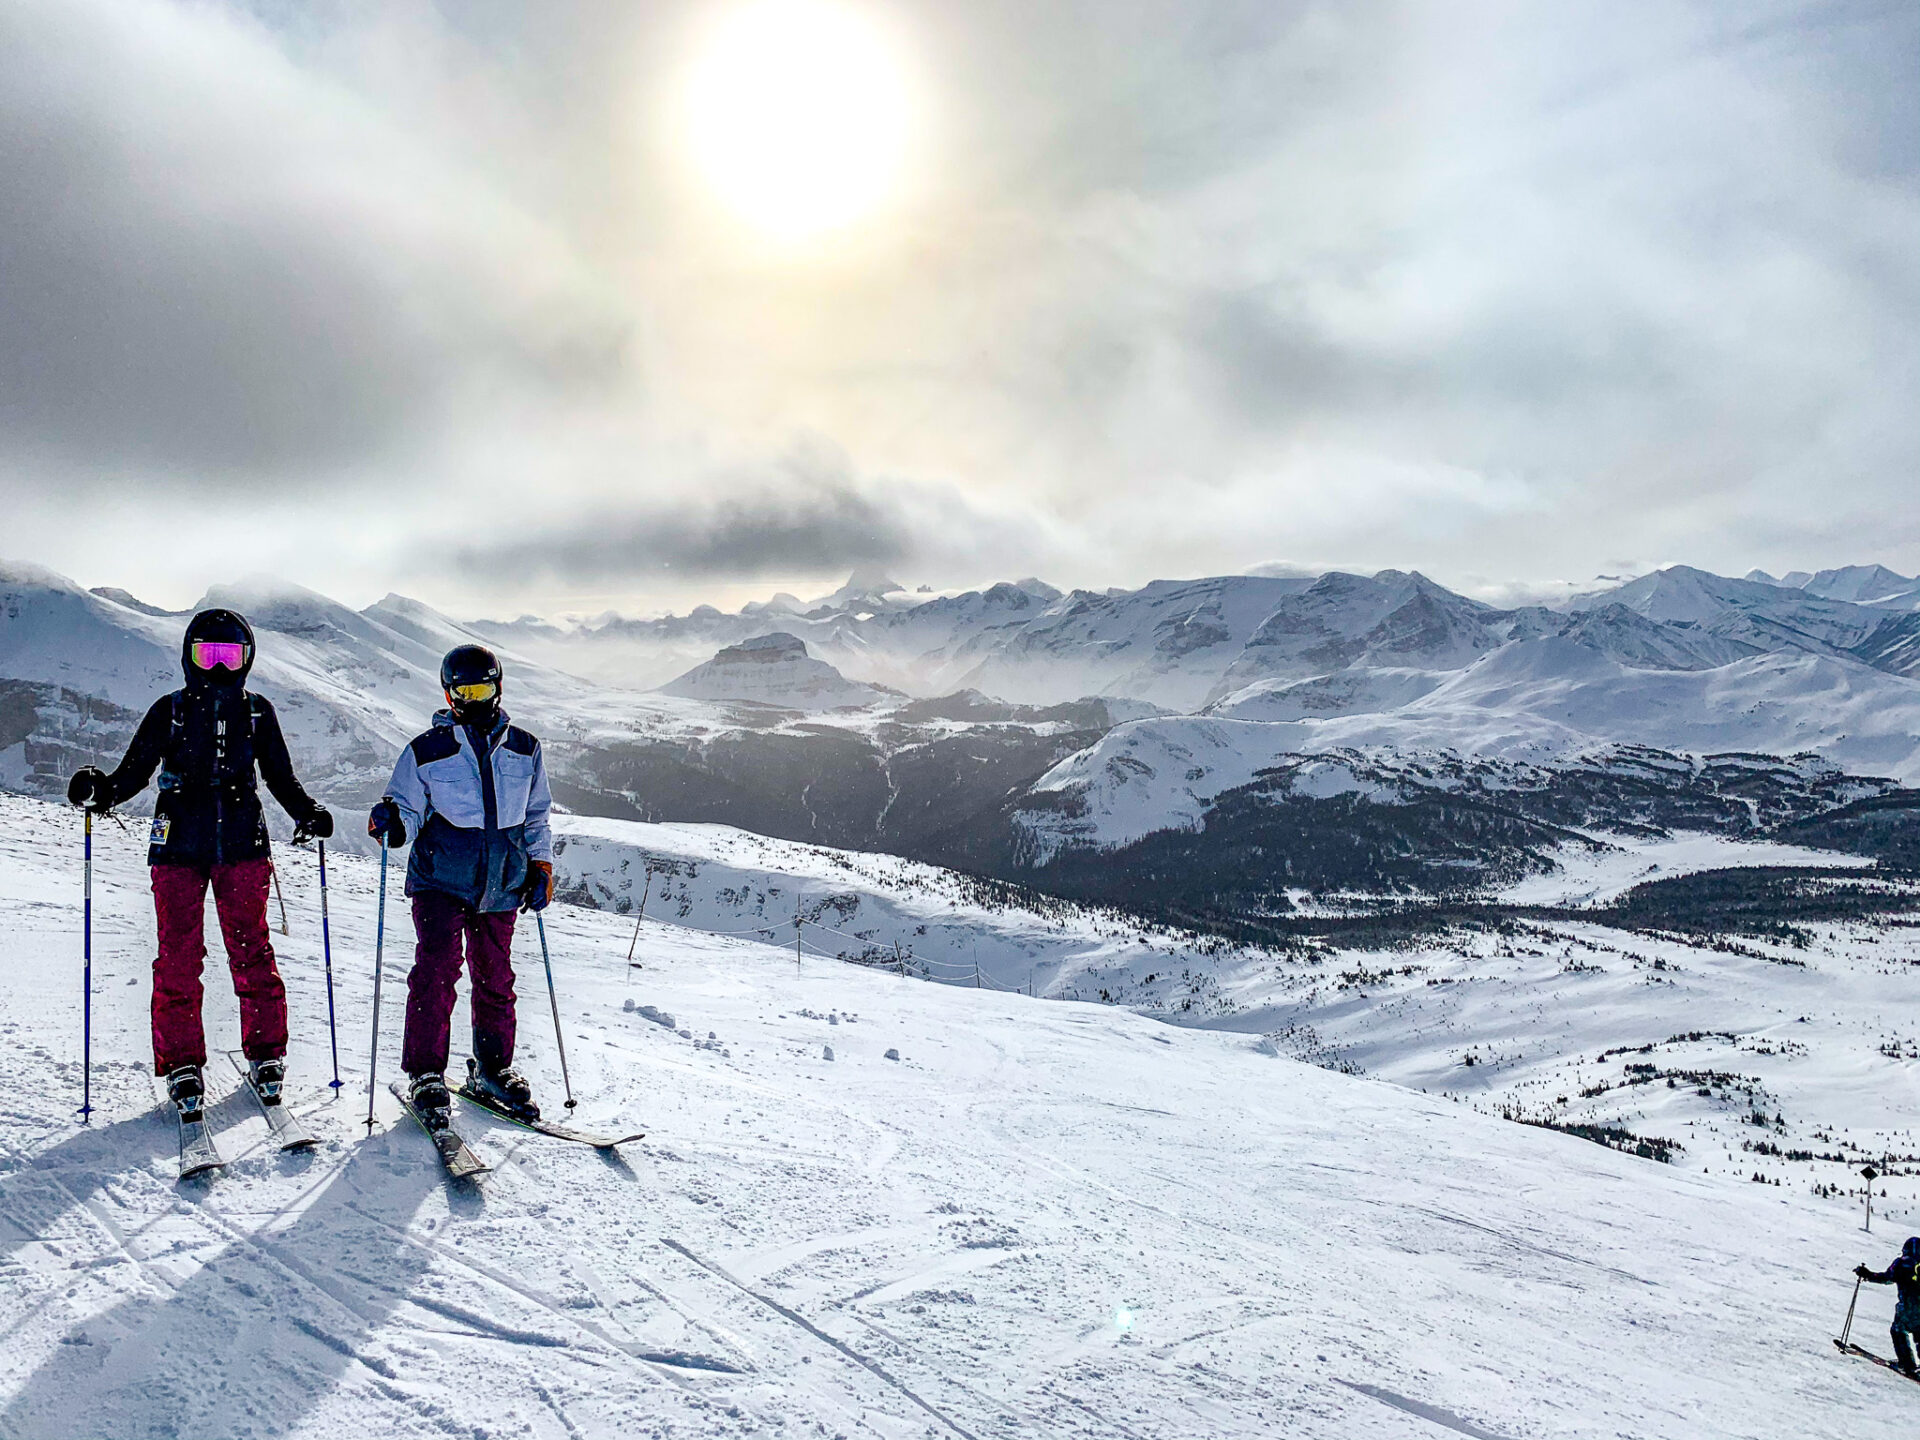
Is it worth it to ski at Sunshine Village Banff?
Yes! Banff Sunshine Village is one of the best ski resorts in Canada.
How many runs does Banff Sunshine have?
There are 130+ named runs at Sunshine Village.
What is the longest run at Sunshine Village?
The longest run at Sunshine Village is from the top of Lookout Mountain to the base of the ski resort. This run is 8kms (5 miles).
Does Sunshine Village use artificial snow?
No. The snow at Sunshine Village is 100% natural.
Does Sunshine Village have any terrain parks?
Yes. Sunshine Village has 6 terrain parks that are constantly changing throughout the season. You can see details about the terrain parks here.
How long is Banff Sunshine’s gondola?
Sunshine’s gondola is 4.5kms (2.8 miles) – approximately 15 minutes. The gondola cabins are not heated.
How can I work at Sunshine Village in Banff?
You can reference this blog post for information on how to work at Sunshine Village in Banff.
Is Banff Sunshine a good resort for snowboarders?
Yes and no. There’s plenty of excellent terrain for snowboarders at Sunshine Village however there are many flat areas on the green runs which means you’ll need to keep your speed. This can bee difficult for new snowboarders.
Is Banff Sunshine Delirium Dive hard?
Yes. Sunshine’s Delirium Dive is very difficult and should only be attempted by serious skiers and snowboarders with avalanche gear and training.
Interactive Banff Map – from a LOCAL
Get my 600+ local Banff recommendations saved to your Google Maps app
I lived in Banff for years & know all the best spots!
Outdoors: 100+ hiking trails, scrambles, backcountry routes, waterfalls & lakes
Planning: lodging, parking, restaurants, public washrooms, transit hubs, shopping & services
Things to do: tours, viewpoints, unique activities, & local secrets
Where is the best place to ski at Sunshine Village Banff?
Happy adventuring!
Taylor ♡
Like This Post?
Share with friends or save it for later!

About the Author
HI, I’m Taylor – the voice behind The Holistic Backpacker.
After moving to Banff National Park in 2020 I became an outdoor adventure enthusiast and vowed to never stop exploring.
I now spend my days travelling the world, climbing mountains, and spending nights under the stars in the Canadian Rockies backcountry.
I created The Holistic Backpacker so I could share my adventures and help connect people like you with the same amazing experiences.