
Devils Thumb Hike & Inversion at Lake Louise – Banff Scrambles
The Devils Thumb hike at Lake Louise is one of the infamous Banff Scrambles. This is a tough and semi-technical hike that features beautiful overheard views of BOTH Lake Louise and Lake Agnes. I was extremely lucky the day I did the Devils Thumb hike and saw something incredible…
Along the way you’ll also have the chance to see Mirror Lake, the Little Beehive Lookout, and the Big Beehive Lookout. I’ve written a detailed guide for how you can hike everything at Lake Louise in 1 day here, however this post speaks specifically about what you can expect when completing the Devils Thumb hike.
More: Lake Louise Circuit: Hike EVERYTHING at Lake Louise in a Day
Before we get started it’s important to note that the Devils Thumb hike is in Banff which is a National Park. You’ll therefor need a Parks Pass for each day you’re in the park. You can buy these at the Park gates, online, or at the visitor centre.
Now, let’s go hiking!
Skip Ahead:
- How to get to Devils Thumb
- Where to stay in Lake Louise
- About Devils Thumb hike
- Hiking Devils Thumb
- Tips for a successful hike
- Essential hiking gear
- What to wear hiking
I have affiliate links in this post which means when you book a hotel or purchase a product, I may make a small commission ~ at no additional cost to you (full disclosure). These funds go back into The Holistic Backpacker and help me create more free content like this!
Thank you for supporting my work!
Related Content
- 50+ Things to do in Banff in summer
- Discover more Banff trail guides
- Complete guide to the Icefields Parkway
- Step-by-step guide for planning a trip to Banff
- What to wear hiking in Banff
- Hiking gear guide for Banff
How To Get To Devil’s Thumb
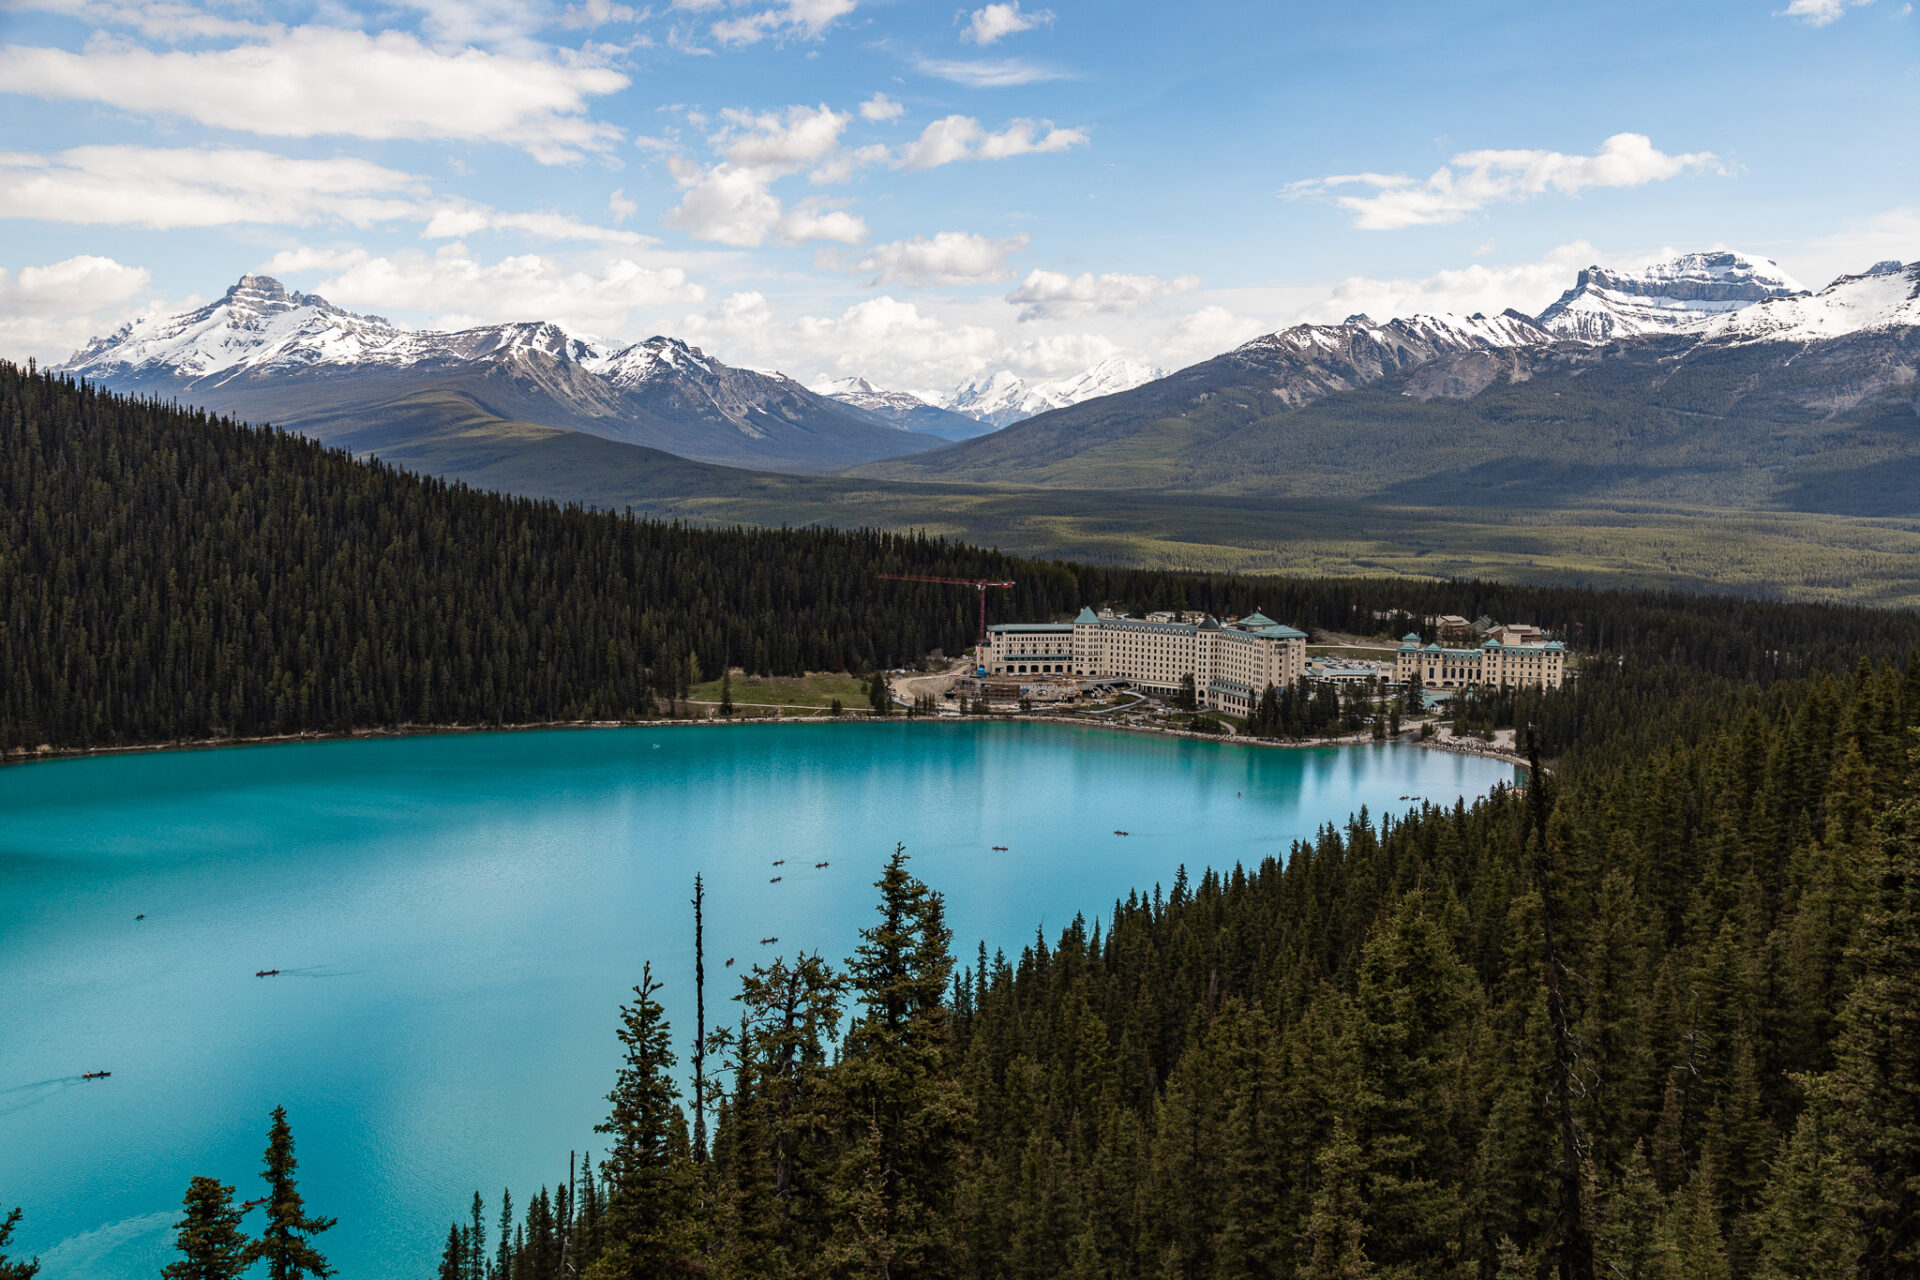
As you most likely guessed, Lake Louise is one of the busiest spots in Banff National Park. You can bet that Banff’s 4 million+ annual visitors flock to Lake Louise’s blue alpine waters – for this reason parking is crazy. You can drive to the Devils Thumb hike, but if you’re coming from the town of Banff I’d recommend taking the Roam bus.
The Roam bus will cost you basically the same as it would to pay for parking (implemented as of 2021) and will save you the hassle of circling the lot a thousand times looking for an open spot.
If you aren’t coming from the town of Banff you’ll have to drive or rent a car to get to Lake Louise.

Best Banff Car Rentals
Most of Banff’s remote trailheads and attractions are inaccessible via public transportation. I 100% recommend renting a car to make the most of your time in the Rockies.
My favourite rental tool is this site as it compares all the local car rental shops to find you the best rate.
Where to Stay at Moraine & Lake Louise
If you plan to hike at Lake Louise or Moraine Lake, there are plenty of lodging options available nearby. Staying directly in Lake Louise will save you driving the 1.5hrs to and from Banff each day.
Luxury Stays – the Fairmont Chateau Lake Louise is the most iconic hotel in Banff. Staying here gives you direct access to Lake Louise, local hiking trails, and on-site parking. The Moraine Lake Lodge is a hard-to-book, but beautiful cabin stay located directly next to Moraine Lake. Staying here gives you the ability to drive your own car to the lake, meals are included and so are the pricey canoe rentals. Book this hotel as far in advance as possible.
Mid-range stays – Paradise Lodge & Bungalows is located a mere 500m from Lake Louise, but it comes in at a much lower price point than the Fairmont Chateau. Alternatively, the Lake Louise Inn offers the best value stay in town.
Budget stays – HI Lake Louise is the only hostel in Lake Louise.
Camp – reservation info.
Where to Lodge in Nearby Banff
Budget Hostels – HI Banff, Banff International, and the Samesun Banff (my top pick).
Budget stay – Bow View Lodge and Irwin’s Mountain Inn.
Mid-range stay – Banff Park Lodge, Banff Caribou Lodge & Spa, and the High Country Inn.
Luxury stay – the Fairmont Banff Springs and the RimRock Resort.
Here’s my breakdown of the best Banff hotels, organized by category
About Devils Thumb Hike
- Distance: 12.9km
- Elevation gain: 883m
- Rated: hard
- Type of trail: out & back
- Estimated time: 5hrs+
The Devil’s Thumb hike is actually one of the many Banff scrambles which means the terrain is more technical and more advanced than your average hike. If you’re new to hiking, I wouldn’t necessarily recommend venturing up Devils Thumb unless you’re with someone more experienced.
The entire trail system at Lake Louise is well trafficked, so you can expect to see lots of people as you’re hiking. The terrain (minus the Devils Thumb portion) is well marked, easy to follow, and easy to navigate. You’ll come across some exposed roots and rocks along the way, but nothing too crazy.
As you hike to Devils Thumb, make sure to take advantage of the lookout points along the way. More on how you can hike everything at Lake Louise here.
Explore My Latest Banff Trail Guides
Explore ALL Banff trail guides
- Aylmer Pass Hike Guide (+ LM8 Campground Stats)

- Aylmer Lookout Hike Guide (+ LM8 Campground Stats)
- Mount Rundle Hike, Banff – DETAILED Scramble Guide with Photos
Hiking Devils Thumb
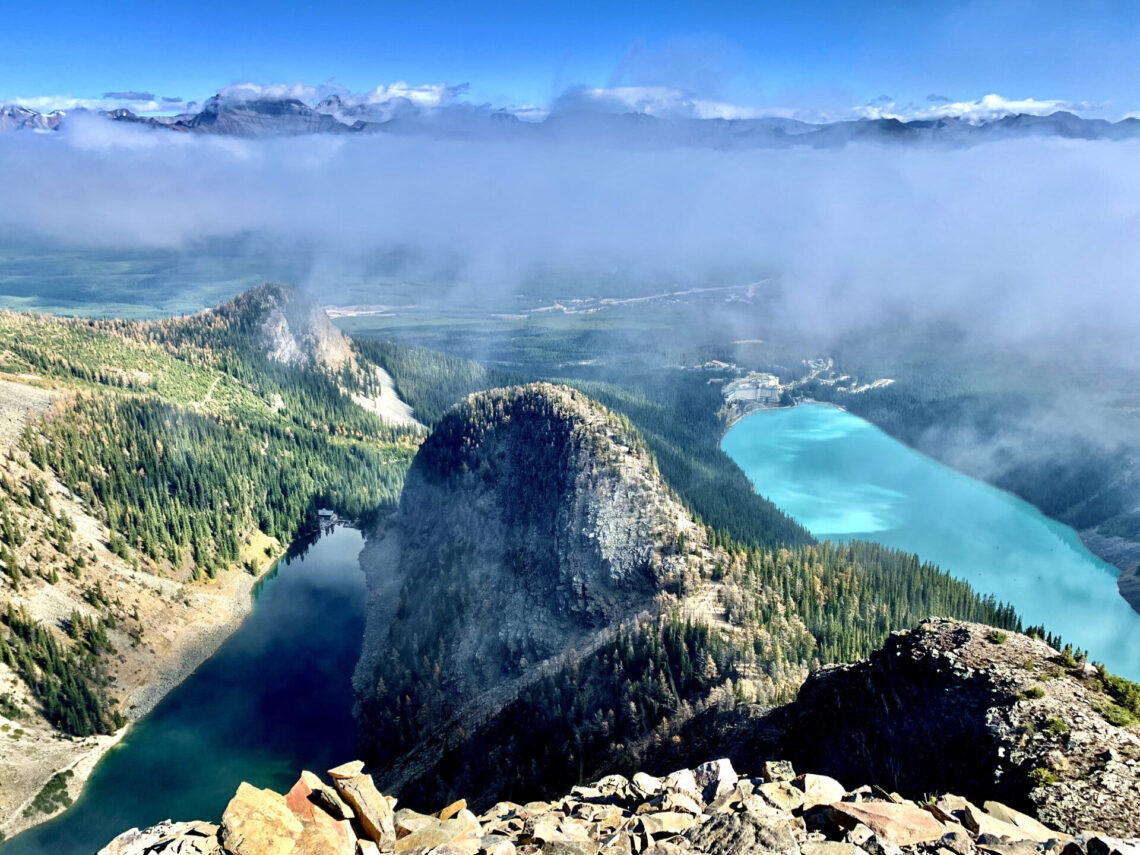
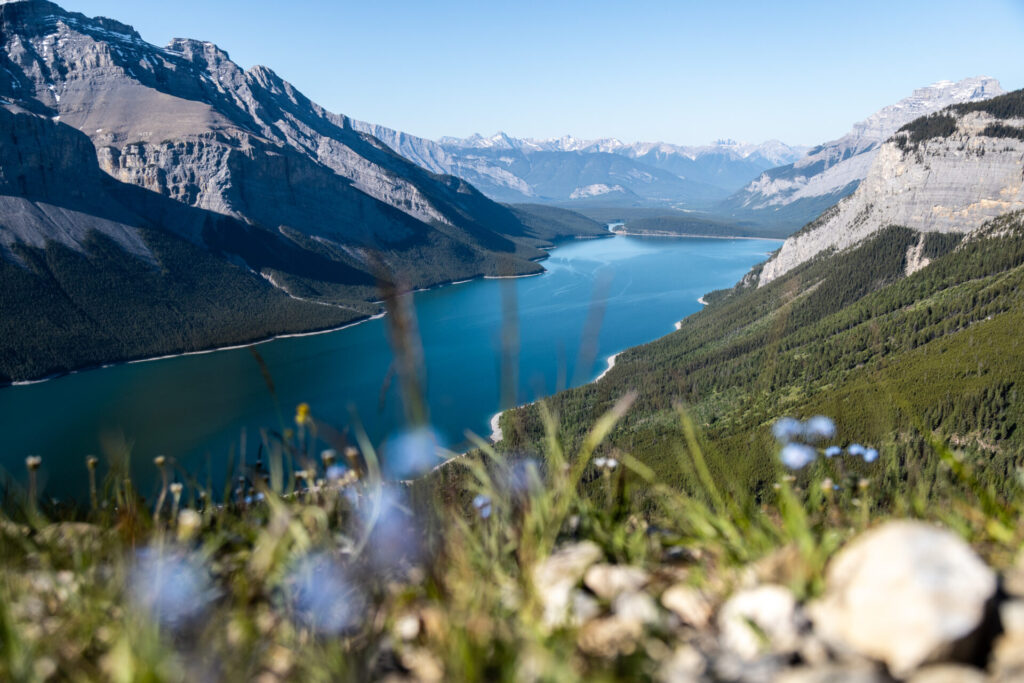
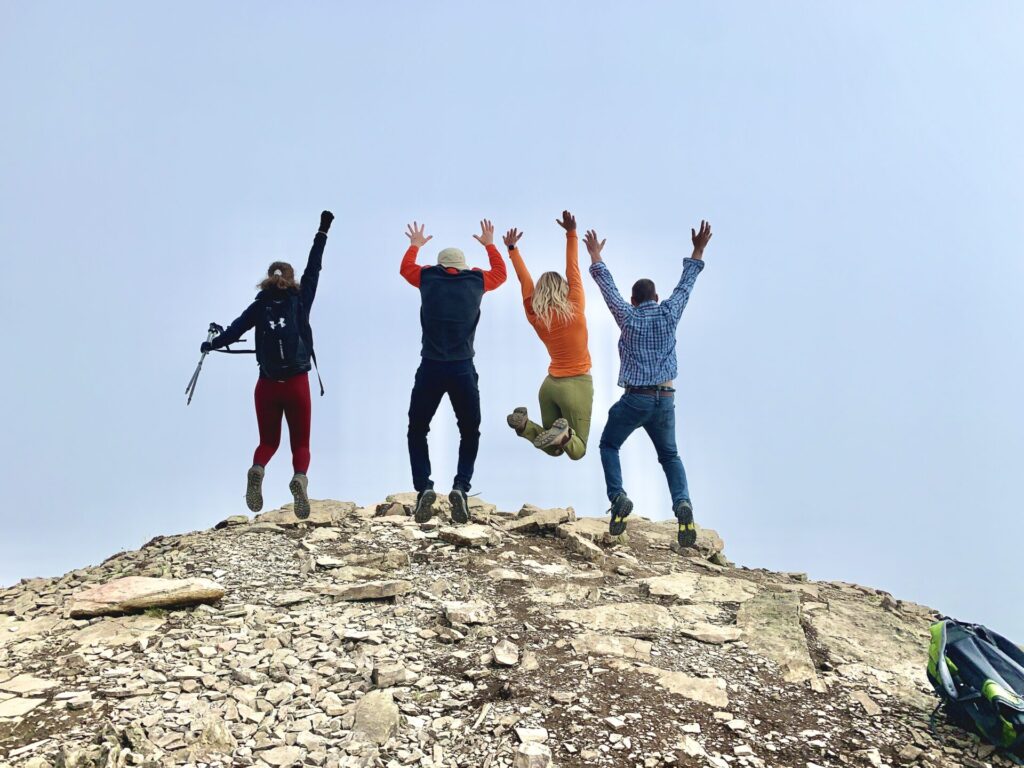
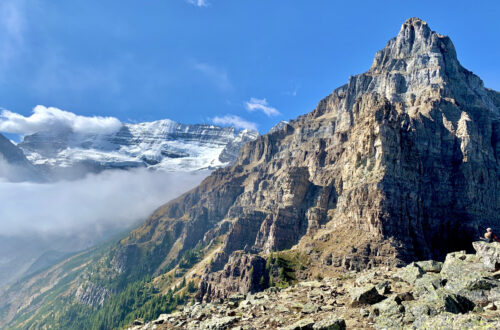
The Devils Thumb hike is my favourite section of the Lake Louise Circuit and it’s one of the best Banff scrambles. It’s steep, technical, and most importantly beautiful. From the top you’ll have a birds-eye view of 2 famous alpine lakes in Banff as well as glaciers and picturesque peaks.
My experience completing the Devils Thumb hike was very unique and allowed me to see something very few people get to see… I’ll talk about this next!
Devils Thumb Hike Trailhead to Mirror Lake
The Devil’s Thumb hike trailhead starts from no other than Banff’s incredible Lake Louise. You’ll want to hike right around the lake and find the Lake Agnes trail (not the Lakeside/Plain of 6 trail).
You’ll quickly start gaining gentle elevation as you follow a few switchbacks up the mountain. Within 3km you’ll reach Mirror Lake!
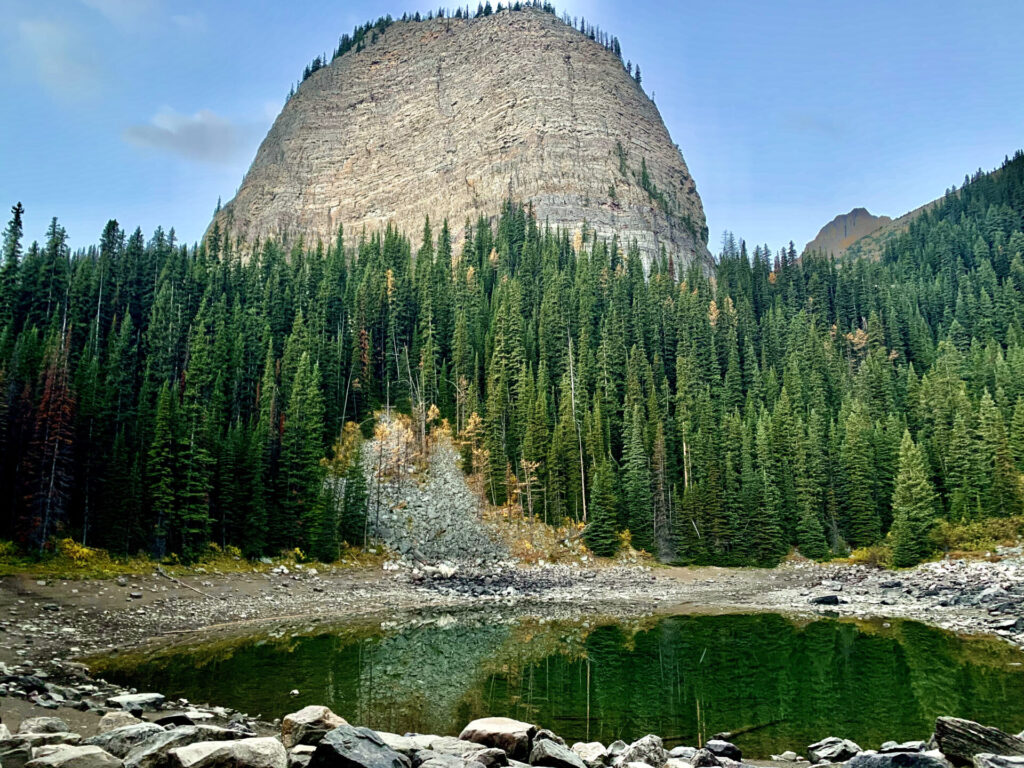
From Mirror Lake you have the option to hike around either side of the lake to get to Lake Agnes. I hiked right, so I’ll talk about that.
Little Beehive Lookout
After taking a right at Mirror Lake you’ll quickly arrive at a fork in the trail. Hiking left at the fork takes you directly to the teahouse, but hiking right gives you the chance to see the Little Beehive which I highly recommend checking out (this is a great place for sunrise).
Lake Agnes
If you decide to go to the Little Beehive, take another right at the next fork and continue walking until you reach the viewpoint – you’ll know it when you see it. Afterwards hike back the same way you came and keep walking straight until you reach Lake Agnes.
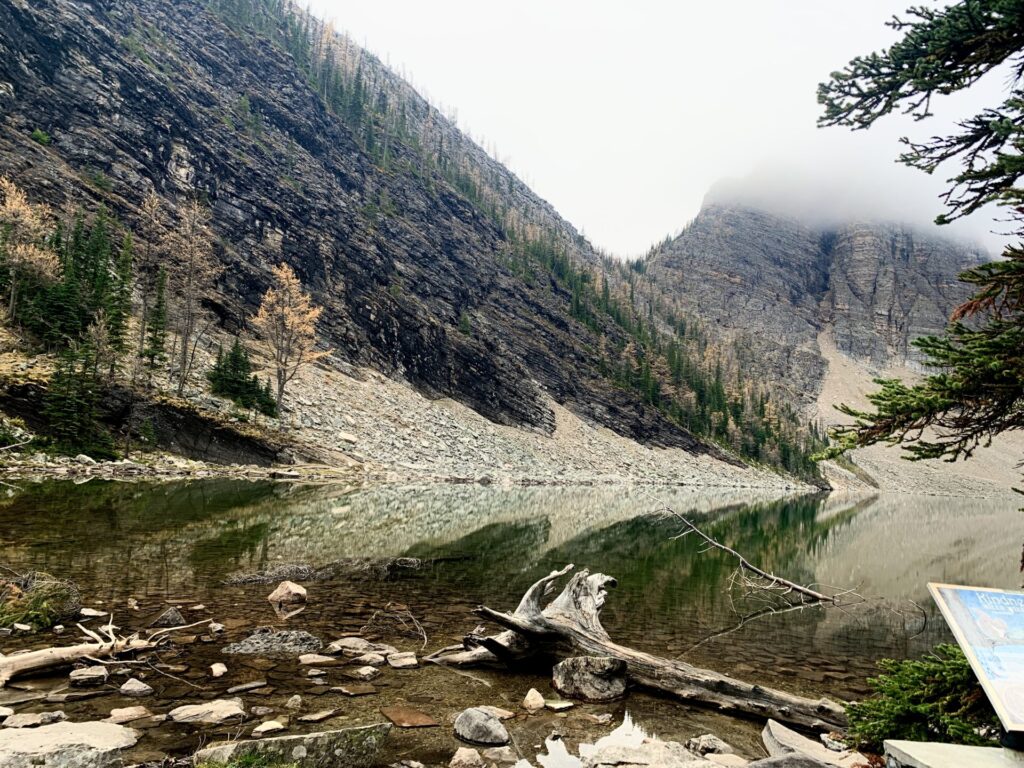
Lake Agnes is home to the Lake Agnes teahouse which serves tasty treats and over 100 types of tea! This is the perfect place to grab breakfast or take a rest before continuing on to Devils Thumb. Just watch out for the killer birds – they’re hungry!
After you’re done chilling’ at Lake Agnes you’ll want to continue hiking around the right side of the lake. You’ll be walking all the way around the lake until you see switchbacks. When you see these start hiking up!
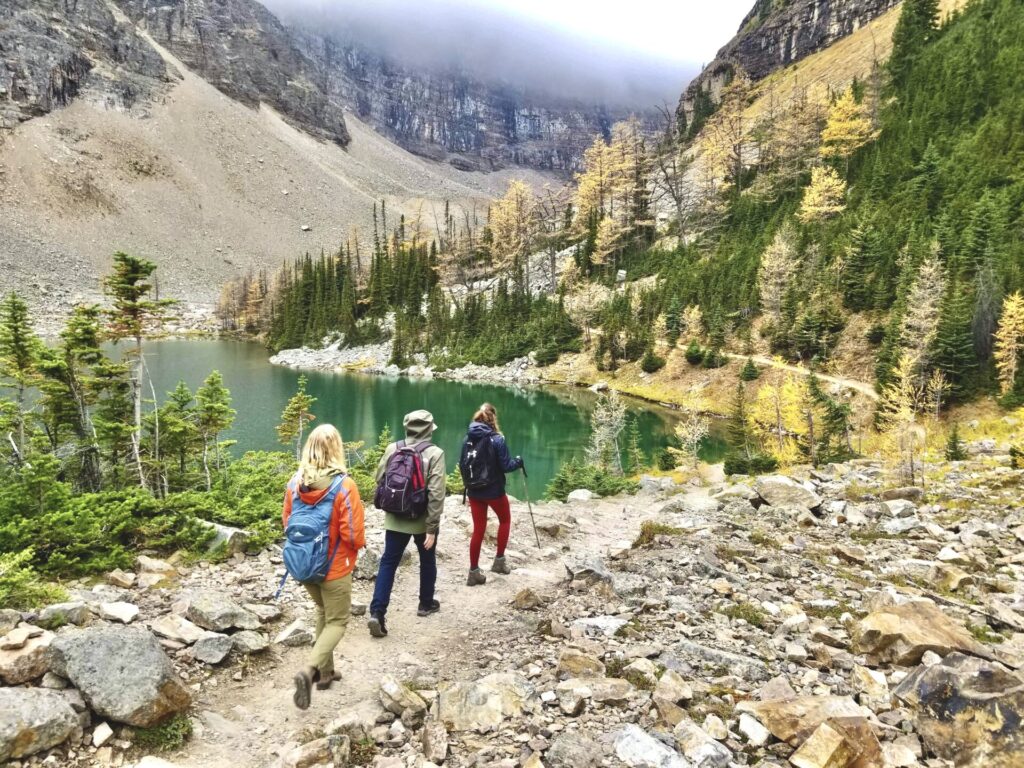
Once you reach the top of the switchbacks you’ll come to a split in the trail. Continuing straight takes you to the Plain of 6 glaciers, hiking left takes you to the Big Beehive, and hiking right takes you to Devils Thumb. **Note there is no sign marking Devils Thumb in efforts to keep tourists off this trail.
Before you head up to Devils Thumb you might as well hike left to see the Big Beehive Lookout as well!
Big Beehive Lookout
The Big Beehive Lookout is very similar to that of the Little Beehive, but it’s from a higher elevation and it’s at the back of Lake Louise rather than the side of the lake.
Connect via socials:
STAY CONNECTED
Sign up for emails to receive a 25% discount on my travel maps.
Taylor ♡
Devils Thumb – Banff Scrambles
Pro tip – bring trekking poles when you complete any of the Banff scrambles, including the Devils Thumb hike. Poles will help you as you scramble up Devils Thumb and as you make the descent.
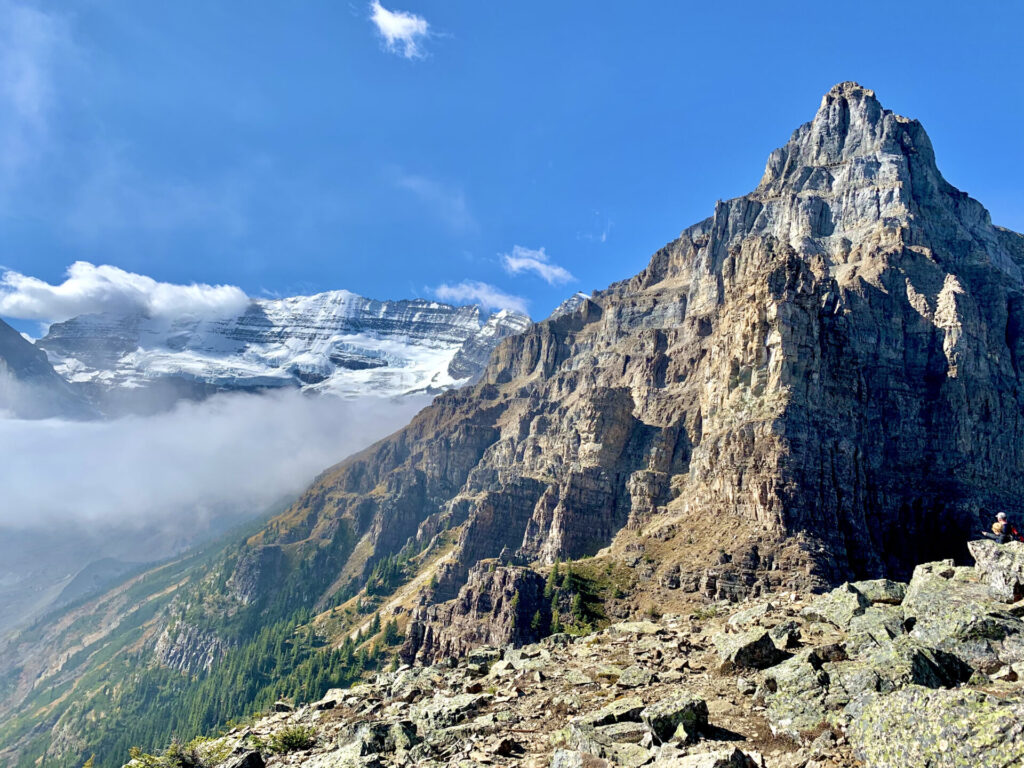
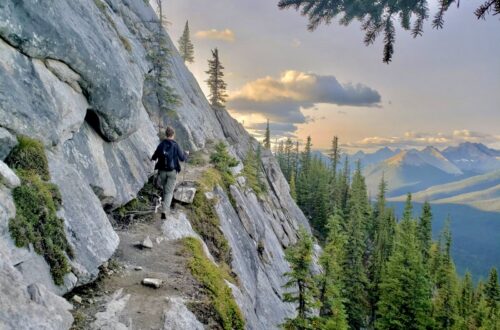
When you’re ready to trek up Devils Thumb, head back and start climbing the unmarked trail. Initially you’ll be trekking alongside a cliff, then you’ll reach an extremely steep section where you’ll most likely need to use your hands and feet to help navigate, making this one of the Banff scrambles.

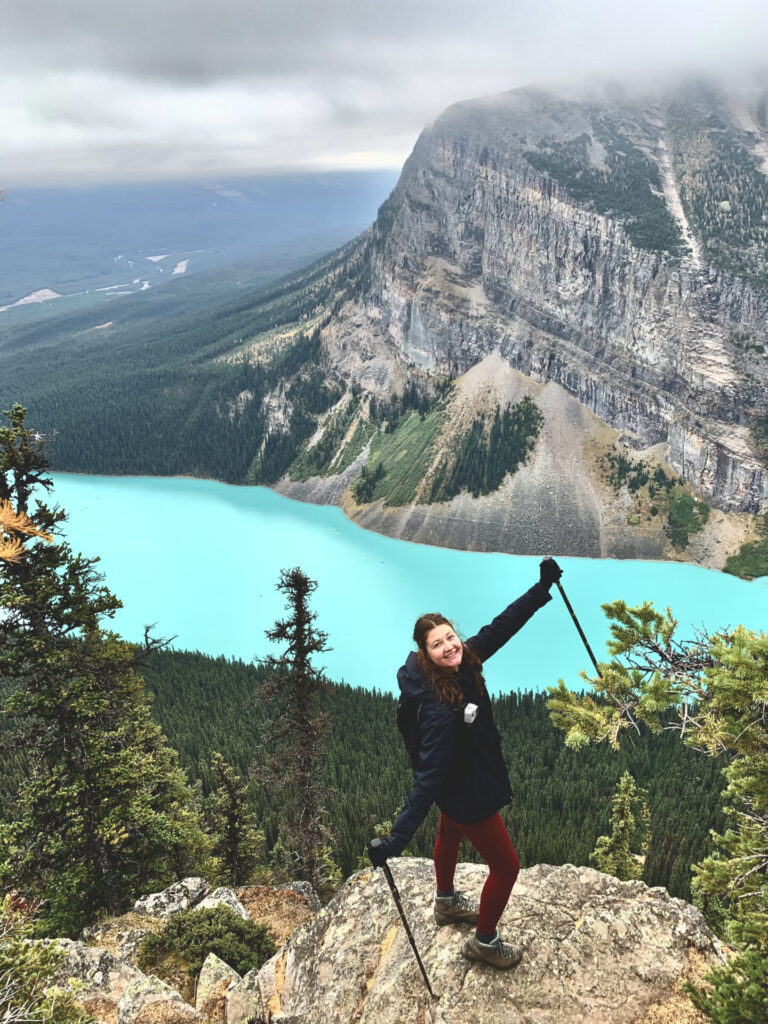
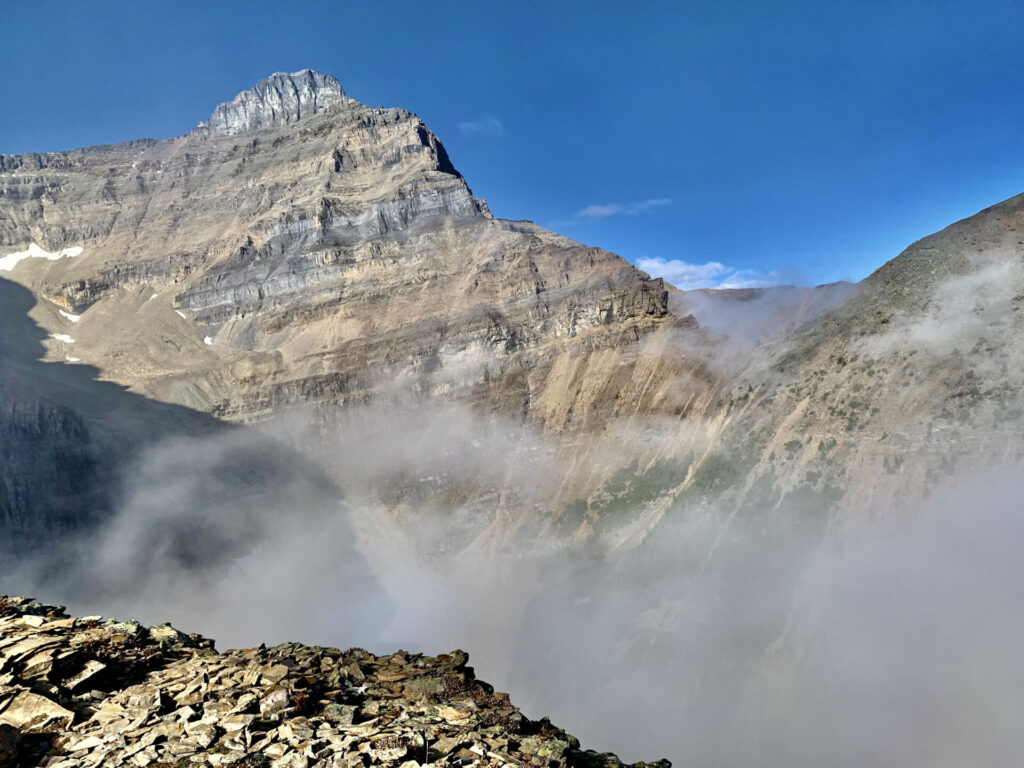
When I completed the Devils Thumb hike there was an extremely low cloud cover, which meant I actually got to scramble up Devils Thumb IN a cloud!
This was super cool, but also super spooky because my hiking partners and I couldn’t see more than 15 feet in front of us; the trail had worse visibility the further we climbed. We were following the trail as best we could, but it was quite difficult because we couldn’t actually see where the trail was going.
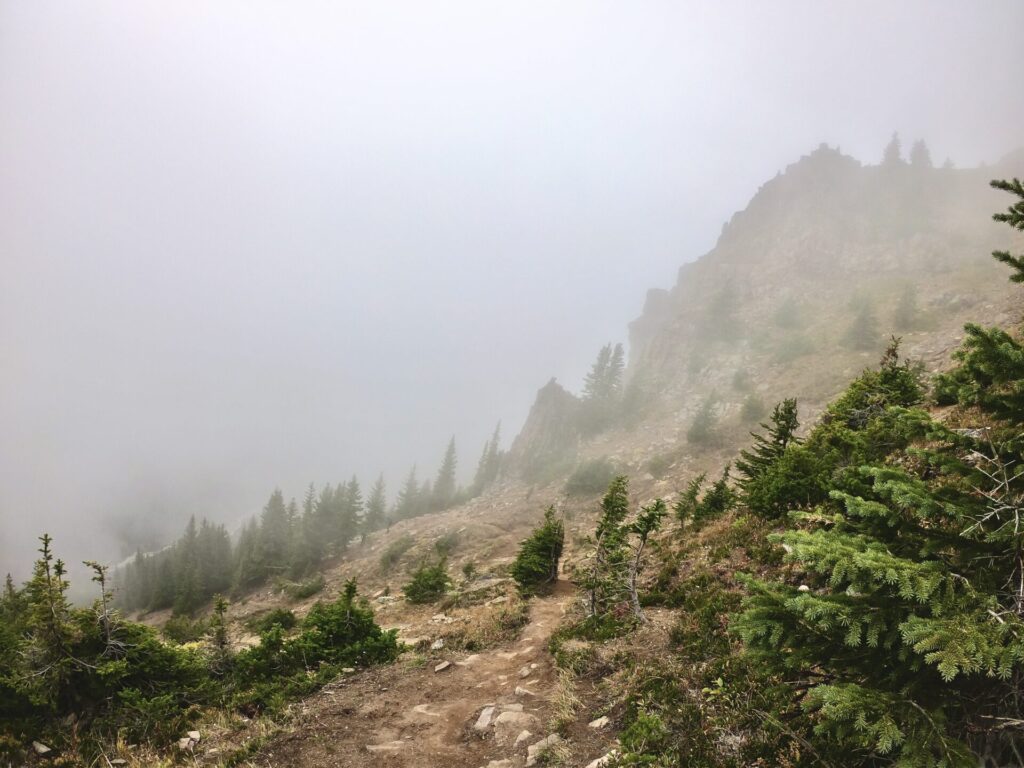
This part of the Devils Thumb hike is steep and has some loose rock/dirt along the way. It’s strenuous, but only lasts for a few hundred meters. After this you’ll have a quick scramble up some larger rocks and you’ll reach the Devils Thumb summit!
Devils Thumb Summit
When my hiking partners and I finally reached the top we could legitimately see nothing. It was like staring into the abyss. I had seen photos of Devil’s Thumb before so I knew the view was amazing. I decided it was best to wait it out and hope the clouds cleared.
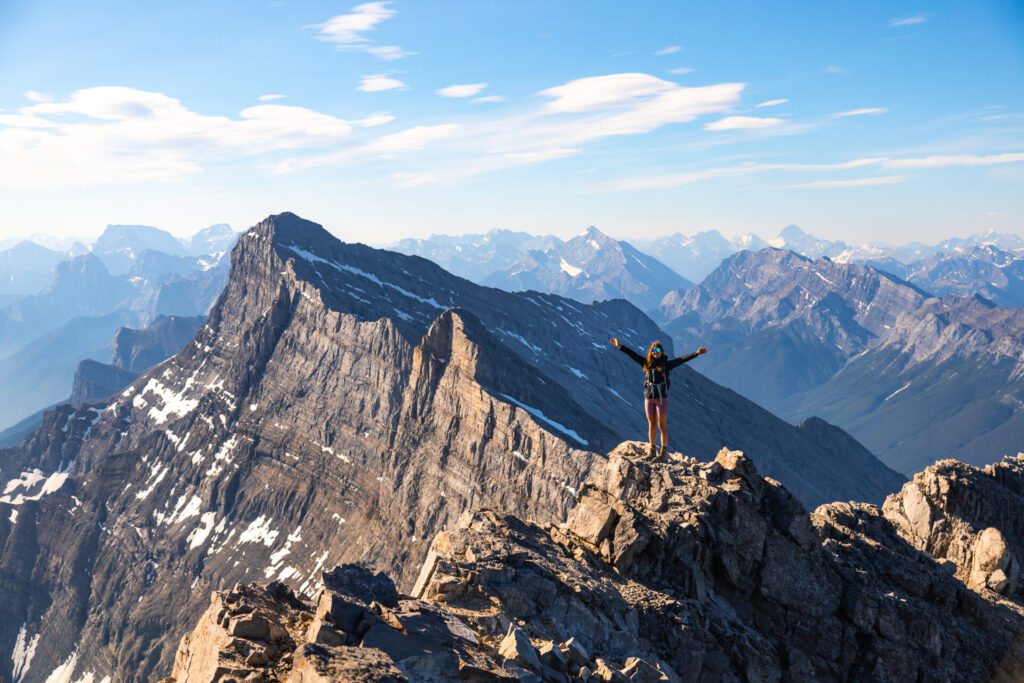
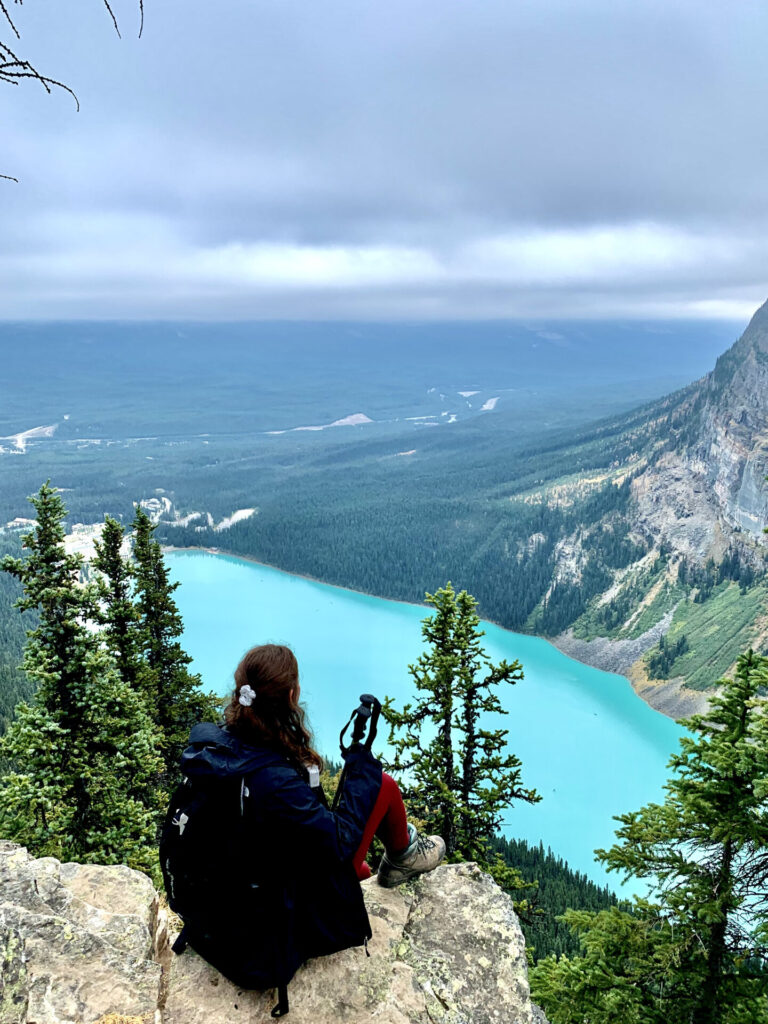
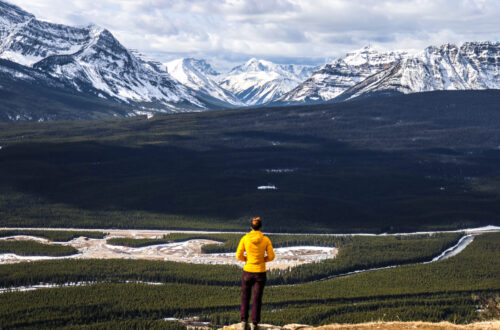
Over the span of an hour, we slowllllly watched the clouds dissipate, which ended up making for the most incredible view! We saw…
An inversion!!! An inversion occurs when the normal temperature distribution of air is flipped (or inverted). In this scenario cold air is trapped underneath the clouds whereas warm air is overtop. This makes for a clearly defined layer of low-lying clouds.
I was literally sitting on-par with the clouds!
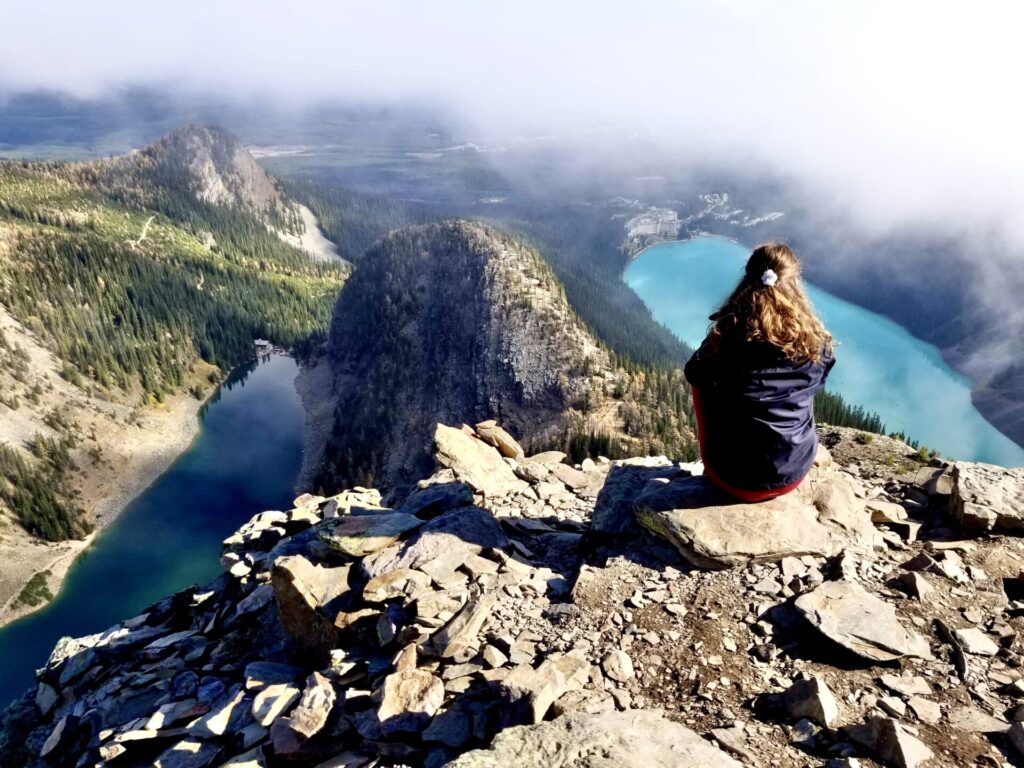
Devils Thumb summit is home to beautiful overhead views of some of Banff’s most famous lakes. This is the perfect place to look at both lakes from above and take in the famous Lake Louise scenery.
Tips For A Successful Trip
- It’s always a good idea to start early when completing one of the Banff scrambles. Start the Devils Thumb hike early to avoid the crowds and catch sunrise!
- If you’re coming from Banff, take the Roam bus rather than driving to avoid parking
- Bring trekking poles, they help immensely on the scramble up Devil’s Thumb and the descent
- Have breakfast at the Lake Agnes teahouse or at least stop for a rest and enjoy a homemade treat!
Looking for More Banff Adventures?
Banff is an adventurer’s & view seeker’s paradise. If you’re planning a trip to this gorgeous Canadian Park, you can start with this step-by-step guide designed to help you plan the perfect Banff itinerary.
Alternatively, check out this page with all my Banff resources.
Banff Hiking Resources
On this page you can find all my Banff trail guides. A few signature hikes in Banff are these easy trails, Tunnel Mountain, Sulphur Mountain, Lake Louise, and Johnston Canyon. If you’re only in Banff for a few days, start with those!
A few of my personal favourite hikes in Banff are Mount Bourgeau, Sentinel Pass, Tower of Babel, the Banff Skoki Loop, and the Sulphur Mountain Traverse Route.
More Banff Resources you Might Find Interesting:
Want to continue your Canadian Rockies expedition outside of Banff? Check out my trail guides & travel resources for British Columbia and Kananaskis Country as well as Jasper, Waterton, Yoho, and Kootenay National Parks 🙂
Happy adventuring!
Taylor ♡
Like This Post?
Share with friends or save it for later!

About the Author
HI, I’m Taylor – the voice behind The Holistic Backpacker.
After moving to Banff National Park in 2020 I became an outdoor adventure enthusiast and vowed to never stop exploring.
I now spend my days travelling the world, climbing mountains, and spending nights under the stars in the Canadian Rockies backcountry.
I created The Holistic Backpacker so I could share my adventures and help connect people like you with the same amazing experiences.


2 Comments
Carly Hill
Hey! I saw your comment on AllTrails, about having wrote a blog about Little Beehive with photos, directons, and what to expect, but your info on Little Beehive specifically is extremely limited in this post, if this is even the right post? The link you shared just takes you to your blog, and this was all that came up from seraching your blog for “Little Beehive”
theholisticbackpacker
Hi Carly! This is specifically my trail guide for Devils Thumb which is a scramble overlooking Lake Louise. This post will definitely help you out more! https://theholisticbackpacker.com/lake-louise-circuit-hike-everything-at-lake-louise/
I talk about all the interconnecting trails at Lake Louise (how you can hike everything in 1 day), but I go more in depth about the stats, specs, and directions for Little Beehive. Enjoy your hike, Little Beehive is a beautiful one!!!