
Mist Mountain Hot Springs via Eagle Ridge | A HUGE Misadventure
The scramble up Eagle Ridge to the Mist Mountain hot springs in Kananaskis is one of the greatest adventures in the Canadian Rockies; or in my case, the biggest misadventure.
My day hiking to the Mist Mountain hot springs looked a biiiiit different than the average hiker’s experience. I’ll tell you all about my misadventure next, but first I’ll go over everything you need to know in order to find these natural hot springs, tips for visiting, recommendations for a successful hike, and of course provide lots of great photos.
Looking for more hikes in Kananaskis Country? Click here.
Now, let’s go hiking!
Skip Ahead:
- How to get to the Mist Mountain trailhead
- About the Eagle Ridge trail
- Hiking to Mist Mountain Springs via Eagle Ridge
- Recommended hiking gear
- What to wear hiking
- Where to stay in Kananaskis
I have affiliate links in this post which means when you book a hotel or purchase a product, I may make a small commission ~ at no additional cost to you (full disclosure). These funds go back into The Holistic Backpacker and help me create more free content like this!
Thank you for supporting my work!
How to get to the Mist Mountain Trailhead
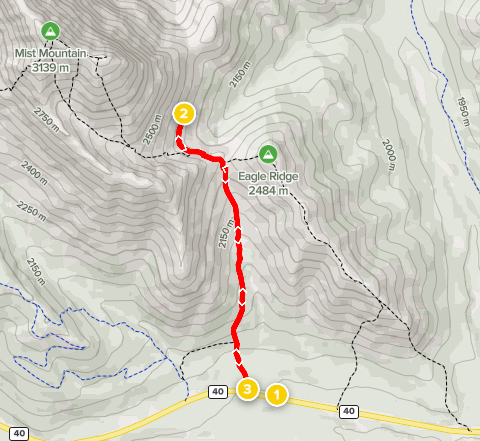
There are 2 trailheads marked on this map; Mist Mountain trailhead or the much lesser travelled Eagle Ridge trailhead.
Eagle Ridge and Mist Mountain hot springs are located in Elbow-Sheep Wildland; one of the Provincial Parks in Kananaskis Country. This hike is “deep” in Kananaskis – the drive takes around 2 hours from Banff and the same from Calgary.
There’s no bus or shuttle that goes through Kananaskis, so if you don’t have a car you’ll need to rent one to access the Mist Mountain trailhead.
Best Alberta Car Rental
Most of Alberta is inaccessible via public transportation. I 100% recommend renting a car here so you can fully enjoy all the mountains, lakes, and badlands.
My favourite Alberta car rental tool is this site. It compares all the local car rental companies to ensure you’re getting the best rate.
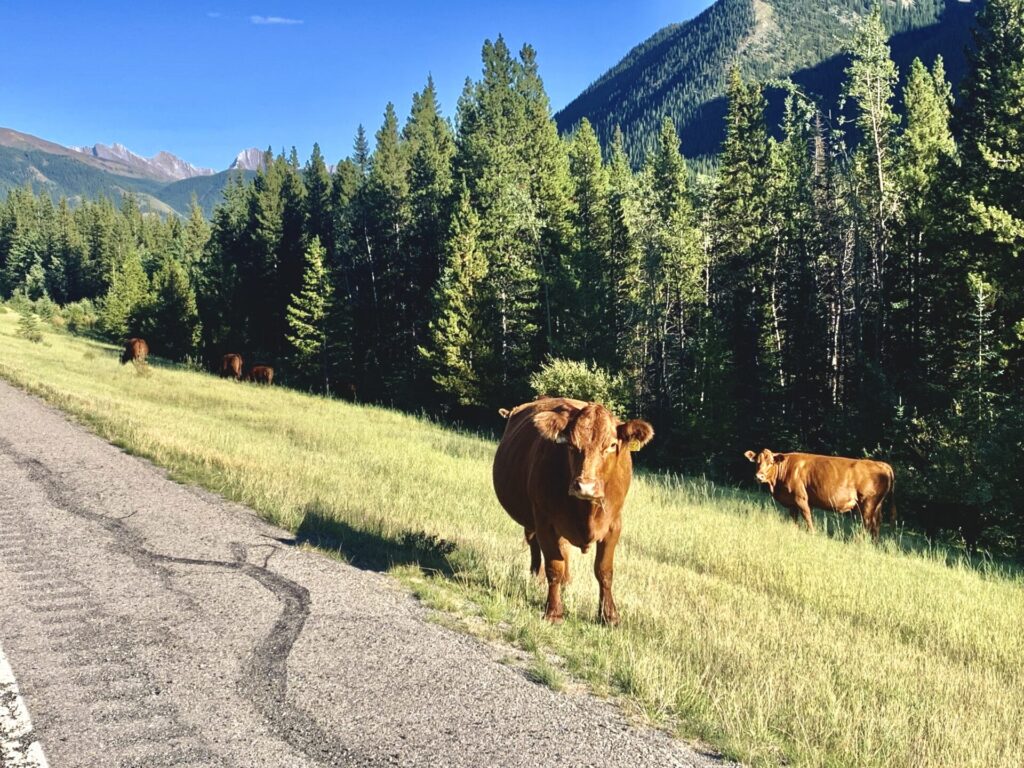
Something unique to look out for on the way are wild cattle. You’ll find these cuties roaming along Highway 40 frequently within the Elbow-Sheep region!
Note that you’ll need a Kananaskis conservation pass to enter Kananaskis and that there’s a seasonal road closure from December to mid June.
Where to Park
If you’re utilizing the Mist Mountain trail, there’s a pull-off to the left next to the trailhead (road-style parking). If you’re utilizing the Eagle Ridge trail, you’ll need to park at the Mist Creek Provincial Recreation Area which is a little further down the road on the right.
About the Eagle Ridge Trail
- Distance: 6.8km
- Elevation gain: 647m
- Rated: hard
- Type of trail: point to point
- Estimated time: Alltrails says 3hrs, but if you take Eagle Ridge plan for significantly more time
Typically, hikers will utilize the Mist Mountain trail to access the Mist Mountain Hot Springs. I decided to make this trail more of a challenge and ascended via the Eagle Ridge route – I’d 100% recommend NOT doing this.
You can also summit Mist Mountain – here’s the Alltrails map.
About the Eagle Ridge Trail
The Eagle Ridge trail in Kananaskis is essentially a massive bushwhacking-fest for the first kilometre. The map above says to start this point to point trail at the Mist Mountain trailhead, but I’d strongly advise against it. The ascent/decent on Eagle Ridge is extremely steep, to the point where I’d think it’d be very dangerous to descend. So, if you’re attempting Eagle Ridge, start from the Eagle Ridge trailhead.
After the ascent up Eagle Ridge, users can expect to traverse multiple peaks – this is totally one of those “hikes that never end.” Once you reach the end of the “unnamed” portion of Eagle Ridge, you’ll have to do a quick descent and make your way over to the Mist Mountain hot springs.
Note that significant route finding skills are required for Eagle Ridge and I’d only recommend taking this route if you’re a very experienced adventurer. A satellite communication device would be a great piece of safety equipment for this hike.
About the Mist Mountain Hot Springs Trail
The Mist Mountain hot springs trail is highly trafficked. The trail starts out in a wooded area, then opens up to a beautiful basin between Mist Mountain and Eagle Ridge. After trekking through the basin, users will reach a smaller “ridge” which connects Eagle Ridge and Mist Mountain. At this point, users must hike over the smaller ridge, then across a mountain stream and hike north for a short while more until they reach the hot springs.
Helpful Information
- Both of these trails are best hiked from June to October, although I recommend waiting until later in the season (late July/early August).
- If you attempt Eagle Ridge, the hike is much longer and more technical. Make sure you’re prepared with lots of snacks and water; I always bring 2L in my Hydrapak.
- Hike very early in the day or late (for sunset) to avoid the crowds at the Mist Mountain hot springs.
- The Eagle Ridge portion of the hike is essentially untravelled; you won’t come across anyone on the trail. Make sure you’re prepared and take safety precautions (bear spray, satellite communication device, and a preloaded Alltrails map)!
- Dogs are not allowed on this trail.
- Continue reading for more tips on visiting the Mist Mountain hot springs.
Connect via socials:
STAY CONNECTED
Sign up for emails to receive a 25% discount on my travel maps.
Taylor ♡
Hiking to Mist Mountain Hot Springs
Eagle Ridge Trailhead: Bushwhacking
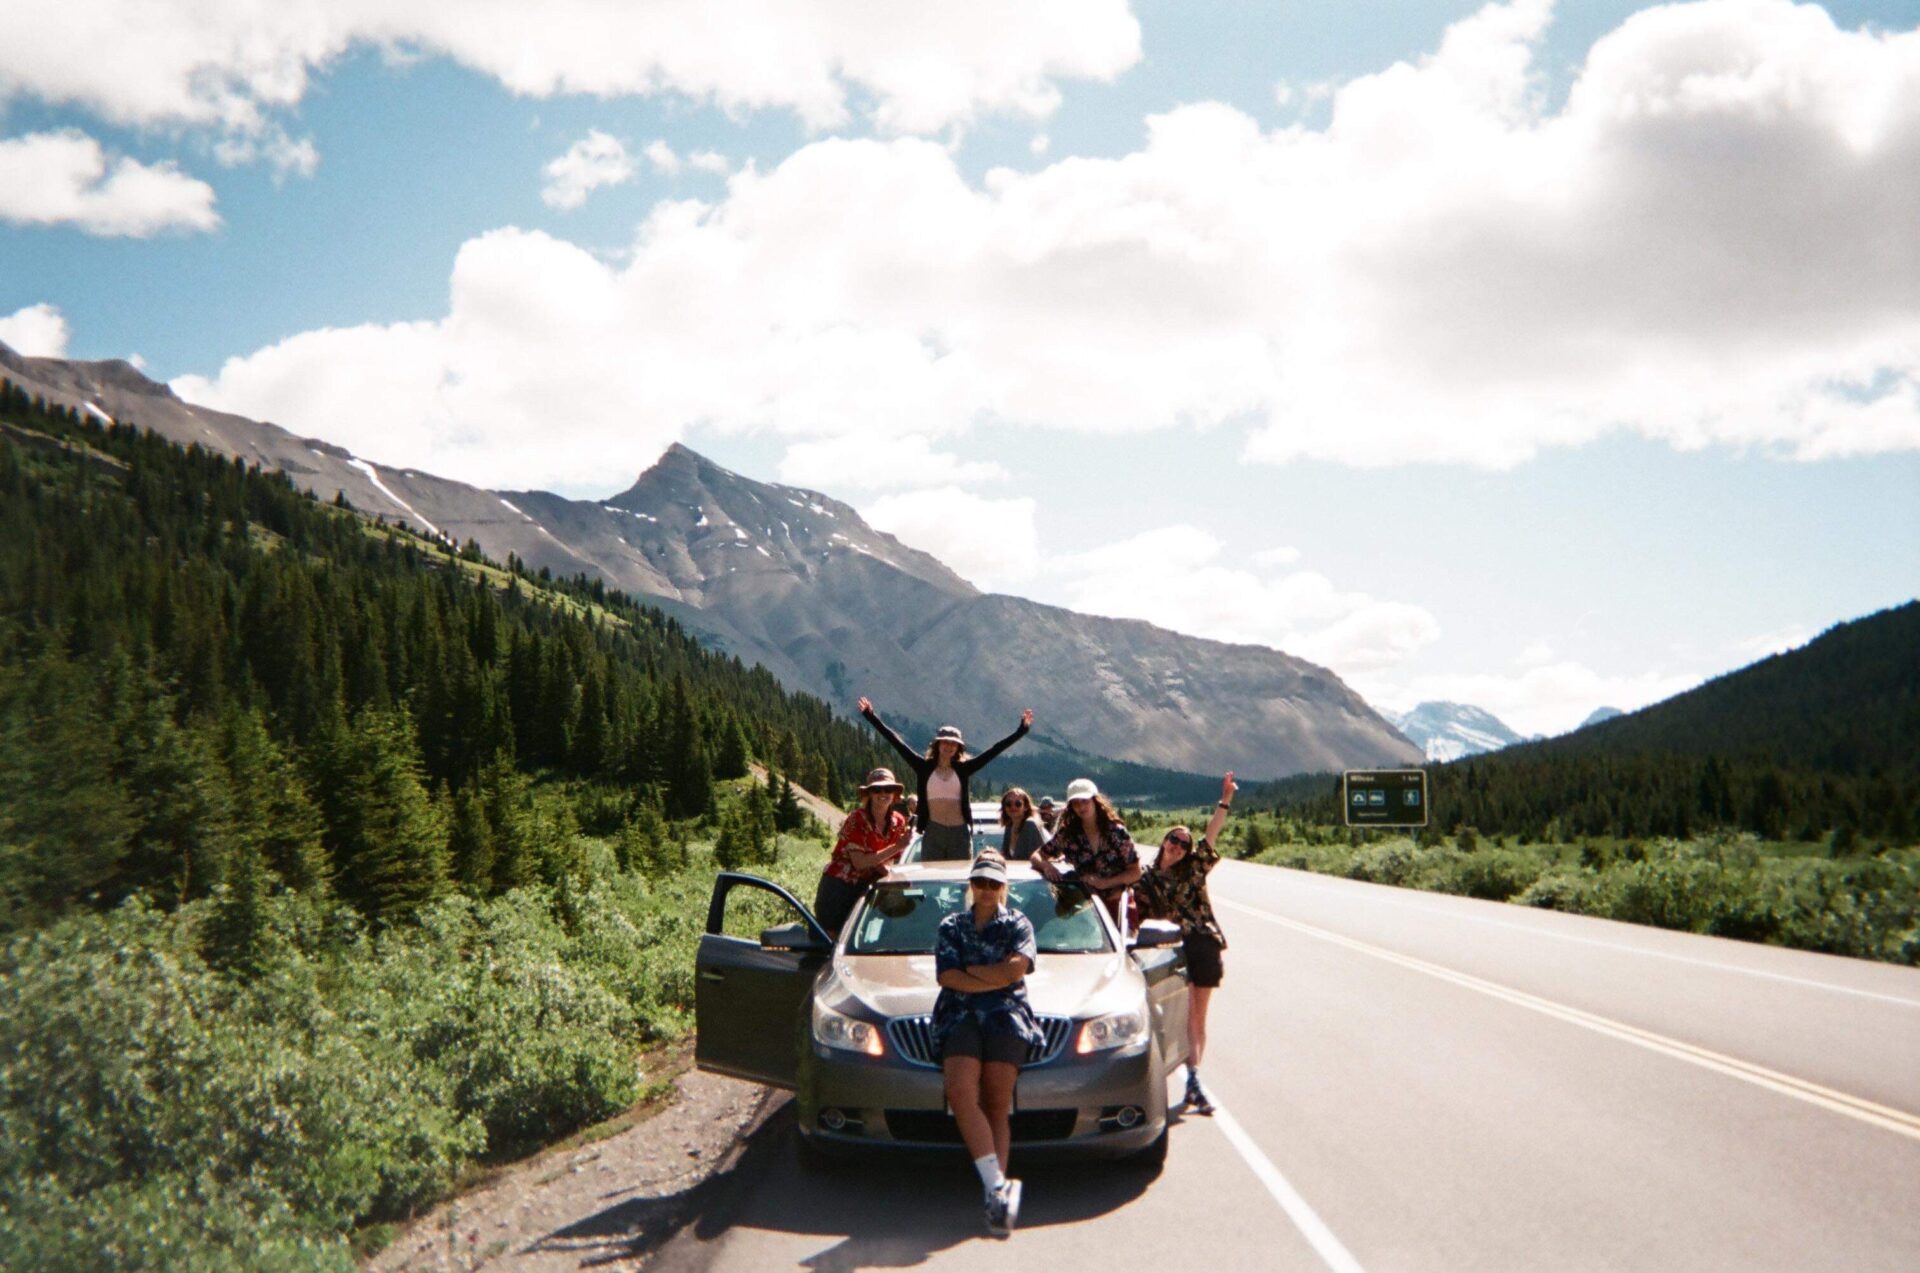
My friend and I ended up parking a couple kilometres down the road at the Mist Creek day use area. From here, we started walking along highway 40 (Kananaskis Way) until we “kinda sorta” found the Eagle Ridge trailhead. And by trailhead I mean we just entered the forest and started bushwhacking – this is where the misadventure began.
From my personal experience I wasn’t able to find a trail. I saw a few trail markers along the way and found a “path” which I think was actually just an animal trail. But, I was more or less left aimlessly bushwhacking, trying to follow my satellite dot on the Alltrails map until I reached Eagle Ridge.
In the bushwhacking section for Eagle Ridge, try to hike northwest (left and back away from the highway). Luckily my friend and I were feeling adventurous this day, however we did contemplate turning back on multiple occasions.
We made it through and found Eagle Ridge, but we did gain lots of scratches and bug bites along the way.
Ascending Eagle Ridge
You’ll know you’ve found Eagle Ridge if and when you see a STEEP and grassy mountain straight ahead. I’m not kidding, climbing (I’m going to use the word climbing rather than hiking) up Eagle Ridge was easily the steepest terrain I’ve navigated – this was even steeper than my climb up from the valley floor of Pocaterra Ridge; another misadventure.
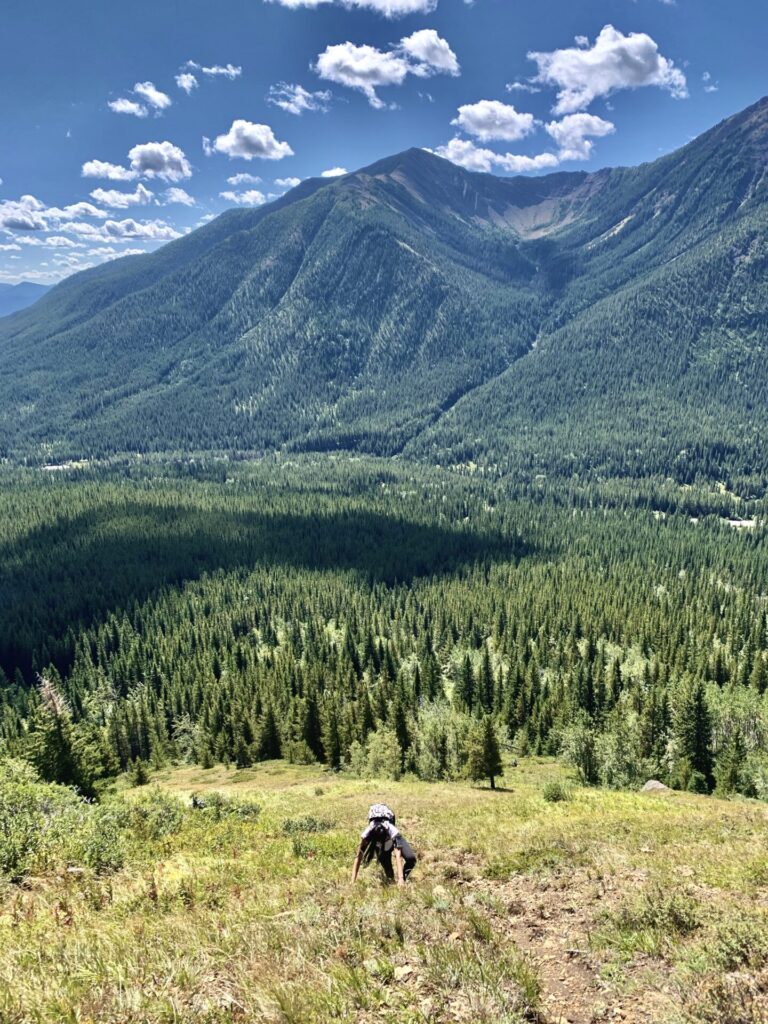
The climb up Eagle Ridge is what qualifies this hike as a scramble. I was on my hands and knees crawling, grabbing onto long grass and the odd plant to maintain my balance and help pull myself up the mountain.
More: Scrambling Trail Guides
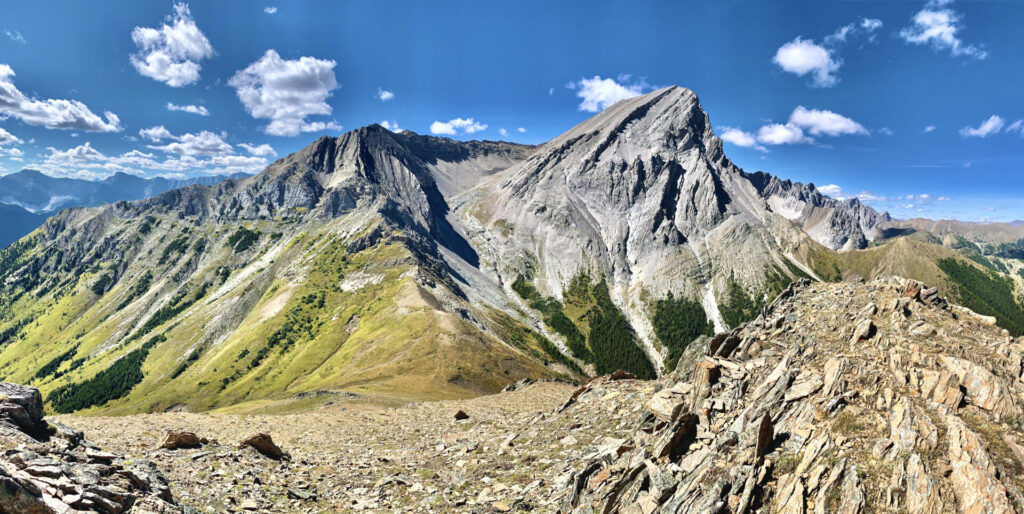
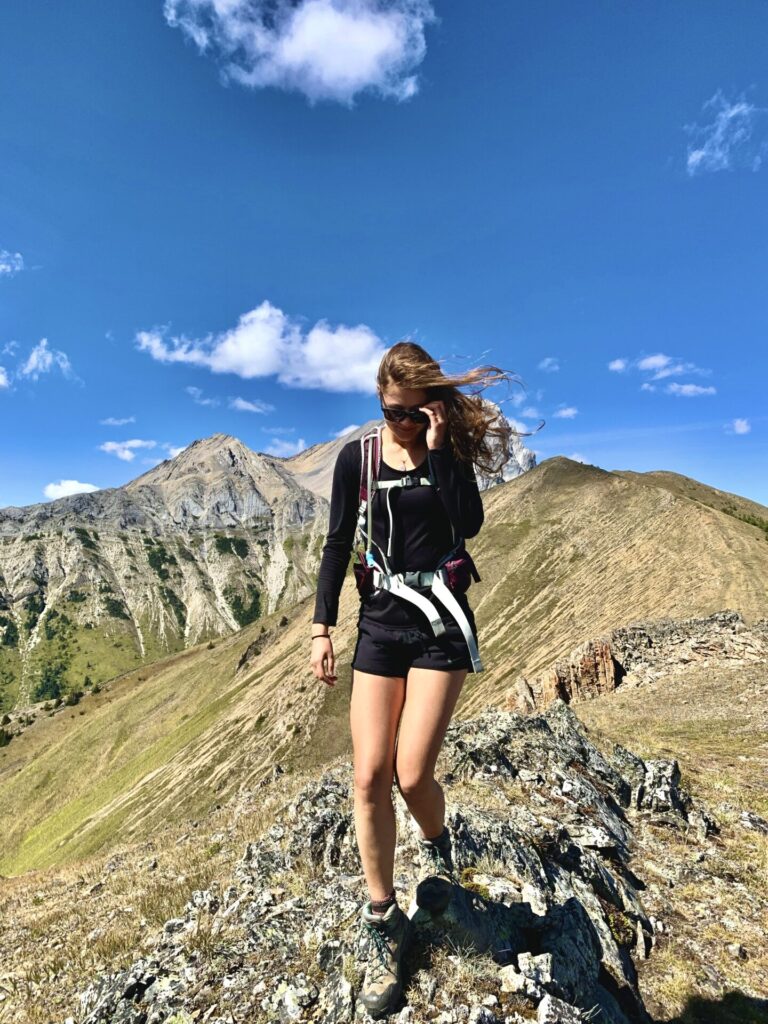
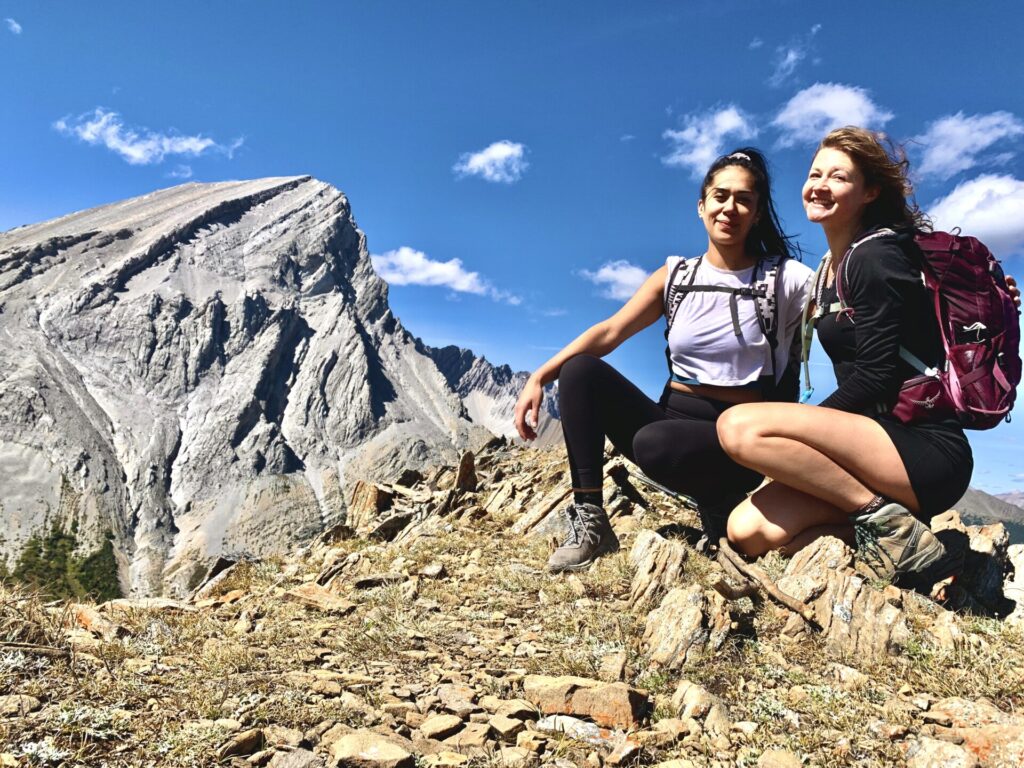
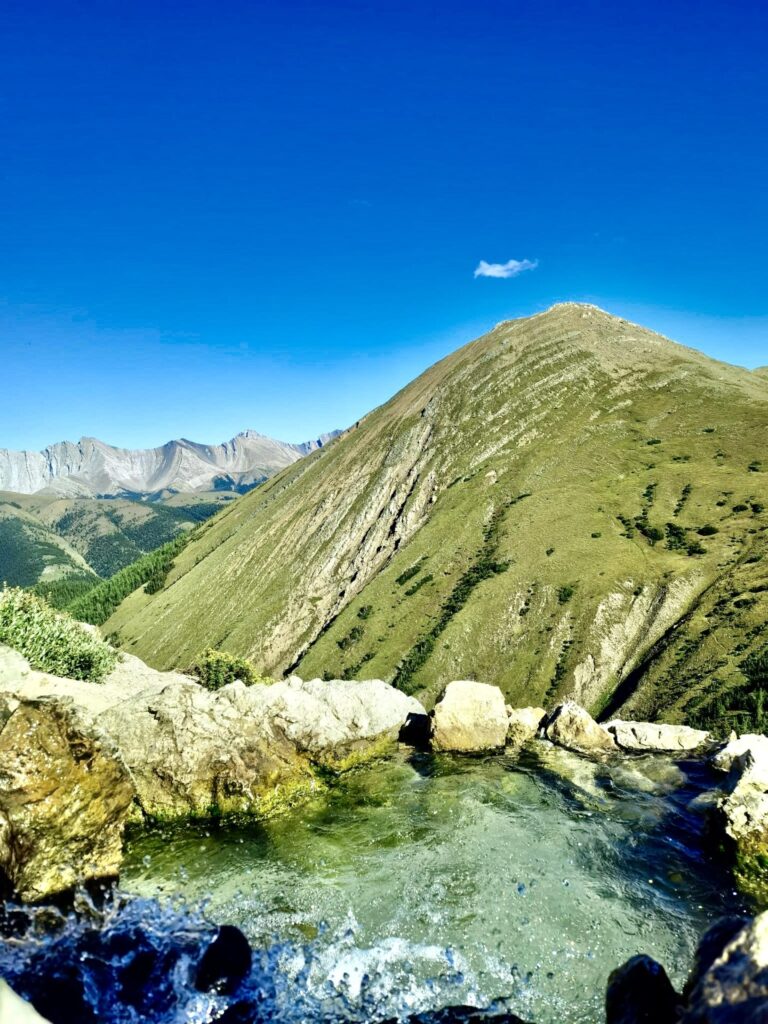
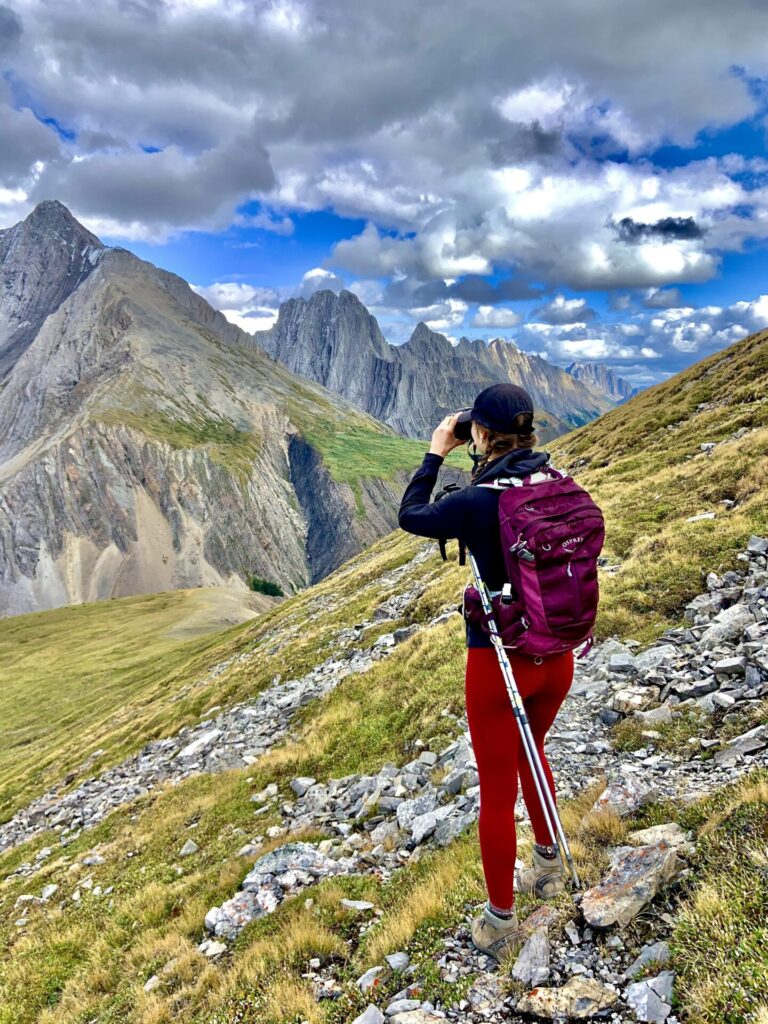
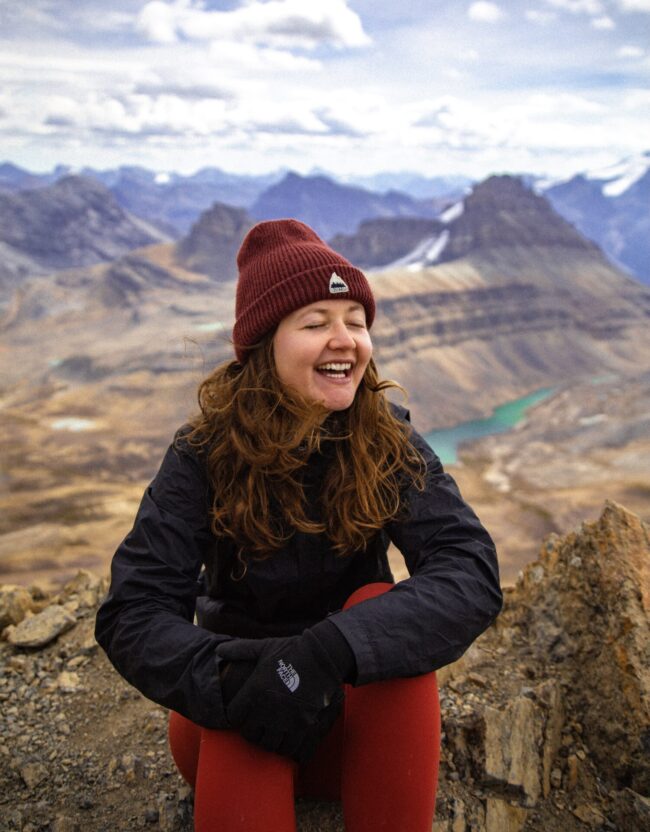
Once you reach the ridge though, the views are absolutely wild! Hiking forward you’ll have a direct view of Mist Mountain’s peak and behind you you’ll have a view down the Kananaskis Valley. You’ll find the ridge is super windy though, so make sure you dress appropriately. The day I hiked was warm and sunny, however we had all the extra layers and shells just in case the weather turned on us.
Here are the jackets I recommend taking on every Rocky Mountain hike.
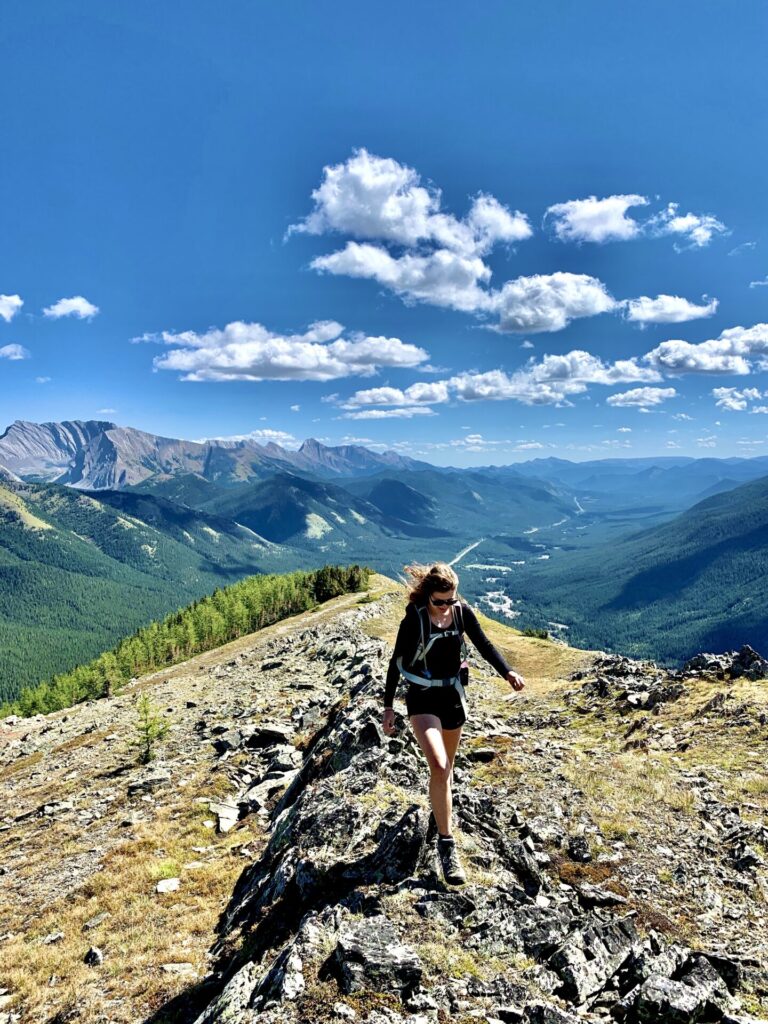
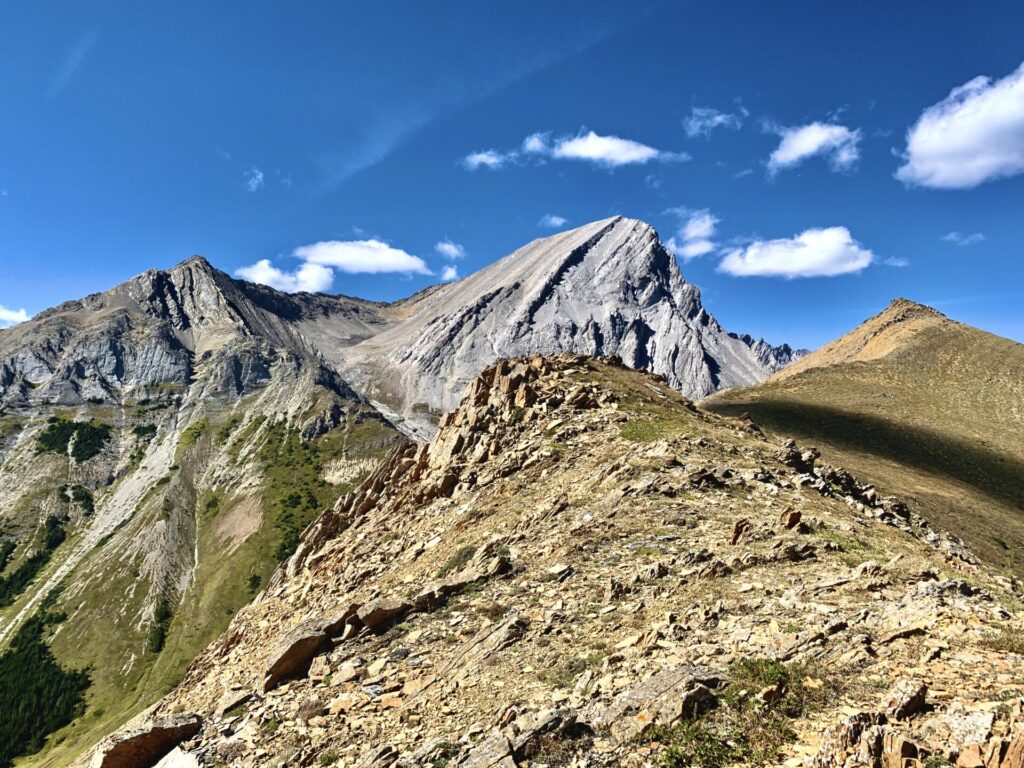
Trekking Across Eagle Ridge’s Peaks
Eagle Ridge should really be called “the hike that never ends,” because oh my god this hike never ends. Since I hadn’t planned on taking the Eagle Ridge route I didn’t look into this route too much. But apparently there are 3 minor peaks you’ll need to cross over before finding the Mist Mountain hot springs – who knew!
Major as in a decent amount of elevation gain – there isn’t anything technical about this hike (besides the scramble up Eagle Ridge).
Minus the crazy wind, I actually really enjoyed trekking across Eagle Ridge. Ridge walks have become one of my favourite types of hikes because they allow you to stay on the summit and enjoy the views for a longer amount of time.
Here are a few trail guides for my favourite ridge walks in Banff/Kananaskis: Pocaterra Ridge, Opal Ridge, Sarrail Ridge, Sulphur Mountain Traverse Route, Tent Ridge, and Wasootch Ridge.
Where to Find the Mist Mountain Hot Springs
After the third peak, you’ll need to descend Eagle Ridge. The descent is a little steep – as per the whole steep theme of this hike – but it’s totally manageable. Take your time and bring trekking poles; they’re super helpful on this hike in particular.
Once you reach the smaller “ridge” connecting Eagle Ridge and Mist Mountain, hike down a bit on the side facing north (hiker’s right). The map below outlines the Mist Mountain trail (red) as well as the Eagle Ridge trail (black dotted line) to give you more of an idea where to go.
^I give you this advice now, but at the time my AllTrails map wasn’t downloaded so I had no idea where the Mist Mountain hot springs actually were. I was totally guessing.
You’ll clearly see a trail and how the trail follows across the little ridge which connects to the bottom half of Mist Mountain itself. Along the way you can expect to cross a mountain stream; there’ll be less water in the stream the longer you wait to hike (late July/August rather than early June). You’ll also hike through a little forested section right before you find the hot springs.
The last little bit can get steep, so prepare to take your time, use a few hand holds, and potentially do some butt scootin’.
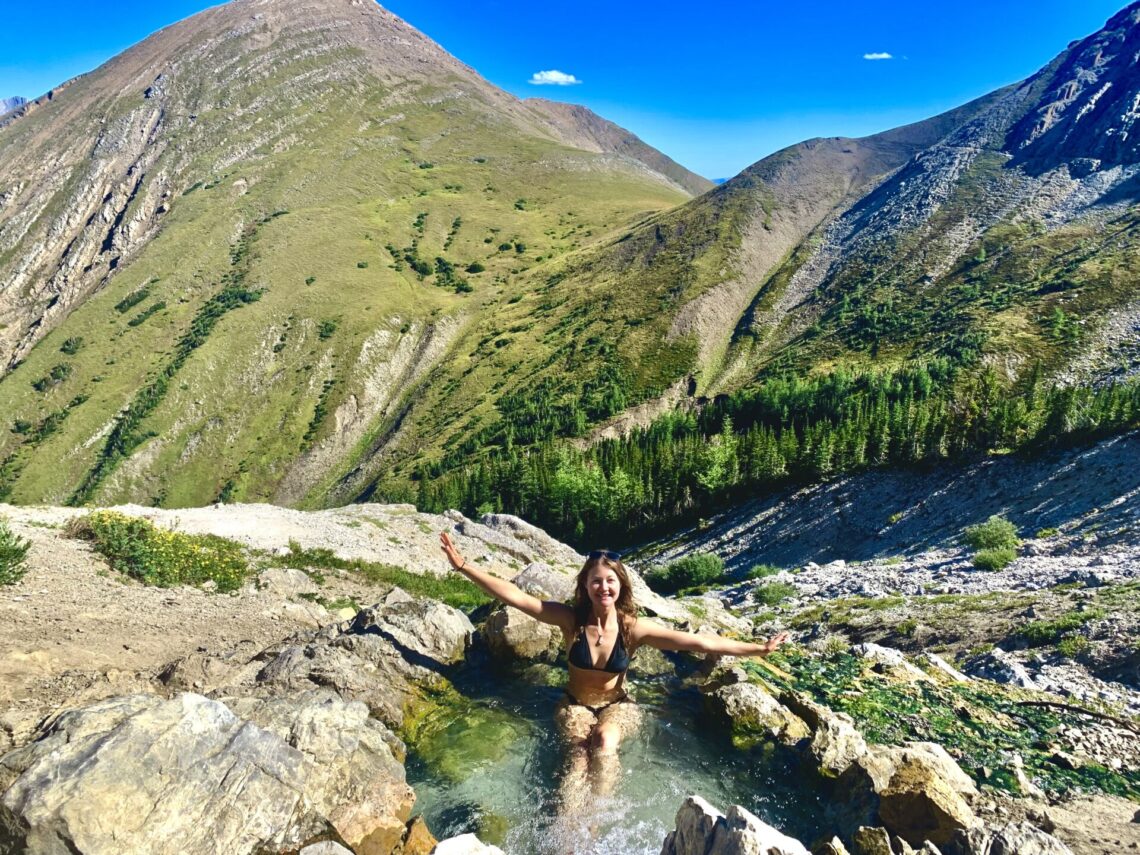
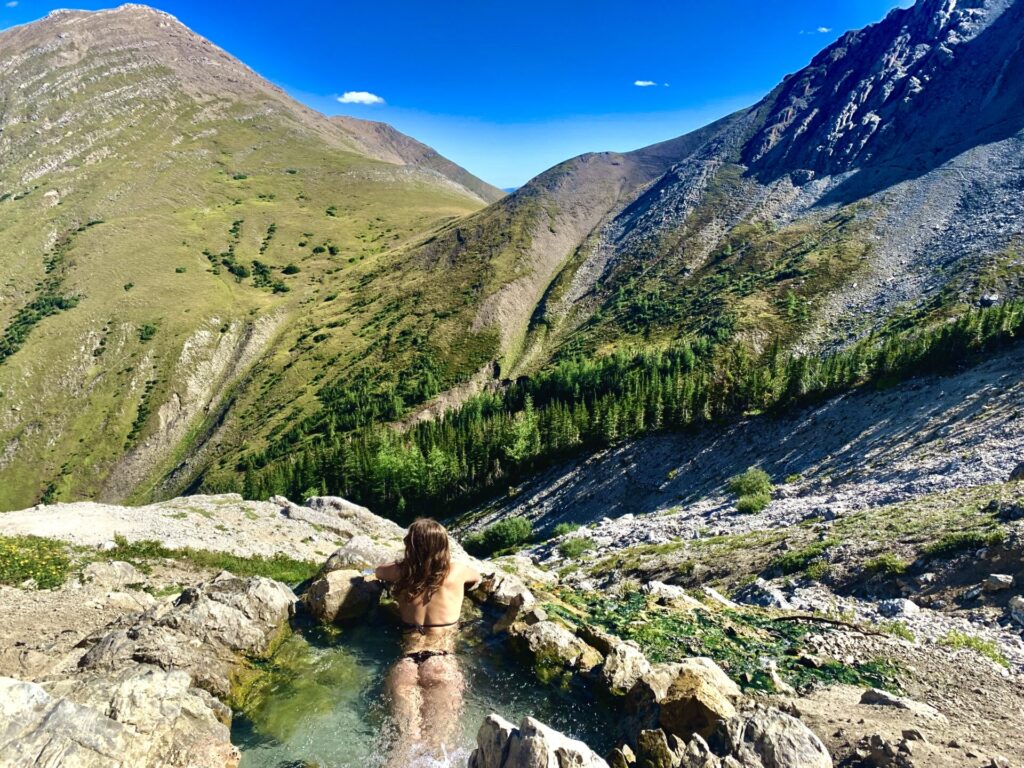
Soon after trekking through the woods you’ll find the Mist Mountain hot springs! I’m going to quickly go over options for the return hike next, then give you alllll the good tips for visiting the Mist Mountain hot springs.
Return Hike: Mist Mountain Trail
ON the descent we took the regular Mist Mountain route.

For those looking to skip Eagle ridge and just hike Mist Mountain… This info is for you.
The Mist Mountain trailhead starts out in a wooded area, then enters an incredible basin squished between Mist Mountain and Eagle Ridge. The hike is considered “hard,” however I’d label it as more moderate. There isn’t anything technical, no route finding skills are required, and the trail is well-trafficked. I’d say anyone with a good level of fitness (regardless of age) would be able to hike this trail.
More Misadventure
Unfortunately, the Mist Mountain trail let out much further away from our parking spot at the Mist Creek day use area, meaning we had a loooong hike back to the car. As per the whole misadventure thing, I thought it would be a good idea to hitchhike. We’d been hiking for 9 hours at this point and the sun was starting to disappear, so we needed to figure something out – and hiking wasn’t it.
SO I did that whole put my finger out thing like they do in movies and within a couple minutes a truck picked us up. I instantly felt fear and regret as soon as the truck pulled over – this was my first time hitchhiking and all I could think was “serial killer serial killer serial killer.” Luckily, the man wasn’t a serial killer and he safely returned us back to my car.
Upon returning to my car, I found the battery to be dead. My spirit guides must have been looking down on me that day though because just as I figured out my battery was dead, a man pulled into the day-use area to use the bathroom. This man conveniently had one of those battery kick-start set things (as you can tell I know lots about cars) and revived my battery.
And that concludes my misadventures on Eagle Ridge and the Mist Mountain hot springs.
Tips for Visiting the Mist Mountain Hot Springs
Mist Mountain hot springs is a super popular hike in Kananaskis, so to ensure you have the best experience possible here are some tips for visiting:
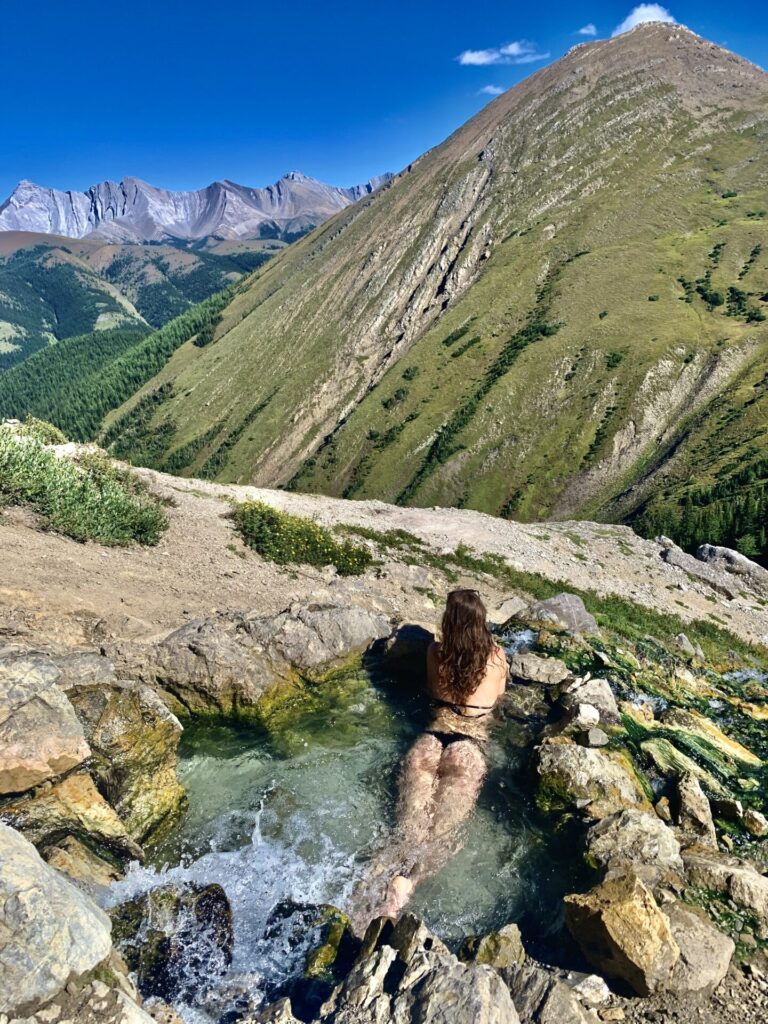
- The water is warm! Not lukewarm or hot, but a very nice warm temperature!
- The springs consist of 2 cascading pools. They aren’t big, there’s room for 2-3 adults at a time.
- Bring a travel towel.
- Hike early in the morning or late in the afternoon (for sunset-ish) to avoid the crowds. There’s normally a line of people waiting to take a dip in the hot springs which can be kind of uncomfortable.
- Try to hike on a warm and sunny day. The springs are best enjoyed under the sun.
- Wear a bathing suit under your clothes; there’s nowhere to change once you get to the hot springs.
- Bring a tripod for photos. There isn’t anywhere good to setup your phone or do the whole make shift tripod thing. I use the travel tripod from Peak Design (which I LOVE), but is it quite pricey. This tripod is another good quality (but cheaper) option for an “adventure tripod.”
- Bring all sorts of clothing. The weather can change on a dime and you’ll most likely be chilly after exiting the springs. Here’s everything I recommend wearing on a day-hike in the Rocky Mountains.
Explore More Hikes In Kananaskis
Kananaskis is an area just outside of Banff that’s made up of multiple Wildland Areas and Provincial Parks. Kananaskis is my favourite hiking destination in the Canadian Rockies, so I urge you to explore more hikes in the area!
Click here to explore more of Kananaskis.
Featured Kananaskis Hikes:
- Cool Experiences: Yamnuska scramble, Mist Mountain hot springs, Grotto winter canyon walk.
- Ridge Walks: Pocaterra Ridge, Sarrail Ridge & Rawson Lake, Opal Ridge, Tent Ridge, and Wasootch Ridge.
- Summits: EEOR and Ha Ling.
- Incredible Scenery/Lakes: West Wind Pass, Picklejar Lakes, and Grassi Lakes.
Explore Kananaskis Country by Area:
Visit National Parks Nearby:
Looking for more hikes? Click here to explore all of my trail guides.
Where to Stay in Kananaskis Country
Unless you plan on camping, lodging options are a bit limited in Kananaskis. Here are a few options for every budget:
Booking.com- Hostel – HI-Kananaskis Wilderness Hostel.
- Glamping – Sundance by Basecamp. Sundance gives you the opportunity to camp in a regular tent, glamping tent, or tipi.
- Mid-range hotel – Crosswaters Resort in Kananaskis Village.
- Luxury Stay – the Kananaskis Mountain Lodge is one of the most luxurious getaways in the Banff-region. At the lodge you’ll find the Kananaskis Nordic Spa which is the most sought after spa in the region. Mount Engadine Lodge is another unique option which gives you the opportunity to lodge in yurts, glamping tents, and cabins. Gourmet food and great views included.
- Stay nearby – If these Kananaskis stays aren’t what you’re looking for, check out lodging options in nearby Canmore or Banff.
- Camping – Kananaskis offers tons of camping facilities scattered throughout the area and they almost always have availability. If you’re one to free-camp, Kananaskis has PLUZ (Public Land Use Zones) and Wildland areas, both of which you can random camp in for free. This is something I have yet to figure out in the Kananaskis region, but if you’re interested you can find more information about it here
Happy adventuring!
Taylor ♡
Like This Post?
Share with friends or save it for later!

About the Author
HI, I’m Taylor – the voice behind The Holistic Backpacker.
After moving to Banff National Park in 2020 I became an outdoor adventure enthusiast and vowed to never stop exploring.
I now spend my days travelling the world, climbing mountains, and spending nights under the stars in the Canadian Rockies backcountry.
I created The Holistic Backpacker so I could share my adventures and help connect people like you with the same amazing experiences.


One Comment
נערות ליווי
I must thank you for the efforts youve put in penning this site. I am hoping to check out the same high-grade blog posts by you in the future as well. In fact, your creative writing abilities has motivated me to get my very own blog now 😉