
Stanley Glacier Hike in Kootenay: Explore Waterfalls, Glaciers & Caves
Stanley Glacier is the most popular hike in Kootenay. This hike, quote on quote, *has it all.* On this trail you can expect a trek through the most gorgeous basin surrounded by striking mountain peaks. On the way to the glacier you’ll encounter gushing waterfalls, ancient fossils, and even a couple caves!
In this guide I’ll tell you all about the Stanley Glacier hike in Kootenay: directions, highlights, pictures, and tips to ensure you have a successful adventure.
Want to explore more of my trail guides? Click here.
Now, let’s go hiking!
Skip Ahead:
- How to get to the Stanley Glacier trailhead
- Where to stay in Kootenay
- About the Stanley Glacier trail
- Hiking to Stanley Glacier
- Recommended hiking gear
- What to wear hiking
I have affiliate links in this post which means when you book a hotel or purchase a product, I may make a small commission ~ at no additional cost to you (full disclosure). These funds go back into The Holistic Backpacker and help me create more free content like this!
Thank you for supporting my work!
How to Get to the Stanley Glacier Trailhead
The Stanley Glacier hike is located in Kootenay National Park; a beautiful Rocky Mountain National Park located just half an hour west of Banff or half an hour south of Lake Louise.
You can find the Stanley Glacier trailhead on highway 93 along with a few other great hiking trails: the Paint Pots (a quick and easy hike located just 6 minutes down the road), Taylor & O’Brien Lake, Boom Lake, and Arnica & Twin Lakes.
Parking is limited, so it’s advised hikers arrive early to get a spot, especially on weekends. There’s no shuttle to the Stanley Glacier hike, so if you don’t have a car you’ll need to rent one to access the trail.
Best British Columbia Car Rental
Most of British Columbia is inaccessible via public transportation. I 100% recommend renting a car so you can properly explore all the beautiful lakes, mountains, and hiking trails here.
My favourite British Columbia car rental tool is this site. It compares all the local rental companies to ensure you’re getting the best rate.
Where to Stay in Kootenay National Park
- Budget – HI Castle Mountain Hostel
- Mid-range – Johnston Canyon Lodge & Bungalows,
- Luxury stay – Storm Mountain Lodge & cabins
- Camp – reservation info.
Most people opt to spend the day in Kootenay and stay overnight in destinations nearby; namely Banff, Lake Louise, and Radium Hot Springs.
- Banff – Fairmont Banff Springs (luxury), Banff Park Lodge (mid-range), High Country Inn (budget), HI Banff, Banff Interntional, and Samesun Banff (hostels).
- Lake Louise – Fairmont Chateau Lake Louise (luxury), Paradise Lodge & Bungalows (500m from the lake), Lake Louise Inn (mid-range), HI Lake Louise (hostel).
- Radium Hot springs – Prestige Radium Hot Springs Resort (luxury), Radium Chalet (luxury), Rocky Mountain Springs Lodge (mid-range), Radium Park Lodge (budget).
About the Stanley Glacier Hike
- Distance: 10.9km
- Elevation gain: 604m
- Rated: hard (in reality, more like moderate)
- Type of trail: out & back
- Estimated time: 4 hours
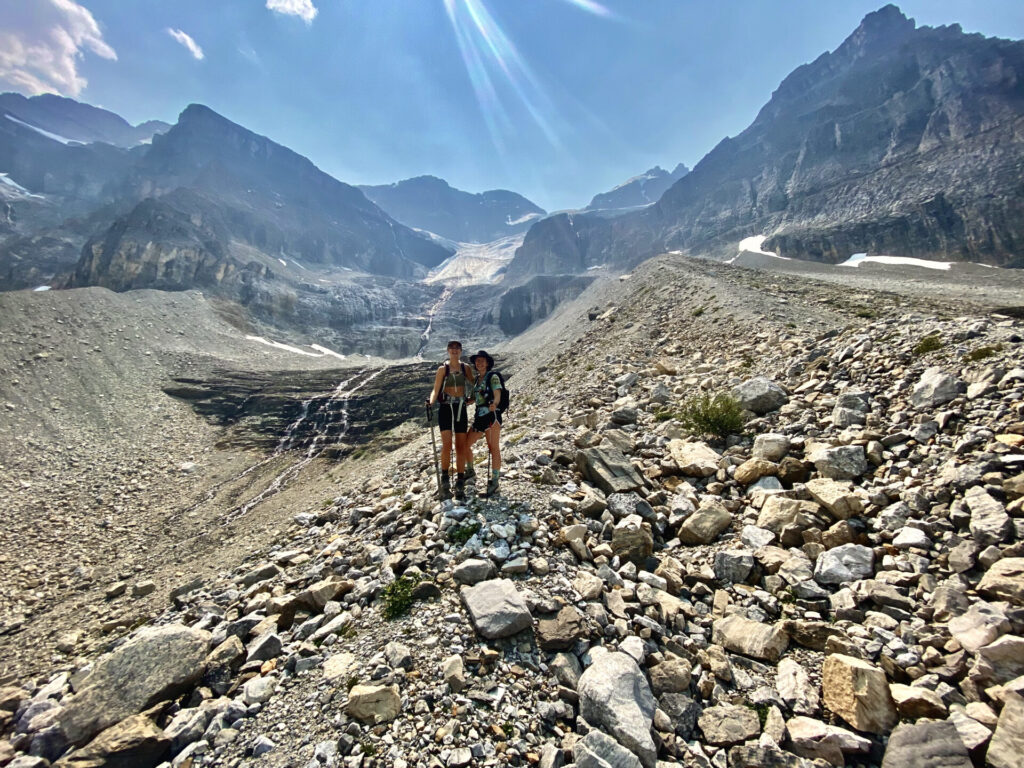
The Stanley Glacier hike in Kootenay is a thrilling trail that features so many natural wonders. Since it’s the most popular hike in Kootenay, you can expect to find lots of fellow hikers on the trail. Users can hike or snowshoe to Stanley Glacier year round, however the trail is best hiked from June to September and I definitely recommend hiking during this timeframe.
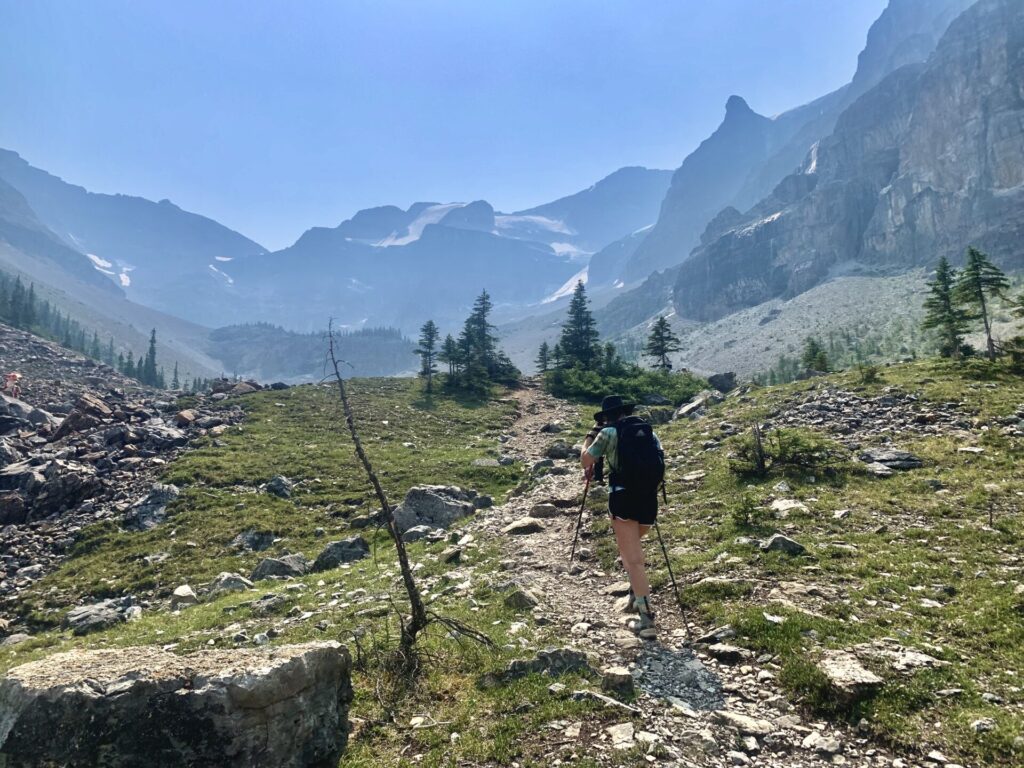
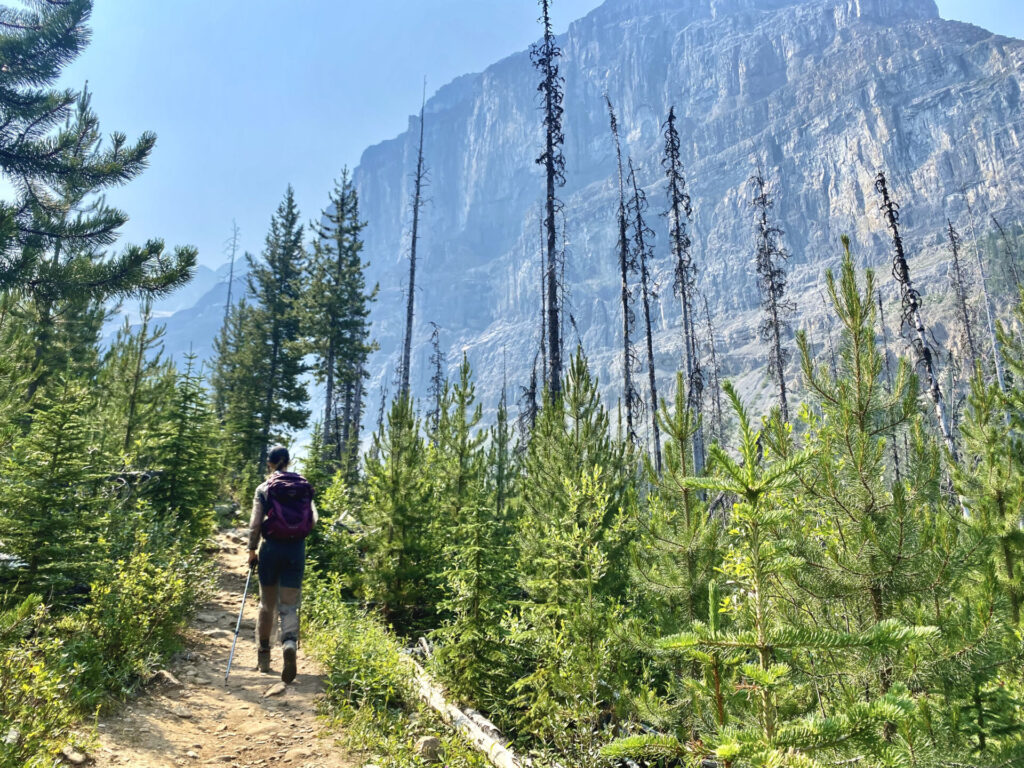
The Stanley Glacier trail starts out following switchbacks through a new growth forest; Kootenay experienced a massive wildfire in 2003. After the switchbacks hikers will enter a mesmerizing basin where they’ll find waterfalls, caves, and fossils.
Toward the end of the hike users can expect the most significant amount of elevation gain (although not overly strenuous) until they reach a plateau. Right before the final steep section is the end of the “official trail,” however it’s recommended that hikers continue past the final steep section for the best view of Stanley Glacier.
Tips for a Successful Hike
- Bring a bug suit or some form of bug repellent. You can expect to find lots of bugs on this trail, especially in the wooded section.
- You’ll be exposed for the vast majority of the Stanley Glacier hike. Bring sunscreen and ensure you have lots of water. I bring 2L of water on every hike via my Hydrapak.
- Arrive early to ensure you get a parking spot.
- Trekking poles are very beneficial, especially if you take the more challenging route.
Connect via socials:
STAY CONNECTED
Sign up for emails to receive a 25% discount on my travel maps.
Taylor ♡
Hiking to Stanley Glacier
The Stanley Glacier hike in Kootenay is rated hard, however as far as Rocky Mountain hiking goes I’d personally consider this hike more “moderate.” The elevation gain isn’t overly steep and there isn’t anything technical about it, making it great for hikers of all ages and ability levels.
Switchbacks to the Little Bridge
The Stanley Glacier hike starts out following switchbacks amongst a new growth forest; see the short, green trees next to the scorched, taller trees. The elevation gain for the first 4km is gently graded and the terrain follows a packed dirt trail. The first little bit isn’t overly exciting, but around the 1km mark you can expect to see the first waterfall followed up by a few bridges and streams.
You may encounter quite a few people in the switchback section. The trail can be quite narrow in areas here, so be patient and practice trail etiquette as you navigate around groups of slower hikers.
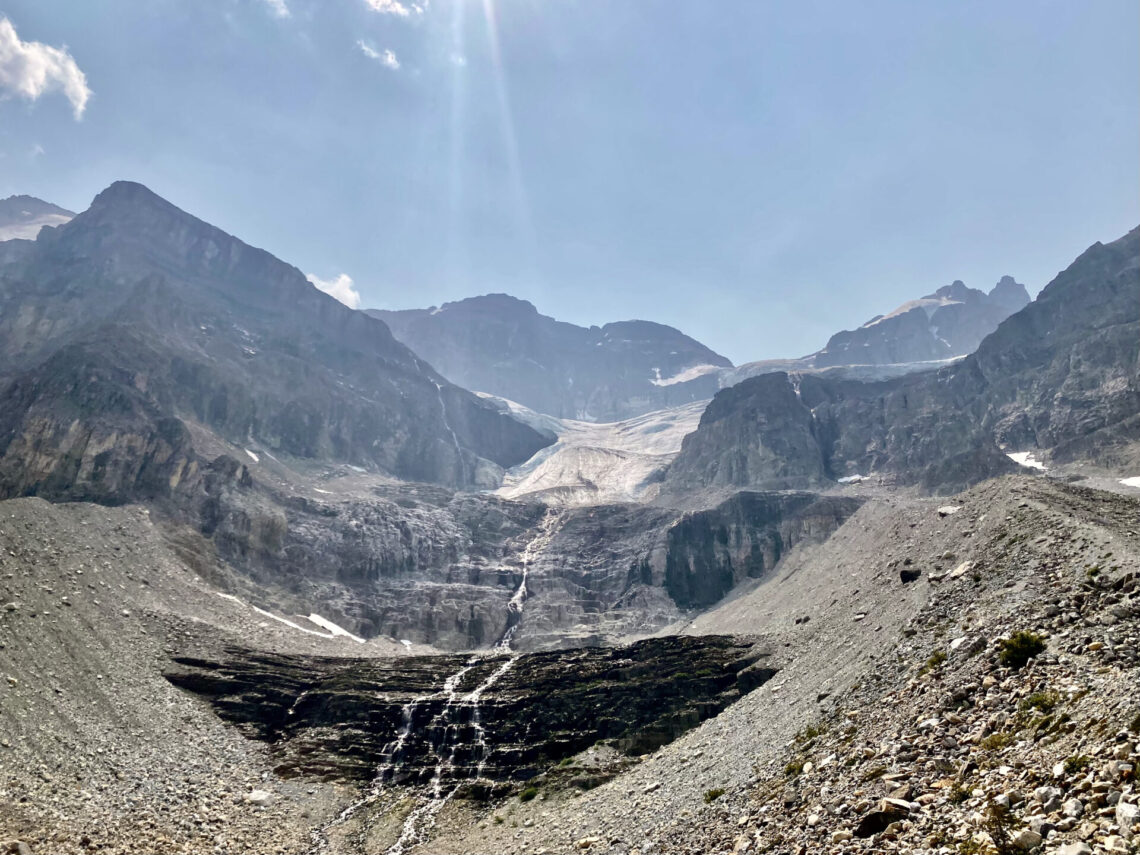
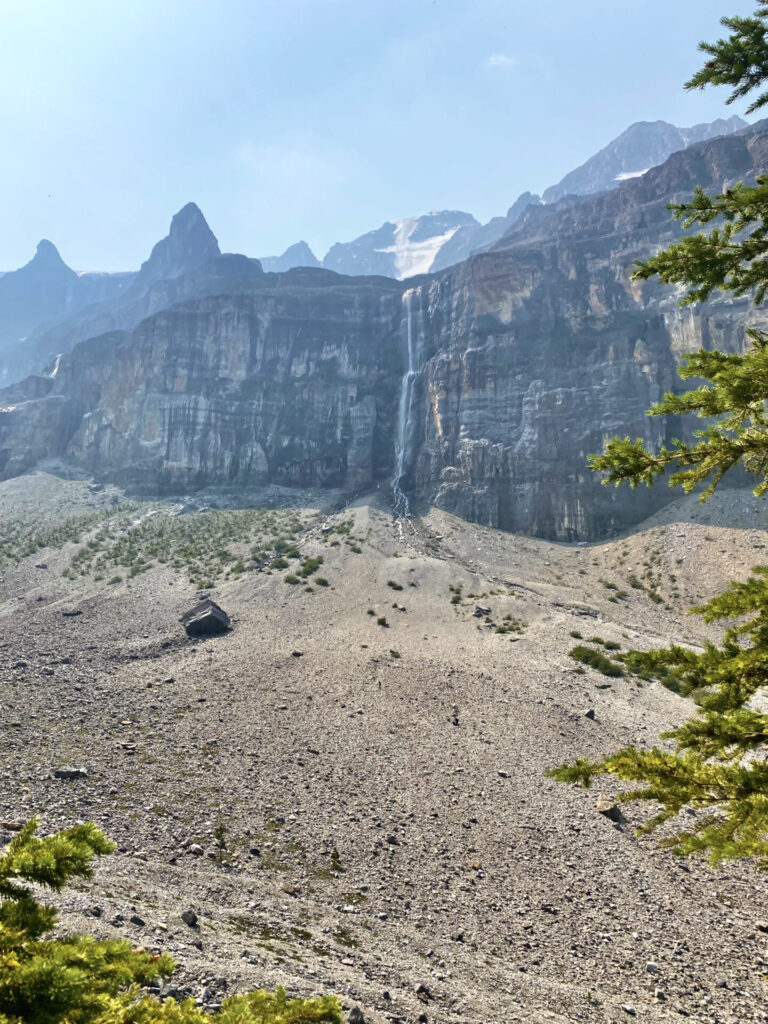
Eventually you’ll enter the basin where you’ll find a great view of the Guard Wall (the big mountain on the right).
In the distance you’ll be able to see the largest waterfall, but wait… The view gets better the closer you get.

Eventually you’ll come to a fork in the trail. If you opt to hike right, you’ll start gaining elevation in the direction of the scree slope (more challenging route). Hiking left takes you to Stanley Glacier via the easier route.
Waterfalls, Waterfalls, and… A Cave!
I’ll be talking about this trail from the perspective of hiking right at the fork. This route is how you’ll get up close and personal with all the exciting waterfalls, caves, and fossils on the Stanley Glacier hike. In order to hike this route though, you’ll need to hike through loose scree. Bring appropriate footwear (I wear these boots/men’s version) and hiking poles.
First up is the giant boulder (featured in the pic below). The talus field surrounding the giant boulder encompasses all sorts of fossils! There’s a guided hike for Stanley Glacier – the guide will take you to the talus field and show you how to find fossils. But in the spirit of cheap travel & adventure, I recommend you hike guide-less and search for fossils on your own.
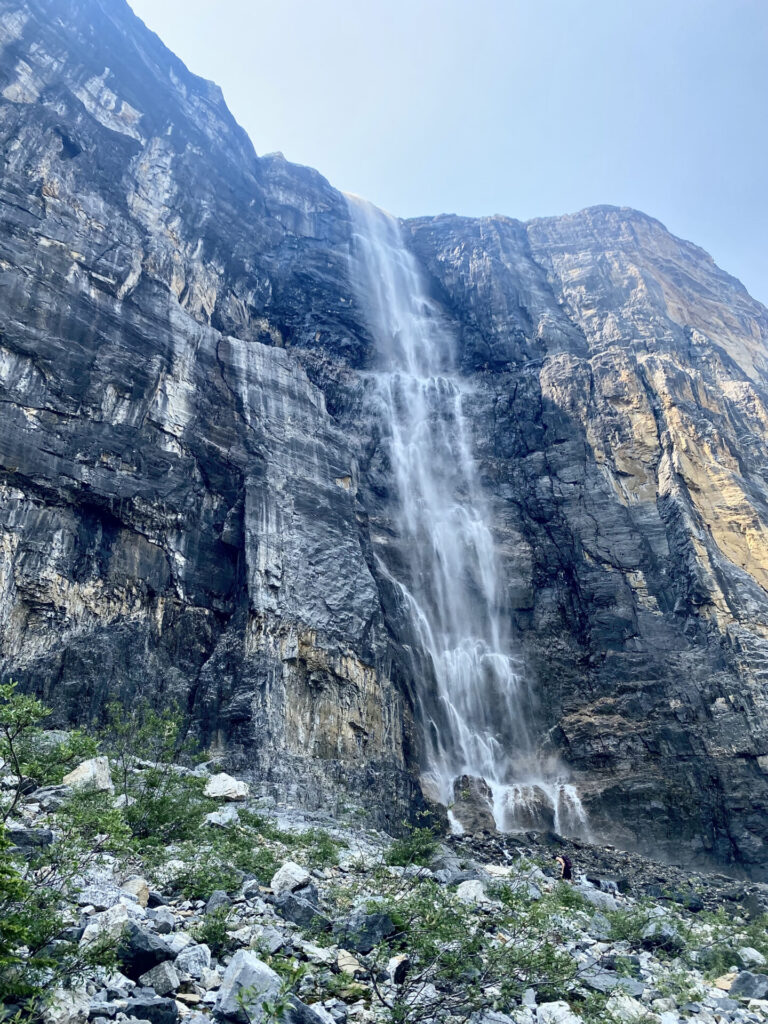
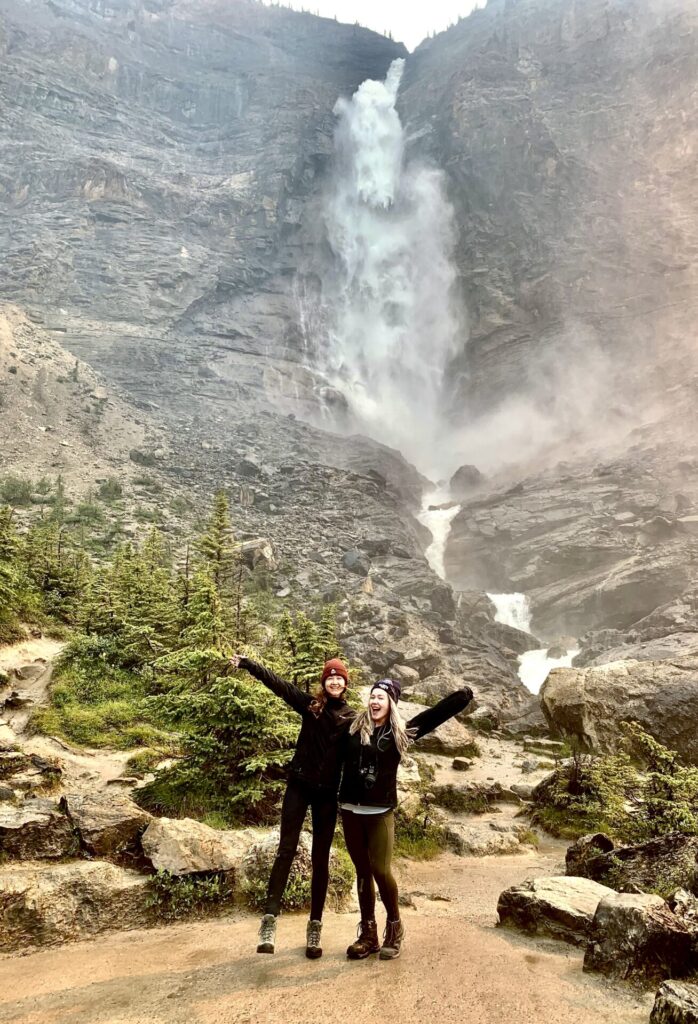
Directly behind the talus field you’ll find the biggest waterfall on the Stanley Glacier hike. This thing is absolutely massive! The only waterfall I’ve seen that compares for height is Takkakaw Falls in Yoho.
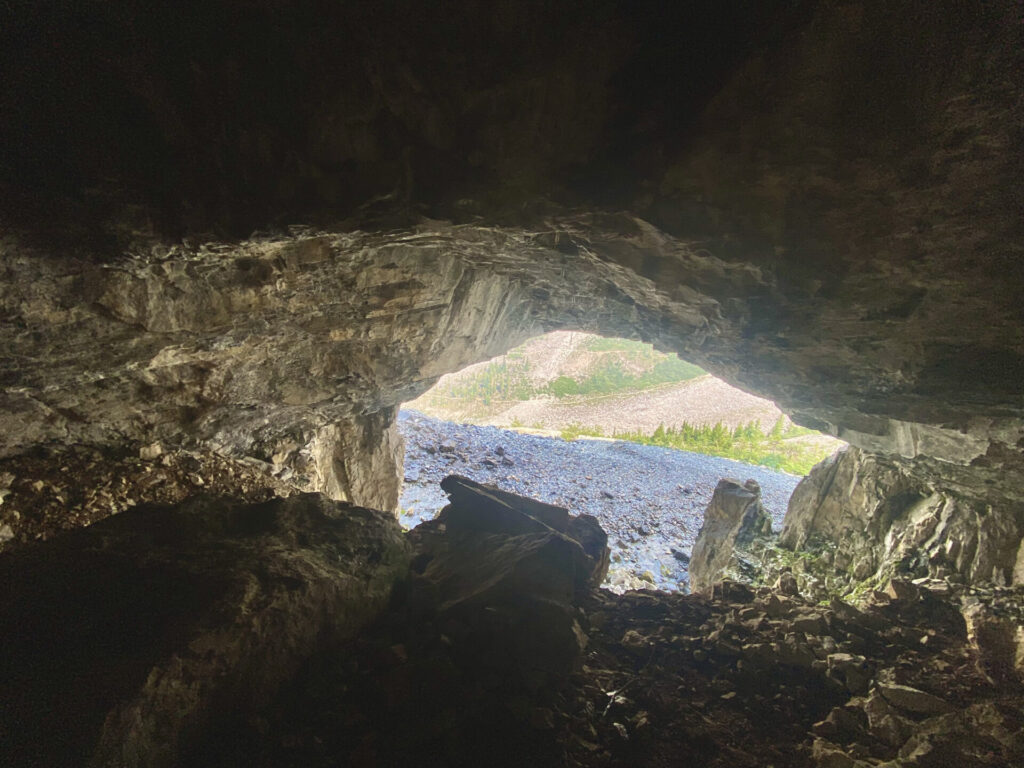
After the waterfalls you’ll find the caves. There’s one big cave and a smaller cave. You can climb inside these caves AND take a quick glacial shower in the tiny waterfalls located directly in front of them.
Cave to Stanley Glacier
After the cave you’ll want to continue following the higher trail. You’ll cross a couple flowing mountain streams then come face-to-face with the final and steepest incline of the hike. Right before this incline is technically the end of the “official trail,” however the best view is yet to come so keep on trekkin’.
After the final push (which only lasts for about 0.5km) the ground levels out and the trail transforms into a rocky plateau. To the left you’ll find Stanley Creek as well as a little alpine meadow full of blooming wildflowers which can be seen in July-ish.
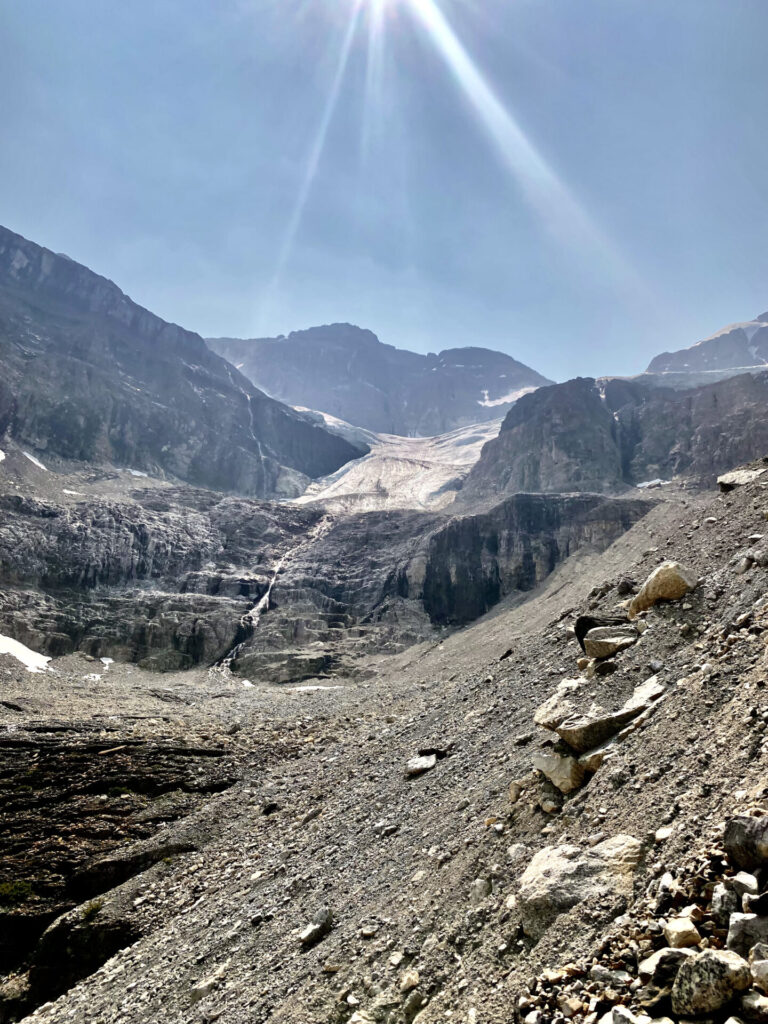
Past the plateau you’ll notice the ground gains more elevation; this raised area is called a moraine. The best view of Stanley Glacier (pictured below) is from the moraine, however hiking on/around moraines can be quite dangerous. SO, I’d recommend hiking only to the ridge of the moraine and walking directly on the highest point. Once you reach the highest point of the moraine, don’t walk down the other side of it as the ground can be quite unstable. Additionally, if you decide to hike up close to the glacier ensure you don’t step foot on it.
Walking on glaciers is extremely dangerous. Glacier walks should be attempted only with guides who have training and proper equipment.
Return Hike
There are a couple options for the return hike. Users can either A) return via the same trail they used to get to the glacier (for me, the trail closest to the waterfalls and caves), or B) hike back on the opposite side of the basin. Eventually both trails meet up so it honestly doesn’t matter where you go.
I took the opposite trail back. This allowed me to see the smaller waterfalls on the opposite side of the basin and it gave me a closeup view of Stanley Creek.
Looking for More Adventures in British Columbia?
The Holistic Backpacker is full of hiking and travel resources for destinations all over the Canadian Rockies.
The following are a few of my personal favourites, but you can find all my BC guides here:
- How to spend 1 day in Yoho National Park
- Best ski resorts in British Columbia
- Paget Peak scramble
- Stanley Glacier hike
Explore Alberta
Alberta is British Columbia’s next door neighbour and is home to incredible National Parks and Wildland areas like Kananaskis Country, Banff National Park, Jasper National Park, Waterton National Park, etc.
You can find all my hiking guides and travel resources for Alberta here.
Happy adventuring!
Taylor ♡
Like This Post?
Share with friends or save it for later!

About the Author
HI, I’m Taylor – the voice behind The Holistic Backpacker.
After moving to Banff National Park in 2020 I became an outdoor adventure enthusiast and vowed to never stop exploring.
I now spend my days travelling the world, climbing mountains, and spending nights under the stars in the Canadian Rockies backcountry.
I created The Holistic Backpacker so I could share my adventures and help connect people like you with the same amazing experiences.


One Comment
נערות ליווי
I must thank you for the efforts youve put in penning this site. I am hoping to check out the same high-grade blog posts by you in the future as well. In fact, your creative writing abilities has motivated me to get my very own blog now 😉