Boom Lake Trail – an Easy Hike in Banff
The Boom Lake trail is part 1 of my 2 part “hike Boom Lake, Taylor Lake, and O’Brien Lake in 1 day” post; you can find part 2 here. The Boom Lake trail is an easy hike in Banff that’s good for all ability levels, families, and solo hikers. The trail takes you through Banff’s beautiful alpine forest and lets out at the magical Boom Lake.
Before I tell you all about what to expect on the Boom Lake Trail it’s important to note that Banff is a National Park which means you’ll need a Park’s Pass. You can buy them at the Park gates, online, or at the visitor centre.
Now, let’s go hiking!
Skip Ahead:
- How to get to Boom Lake trail
- About Boom Lake Trail
- Hiking Boom Lake Trail
- Essential hiking gear
- What to wear hiking
- Part 2: Taylor & O’Brien Lake
- Tips for a successful hike
- Best places to stay in Banff
I have affiliate links in this post which means when you book a hotel or purchase a product, I may make a small commission ~ at no additional cost to you (full disclosure). These funds go back into The Holistic Backpacker and help me create more free content like this!
Thank you for supporting my work!
Related Content
- 50+ Things to do in Banff in summer
- Discover more Banff trail guides
- Complete guide to the Icefields Parkway
- Step-by-step guide for planning a trip to Banff
- What to wear hiking in Banff
- Hiking gear guide for Banff
How To Get To Boom Lake Trail
In case you decide to do part 2 of this hike (Taylor Lake & O’Brien Lake), I’ve marked the Boom Lake trailhead AND the Taylor Lake trailhead below. You’ll need 2 cars to do a car drop.
The Boom Lake trail is located in Banff National Park right near the famous Lake Louise. You can read more about my favourite hike at Lake Louise here.
The Boom Lake trailhead is located 30 minutes from Banff along highway 93. There are no shuttles that take you to the Boom Lake trailhead, so if you don’t have a car you’ll have to rent one.
The Boom Lake day-use area (where you park) has a bathroom and picnic tables.

Best Banff Car Rentals
Most of Banff’s remote trailheads and attractions are inaccessible via public transportation. I 100% recommend renting a car to make the most of your time in the Rockies.
My favourite rental tool is this site as it compares all the local car rental shops to find you the best rate.
About Boom Lake Trail
- Distance: 10.8km
- Elevation gain: 572m
- Rated: easy
- Type of trail: out & back (point to point if you hike part 2)
- Estimated time: 4hrs
Don’t let the distance scare you! The Boom Lake trail is a long one, but the elevation you gain along the way is at a very gentle grade. You therefor barely feel the effort you’re putting in.
The trail is heavily trafficked and well marked, making this a great hike if you’re interested in solo-hiking. The terrain is simple to navigate and does not contain much exposed roots and rocks. This holds true until you get to the lake, which is surrounded by a rock field.
You’ll cross a few tiny streams along the path and walk over a newly renovated boardwalk closer to the lake.
A couple things to note about the Boom Lake trail:
- It’s buggy – bring a bug suit. I prefer bug suits over bug repellent because they’re totally chemical & waste free
- Bears – there are both black bears and grizzlies in Banff National Park. It’s wise to bring bear spray for protection
- Mud – the trail can be quite muddy. make sure you have proper Gore-tex footwear. I use the Scarpa Kailesh boot (men’s version) and I absolutely love them. They’re great in any type of terrain, on day-hikes, and multi-day backpacking excursions.
More: hiking trails in Banff National Park
More: backpacking in Banff National Park
Connect via socials:
STAY CONNECTED
Sign up for emails to receive a 25% discount on my travel maps.
Taylor ♡
Hiking Boom Lake Trail
The Boom Lake trail starts at the Boom Lake day-use area. You’ll see a trail sign, the Boom Lake trailhead is directly behind it. There’s honesty not a whole lot to say about the Boom Lake trail! It’s very straight forward and easy to follow.
Along the way you’ll see a few side trails – don’t take these unless you’re headed to Taylor Lake. You’ll be in the trees for the entirety of this hike, so the only views you’ll get along the way are the occasional sneaky opening in the trees.
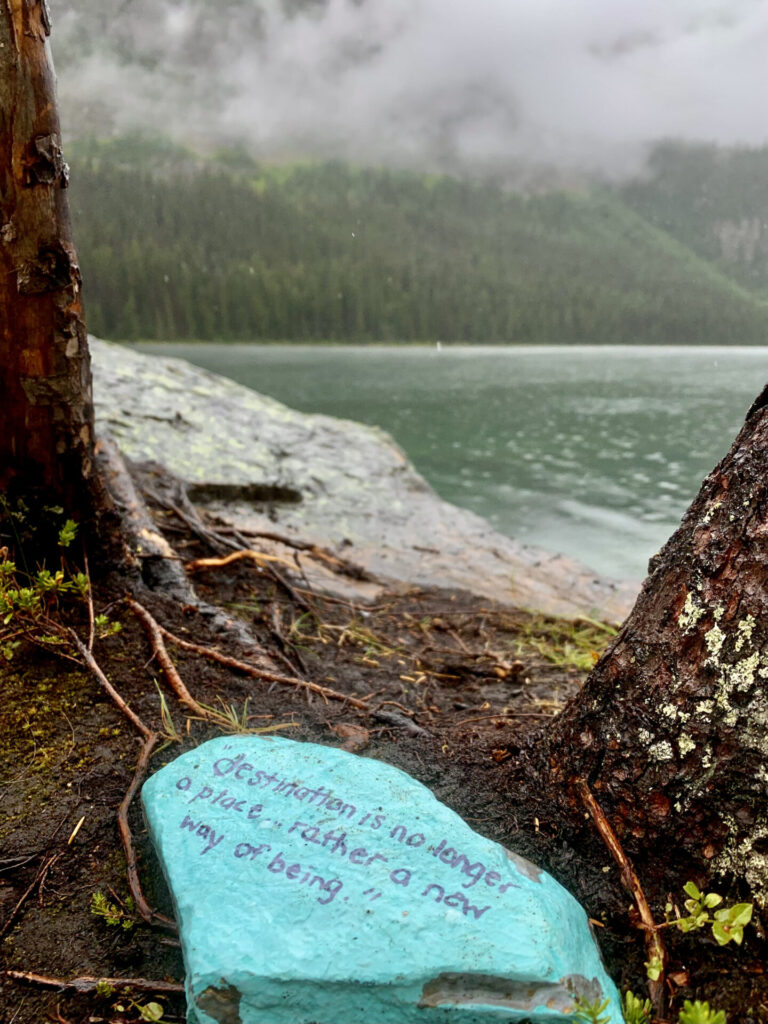
Do keep an eye out for the cutest painted rocks along the way! They’re scattered on the trail and there’s a few around Boom Lake’s shore.
Right before you reach Boom Lake you’ll cross a newly renovated boardwalk.
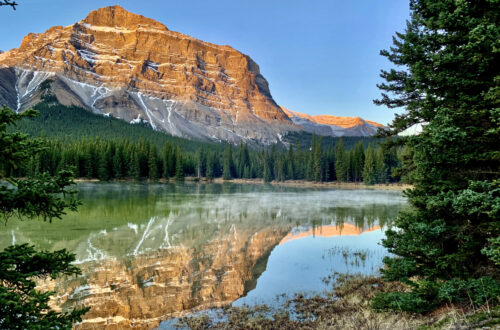
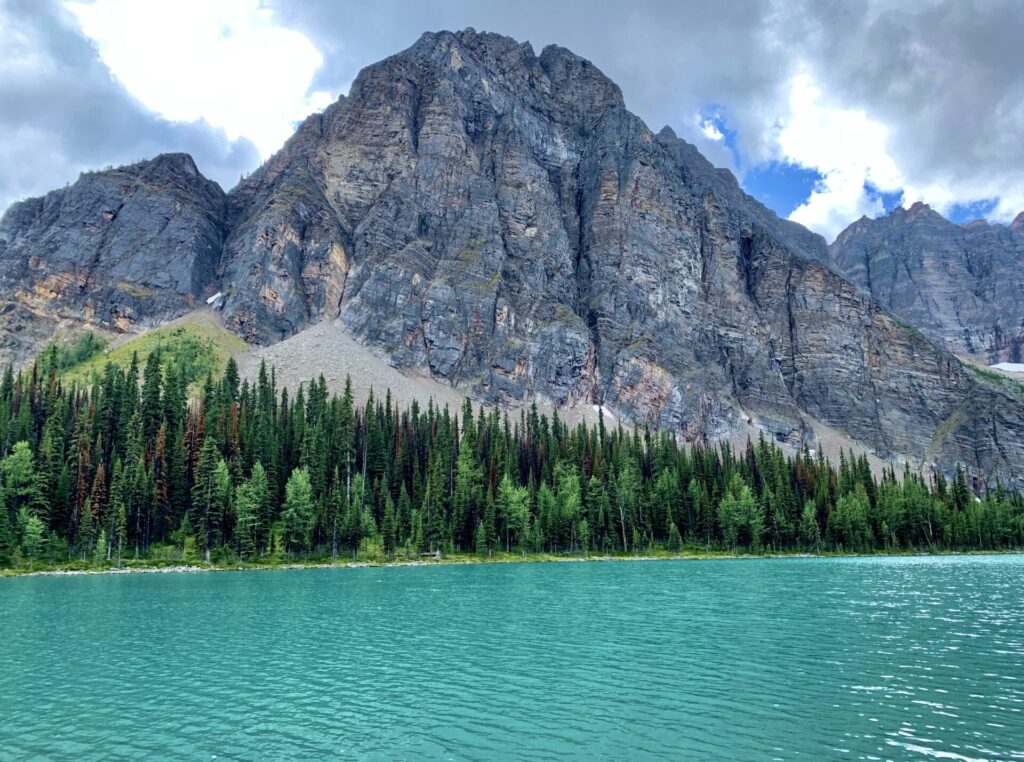
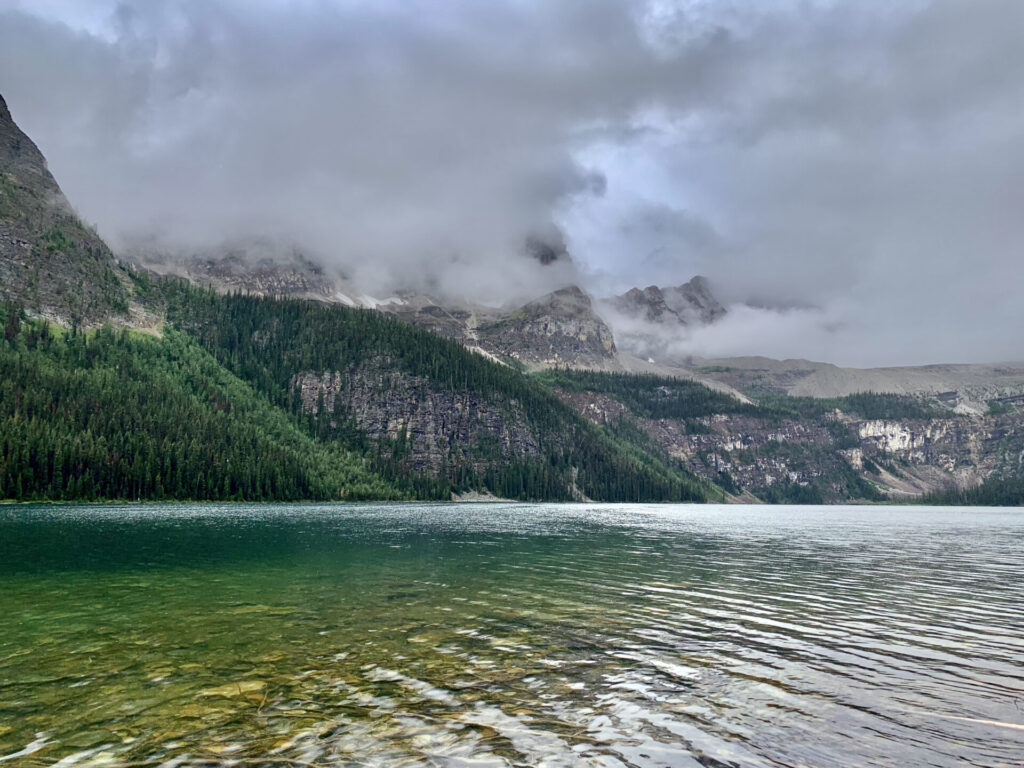
Boom Lake
Once you arrive at Boom Lake you’ll quickly discover there’s not many places to sit and chill because the entire shoreline is covered in a rock field. If you want to hangout for the day here, bring camping chairs (these ones are excellent for hiking and backpacking; they’re small and lightweight).
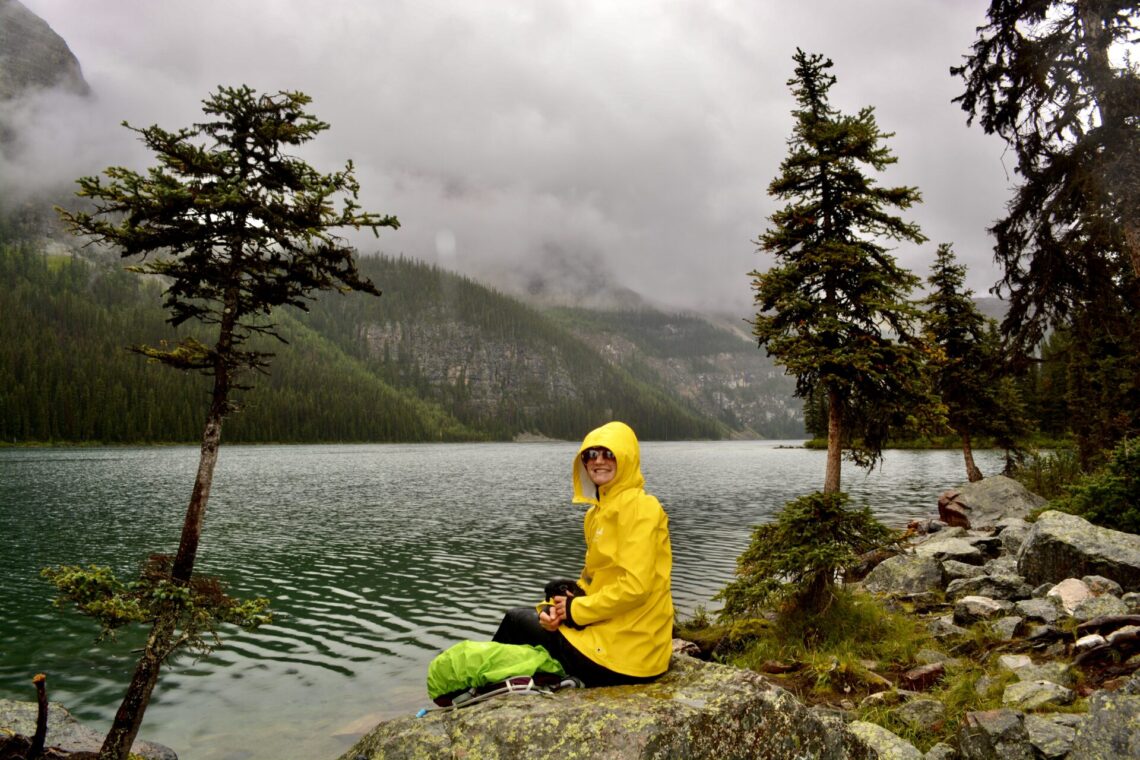
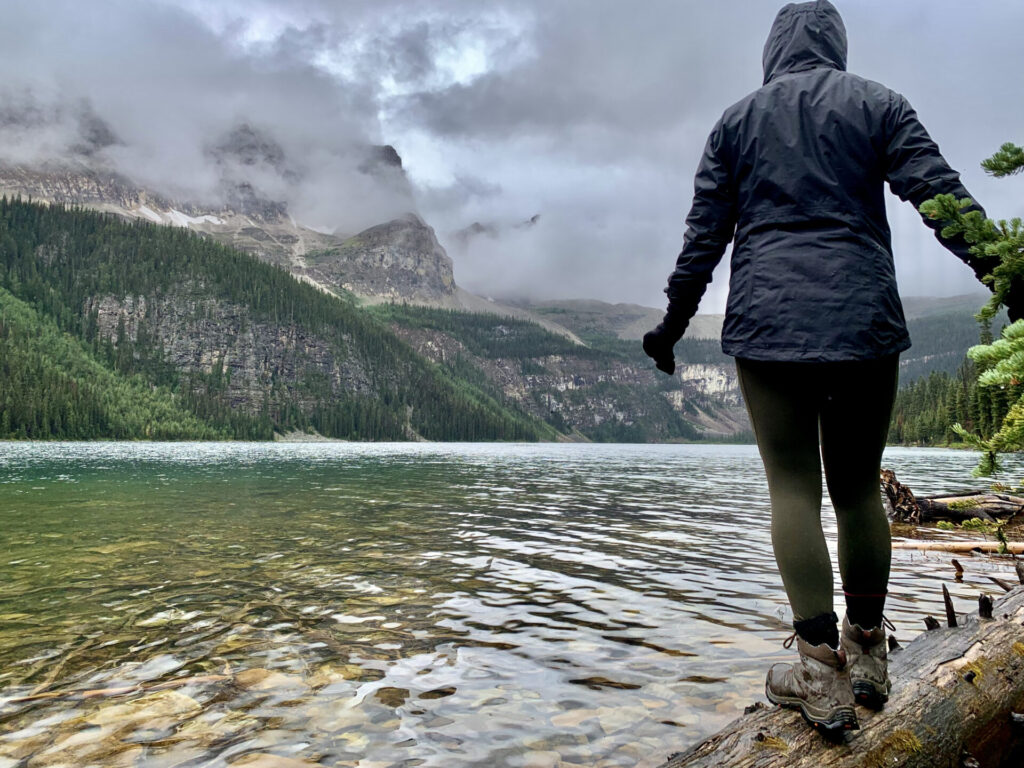
^Also make sure you hike on a nice day! My hiking partners and I hiked on a cold and rainy day. We were super keen to get out and explore, but the rain did make the trip slightly less enjoyable. Mainly because it took away some of the views.
You’ll find one notably large rock along the shore which is the best photo-op.
You can also continue to hike around Boom Lake. There is a very lightly beaten down path that leads through the trees. You may be able to find some pink/orange trail markers, however it’s mostly bushwhacking because this path is not well travelled at all. You’ll pass by a hill, then come to another tiny open spot in the trees which allows you to see the other side of Boom Lake.
According to a good friend of mine (who also created Banff Buzz), this is the best place to fish at Boom Lake! Just make sure you know about all the Park rules and regulations for fishing in Banff.
Continue reading for: part 2 (Taylor Lake & O’Brien Lake), tips for a successful Boom Lake hike, essential hiking gear for Banff, and the best places to stay in Banff.
Looking for More Banff Adventures?
Banff is an adventurer’s & view seeker’s paradise. If you’re planning a trip to this gorgeous Canadian Park, you can start with this step-by-step guide designed to help you plan the perfect Banff itinerary.
Alternatively, check out this page with all my Banff resources.
Banff Hiking Resources
On this page you can find all my Banff trail guides. A few signature hikes in Banff are these easy trails, Tunnel Mountain, Sulphur Mountain, Lake Louise, and Johnston Canyon. If you’re only in Banff for a few days, start with those!
A few of my personal favourite hikes in Banff are Mount Bourgeau, Sentinel Pass, Tower of Babel, the Banff Skoki Loop, and the Sulphur Mountain Traverse Route.
More Banff Resources you Might Find Interesting:
Want to continue your Canadian Rockies expedition outside of Banff? Check out my trail guides & travel resources for British Columbia and Kananaskis Country as well as Jasper, Waterton, Yoho, and Kootenay National Parks 🙂
Part 2: Taylor Lake & O’Brien Lake
I hiked Boom Lake on one day & Taylor Lake and O’Brien Lake another, however you do have the option to hike both of these trails in a single day. Keep in mind the trailheads are far apart though so you will need to do a car drop (find the Boom Lake trailhead and Taylor Lake trailhead on my trailhead map).
More: How to Hike Taylor Lake & O’Brien Lake (Part 2)
Hiking To Taylor Lake FROM Boom Lake
Keep an eye out for the sign (hiker’s right) on the Boom Lake trail that marks the side-trail for Taylor Lake. It will be located midway between the trailhead and Boom Lake; it will clearly state which direction is for Boom Lake vs which direction is for Taylor Lake. Before taking this route, make sure you check out Boom Lake because the Taylor Lake side-trail will lead you away from it! Within 2.5km of following the trail you’ll arrive at the beautiful O’Brien Lake! For a more detailed description of the Taylor Lake trail, check out part 2 of my “how to hike Boom Lake, Taylor Lake, and O’Brien Lake in one day” guide.
- For reference this is the actual route, however it does not include a stop at Boom Lake, so make sure you include Boom Lake in your itinerary!
Tips For A Successful Hike
- Check out part 2 of the Boom Lake Trail; Taylor Lake & O’Brien Lake
- Start the Boom Lake Trail early to avoid the crowds – this is a very popular hike in Banff
- Bring fishing equipment (make sure you’re following the Park’s guidelines for fishing)
- Bring a picnic and backpacking chairs to enjoy Boom Lake’s scenery
- There’s one big rock along Boom Lake’s shoreline, this is the best photo-op
- Look for the painted rocks with inspirational quotes along the way
- Hike Boom Lake on a clear day. If you hike on a foggy day the mountains will be covered and there isn’t tons to see
- Continue to walk along Boom Lake’s shore through the overgrown trail to view different parts of the lake
Where to Stay in Banff
From hostels to camping to luxury hotels – Banff has accommodations for everyone. Here are my top recommendations for where to lodge in Banff based on every budget.
I recommend giving this post a read as I’ve listed every Banff hotel worth staying at and organized them by category.
- Hostels – Samesun Banff (best location + bar/restaurant on-site), Banff International Hostel (second best), and HI Banff.
- Budget hotels – Bow View Lodge and High Country Inn.
- Mid-range stays – Banff Park Lodge, Mount Royal, Elk & Avenue, and the Banff Caribou & spa.
- Luxury stays – Fairmont Banff Springs and the Rimrock Resort.
- Cabin retreats: Johnston Canyon Bungalows, Baker Creek, and Castle Mountain Chalets.
- Camping – reservation information can be found here. Ensure you book campsites far in advance as they’re full during summer.
- For those on ski trips: lodge on-mountain at Sunshine Village, stay near Norquay, and see my Lake Louise suggestions below.
Lodging Options Near Banff
Enjoy the nature and activities of Banff National Park, but lodge away from the busy tourist town centre at any of the following:
- Lake Louise – Fairmont Chateau Lake Louise (luxury), Paradise Lodge & Bungalows (500m from the lake), Lake Louise Inn (value stay), HI Lake Louise (hostel).
- Canmore – Malcolm Hotel (luxury), Stoneridge Mountain Resort (condo suites with fully equipped kitchens), Mountain View Inn (budget), Canmore Downtown Hostel & the Canmore Hostel (party hostel).
- Johnston Canyon – Johnston Canyon Lodge & Bungalows, Castle Mountain Chalets, and HI Castle Mountain Hostel.
- Yoho National Park – Emerald Lake Lodge and Cathedral Mountain Lodge.
- Kootenay National Park – Storm Mountain Lodge & Cabins.
- Kananaskis Country – Mount Engadine Lodge and Kananaskis Mountain Lodge (luxury), Crosswaters Resort (mid-range), and HI Kananaskis Wilderness Hostel (budget).
Happy adventuring!
Taylor ♡
Like This Post?
Share with friends or save it for later!

About the Author
HI, I’m Taylor – the voice behind The Holistic Backpacker.
After moving to Banff National Park in 2020 I became an outdoor adventure enthusiast and vowed to never stop exploring.
I now spend my days travelling the world, climbing mountains, and spending nights under the stars in the Canadian Rockies backcountry.
I created The Holistic Backpacker so I could share my adventures and help connect people like you with the same amazing experiences.