Paget Peak Scramble & Sherbrooke Lake Hike – Yoho
I would like to preface this trail guide by saying the Paget Peak hike in Yoho is one of those “Instagram-worthy hikes.” The Paget Peak scramble and Sherbrooke Lake hike feature some of the most dramatic mountaintop views I’ve seen in British Columbia, beautiful lakes, and a thrilling scramble.
This is a multi-faceted hike that has something for everyone. Whether you’re looking for an easy hike to an alpine lake, a moderate trek through the forest, or some serious mountain-style scrambling, the Paget Peak hike has you covered.
In this guide I’ll tell you everything you need to know before you hit the trail.
More: How to Spend 1 Day in Yoho National Park
Now, let’s go hiking!
Skip Ahead:
- How to get to Paget Peak trailhead
- About Paget Peak scramble
- Scrambling Paget Peak
- Sherbrooke Lake hike
- Hiking gear for the Rockies
- What to wear hiking in the Rockies
- Where to stay in Yoho
I have affiliate links in this post which means when you book a hotel or purchase a product, I may make a small commission ~ at no additional cost to you (full disclosure). These funds go back into The Holistic Backpacker and help me create more free content like this!
Thank you for supporting my work!
How to get to Paget Peak Trailhead
The Paget Peak trailhead is located just off the Trans Canada highway near the turn off for Lake O’Hara and Wapta Falls. There’s no shuttle to the Paget Peak trailhead, so to get there you’ll need to rent a car if you don’t already have one.
Best British Columbia Car Rental
Most of British Columbia is inaccessible via public transportation. I 100% recommend renting a car so you can properly explore all the beautiful lakes, mountains, and hiking trails here.
My favourite British Columbia car rental tool is this site. It compares all the local rental companies to ensure you’re getting the best rate.
You can expect the drive from Banff to take about 45 minutes, the drive from Golden is about half an hour, and the drive from Calgary is just over 2 hours.
Parking is limited at the Paget Peak trailhead, so if you plan to hike during high season (summer) ensure you arrive early. There are also no bathrooms at the trailhead or elsewhere along the trail. Make sure you take care of business ahead of time!
About Paget Peak Scramble Trail
- Distance: 9.5km
- Elevation gain: 962m
- Rated: hard
- Type of trail: out & back
- Estimated time: 4.5hrs (+1 hour-ish if you go to Sherbrooke Lake)
The Paget Peak hike and the Paget Peak scramble are different. The Paget Peak hike takes you to Paget Peak Lookout (the famous bench/shelter you aways see in photos), which marks the end of Paget Peak hike. After this, the trail becomes significantly steeper and you start the scramble.
The Paget Peak hike is forested and follows switchbacks up the mountain. This section of the trail is well trafficked and easy to follow, which makes it great for solo-hikers.
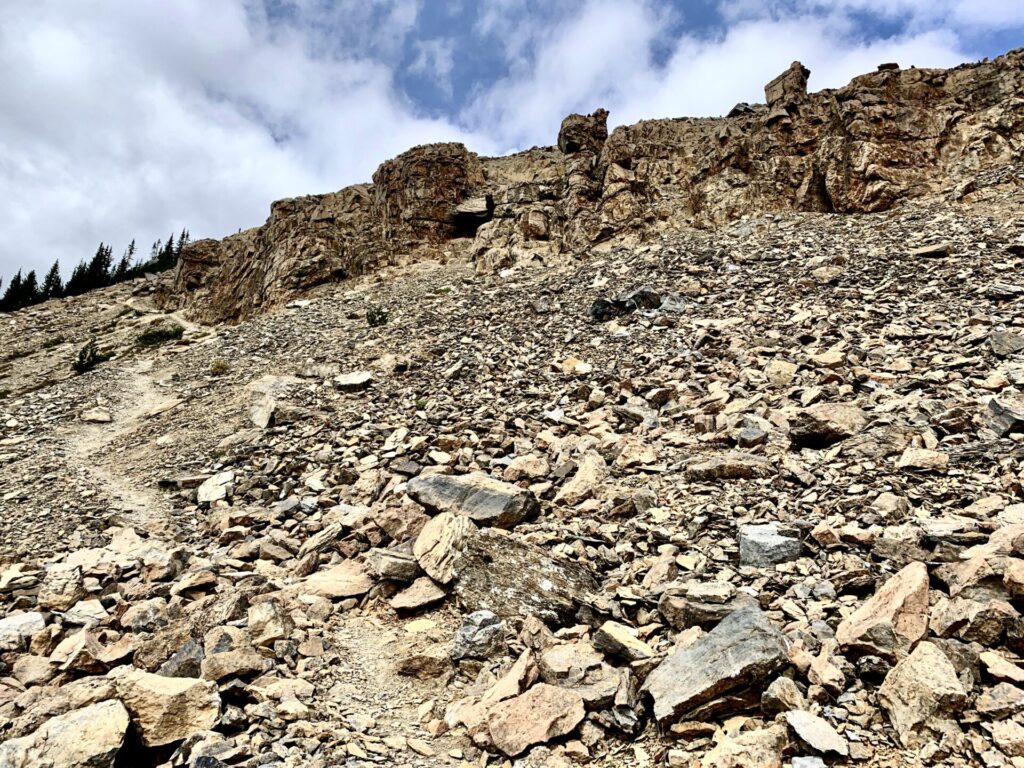
The terrain throughout the Paget Peak scramble is much more technical. There’s a massive and steep scree field which will definitely test your limits. The trail here is quite difficult to follow, so it’s recommended that you only complete the Paget Peak scramble if you have previous scrambling experience or are with an experienced hiker.
I’ll get into more of the specifics next, but I’d like to put it on the record now that the Paget Peak hike is absolutely KILLER!
More: Plan your trip to Yoho
More Helpful Info
- June-October is the best time of year to complete the Paget Peak hike
- If you hike in snowy conditions wear crampons or at least micro-spikes
- Bring gloves (I use these/men’s version) – gloves will protect your hands during the scramble
- Dress warm and bring layers (I use these) – you’ll be completely exposed on the summit
- This is 100% a trekking pole typa hike
Scrambling Paget Peak
The Paget Peak trailhead is actually marked by a metal gate you’ll find right next to the parking lot. Make sure you close the gate after you pass through – these gates are intended to keep wildlife off the highway. Shortly after the gate the trail will split, take a left here.
The Paget Peak hike starts out in a wooded area where you’ll gain gentle elevation for 1.4km. The gentle elevation acts as a “warm up” so to speak rather than starting out with a steep climb like most scrambles do.
This section of the trail can be quite crowded and features a fair bit of exposed roots. Watch your step!
After the first 1.4km, you’ll come to a fork in the trail. Hiking straight takes you to Sherbrooke Lake, hiking right takes you to the Paget Peak scramble as well as the Paget Peak Lookout. It’ll take around 45 minutes to an hour to reach the lookout from the trailhead.
I’d recommend completing the Paget Peak scramble first, then visiting the lake afterwards, but up to you! I’ll talk about the Sherbrooke Lake hike next.
Paget Peak Lookout
After the fork in the trail, continue walking through the wooded section for about 2km before you reach the lookout. This section of the trail is quite buggy (I’d recommend bringing a bug suit), it has a decent amount of sun exposure, and is prime bear territory. Remember to bring your bear spray!
You’ll find there are a few switchbacks in-between the fork and Paget Peak Lookout. The terrain here is slightly steeper than the previous trail, however it’s nothing overly strenuous.
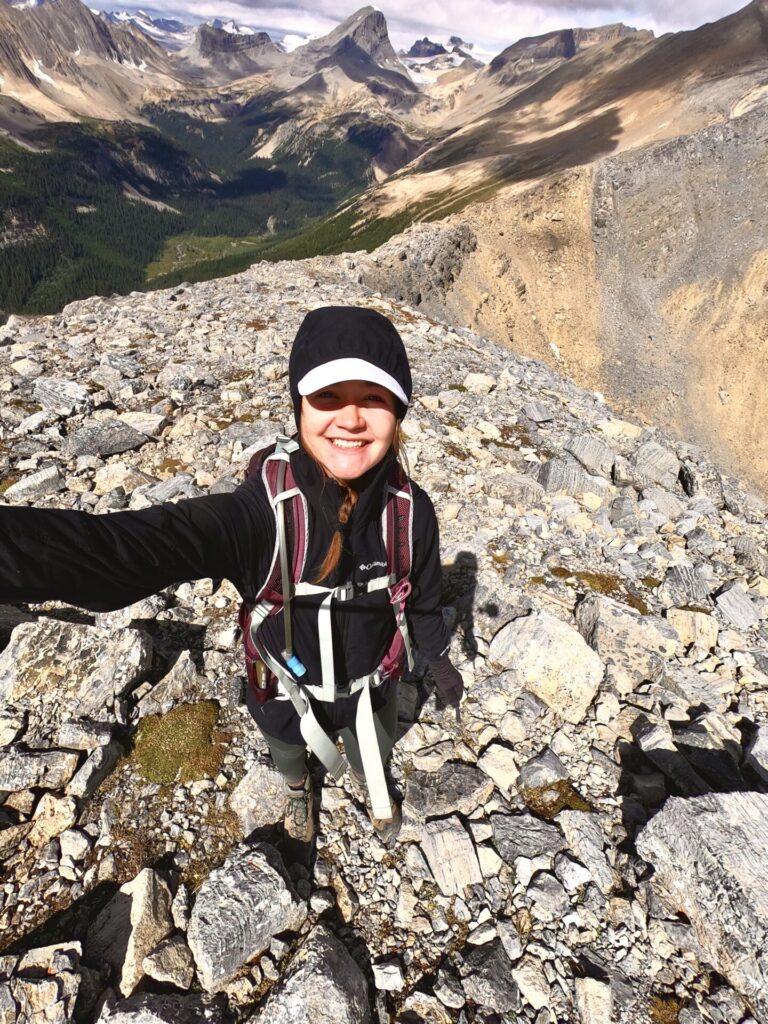
I say this, however I was dying as I made my way up to the lookout. This was day 3 of my “hiking bender.” I had just completed Opal Ridge and Taylor Lake the previous 2 days… I admittedly was quite tired!
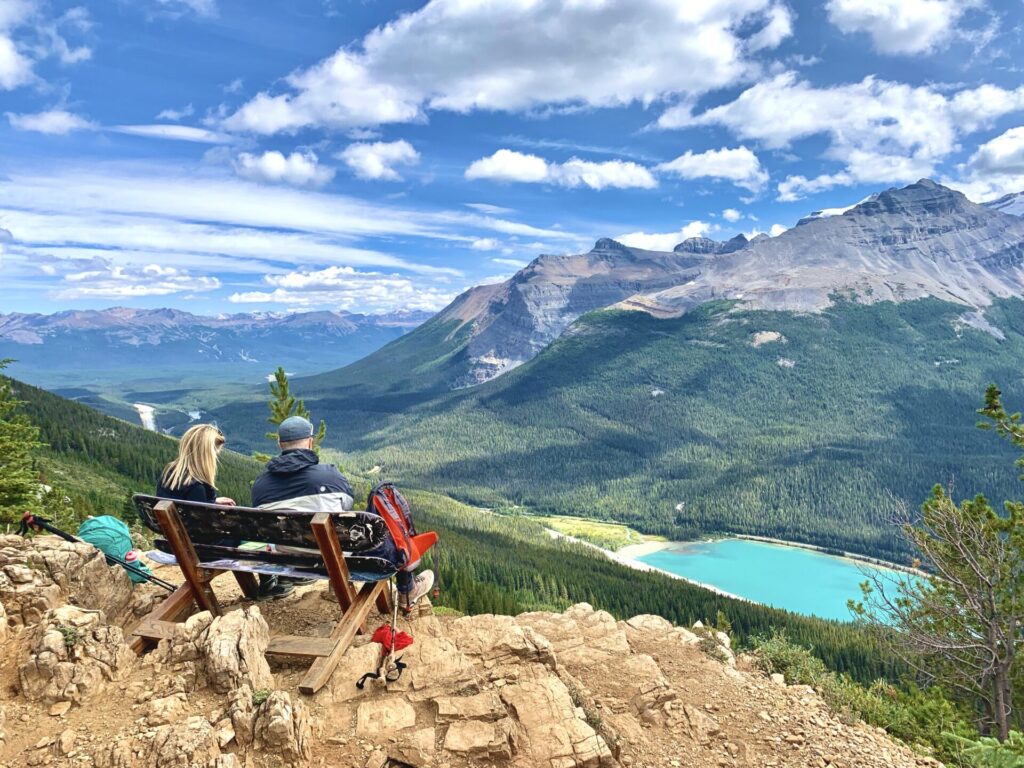
Remember how I said this hike was “Instagram-worthy?” Well this is what I was talking about. THIS BENCH is in almost every photo I see of Paget Peak. Instead of completing the Paget Peak scramble, most people only hike to the lookout so they can take this photo.
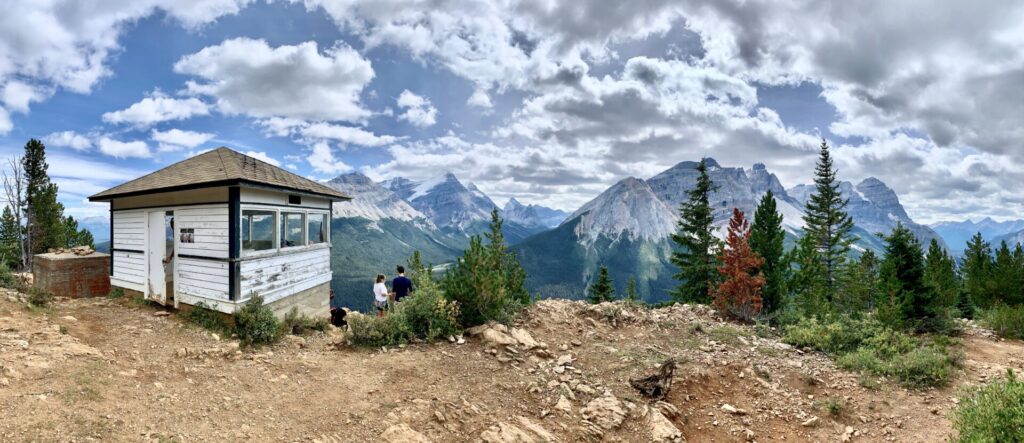
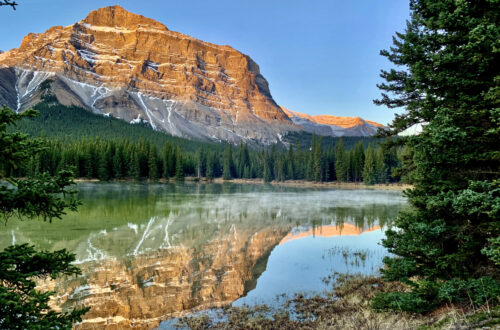
If you aren’t an experienced hiker, or aren’t into the whole scrambling thing, Paget Peak Lookout is the perfect place to end your hike. Here you’ll find beautiful views of Wapta Lake and the mountains that surround Lake O’Hara.
Continue reading for Paget Peak scramble directions and information for the Sherbrooke Lake hike.
Paget Peak Scramble
This next part, this is where adventurers thrive.
Prior to moving to Banff, I’d never heard the word “scramble.” Now, it’s one of my favourite things to do up in the mountains! For those looking to scramble more, check out my scrambling trail guides.
The Paget Peak scramble is considered a great “intro” for those who have no previous experience. I however found this scramble in particular to be bit more daunting; I’d recommend scrambling C-Level Cirque in Banff first. The Paget Peak scramble is quite steep and there’s no clear trail. I’m not one to ever get nervous of heights or mountain terrain, but I actually had a couple instances where I got spooked and had to take a breather to get back into a good headspace before continuing.
Again though, maybe this is just because I was so tired from hiking so much the previous couple days.
Scrambling Directions
You can definitely expect to do a lot of route finding as you summit Paget Peak. After the lookout you’ll find a clear, steep path through a section of slab style rocks in the trees. There will then be an easily identifiable path through the first part of the scree field. Follow this path around the left side of the rock face.
After you hike around the rock face though, anything is fair game. You’ll see potential paths going in every direction and it’s very difficult to know whether you’re on the actual trail or not. I kept making my way right which was definitely not great. I ended up coming around a corner only to find I had to boulder up a rock face.
If you stay far left, close to the grass, I think you’ll have an easier time ascending. Just note the terrain here is very steep and has a lot of loose rock. I found trekking poles to be invaluable as I completed the Paget Peak scramble. If it weren’t for them, I don’t think I’d have returned with functioning knees!
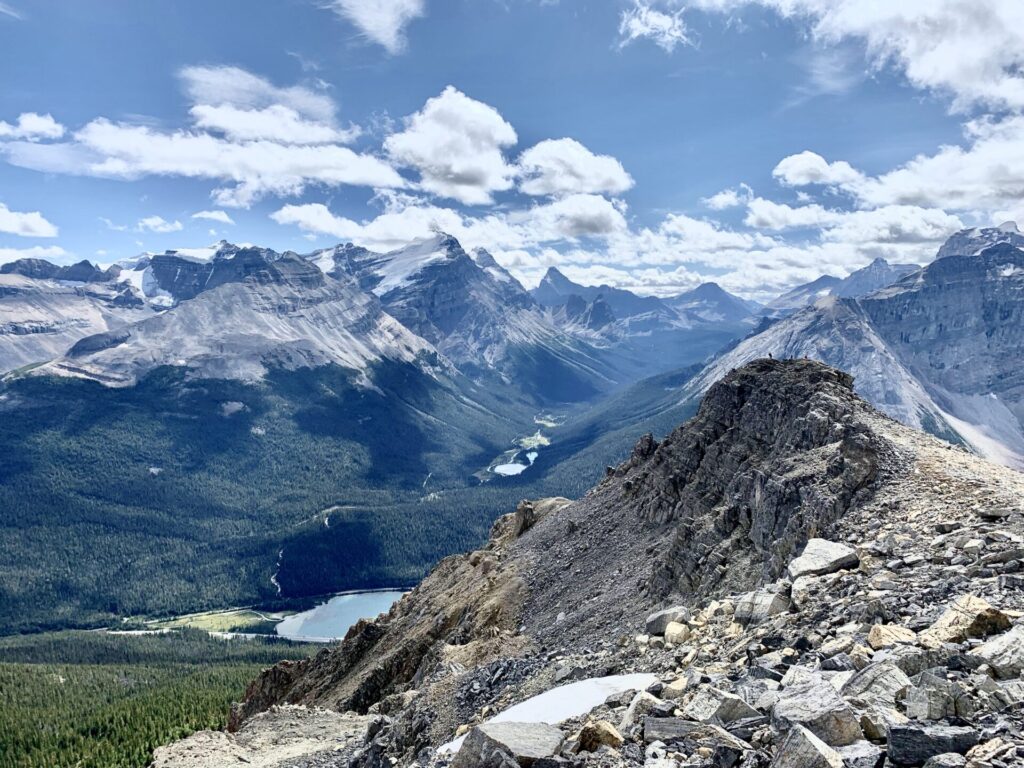
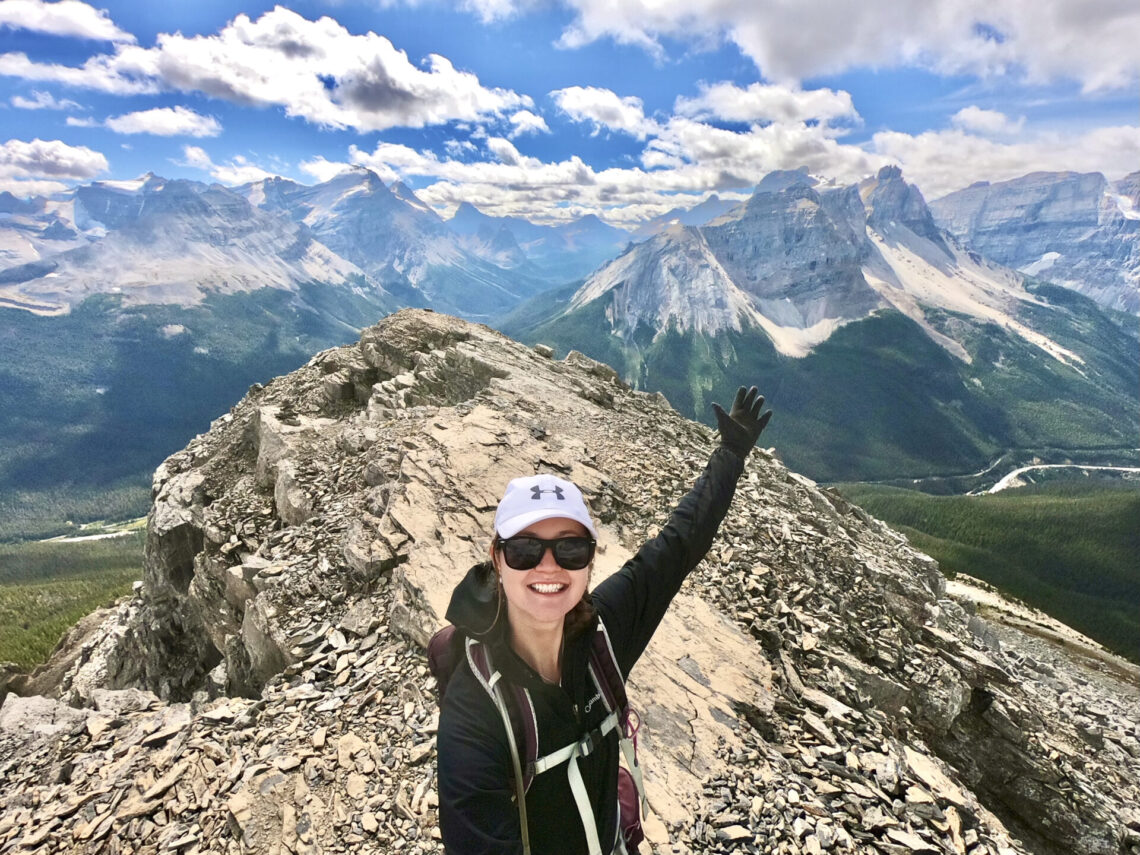
This is one of those “omg is it over yet” hikes. Every time you think you’ve made it to the summit, you’ll realize you in fact haven’t and there’s still tons of ground to cover. When you finally do reach the summit though, take your photos here! The most picture-perfect spot is when you first exit the scramble.
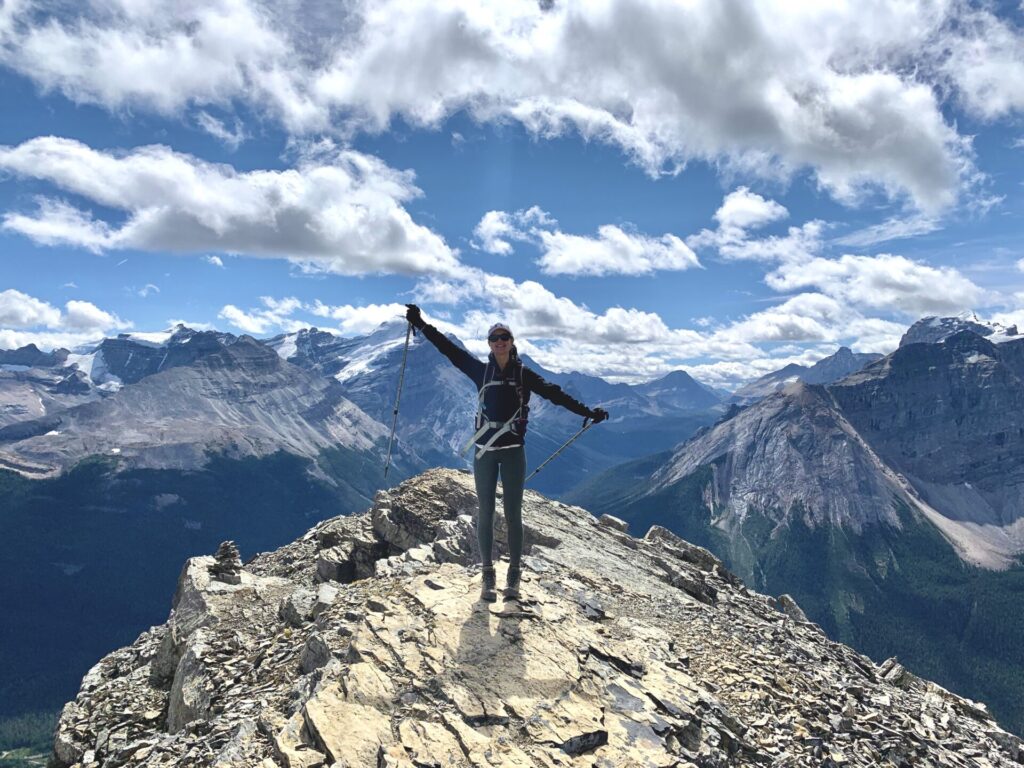
Paget Peak Summit
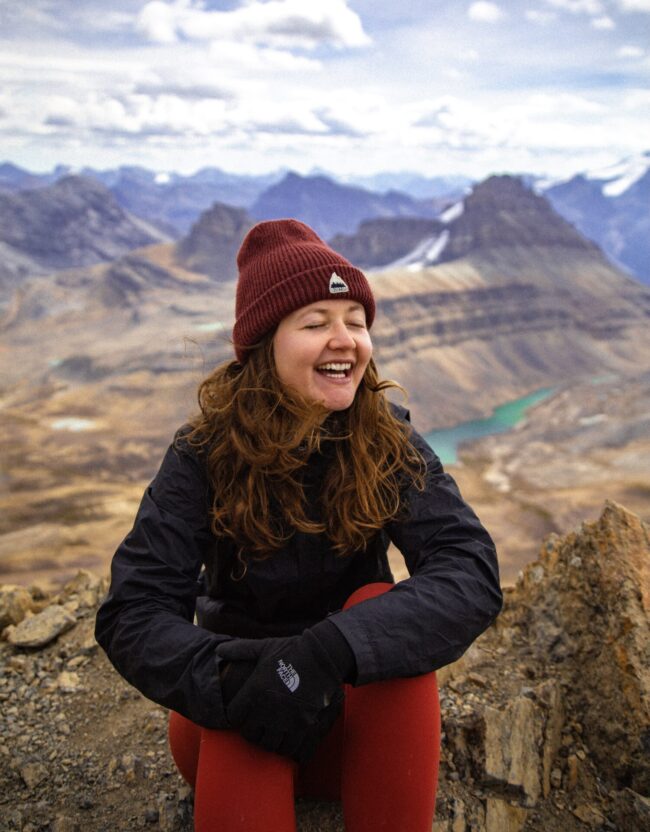
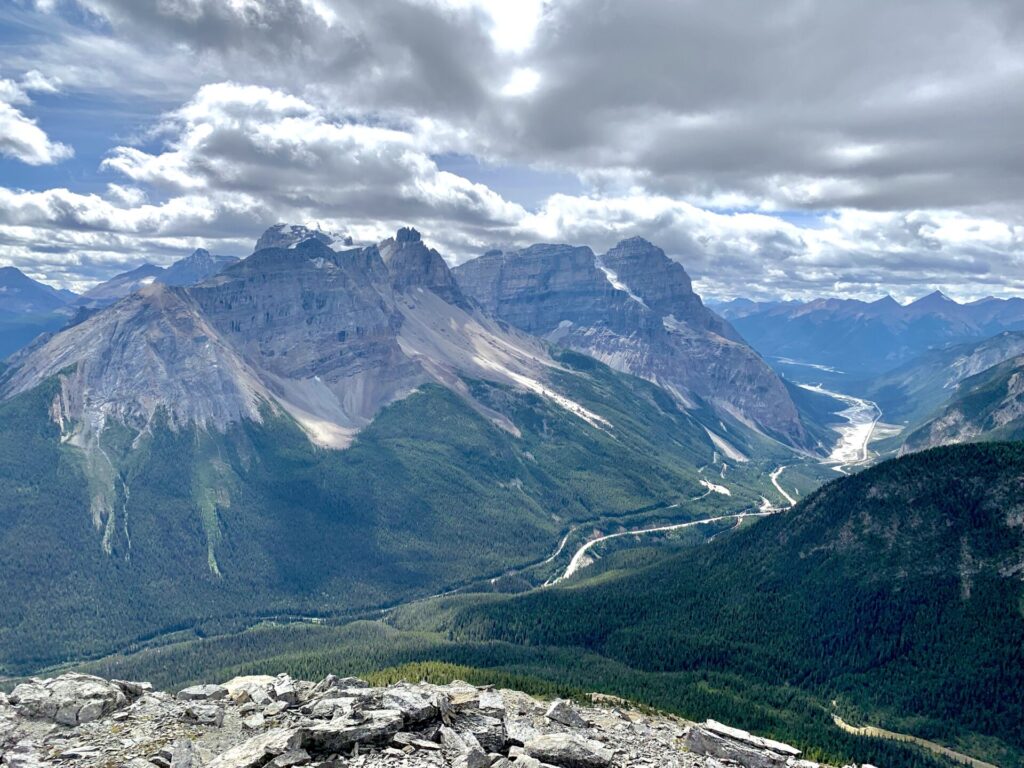
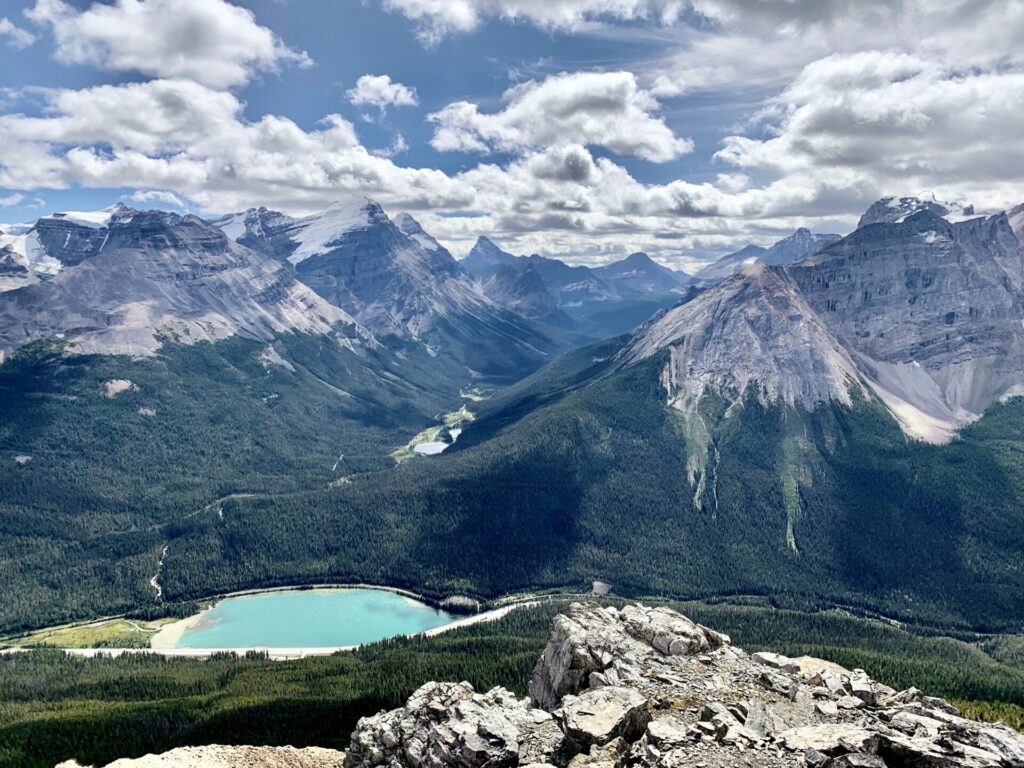
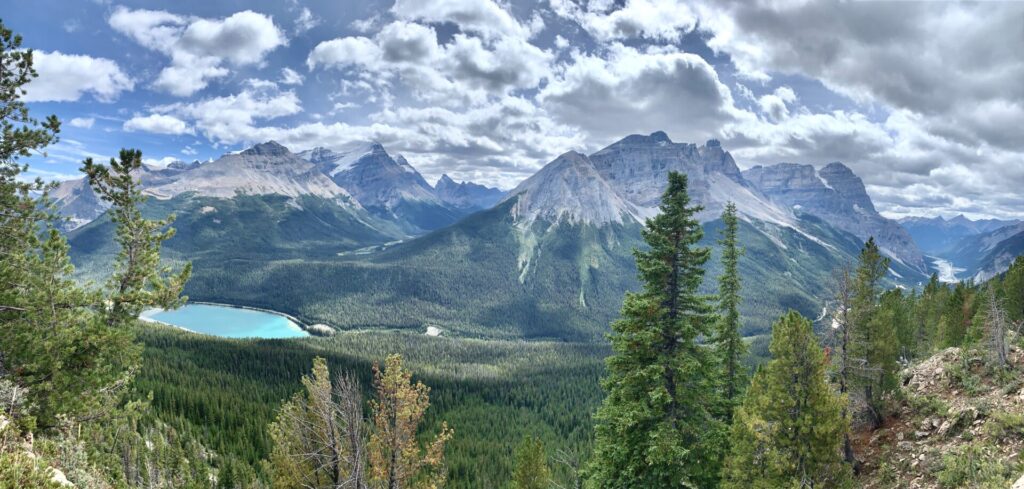
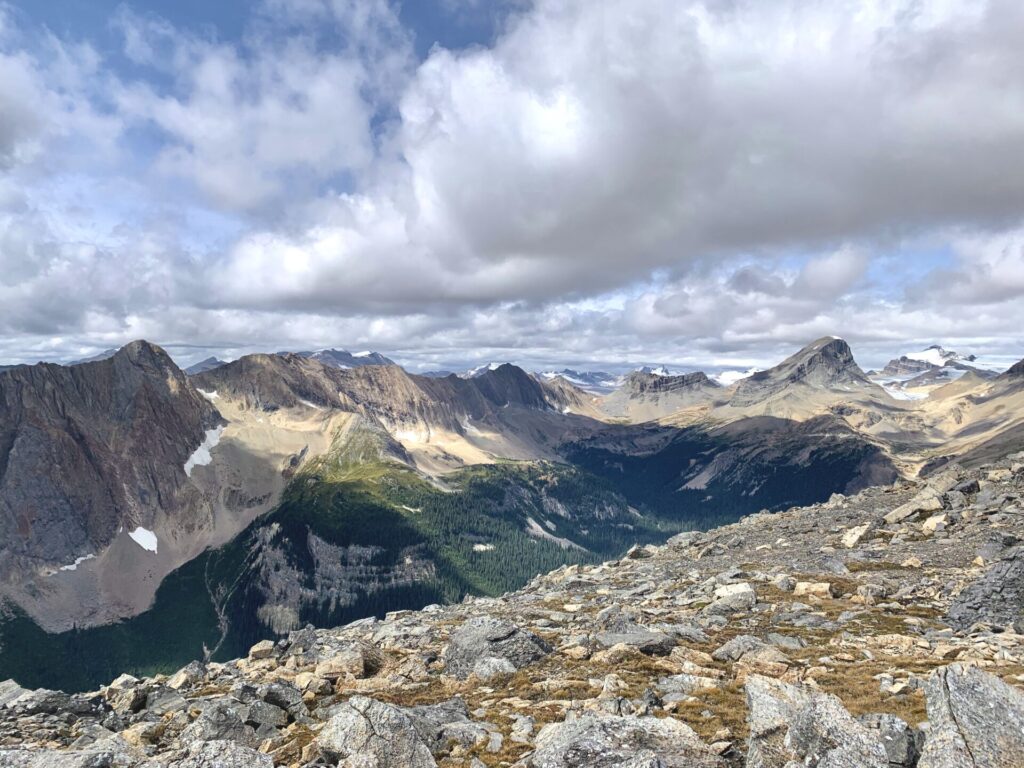
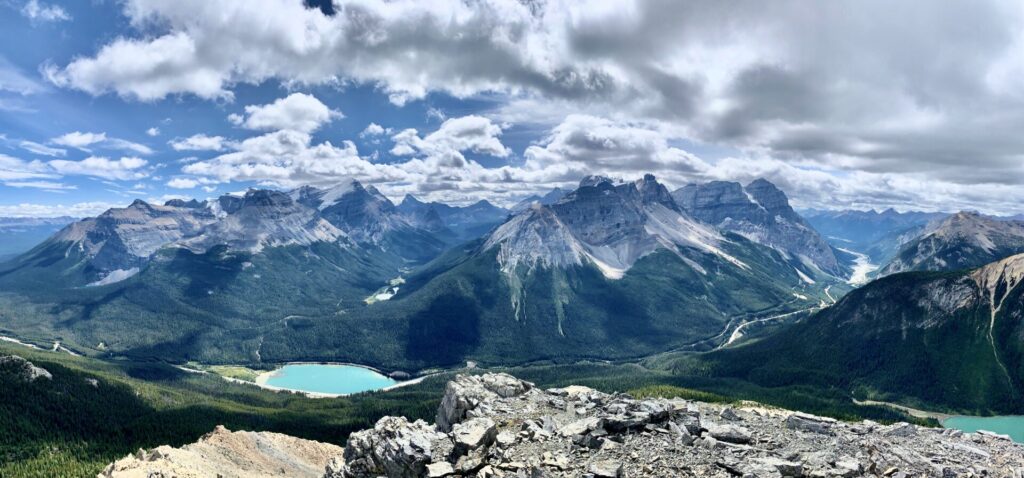
The Paget Peak summit is truly beautiful. In one direction you’ll be looking directly at the glaciated mountains of the Great Divide, Wapta lake, and the Trans Canada highway (aka the Kicking Horse Pass). If you look over Sherbrooke Lake you’ll find a lush valley surrounded by mountains that have a completely different colour and shape. And on the side opposite to Sherbrooke Lake you’ll find Mont Bosworth which is framed by an orangey-brown scree field.
The views up here are so unique compared to the mountaintop views I’ve had elsewhere in the Canadian Rockies.
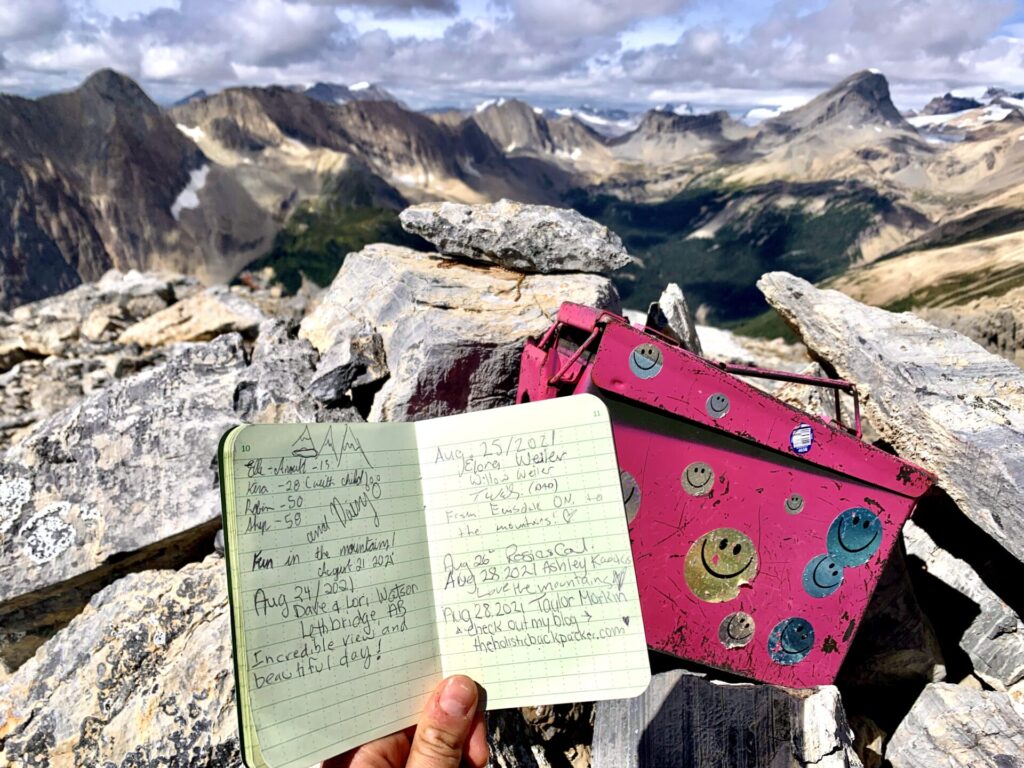
At the true summit you’ll find a logbook in a pink box which is enclosed in a cairn. Make sure you sign your name and the date! You’ll notice I left a link for The Holistic Backpacker in there hehehe.
You also have the option to hike further up along the North Ridge for a more elevated view. I did this a little bit, but didn’t trek to the very top as it wasn’t marked on Alltrails and I scrambled this solo.
What to Expect at the Summit
You can expect a few things at the Paget Peak summit. The first being wind and cold weather. I started the Paget Peak hike wearing just a t-shirt and leggings. It was a warm, fairly sunny day with minimal wind down at the base so I thought I’d be fine with a light sweater. WRONG.
At the summit, you’ll be completely exposed to the elements. There’s nowhere to hide up there and it’s cooooold. I’ve found the best layering combo for high elevation Rocky Mountain hikes to be a puffer jacket and waterproof jacket over a long sleeve. I link the clothes I always wear hiking here, but I want to quickly note that a puffer and waterproof jacket are the perfect layers for hiking because they provide warmth, wind protection, and water protection. They’re also light weight and compact which makes them easy to throw in your day-bag.
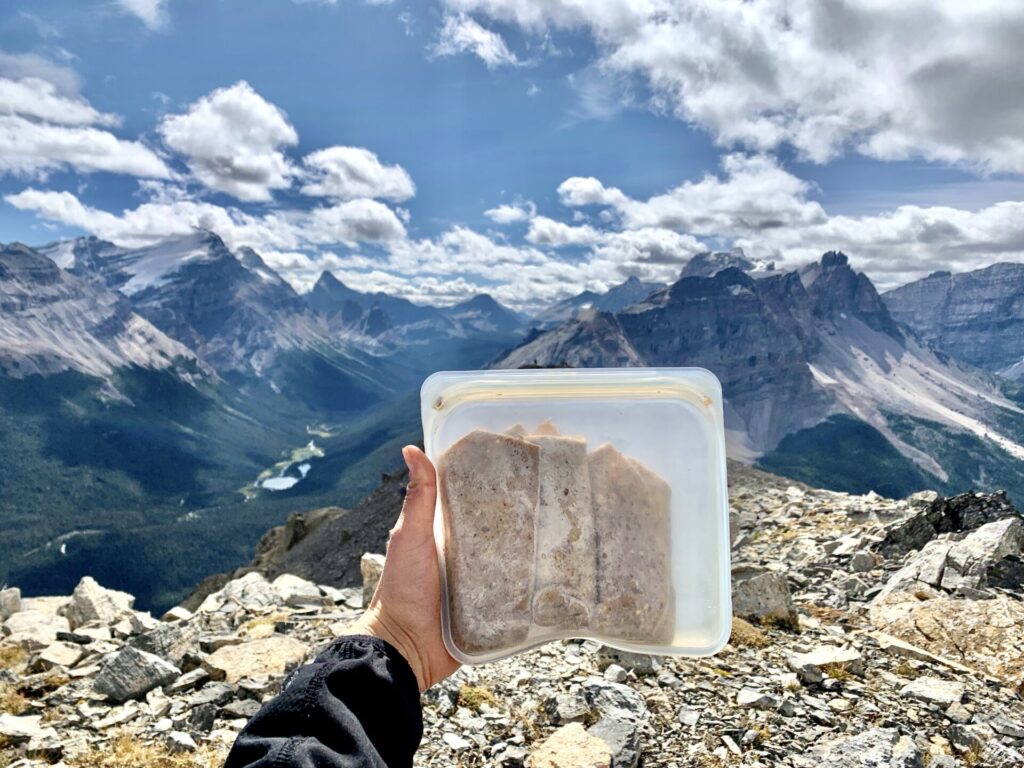
Secondly, you can expect to be HUNGRY. I’m always hungry on hikes and I’m always infamous for bringing a small amount of food, then complaining because I only brought a small amount of food. Every time. Literally.
I’m a huge DIY, whole food type of eater, so I must share a quick recipe I love to make for hiking. I DIY a tortilla wrap, then fill it with a chickpea spread which contains mashed chickpeas, tahini, S&P, cumin, lemon, red onion, and cilantro. I then pack it up in my reusable and eco-friendly silicone Stasher bag.
Stasher bags are my go-to for packing hiking snacks and making meals when I’m backcountry camping. If you’ve never heard of these bad boys, I’d HIGHLY recommend checking them out.
Return Hike
Okay so on the return hike definitely go as far right as possible the scramble and follow the trail down next to the grassy area. This is what I did on the return hike and it seemed to make it much easier. Again though, I’d recommend bringing trekking poles for the Paget Peak scramble. These will save your knees and will help tremendously with balance.
After you make it back to the fork in the trail, you can either hike left for the parking lot, or make a quick detour to visit Sherbrooke Lake.
Connect via socials:
STAY CONNECTED
Sign up for emails to receive a 25% discount on my travel maps.
Taylor ♡
Sherbrooke Lake Hike
Okay so I done goofed and forgot to take a picture of Sherbrooke Lake from the top of Paget Peak, so you’ll just have take my word when I say Sherbrooke Lake from above is SO blue. Like seriously, this lake is freakin’ beautiful.
Here’s the Alltrails map for the Sherbrooke Lake hike.
Sherbrooke Lake Hike
After you return to the fork in the trail, take a right for Sherbrooke Lake. It’ll be about 1.5km of trekking along mostly flat land and boardwalks over marshy terrain until you reach the beginning of the lake. Eventually you’ll find a gap in the trees (hiker’s left) which allows you to find the shore of the lake.
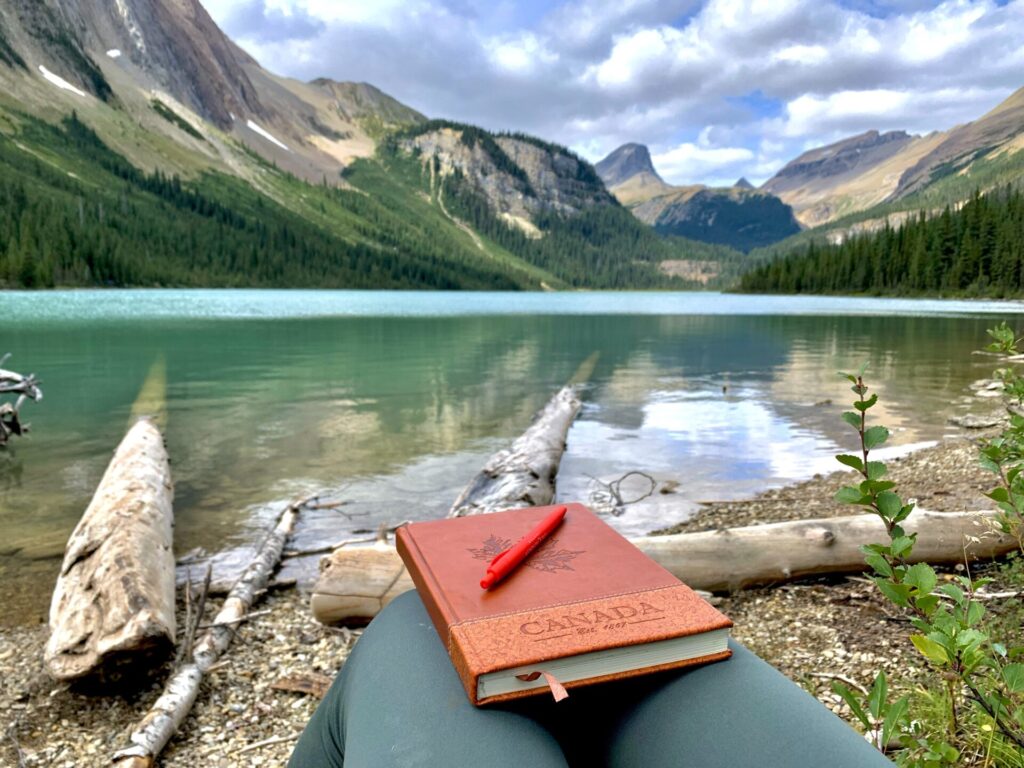
There’s actually nowhere to sit at Sherbrooke Lake and there’s very limited space. There were lots of people when I completed the Sherbrooke Lake hike, so I actually made it to shore, then walked down the shore (left) to the pile of logs. I found a nice rock to sit on and journaled all about the Paget Peak hike before making the 2.8km trek back to my car.
Tip – a lightweight backpacking chair like this one would have been perfect for the Sherbrooke Lake hike.
Next I’ll go over my favourite hiking clothes and hiking gear for the Rockies as well as recommend some great places to stay near Yoho.
Looking for More Adventures in British Columbia?
The Holistic Backpacker is full of hiking and travel resources for destinations all over the Canadian Rockies.
The following are a few of my personal favourites, but you can find all my BC guides here:
- How to spend 1 day in Yoho National Park
- Best ski resorts in British Columbia
- Paget Peak scramble
- Stanley Glacier hike
Explore Alberta
Alberta is British Columbia’s next door neighbour and is home to incredible National Parks and Wildland areas like Kananaskis Country, Banff National Park, Jasper National Park, Waterton National Park, etc.
You can find all my hiking guides and travel resources for Alberta here.
Where to Stay in Yoho
Booking.com- Hostels – HI Yoho Whiskey Jack Wilderness Hostel, Dreamcatcher Hostel (25 minute drive).
- Mid-range hotel – Canadian Rockies Inn (adults only).
- Luxury stay – Emerald Lake Lodge is an iconic hotel in the Rockies featuring a restaurant, bungalows, canoe rentals, and more. Cathedral Mountain Lodge is another gorgeous lodging option in Yoho where you’ll have the opportunity to stay in log cabins.
- Camp – reservation info.
- See all Yoho lodging options.
- See Golden lodging options (25 minutes away).
Happy adventuring!
Taylor ♡
Like This Post?
Share with friends or save it for later!

About the Author
HI, I’m Taylor – the voice behind The Holistic Backpacker.
After moving to Banff National Park in 2020 I became an outdoor adventure enthusiast and vowed to never stop exploring.
I now spend my days travelling the world, climbing mountains, and spending nights under the stars in the Canadian Rockies backcountry.
I created The Holistic Backpacker so I could share my adventures and help connect people like you with the same amazing experiences.