Mount Yamnuska Hike in Kananaskis (Bow Valley Wildland)
Okay folks, the Mount Yamnuska hike in Kananaskis is one for the BOOKS! Mount Yamnuska is a technical hike that features the most amazing scramble I’ve ever done in the Rockies. PLUS this was the mountain where I accidentally got bear sprayed. But more about that later…
In this trail guide I’ll tell you everything you need to know about the Mount Yamnuska hike in Kananaskis: directions, how to navigate the infamous cable section, helpful gear, how to not get bear sprayed, best photo-op spots, scrambling info, and so much more.
Now, let’s go hiking!
Skip Ahead:
- How to get to the Mount Yamnuska trailhead
- About the Mount Yamnuska hike in Kananaskis
- Hiking Mount Yamnuska in Kananaskis
- Best hiking gear for the Rockies
- What to wear hiking for the Rockies
- Best places to stay in Banff
I have affiliate links in this post which means when you book a hotel or purchase a product, I may make a small commission ~ at no additional cost to you (full disclosure). These funds go back into The Holistic Backpacker and help me create more free content like this!
Thank you for supporting my work!
How to get to the Mount Yamnuska Trailhead
The Mount Yamnuska trailhead is located about 40 minutes from Banff, 20 minutes from Canmore, and about 1 hour from Calgary. You’ll need to drive or rent a car to get to the trailhead, as there’s no shuttle.
Best Alberta Car Rental
Most of Alberta is inaccessible via public transportation. I 100% recommend renting a car here so you can fully enjoy all the mountains, lakes, and badlands.
My favourite Alberta car rental tool is this site. It compares all the local car rental companies to ensure you’re getting the best rate.
There have been reports of cars being broken into at the Mount Yamnuska trailhead, so it’s recommended you leave nothing valuable in your car.
The Mount Yamnuska hike is specifically located in Bow Valley Wildland Provincial Park which is in the Kananaskis Region. For more trail guides in Kananaskis, click here.
IMPORTANT: as of summer 2021 you need a Kananaskis conservation pass to enter Kananaskis/the Bow Valley Corridor.
About the Mount Yamnuska Hike
- Distance: 8.9km
- Elevation gain: 922m
- Rated: hard
- Type of trail: loop
- Estimated time: 4 hours, 15 minutes
The map above is the Mount Yamnuska Ridge and CMC Valley trail which features the scramble. Alternate routes that don’t include the scramble are Mount Yamnuska Trail and Yamnuska Raven’s End.
The Mount Yamnuska trailhead begins in a forested section where you’ll gain steady elevation for about 3km. After this, the trail takes you through a chimney, across a scree field, and along a set of cables on a cliff edge. Shortly after the cables, you’ll reach the summit. From here you can either complete the loop and scramble down the mountain, or return to the trailhead via the route you took to ascend Mount Yamnuska.
The trail leading to the chimney is well trafficked, however after this only advanced hikers continue on to the summit/scramble. You can therefore expect to see very few people after the chimney.
Safety Tips for Mount Yamnuska Hike in Kananaskis
The Mount Yamnuska hike is advanced. This is not a “regular” hike and it should only be attempted by those who have previous scrambling experience. Multiple people have died/been seriously injured on the Mount Yamnuska trail. This hike in particular is visited nearly weekly for rescues.
- I wouldn’t recommend hiking Mount Yamnuska in the snow/rain. Conditions could get quite dangerous in wet terrain.
- The terrain becomes significantly more technical past the chimney and advanced route finding skills are required. This is especially true for the scramble.
- There are over 150 climbing routes on the face of Mount Yumnuska. Ensure you DON’T throw/dislodge any rocks from the summit.
- Understand and practice proper scrambling safety.
- The scramble/summit route is not necessarily safe for dogs.
- Recommended safety equipment: a climbing helmet and trekking poles for the scramble, a satellite communication device, and good quality hiking boots with ankle support (I use these/men’s version). I’d also recommend bringing a small first aid kit and gaiters for the scree field; gaiters will prevent small rocks from entering your boots (trust me, there’ll be tons).
More Info for the Mount Yamnuska Hike in Kananaskis
- The Mount Yamnuska hike is marked via blue squares. It’s especially important to follow these markers after the chimney.
- The trail is best hiked from June to October.
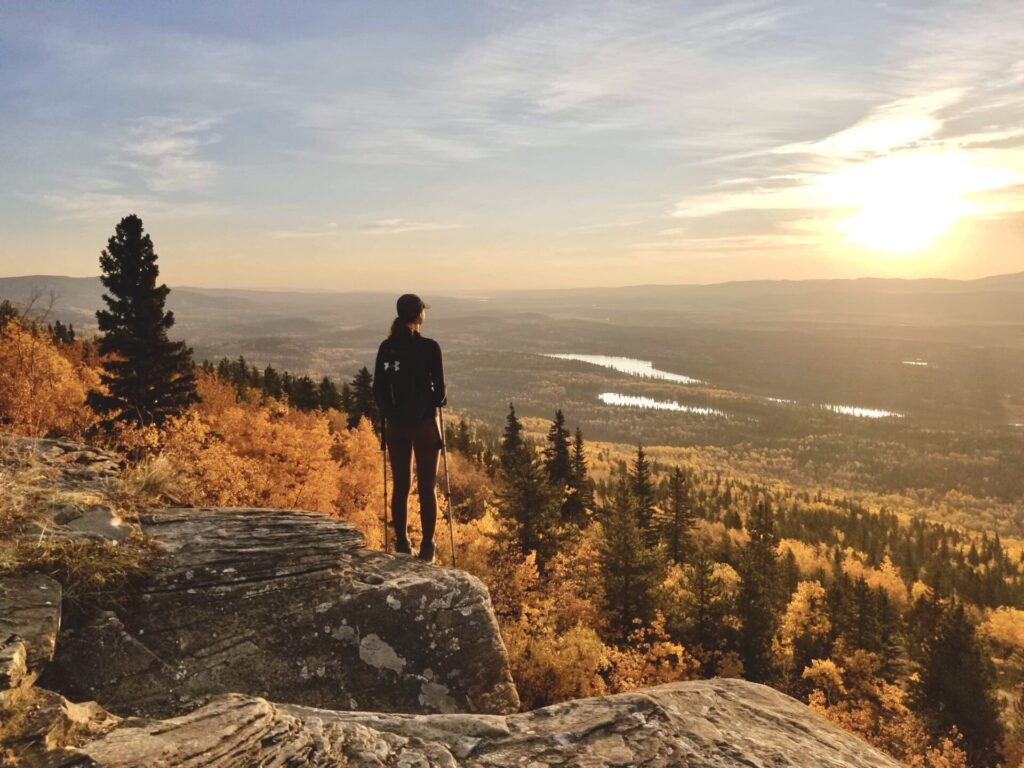
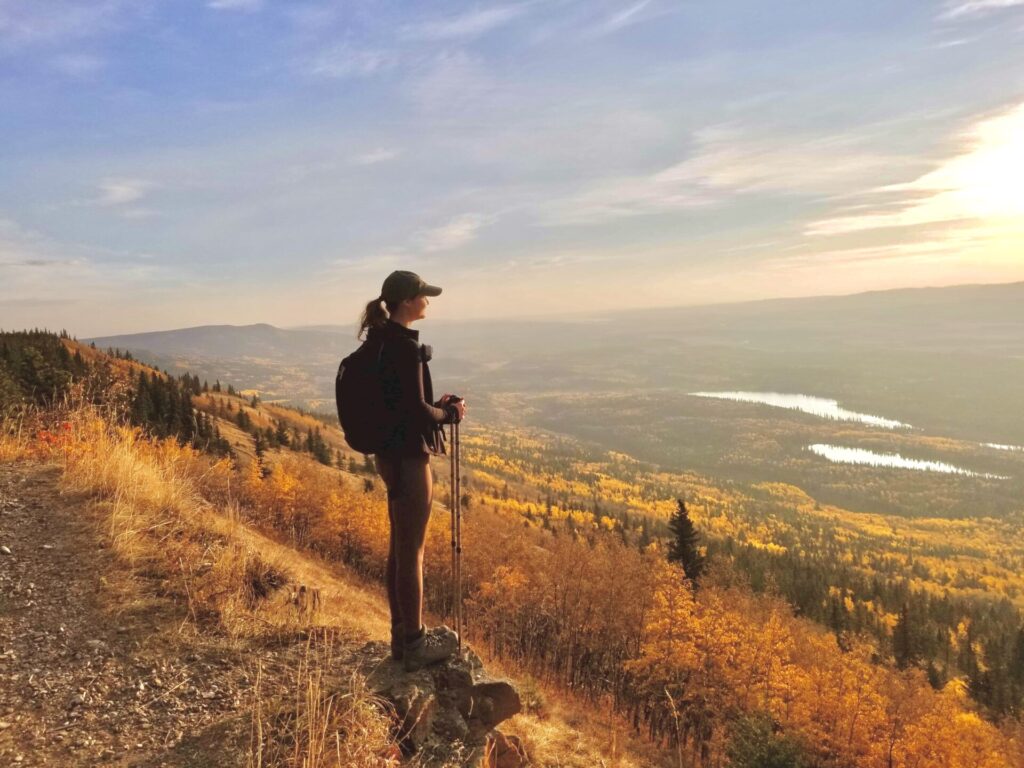
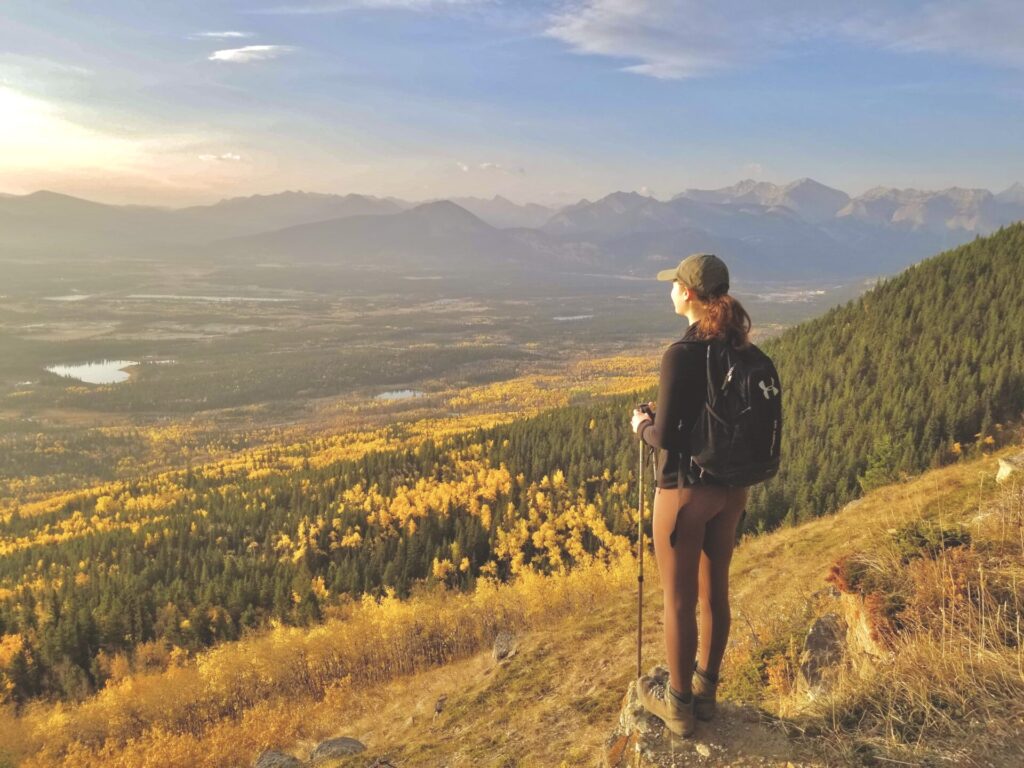
- The Mount Yamnuska hike is perfect for sunrise; there’s a viewpoint a couple kilometres into the trail which overlooks a few surrounding lakes, the Mount Yamnuska summit, and the distant Rocky Mountains.
- You can find vibrant yellow Larch trees along this trail during the fall. In the spring/summer you will find bountiful wildflowers.
Hiking Mount Yamnuska
For any of you that know me, you know I have very interesting hiking experiences and stories. I’m not necessarily “careful” and I end up in some pretty whack situations. But hey, the more I hike, the more I’m learning that being careful actually has it’s merits! I now take safety precautions and I bring appropriate gear with me on my big mountain summits.
Mount Yamnuska, however, was pre me-being-careful. So, here’s a complete recap of my hike up Mount Yamnuska, my story of scrambling down the mountain drunk, and how I got bear sprayed. OH, I’ll also tell you everything you need to know about hiking Mount Yamnuska in Kananaskis.

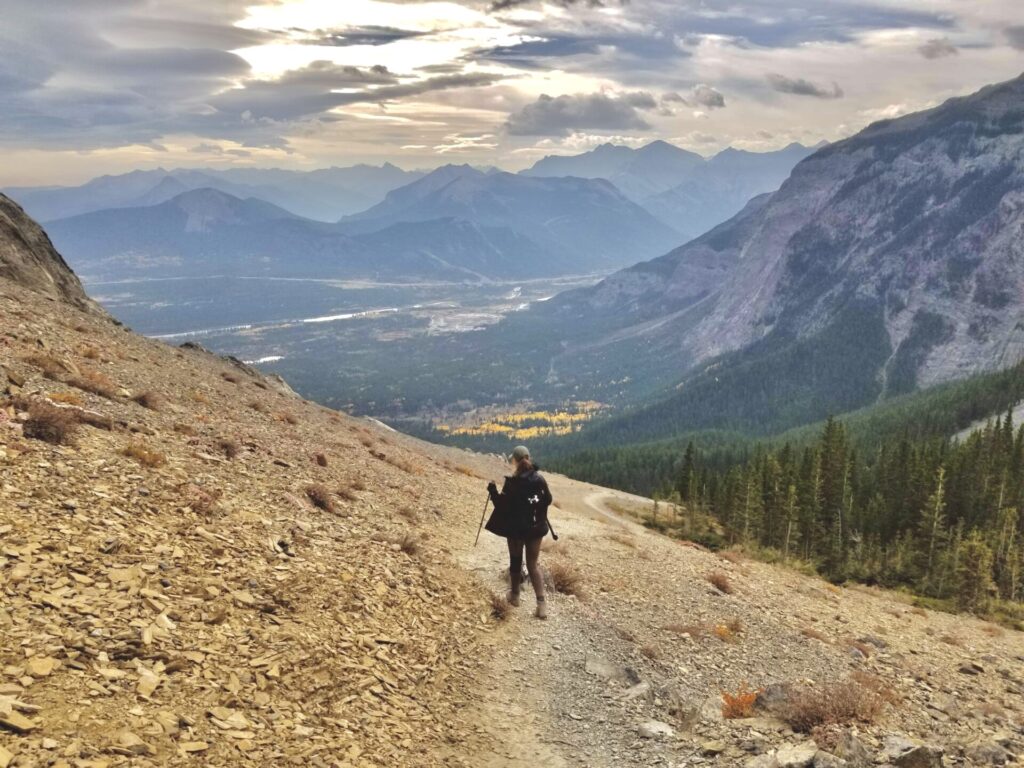
Mount Yamnuska Trailhead to the Sunrise Lookout
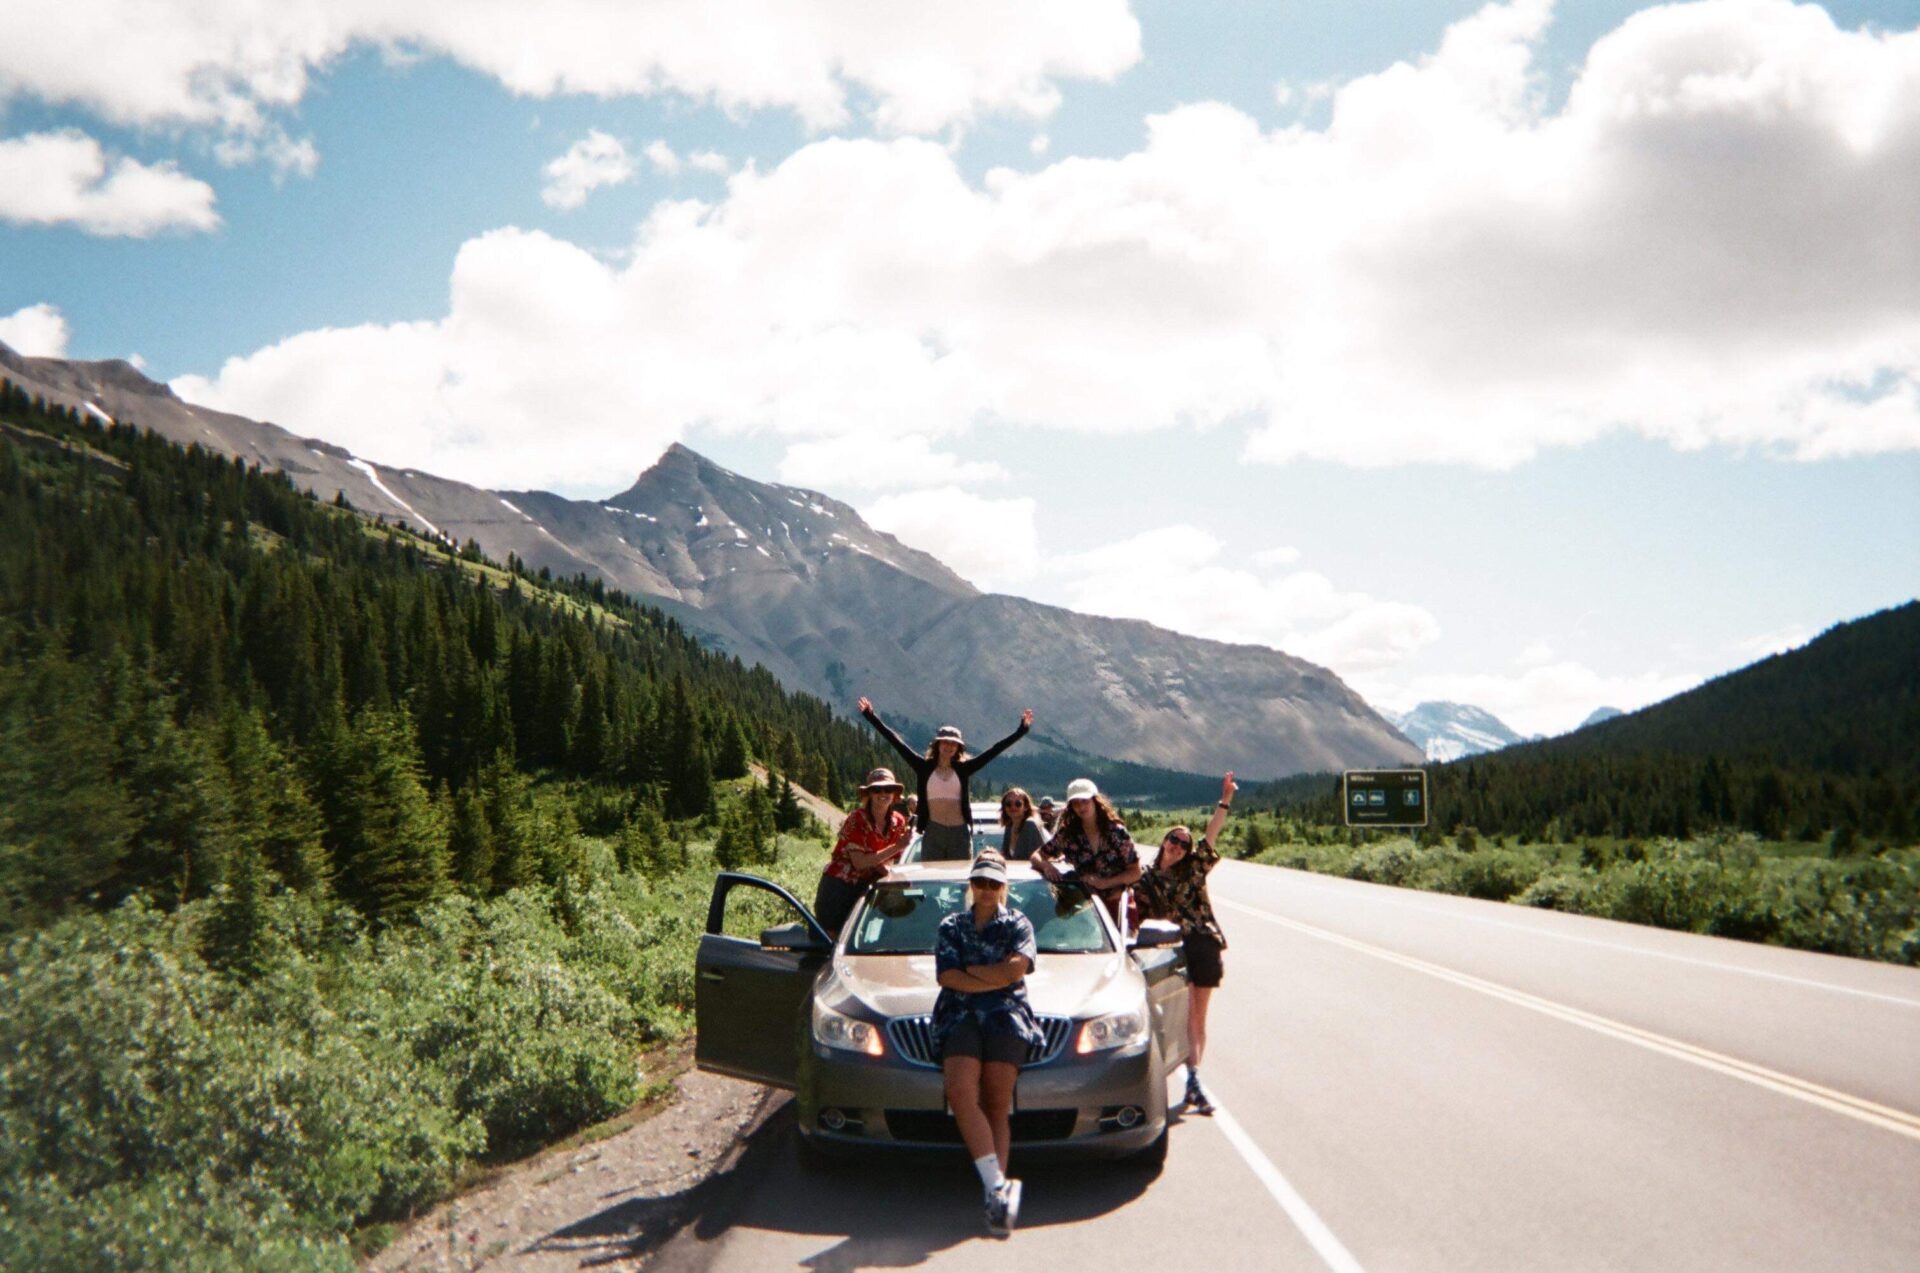
Mount Yamnuska was my last hike of the season before I headed off on my solo road trip to Vancouver Island and before ski season in Banff started. Obviously this was a “go big or go home” hike, so myself and my hiking partner (who is actually Greg over at Banff Buzz) arrived at the Mount Yamnuska trailhead for 7am. We started off our big day of hikin’ with a celebratory shot of tequila. It honestly all went downhill after this.
The first 3.5km of the Mount Yamnuska hike follows a trail that’s in a completely forested section. You can expect to find lots of exposed rocks on the ground here. You’ll also want to ensure you have a canister of bear spray in an easily accessible location; this forested area is prime bear territory.
At about the 0.8km mark you’ll find a fork in the trail. Take a right here as this will bring you to a lookout that’s great for sunrise. If you hike left, you’ll arrive at the scree field first. To be honest, scrambling up this scree field would suck. I recommend taking a right at the fork to avoid this.
The sunrise lookout point (not actually it’s name, just what I’m calling it) is located just before the U-turn at the 2.5km mark; refer to the Alltrails map to see where the U-turn is. I can confidently say the golden sun casting it’s light over the vibrant larch trees, distant mountains, and little lakes was one of the most beautiful sunrises I’ve seen to date.
Here’s a quick sunrise gallery:

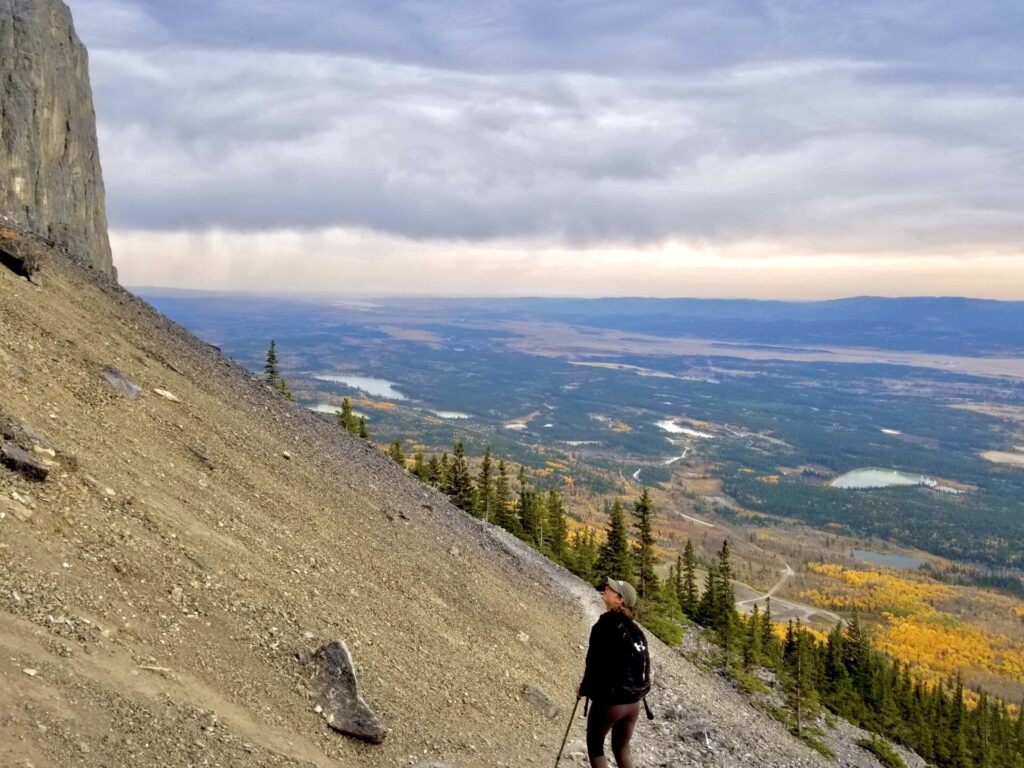
Sunrise Lookout to the Chimney
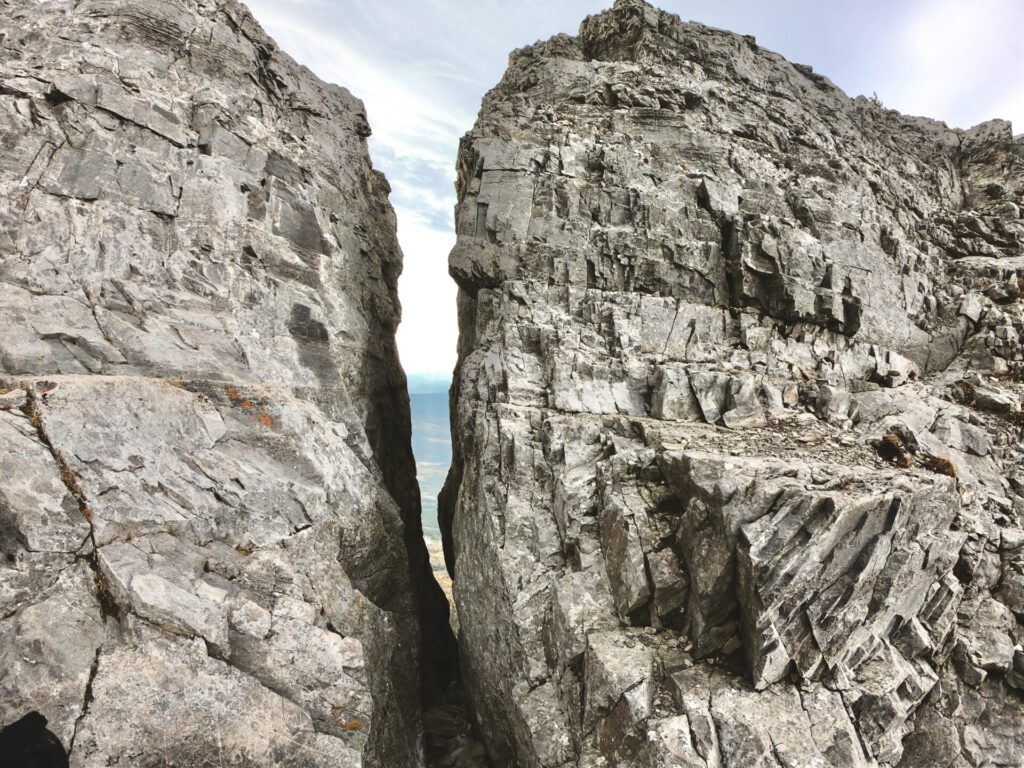
After the sunrise lookout, the trail will become tight and a little difficult to follow. However, you’ll arrive at the chimney within 1km. For those of you who are new to Rocky Mountain lingo, a chimney is a gap between two vertical faces of rock or ice.
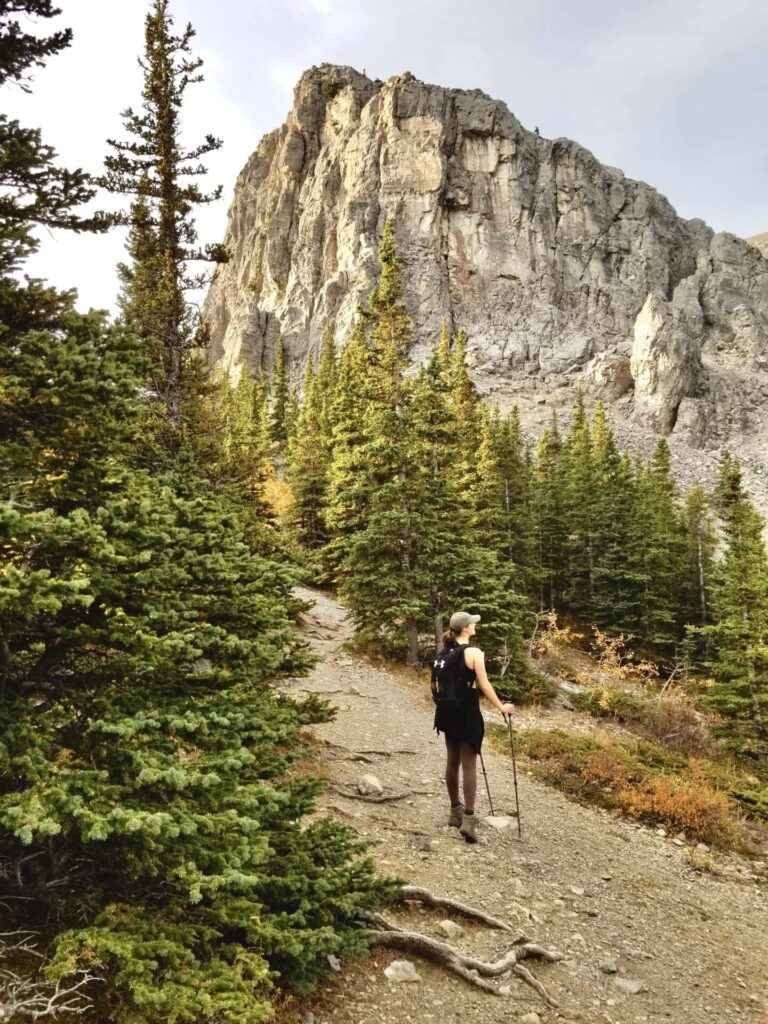
The chimney isn’t overly difficult to maneuver through and you’ll navigate it pretty quickly – but it is freakin’ cool. You’ll need to utilize both your hands and feet in this section. I actually had to turn sideways in order to fit my body and backpack through the tight spaces. Climbing through the chimney really makes you feel like you’re doing some serious mountain hiking.
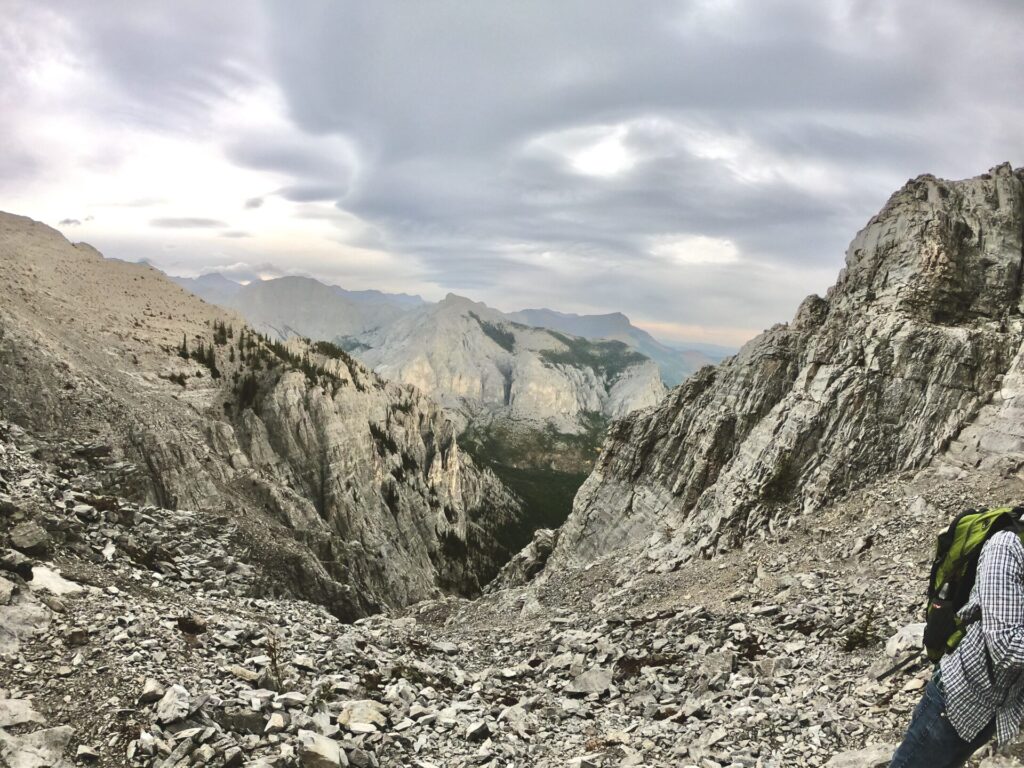
There’s also a viewpoint right before the chimney that overlooks the valley along the backside of Mount Yamnuska. Take a second here to appreciate the views – they’re pretty damn spectacular!
The Bear Spray Explosion
The bear spray explosion was probably the craziest, and in hindsight, funniest thing that’s ever happened to me on a hike. Note that it’s only funny because my hiking partner and I weren’t seriously injured.
As my hiking partner and I climbed through the chimney, I heard a loud hissing noise. Initially I thought it was from a beer can in my hiking partner’s bag. However not a second later my eyes started stinging like they’d never stung before. The air around me became so *pungent* (I don’t even know how to describe it) that I couldn’t breath. I was literally gasping for air, but the more breaths I took, the less air I could take in.
My eyes stung so bad I couldn’t open them. My hiking partner and I had to literally climb backwards out of the chimney, blind. We carefully maneuvered our way out and away from the steep cliff next to us until we were far enough away we could open our eyes. We chugged water, rinsed our eyes out, and caught our breath.
Connect via socials:
STAY CONNECTED
Sign up for emails to receive a 25% discount on my travel maps.
Taylor ♡
My hiking partner didn’t have the clip on his bear spray, so when it touched the walls of the chimney, it released the spray. Luckily the nozzle was facing his arm, so it released onto his body rather than directly onto my face, which was mere inches away from the canister. His arm however was badly burned.
As I said, this was our last summit of the season, so we weren’t going to let a lil bit of mace stop us. After we recuperated, we geared up and hit the trail again even though we were now complete bear magnets.
^After bear spray is released, it actually attracts bears. Oops.
Moral of the story: ALWAYS USE THE CLIP ON YOUR BEAR SPRAY.
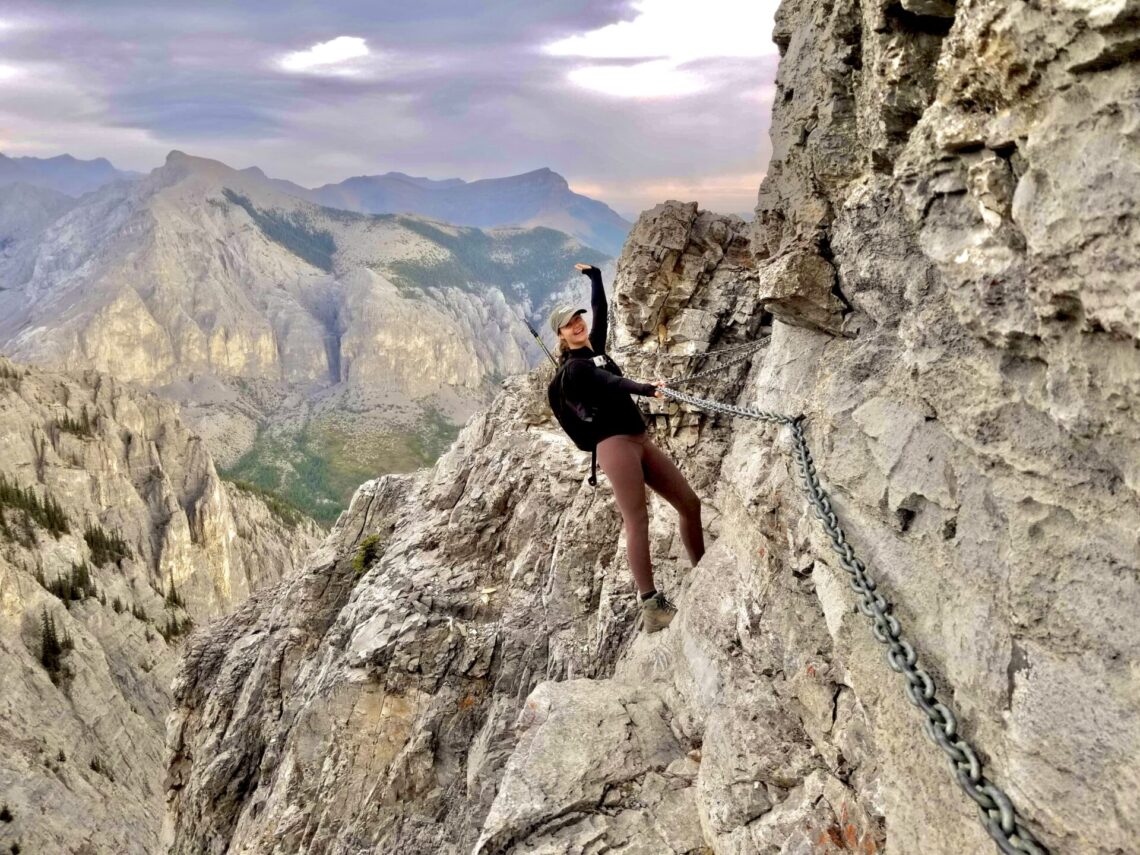
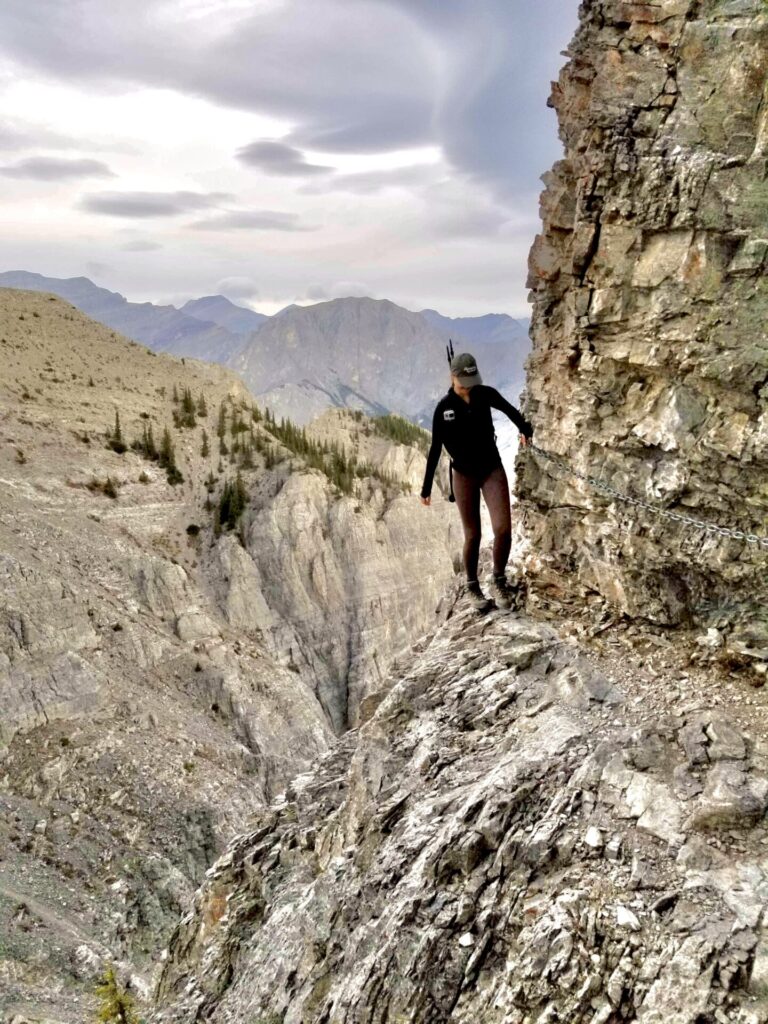
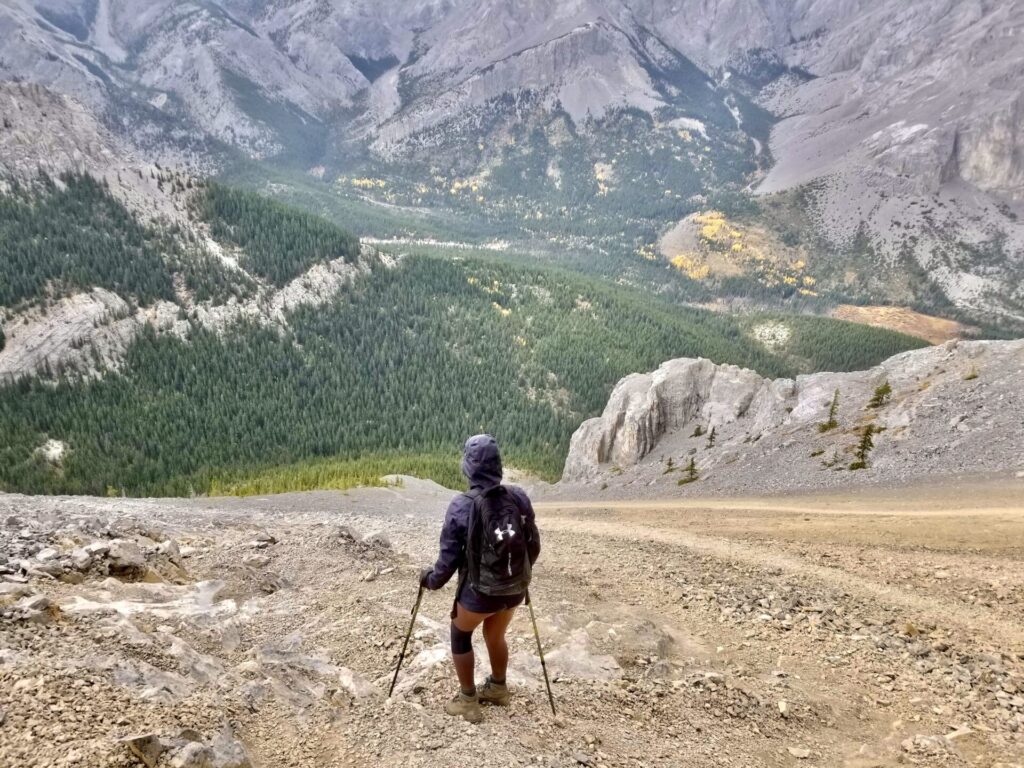
The Chimney to the Cables
Distance from the chimney to the cables: 1km.
After the chimney, the trail enters a massive field of loose rocks that extends the entire length of Mount Yamnuska. Here you’ll need to rely on route-finding skills, however you’ll occasionally come across blue markers which will indicate the general direction you should be following.
**If you plan on summiting or scrambling down Mount Yamnuska, ensure you have proper hiking boots (I use these/men’s version). This is absolutely NOT a hike you can complete in runners.
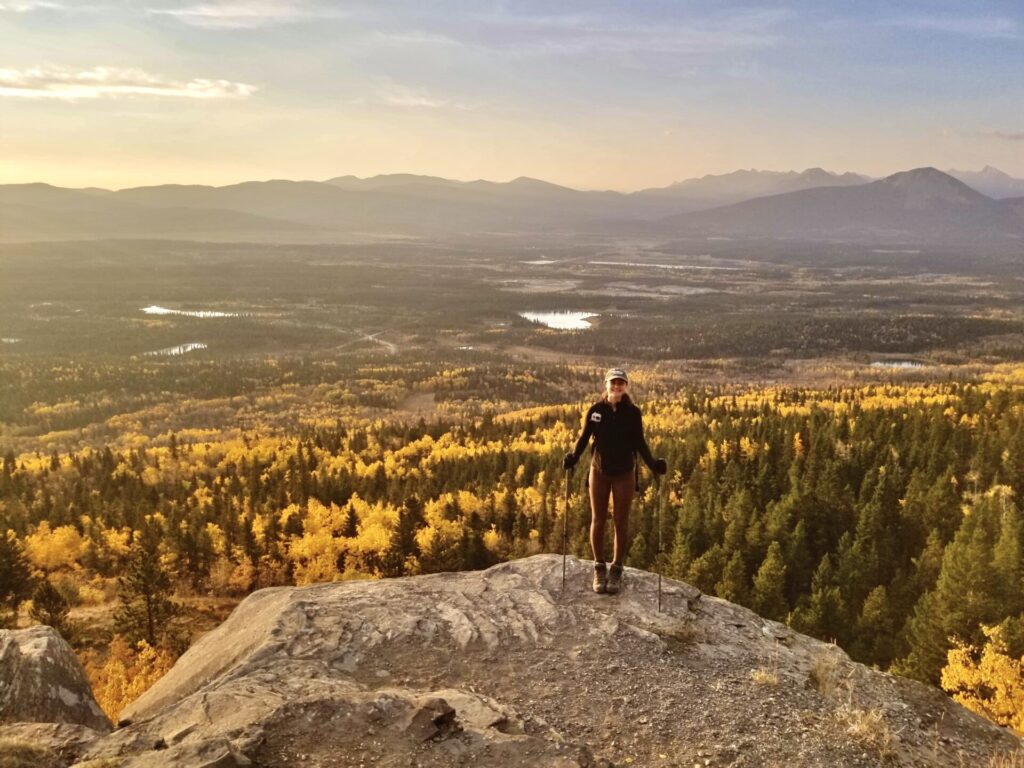
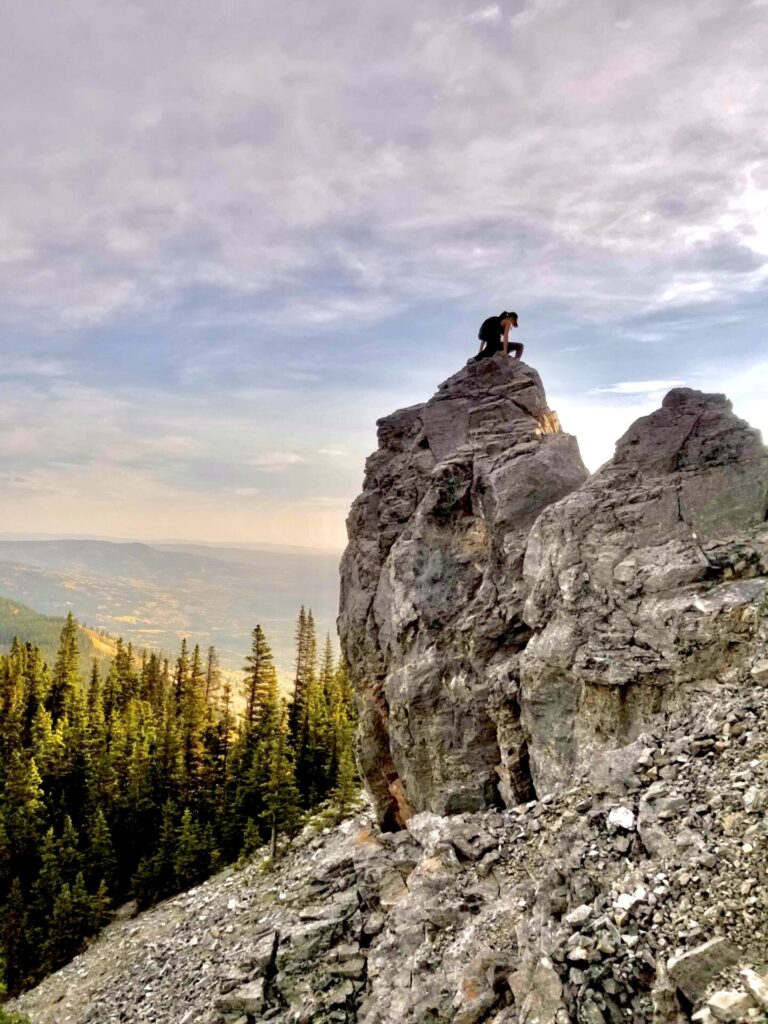
Keep an eye on the ridge too. Shortly after the chimney, the trail extends upwards toward the ridge. If you climb a bit higher off the trail, you’ll find a killer viewpoint (featured below).
There’s one section of the trail that gets very confusing and technical. Right before the cables, you’ll need to boulder up steep rocks. This would honestly be SO sketchy in the rain, so I recommend you only complete the Mount Yamnuska hike in dry conditions. Climb wherever you feel safest in this section, but keep an eye out for those blue markers. They’ll lead you along the safest path.
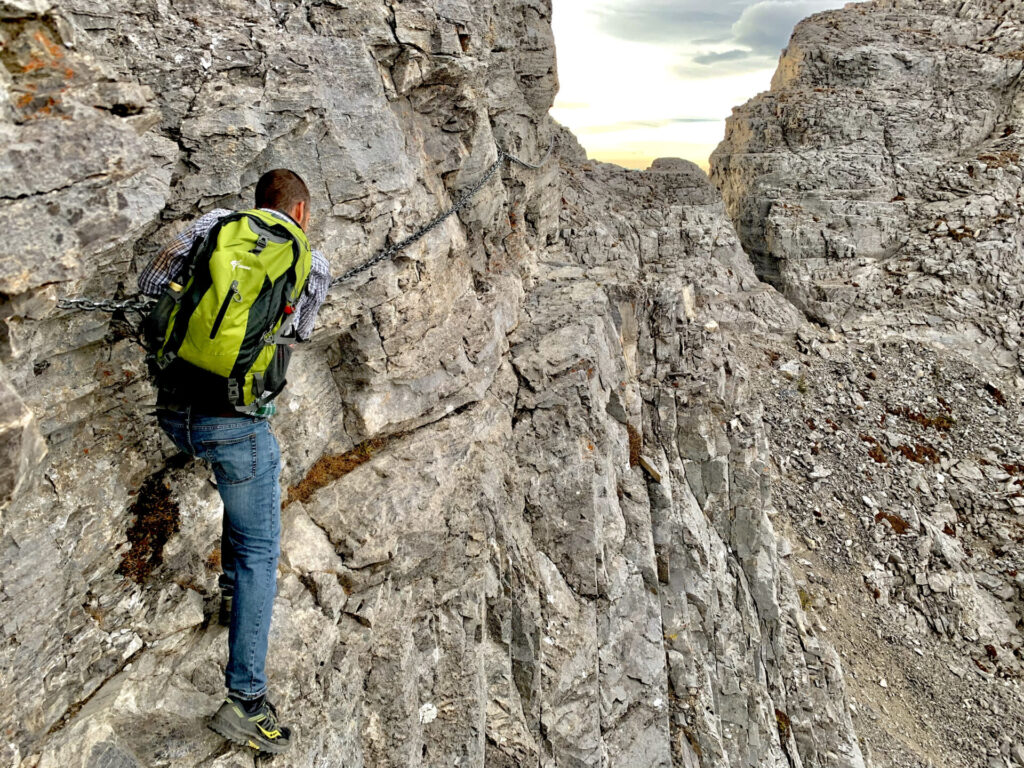
Next up, the cables. The cable section is very daunting for those who are afraid of heights. As you traverse the cables, you’ll be looking directly down a steep drop. It honestly looks way scarier and steeper in photos – I swear it’s not that bad! The cables are a great safety feature on this hike and they’re super unique. The only other hike I know of that has cables like this is the Crypt Lake hike in Waterton.
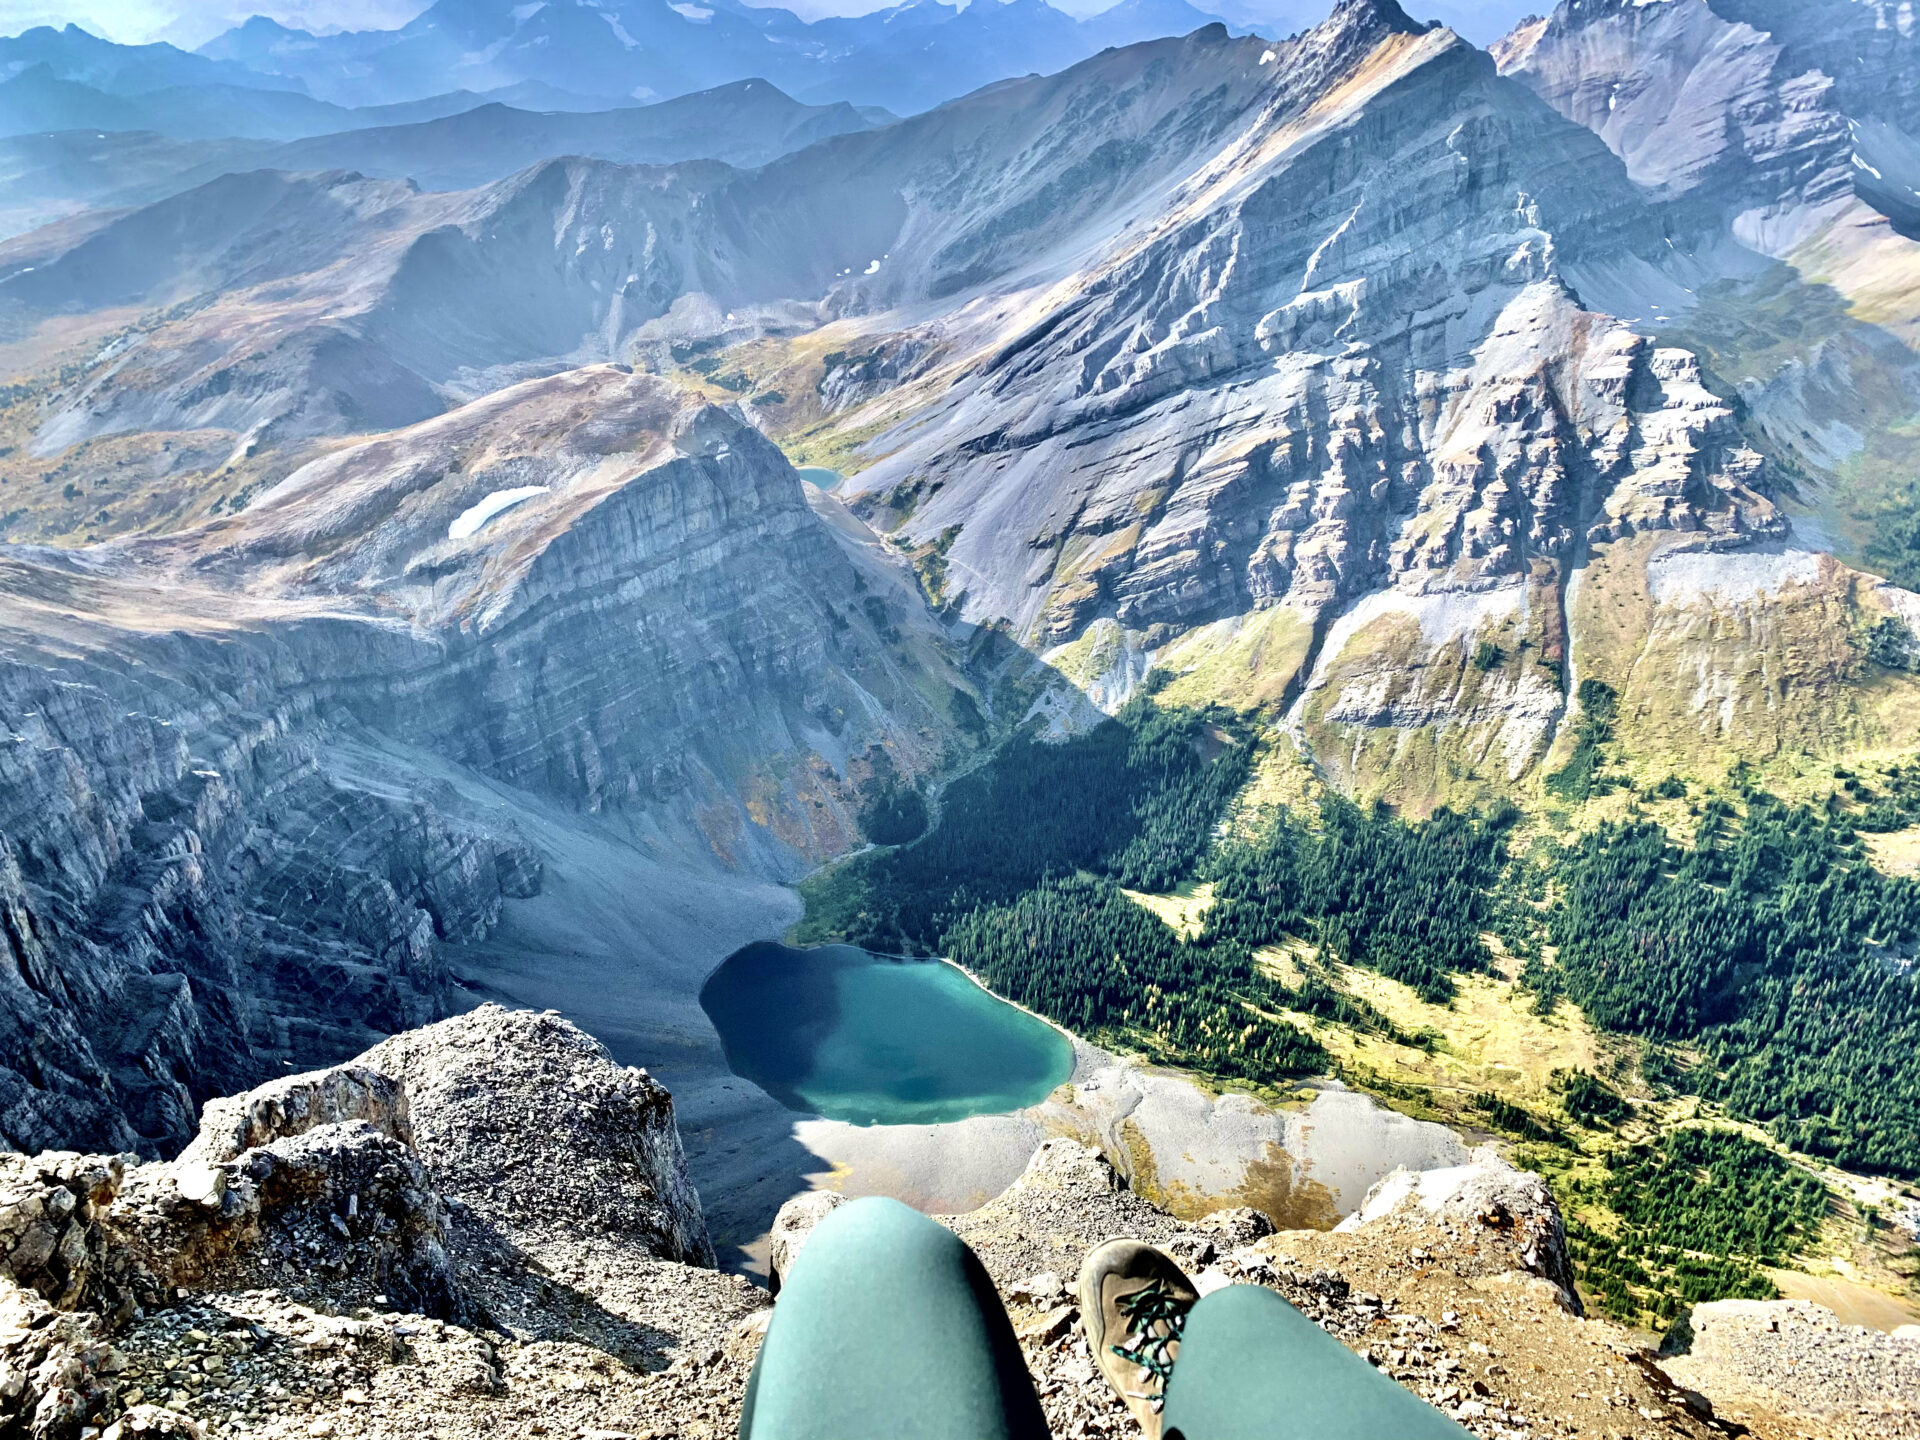
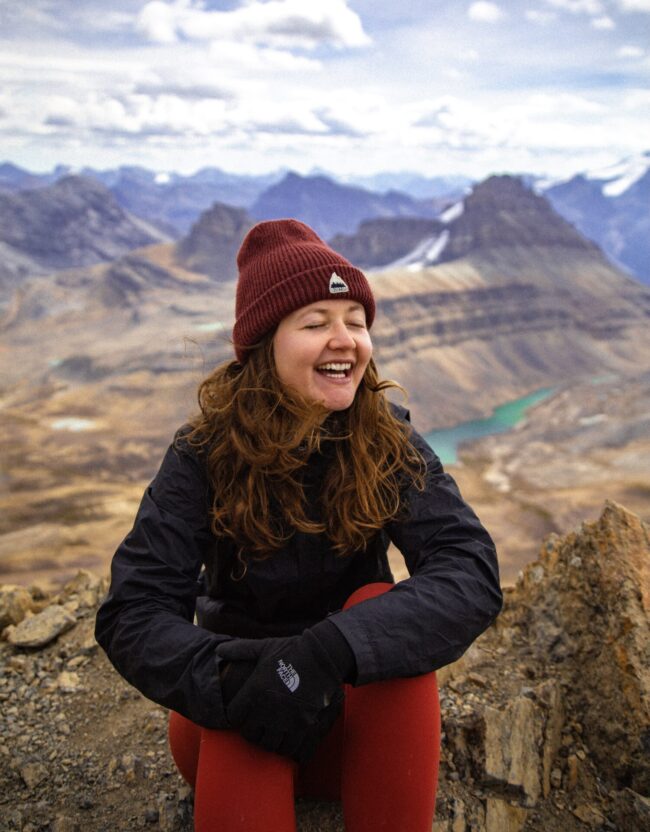
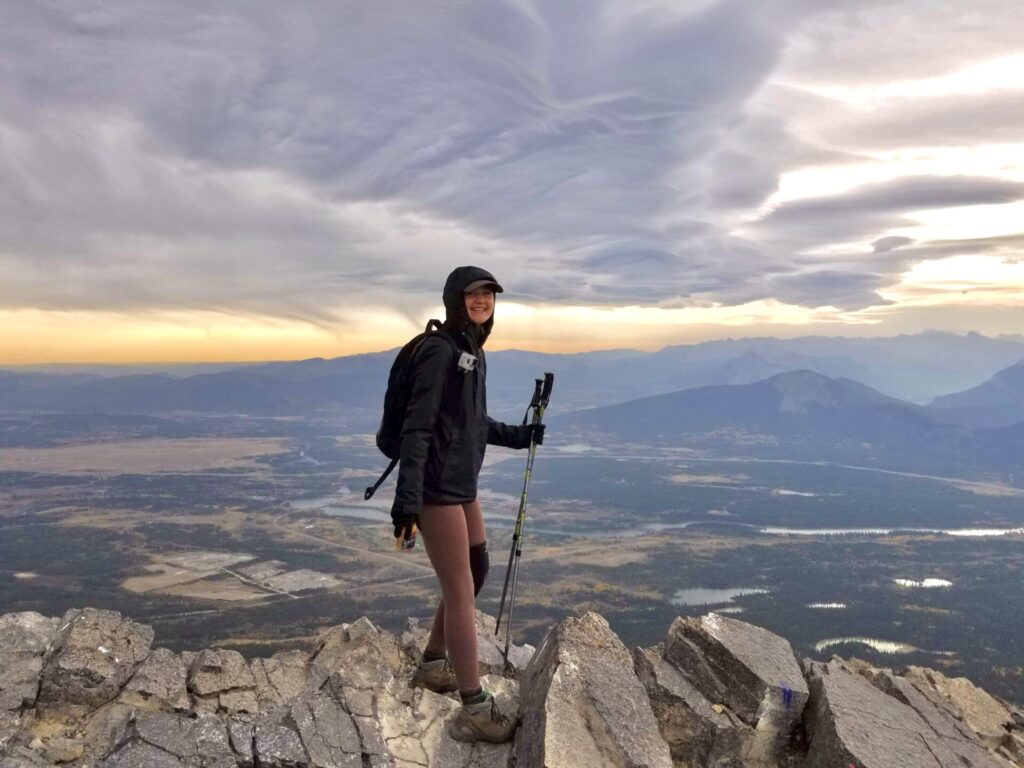
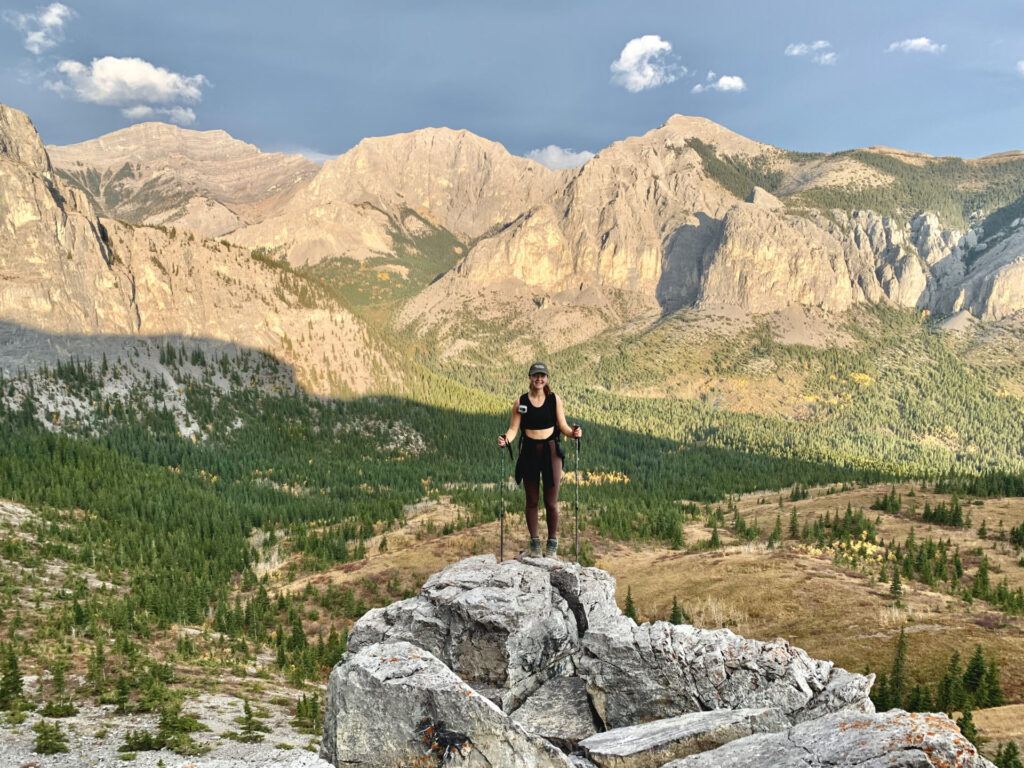
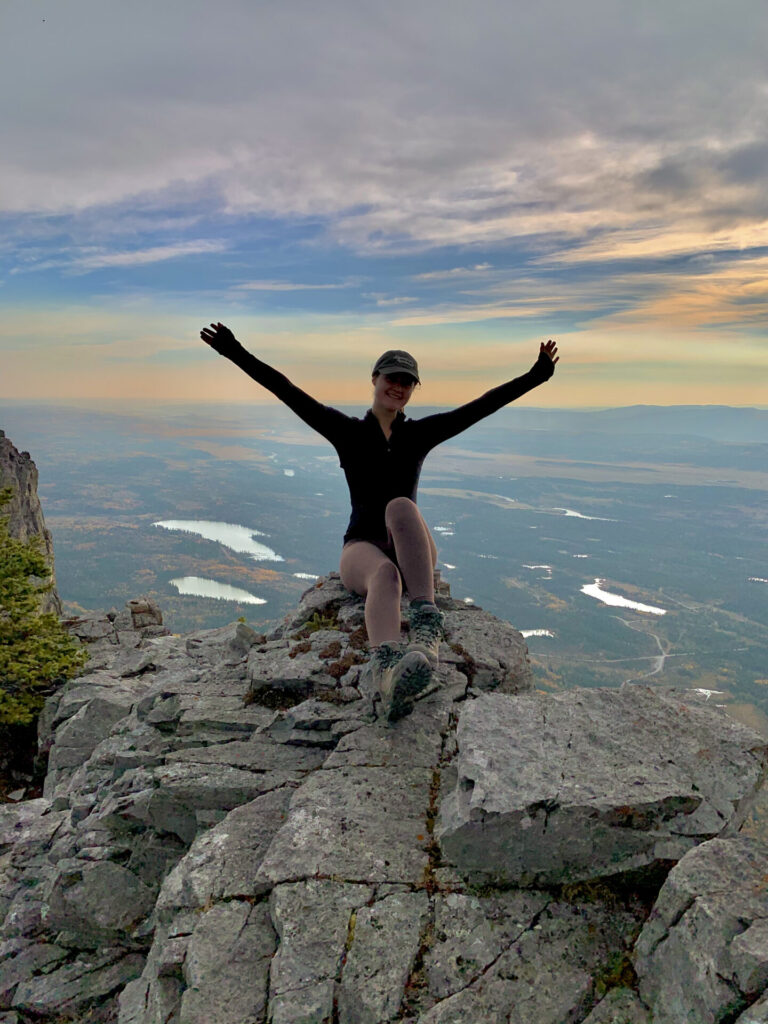
Mount Yamnuska Summit
After the cables you’re only a quick hop, skip, and a jump away from the Mount Yamnuska summit. At the summit you’ll find beautiful 360 degree views of the Rocky Mountains, the plains leading toward Calgary, and a few nearby lakes; the most notable being Heart Lake. It’s literally in the shape of a heart!
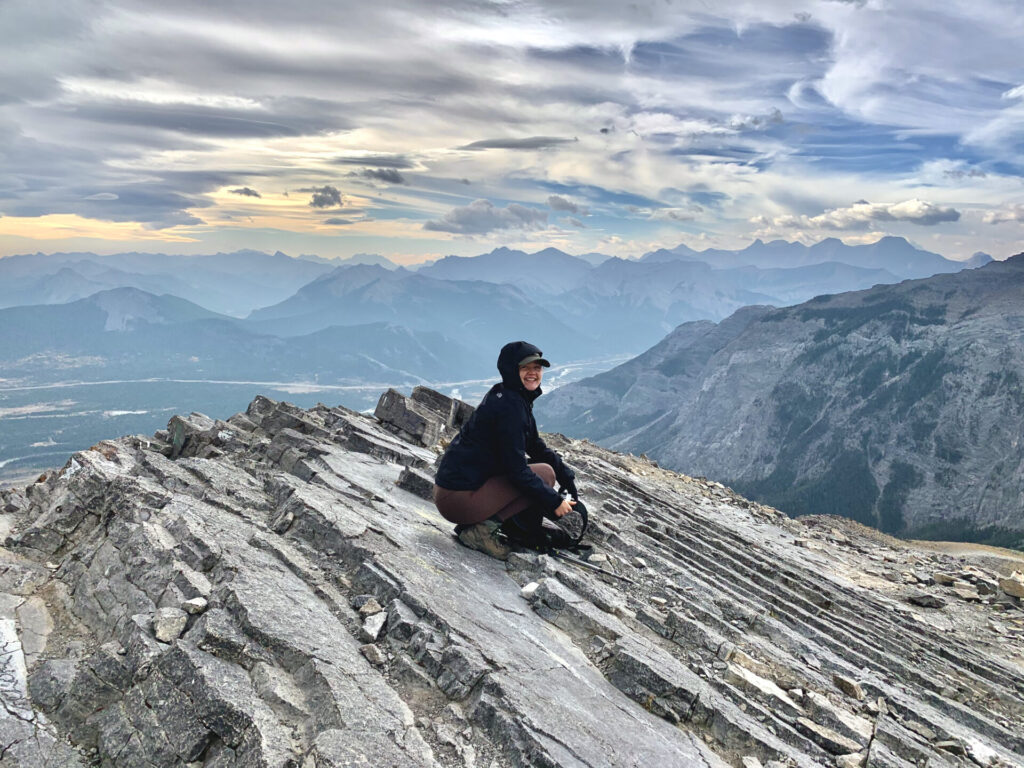
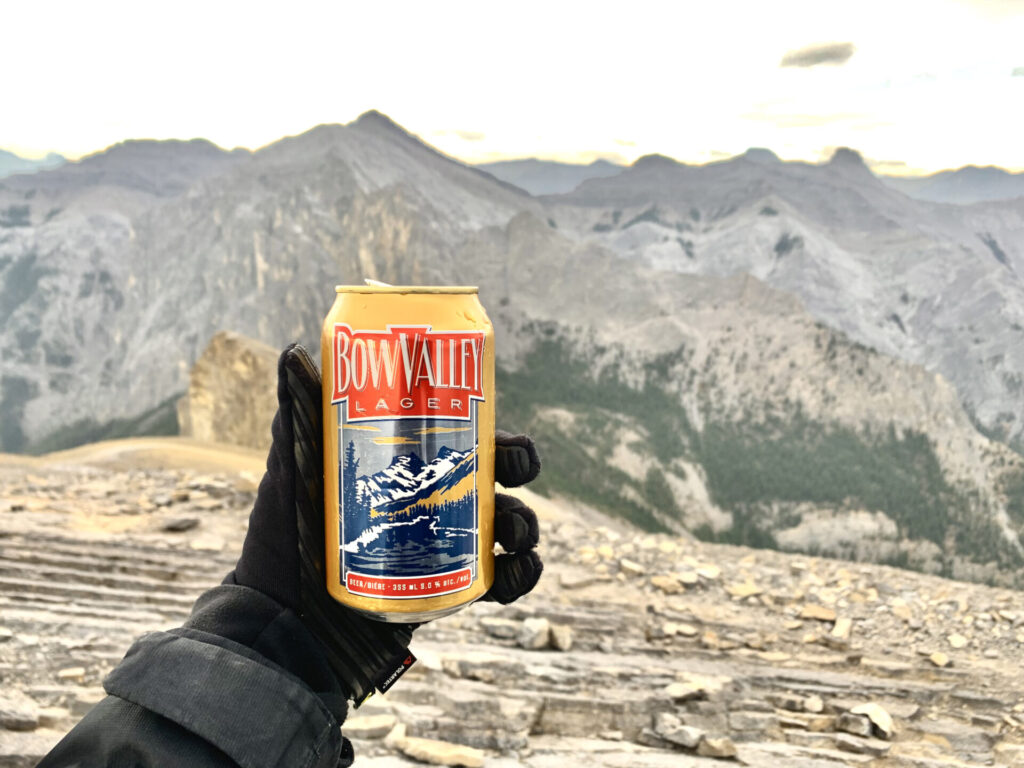
The summit is mostly made up of slab style rocks, which makes it semi-comfortable to sit on as you’re having a lunch break, or in our case a couple of celebratory summit beers. This is how our drunken Mount Yamnuska descent started.
I feel like I’m constantly giving recommendations and words of advice in this guide, but here’s some more… DON’T drink on the Mount Yamnuska hike! We truly didn’t realize how dangerous and technical this hike was before started it. If we did, we probablyyyyy would have held off on the beers until we got back to the trailhead.
It’s important to note you’ll also be completely exposed at the summit. It’s cold and windy up there! I always dress in layers to stay warm and I’ve found these to be perfect for hiking in the Rockies.
Descending Mount Yamnuska
After reaching the Mount Yamnuska summit, you need to make the decision of whether or not you want to compete the scramble. If you do, continue hiking onwards. If not, turn back and return to the trailhead via the trail you took to the summit.
The Mount Yamnuska hike will take you down and around the other side of Mount Yamnuska. The terrain down this section is steeeeeeeep. I 100% recommend using trekking poles for this as they really helped me maintain my balance.
This section was so steep I actually had to sit down and butt scoot through some areas. It also didn’t help that by this point I was a little (more than) tipsy. The 7am tequila shots, summit beers, general fatigue, and come down from the bear spray incident were really all working against me. Drunk me and steep mountain terrain… Not necessarily a great duo, but the perfect combination for a stumbly hiking story!
After you hike down and around the mountain, you’ll have to navigate through a very steep area which thankfully has some trees you can hold onto for support. It’s very difficult to find/follow a trail here, so just make your way down and aim for the front face of Mount Yamnuska. This is where the scramble begins.
Mount Yamnuska Scramble to Mount Yamnuska Trailhead
Between the chimney, the chains, and the scramble the Mount Yamnuska hike offers SO many cool features that’ll get your adrenaline pumping. The scramble though is really something else.
I’ve done a fair bit of scrambling in the Canadian Rockies (you can find all my scrambling trail guides here), however the Mount Yamnuska scramble is by far the best. The rocks are all super tiny and loose which makes it possible to literally float down as you scree ski. Here’s a video to give you an idea of what scree skiing on the Mount Yamnuska scramble looks like.
The Mount Yamnuska scramble is approximately 0.3km in length, so it’s very possible to make it down within minutes if you’re an experienced scrambler. This can be a dangerous scramble though which is why it’s important to keep your wits about you, have proper safety gear, and follow proper scrambling safety.
People have been seriously injured and have died on the Mount Yamnuska scramble. Pay attention to loose rocks, be sure to yell “ROCK” if you set off any that could hit hikers below you, and don’t hike down in a single line fashion.
Again, here’s the recommended gear for the Mount Yamnuska scramble: trekking poles, climbing helmet, satellite communication device, proper hiking boots with ankle support (I use these/men’s version), first aid kit, and gaiters to keep loose rocks from entering your boots.
Return hike to the Mount Yamnuska Trailhead
After the scramble you’ll still have quite a while to hike until you reach the parking lot at the Mount Yamnuska trailhead. For 1.5km you’ll follow a lightly treaded path through dense forest which has grown over into the trail. It can be kind of hard to follow the path here, so make sure you have your Alltrails map downloaded as a backup.
After the 1.5km mark, you’ll arrive at a fork in the path, take a right here. This will will take you back to the parking lot next to the Mount Yamnuska trailhead.
And there you have it! You’re now prepared for the Mount Yamnuska hike in Kananaskis.
Explore More Hikes In Kananaskis
Kananaskis is an area just outside of Banff that’s made up of multiple Wildland Areas and Provincial Parks. Kananaskis is my favourite hiking destination in the Canadian Rockies, so I urge you to explore more hikes in the area!
Click here to explore more of Kananaskis.
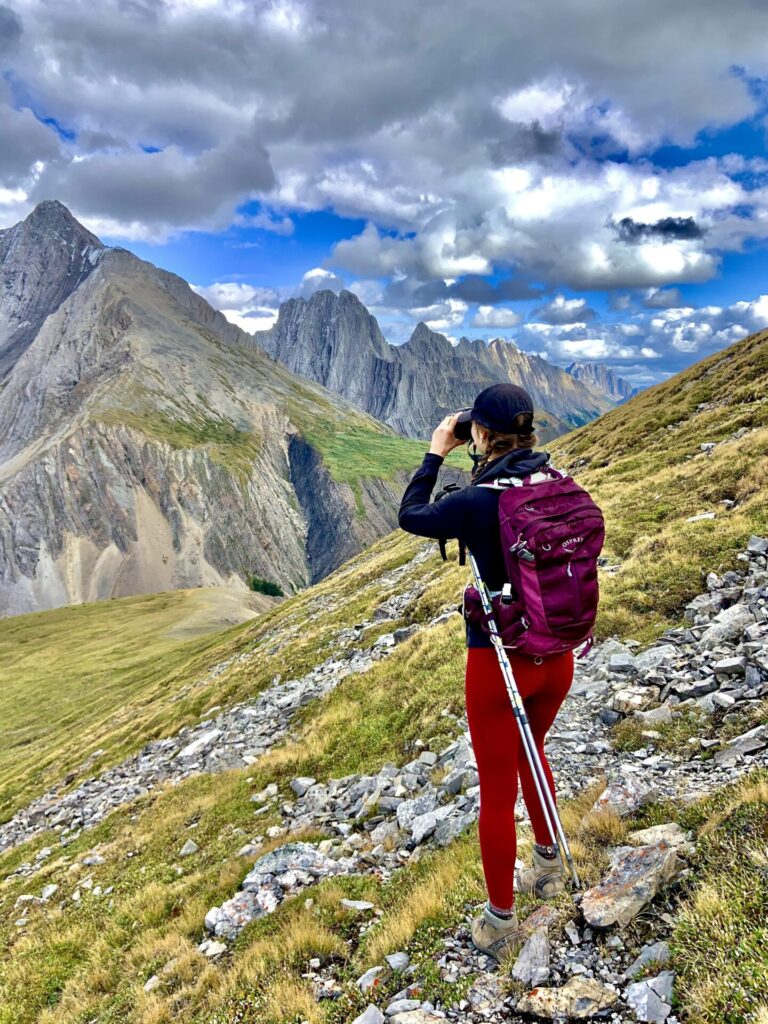
Featured Kananaskis Hikes:
- Cool Experiences: Yamnuska scramble, Mist Mountain hot springs, Grotto winter canyon walk.
- Ridge Walks: Pocaterra Ridge, Sarrail Ridge & Rawson Lake, Opal Ridge, Tent Ridge, and Wasootch Ridge.
- Summits: EEOR and Ha Ling.
- Incredible Scenery/Lakes: West Wind Pass, Picklejar Lakes, and Grassi Lakes.
Explore Kananaskis Country by Area:
Visit National Parks Nearby:
Looking for more hikes? Click here to explore all of my trail guides.
Where to Stay in Banff
From hostels to camping to luxury hotels – Banff has accommodations for everyone. Here are my top recommendations for where to lodge in Banff based on every budget.

I recommend giving this post a read as I’ve listed every Banff hotel worth staying at and organized them by category.
- Hostels – Samesun Banff (best location + bar/restaurant on-site), Banff International Hostel (second best), and HI Banff.
- Budget hotels – Bow View Lodge and High Country Inn.
- Mid-range stays – Banff Park Lodge, Mount Royal, Elk & Avenue, and the Banff Caribou & spa.
- Luxury stays – Fairmont Banff Springs and the Rimrock Resort.
- Cabin retreats: Johnston Canyon Bungalows, Baker Creek, and Castle Mountain Chalets.
- Camping – reservation information can be found here. Ensure you book campsites far in advance as they’re full during summer.
- For those on ski trips: lodge on-mountain at Sunshine Village, stay near Norquay, and see my Lake Louise suggestions below.
Lodging Options Near Banff
Enjoy the nature and activities of Banff National Park, but lodge away from the busy tourist town centre at any of the following:
- Lake Louise – Fairmont Chateau Lake Louise (luxury), Paradise Lodge & Bungalows (500m from the lake), Lake Louise Inn (value stay), HI Lake Louise (hostel).
- Canmore – Malcolm Hotel (luxury), Stoneridge Mountain Resort (condo suites with fully equipped kitchens), Mountain View Inn (budget), Canmore Downtown Hostel & the Canmore Hostel (party hostel).
- Johnston Canyon – Johnston Canyon Lodge & Bungalows, Castle Mountain Chalets, and HI Castle Mountain Hostel.
- Yoho National Park – Emerald Lake Lodge and Cathedral Mountain Lodge.
- Kootenay National Park – Storm Mountain Lodge & Cabins.
- Kananaskis Country – Mount Engadine Lodge and Kananaskis Mountain Lodge (luxury), Crosswaters Resort (mid-range), and HI Kananaskis Wilderness Hostel (budget).
Happy adventuring!
Taylor ♡
Like This Post?
Share with friends or save it for later!

About the Author
HI, I’m Taylor – the voice behind The Holistic Backpacker.
After moving to Banff National Park in 2020 I became an outdoor adventure enthusiast and vowed to never stop exploring.
I now spend my days travelling the world, climbing mountains, and spending nights under the stars in the Canadian Rockies backcountry.
I created The Holistic Backpacker so I could share my adventures and help connect people like you with the same amazing experiences.