Pocaterra Ridge: A Beautiful Fall Hike in Kananaskis
If you’re looking for a fall hike in Kananaskis featuring golden Larch trees, gnarly mountain peaks, colourful vistas, and a picturesque lakes, look no further than the Pocaterra Ridge hike.
Pocaterra Ridge offers a STUNNING display of fall colours and visually striking mountains views in every direction. The trail runs over multiple peaks and will impress even the most experienced of hikers.
Looking for more fall hikes in the Rockies? Check out Mount Yamnuska and Larch Valley.
Now, let’s go hiking!
Skip Ahead:
- How to get to Pocaterra Ridge trailhead
- About Pocaterra Ridge hike
- How I messed up the Pocaterra Ridge hike
- Hiking Pocaterra Ridge
- Recommended hiking gear
- Recommended clothes for hiking
- Where to stay in Kananaskis
Pocaterra Ridge hike in Kananaskis
Pocaterra Ridge hike in Kananaskis
I have affiliate links in this post which means when you book a hotel or purchase a product, I may make a small commission ~ at no additional cost to you (full disclosure). These funds go back into The Holistic Backpacker and help me create more free content like this!
Thank you for supporting my work!
Pocaterra Ridge hike in Kananaskis
How to get to Pocaterra Ridge Trailhead
Pocaterra Ridge is located in Peter Lougheed Provincial Park which is in Kananaskis Country. Since the trail is point to point, there are 2 official trailheads along Highway 40, AKA Kananaskis; one starting from Highwood Pass, the other from Little Highwood Pass. You can either do a car drop, or hitchhike. Hitchhiking is quite common on this trail – my group actually befriended another hiker along the way and drove him back to his car after we completed Pocaterra Ridge.
My hiking group and I started from Little Highwood Pass, but we totally made the wrong call (more on this next) and should have started from Highwood Pass which is a little further down highway 40. Starting from Highwood Pass takes 280m gain off the hike and allows you to face the prettier view while trekking across the ridge.
There are no shuttles that drive through Kananaskis, so you’ll either need to drive your car or rent one to access the Pocaterra Ridge trailhead. Once you arrive at Highwood Pass, you’ll find a massive parking lot. In the fall when the Larch trees turn gold, this lot fills quickly. To ensure you get a parking spot, arrive early.
Keep in mind there’s a seasonal road closure from December 1 to June 14 and (as of summer 2021) you need to purchase a Conservation Pass when visiting Kananaskis.
Pocaterra Ridge hike in Kananaskis
About Pocaterra Ridge Hike
- Distance: 9.8km
- Elevation gain: 728m
- Rated: hard
- Type of trail: point to point
- Estimated Time: 4 hours
Pocaterra Ridge is a lengthy and more difficult hike, although it may seem moderate to more experienced hikers. Along the way you’ll climb over multiple peaks, enter a few forested sections, and witness stunning views of dramatic mountain landscapes and deep valleys.
The trail is well trafficked and is easy to follow (for the most part). Starting from Highwood Pass is a sure-fire way to not get lost. However starting the Pocaterra Ridge hike from Little Highwood Pass proves to be a bit more confusing as you enter the trail in a densely forested and less travelled section.
Pocaterra Ridge can be hiked from mid June to October, however late September/early October proves to be the best time of year to hike because the Larch trees take on a golden hue that light up the ridge and the surrounding valleys.
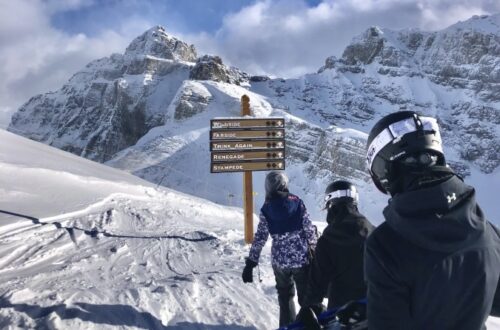
Alternate Trails for the Pocaterra Ridge Hike in Kananaskis
There are multiple hiking trails that can be accessed from the Pocaterra Ridge trailhead; Highwood Pass to be exact. I’d recommend completing the main trail from point to point as you get to spend more time on the summit (where the view is the best), however here are a few more options:
- Summit, but no ridge walk: South Pocaterra Ridge
- Fall colours with minimal elevation gain (no summit): Pocaterra Cirque
- Nearby summits: Highwood Ridge and Mount Tyrwhitt to Mount Pocaterra
- Other: Highwood Ridge & Grizzly Col
Helpful Tips for Pocaterra Ridge
- Hiking poles are extremely beneficial on the Pocaterra Ridge hike.
- Your are very exposed while trekking across the peaks on Pocaterra Ridge. I Recommend bringing these jackets while hiking in the Rockies to ensure you stay warm and protected: Waterproof jacket (men’s version) and a puffer jacket (men’s version).
- Bring lots of water; there are no water sources along the way. I bring my 2L Hydrapak on every hike.
- Pack your camera and make sure you have easy access to it! Pocaterra Ridge is one of those hikes where you’ll want to snap a picture every few minutes. I attach my camera to my pack’s straps via the Peak Design capture clip (CAD site). It’s sturdy, reliable, and ensures you have quick and easy access to your camera at all times.
- Download the Alltrails map. If you complete the entire Pocaterra Ridge hike, the descent can get a bit confusing.
Connect via socials:
STAY CONNECTED
Sign up for emails to receive a 25% discount on my travel maps.
Taylor ♡
Pocaterra Ridge hike in Kananaskis
How I Totally Messed up the Pocaterra Ridge Hike
For the purpose of this trail guide, I’ll retell the Pocaterra Ridge hike from the perspective of starting from Highwood Pass & finishing at Little Highwood Pass. FIRST though, I want to quickly recap what starting the hike at Little Highwood Pass looked like…
My hiking group and I totally messed up and thought we were cutting off elevation by starting the hike the opposite way (Little HIghwood Pass fist). We weren’t. We entered a densely forested trail, one of which we could barely follow, until we came across Pocaterra Creek. Next, we crossed the creek (which was correct) and then thought it was a good idea to continue hiking across the valley floor. It wasn’t.
After a while of trekking through the valley we thought it was strange we hadn’t gained any elevation. We were supposed to be doing a “ridge walk” after all.
Bushwhacking/Scrambling up Pocaterra Ridge
Long story short, we totallyyyy ef’d up and had to BUSHWHACK up the steepest mountain terrain I’ve ever trekked across.
This started out as holding onto trees for dear life as we made our way up the side of the otherwise “unhiked” section of the mountain. However after eating face-fulls of branches, leaves, and who knows what else, our luck ran out. We were then faced with the steepest scramble up the grassiest slope.
Hiking poles quite literally saved my life here. They helped me keep my balance and helped me maintain some sort of grip on this flat, slippery surface.
It felt like I was scrambling (more like crawling) for a solid 3 hours until I took that final step that put me on the ridge – where we should have been hiking all along. After reaching the ridge it was smooth sailing, but DAMN. That was a spooky introduction to the Pocaterra Ridge hike.
Moral of the story – don’t be like me. Be smart. Start from the Highwood Pass parking lot. Don’t scramble/crawl up the unhiked side of the mountain.
Pocaterra Ridge hike in Kananaskis
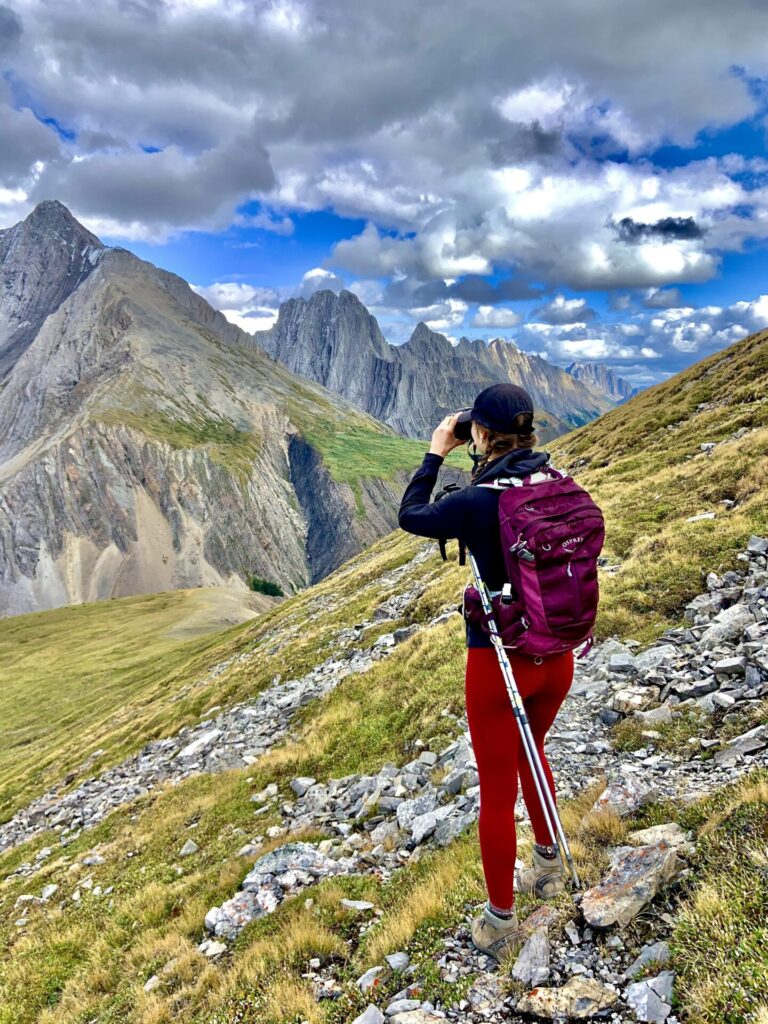
Hiking Pocaterra Ridge
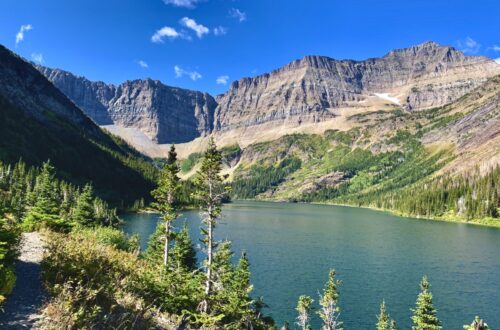
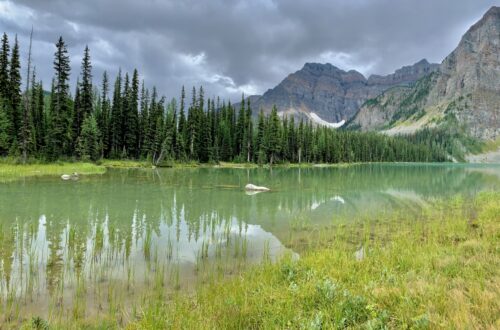
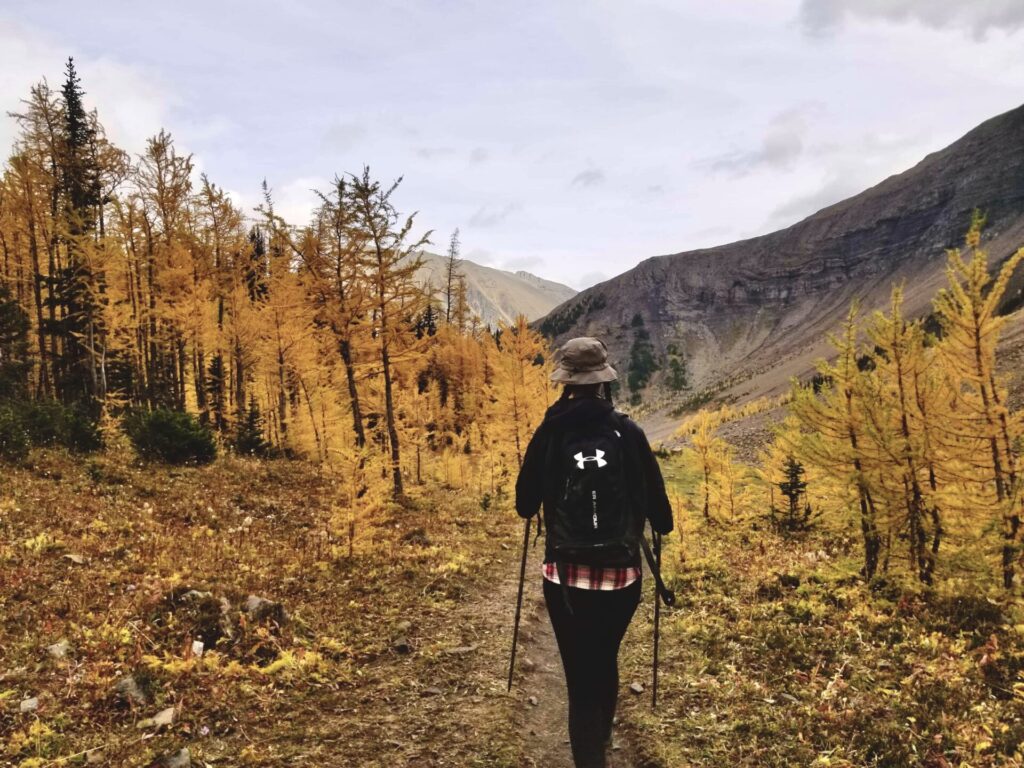
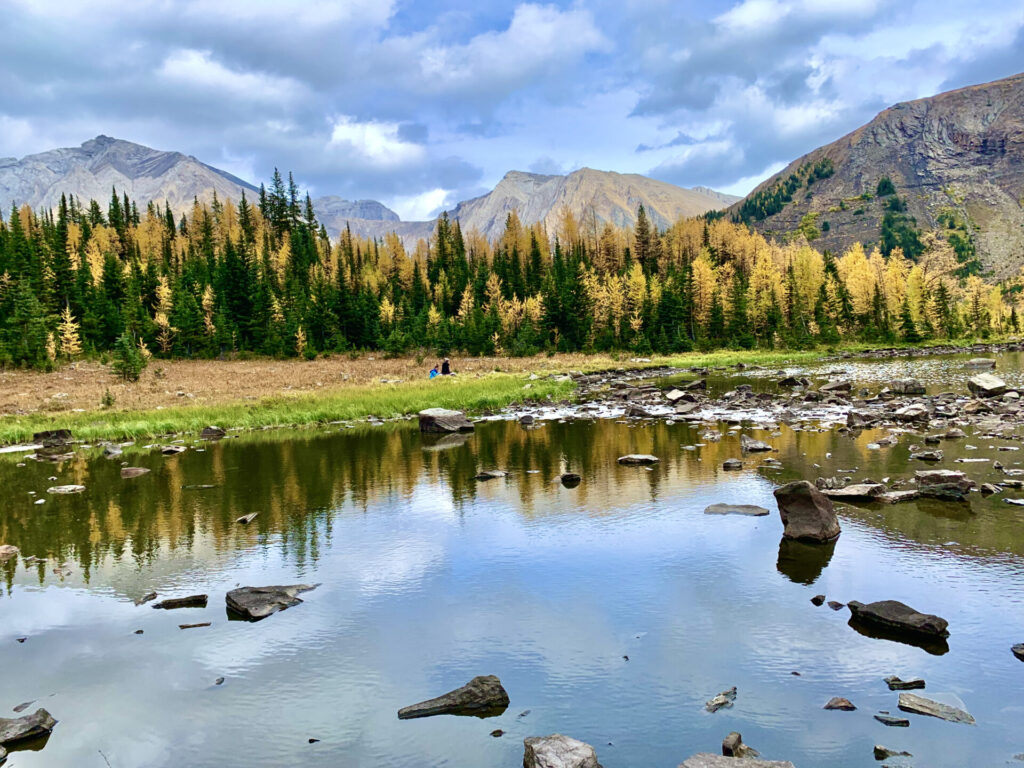
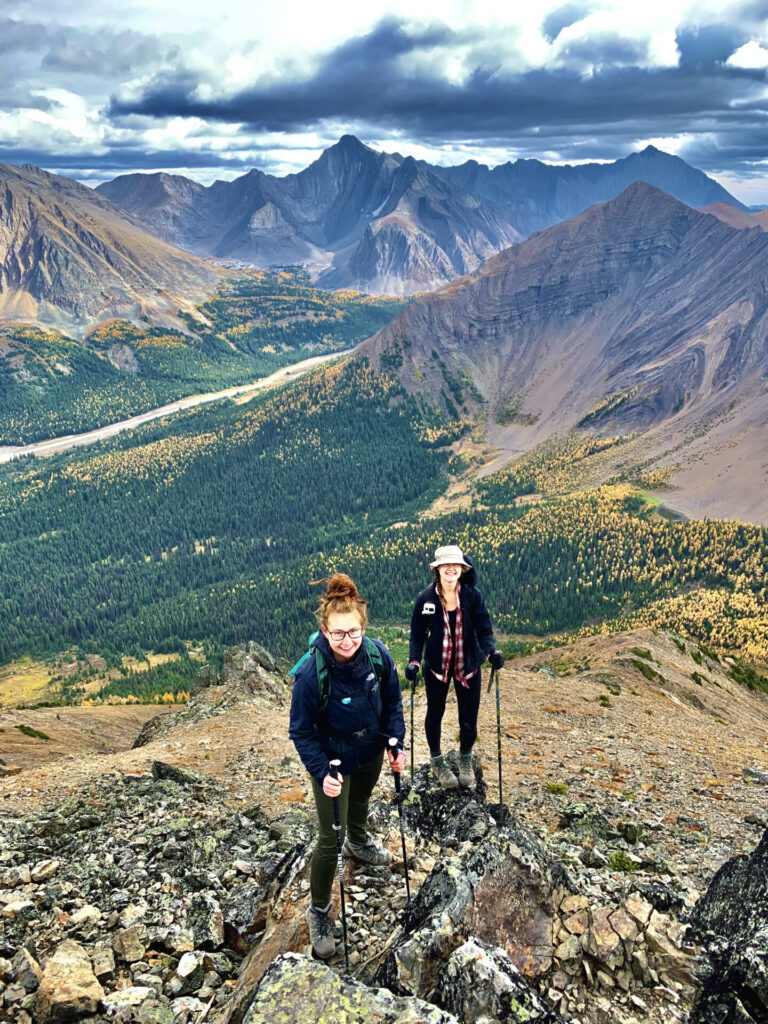
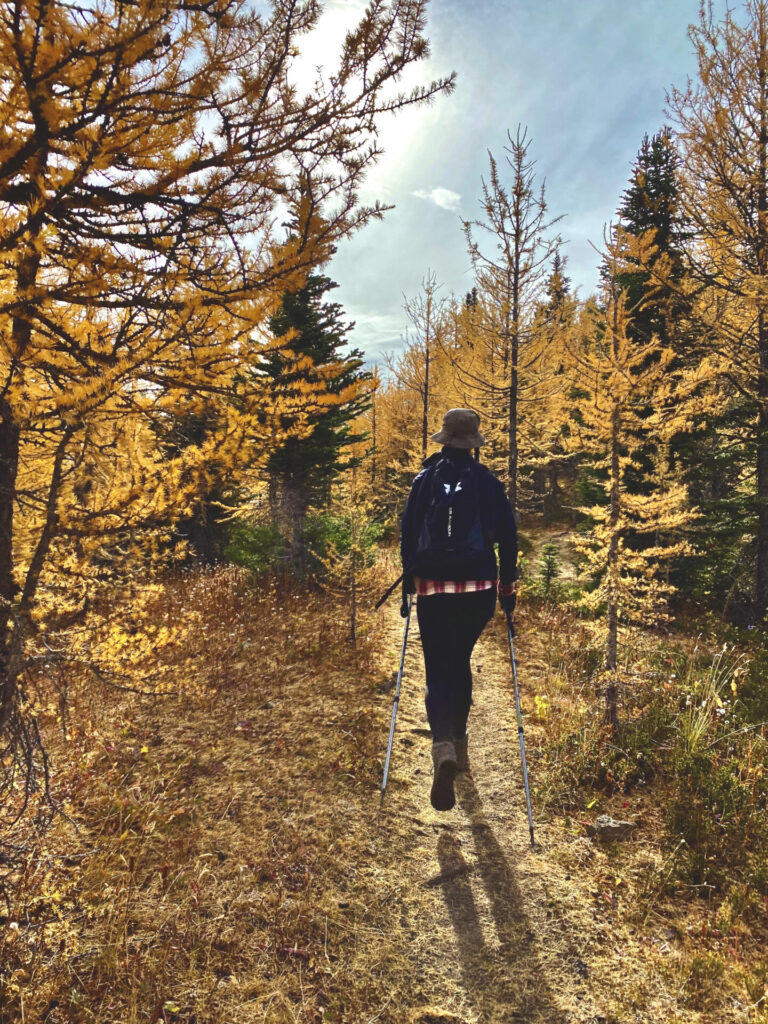
Very quickly after starting the Pocaterra Ridge trail, hikers will find themselves entering an area filled with golden Larch trees (in the fall). Here you can expect to find a small, unmanned pond which – on calm days – has a perfect reflection of the distant mountains and nearby vegetation.
If hikers want to avoid elevation and are just “in it” for the fall colours, they can end their hike here. I however 100% recommend at least reaching the Pocaterra summit. This is where the views turn really wow.
Ascending Pocaterra Ridge
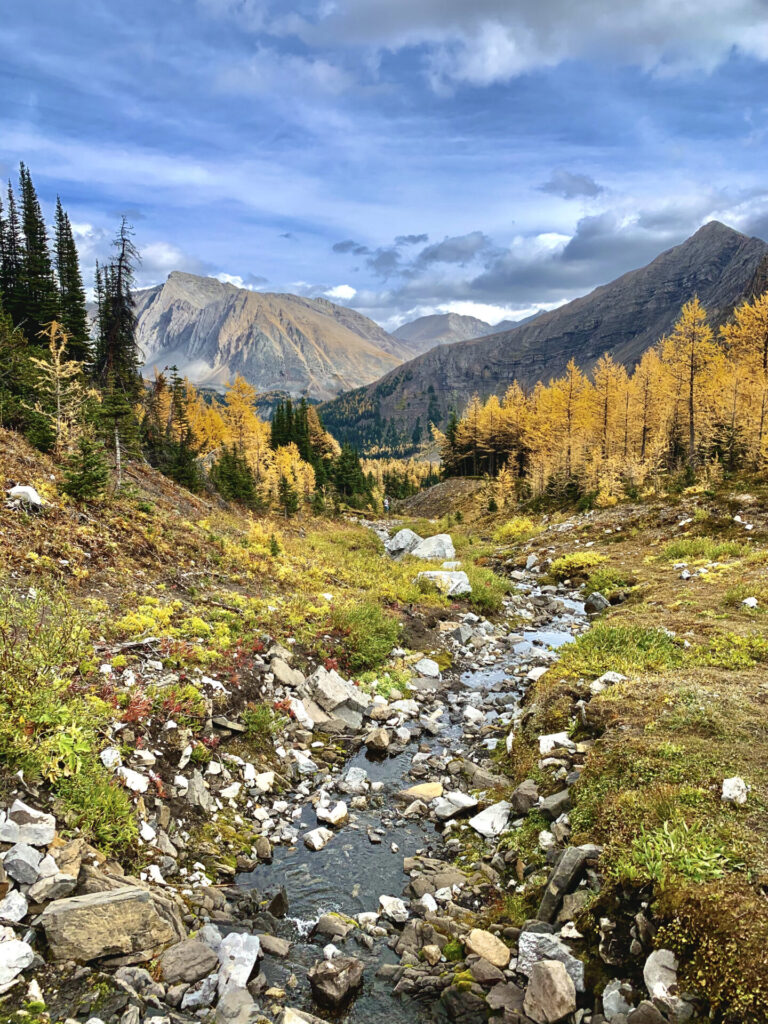
Toward the end of this beautiful, golden trail of trees hikers will notice a very distinct path to their right which takes a steep route up the mountain. This path takes you directly to the ridge where you’ll be able to see the area you just trekked through from above as well as the surrounding mountain peaks and valleys.
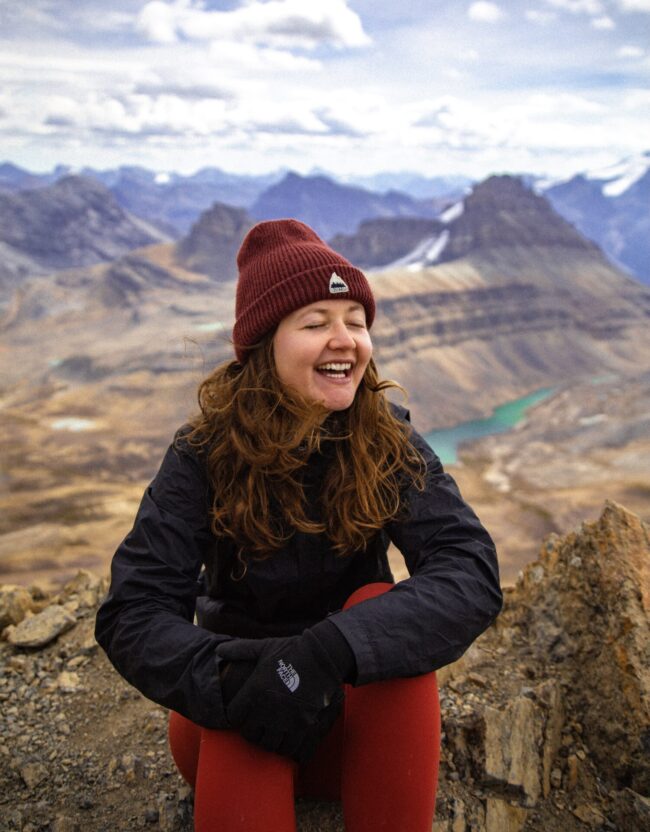
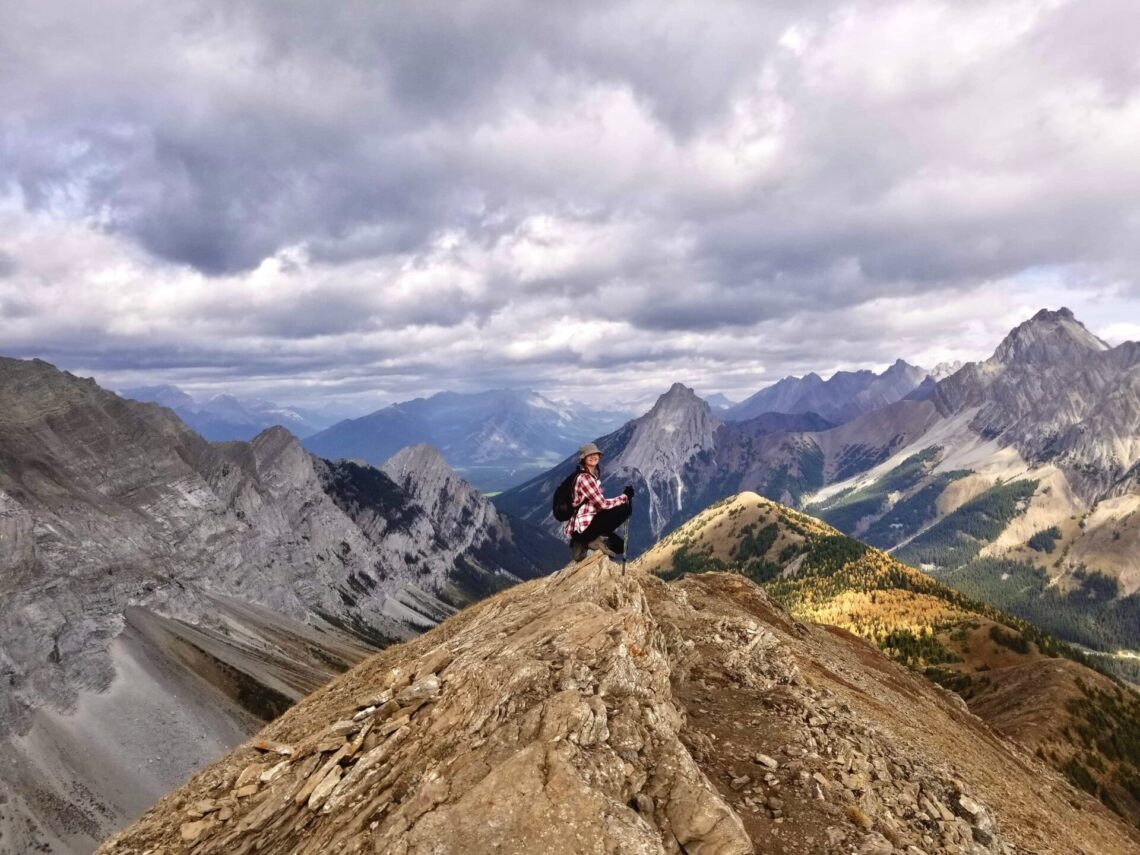
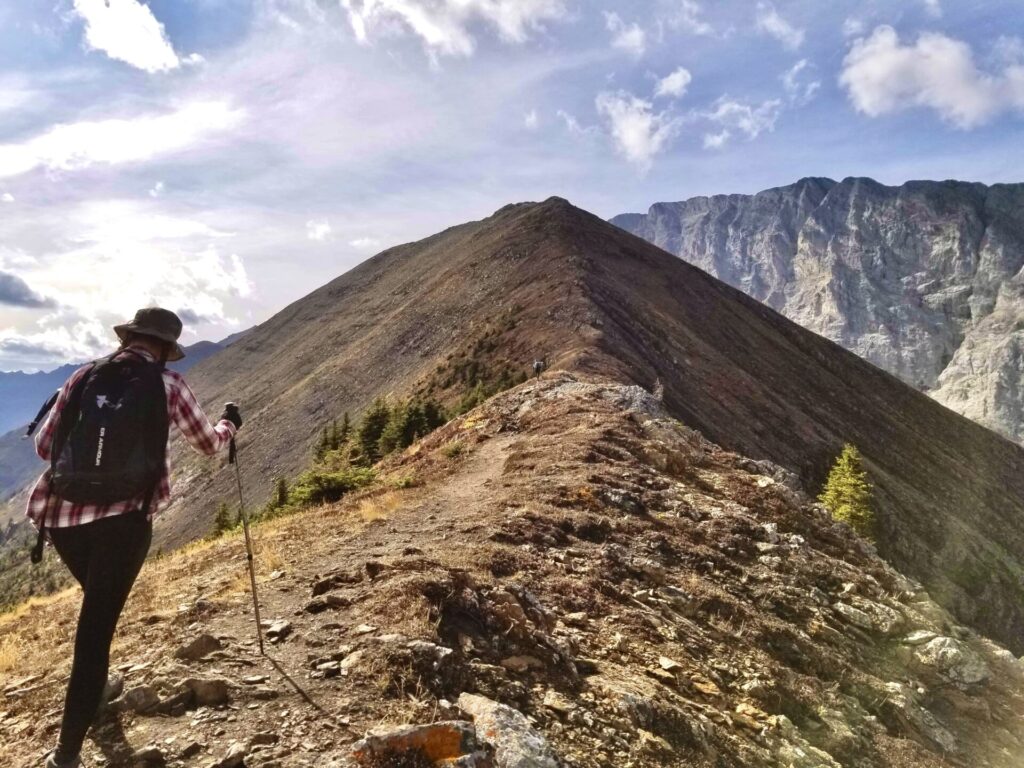
The ascent to Pocaterra Ridge is honestly an absolute slog. You can expect to gain around 330m in 1km. BUT, fear not. Your hard work is rewarded with this oh-so-sweet view:
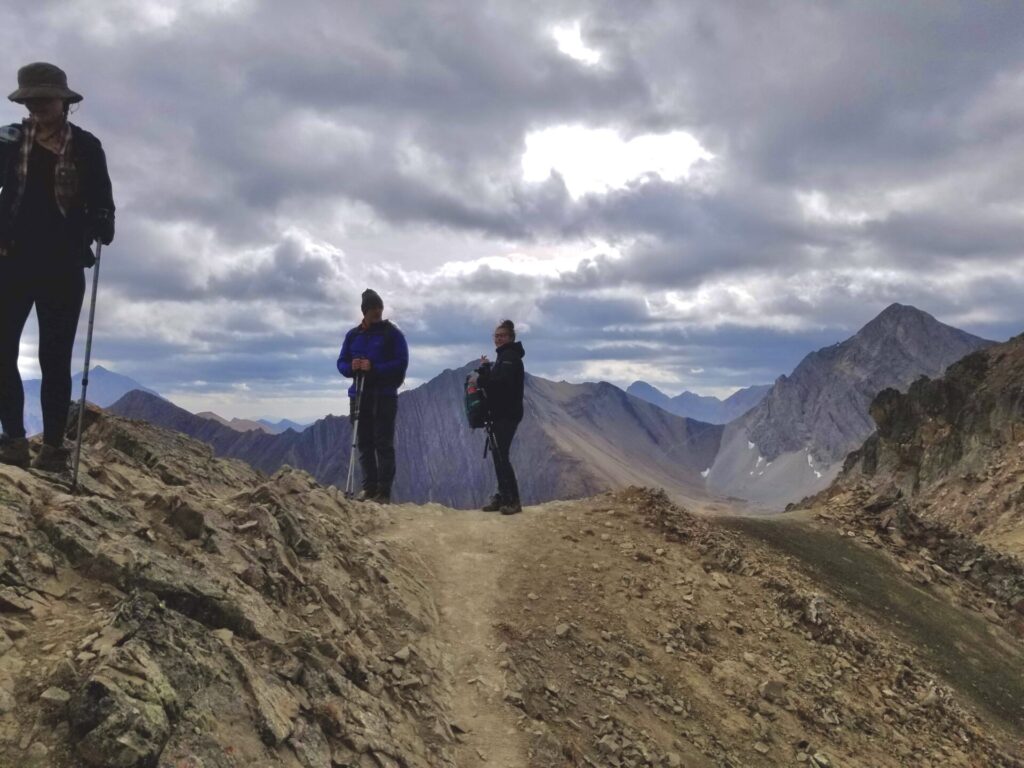
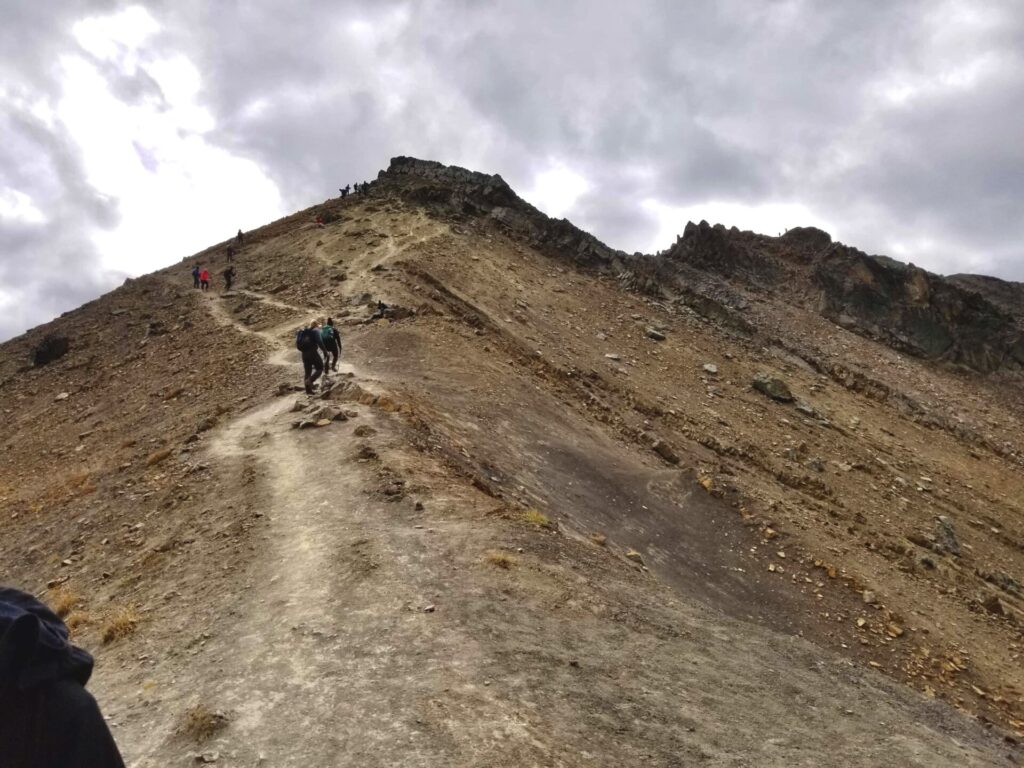
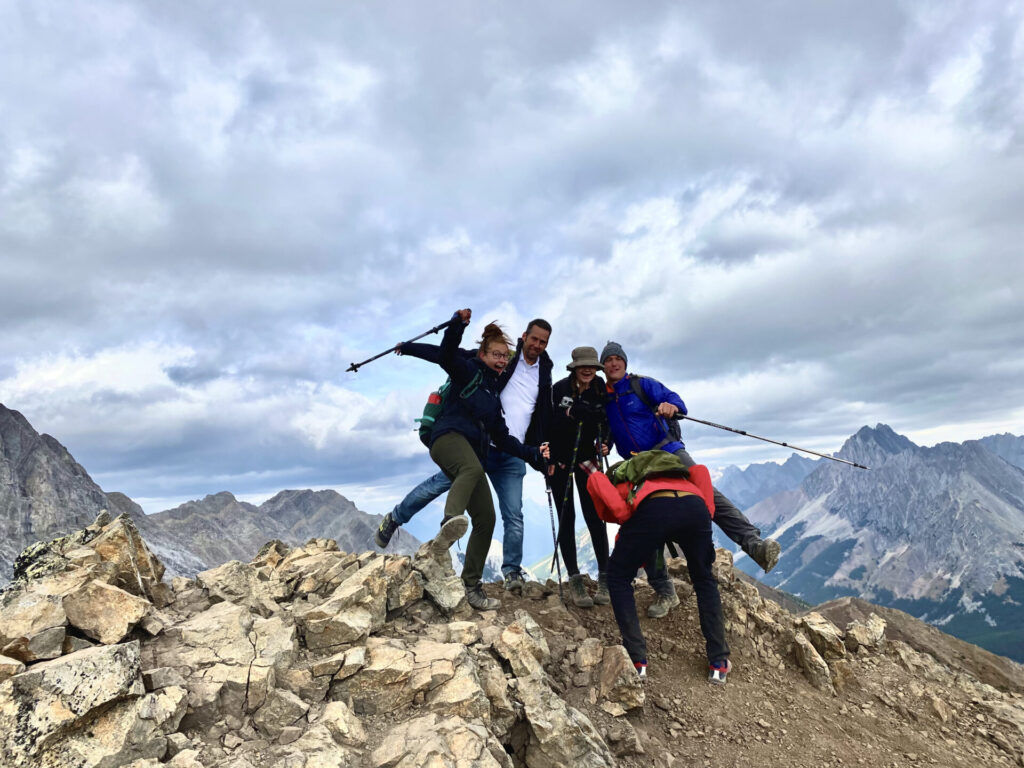
Once you arrive at the summit you have the option of turning back or continuing on to complete the ridge walk. If you continue on, expect to climb 2 more peaks (there’s 3 total).
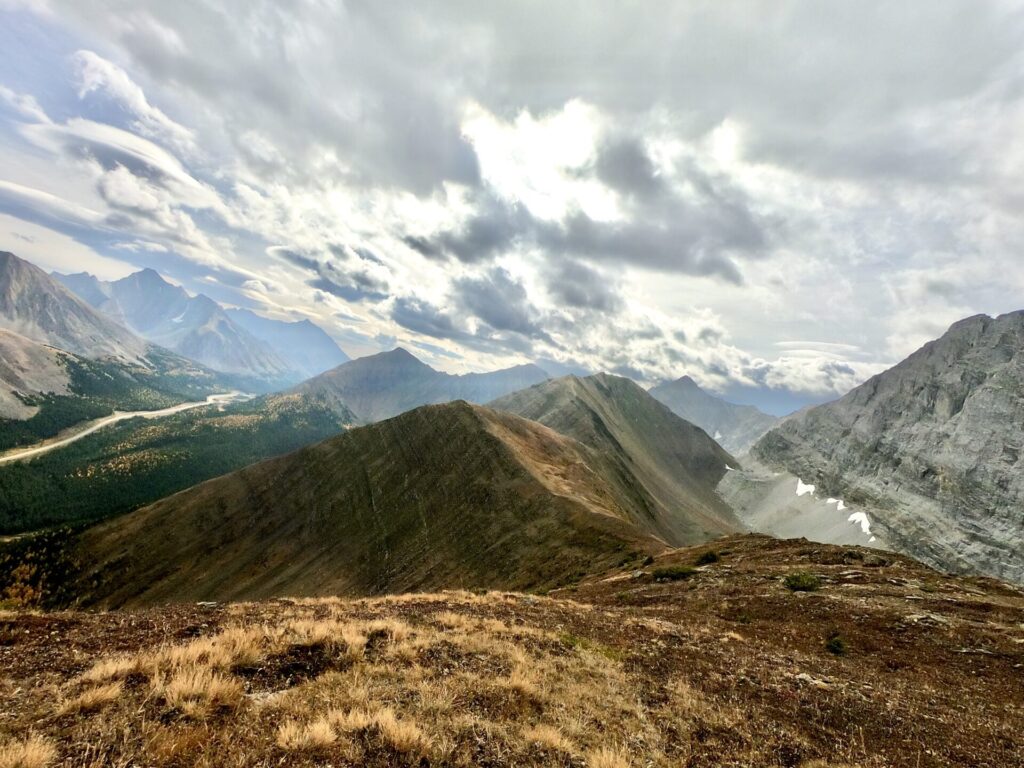
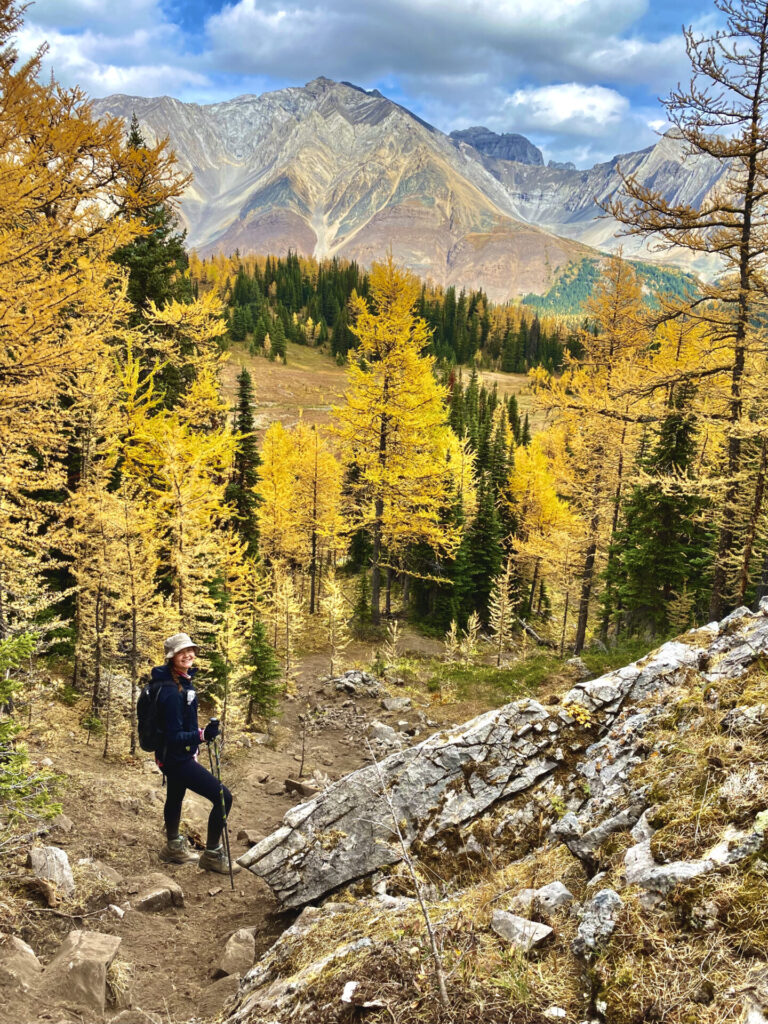
Trekking Along Pocaterra Ridge
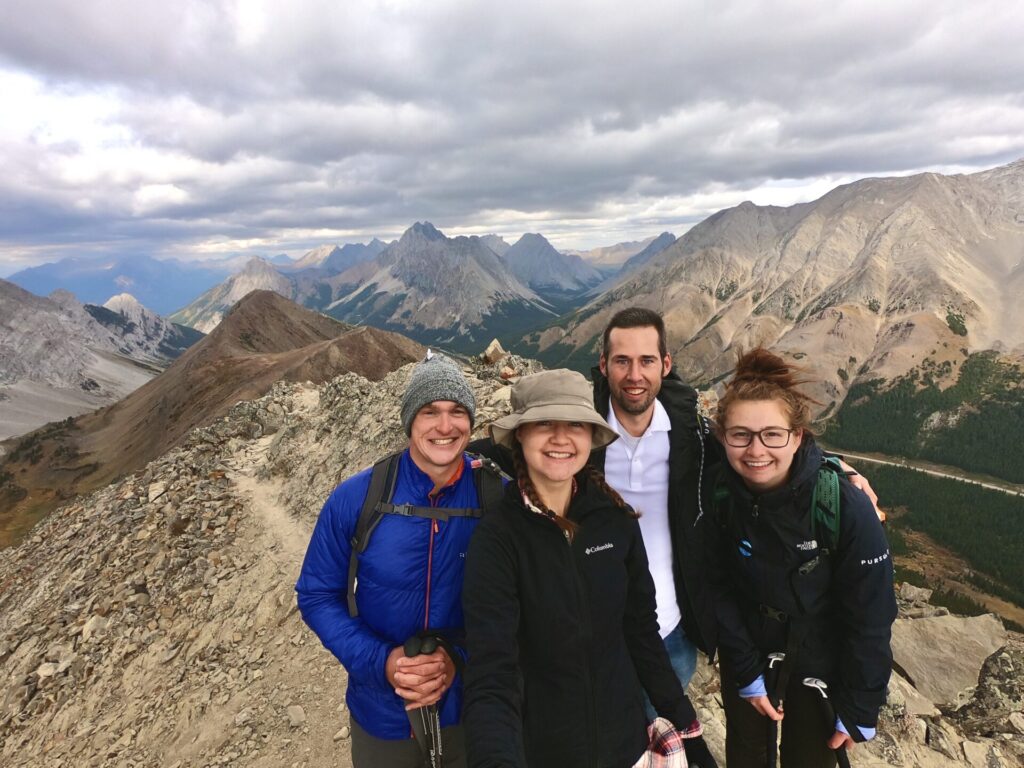
Having to trek across 2 more peaks may seem a bit daunting, but I assure you it’s totally doable. The first peak is the most gruelling and after that the peaks become much smaller and more manageable.
Keep in mind this is only true if you start Pocaterra Ridge from Highwood Pass. Starting from Little Highwood Pass means the peaks only get bigger and badder as you hike.
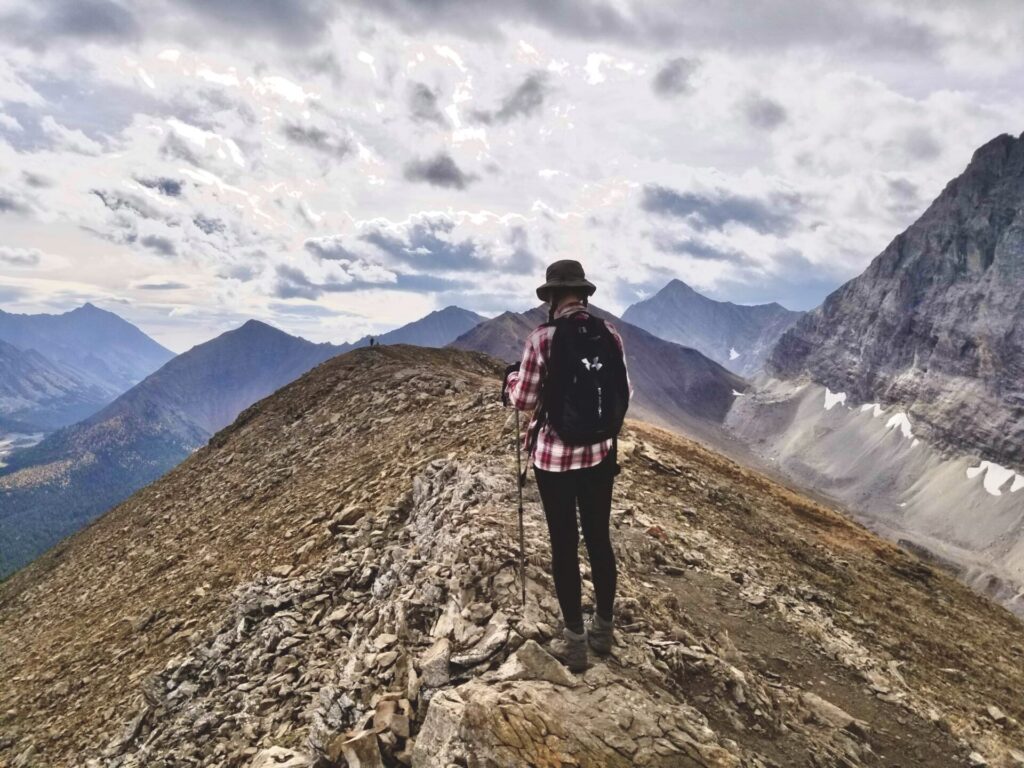
In an attempt to further convince you to complete the ride walk… This is what you can expect to stare at the entire time:
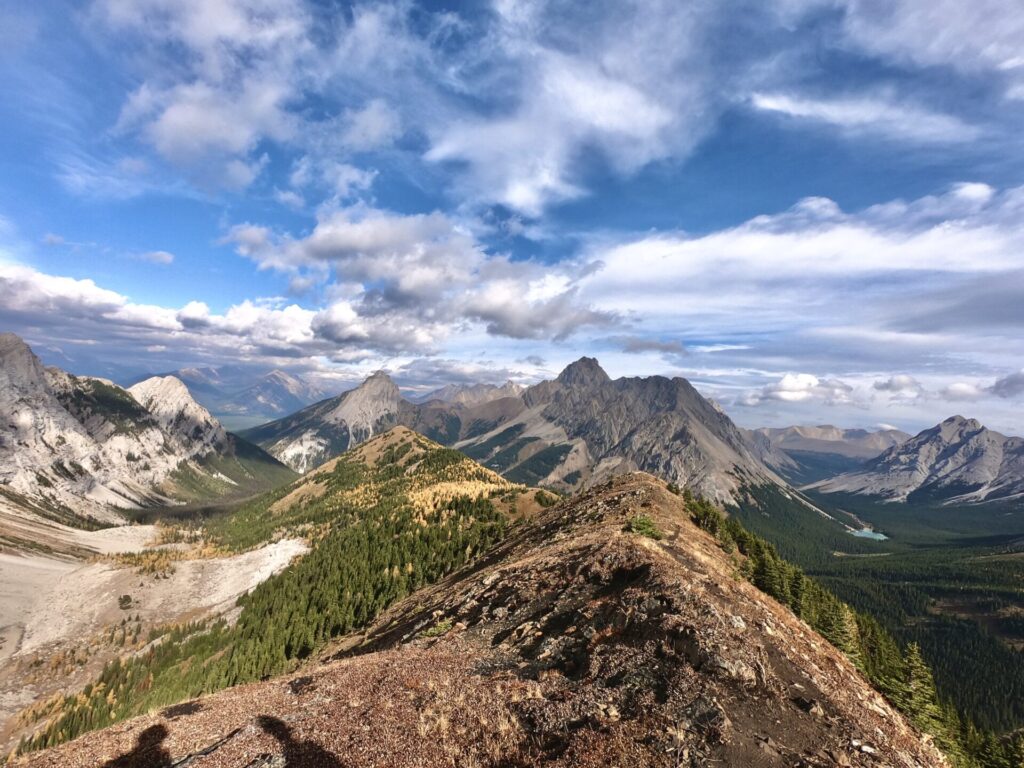
I was super bummed because this view was behind me the entire time… Let’s just say I took frequent breaks to turn around and admire.
Descending Pocaterra Ridge
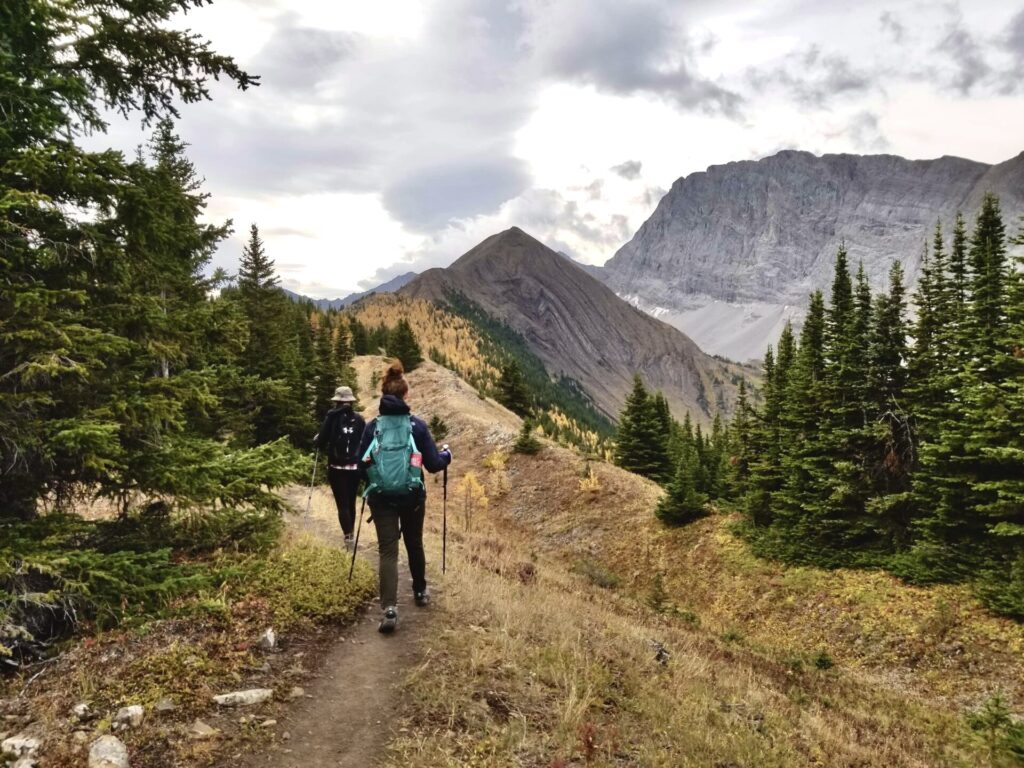
Once you reach the final peak, you’ll start entering small sections of trees; you can expect to find more fall colours here.
This also means you’ll eventually start to loose elevation and make your way down from Pocaterra Ridge. This is where things get a bit confusing, so make sure you’ve got your Alltrails map downloaded.
The descent is steep, so I recommend using trekking poles to help protect your knees.
As I mentioned, I did this hike in the opposite direction and totally fudged up the route. After looking at Alltrails reviews though, I’ve come to the conclusion that the best approach to finishing off the trail is to cross Pocaterra Creek when you see large boulders and shallow water. From here you’ll want to make your way right until you reach the highway or the Little Highway Pass parking lot.
Hopefully you’ll be luckier than me and find a suitable trail in this area!
Next I’ll go over some of my favourite hiking gear/clothes for the Rockies and I’ll give some suggestions for where to stay in Kananaskis if you’re planning a trip
Explore More Hikes In Kananaskis
Kananaskis is an area just outside of Banff that’s made up of multiple Wildland Areas and Provincial Parks. Kananaskis is my favourite hiking destination in the Canadian Rockies, so I urge you to explore more hikes in the area!
Click here to explore more of Kananaskis.
Featured Kananaskis Hikes:
- Cool Experiences: Yamnuska scramble, Mist Mountain hot springs, Grotto winter canyon walk.
- Ridge Walks: Pocaterra Ridge, Sarrail Ridge & Rawson Lake, Opal Ridge, Tent Ridge, and Wasootch Ridge.
- Summits: EEOR and Ha Ling.
- Incredible Scenery/Lakes: West Wind Pass, Picklejar Lakes, and Grassi Lakes.
Explore Kananaskis Country by Area:
Visit National Parks Nearby:
Looking for more hikes? Click here to explore all of my trail guides.
Pocaterra Ridge hike in Kananaskis
Where to Stay in Kananaskis Country
Unless you plan on camping, lodging options are a bit limited in Kananaskis. Here are a few options for every budget:
Booking.com- Hostel – HI-Kananaskis Wilderness Hostel.
- Glamping – Sundance by Basecamp. Sundance gives you the opportunity to camp in a regular tent, glamping tent, or tipi.
- Mid-range hotel – Crosswaters Resort in Kananaskis Village.
- Luxury Stay – the Kananaskis Mountain Lodge is one of the most luxurious getaways in the Banff-region. At the lodge you’ll find the Kananaskis Nordic Spa which is the most sought after spa in the region. Mount Engadine Lodge is another unique option which gives you the opportunity to lodge in yurts, glamping tents, and cabins. Gourmet food and great views included.
- Stay nearby – If these Kananaskis stays aren’t what you’re looking for, check out lodging options in nearby Canmore or Banff.
- Camping – Kananaskis offers tons of camping facilities scattered throughout the area and they almost always have availability. If you’re one to free-camp, Kananaskis has PLUZ (Public Land Use Zones) and Wildland areas, both of which you can random camp in for free. This is something I have yet to figure out in the Kananaskis region, but if you’re interested you can find more information about it here
Happy adventuring!
Taylor ♡
Like This Post?
Share with friends or save it for later!

About the Author
HI, I’m Taylor – the voice behind The Holistic Backpacker.
After moving to Banff National Park in 2020 I became an outdoor adventure enthusiast and vowed to never stop exploring.
I now spend my days travelling the world, climbing mountains, and spending nights under the stars in the Canadian Rockies backcountry.
I created The Holistic Backpacker so I could share my adventures and help connect people like you with the same amazing experiences.