25+ Epic Lake Louise Hikes (Frontcountry & Backcountry)
If you’re looking for the ultimate list of Lake Louise hikes, you’ve stumbled across the right blog. This post features every hike in Lake Louise from easy to hard to backcountry and more.
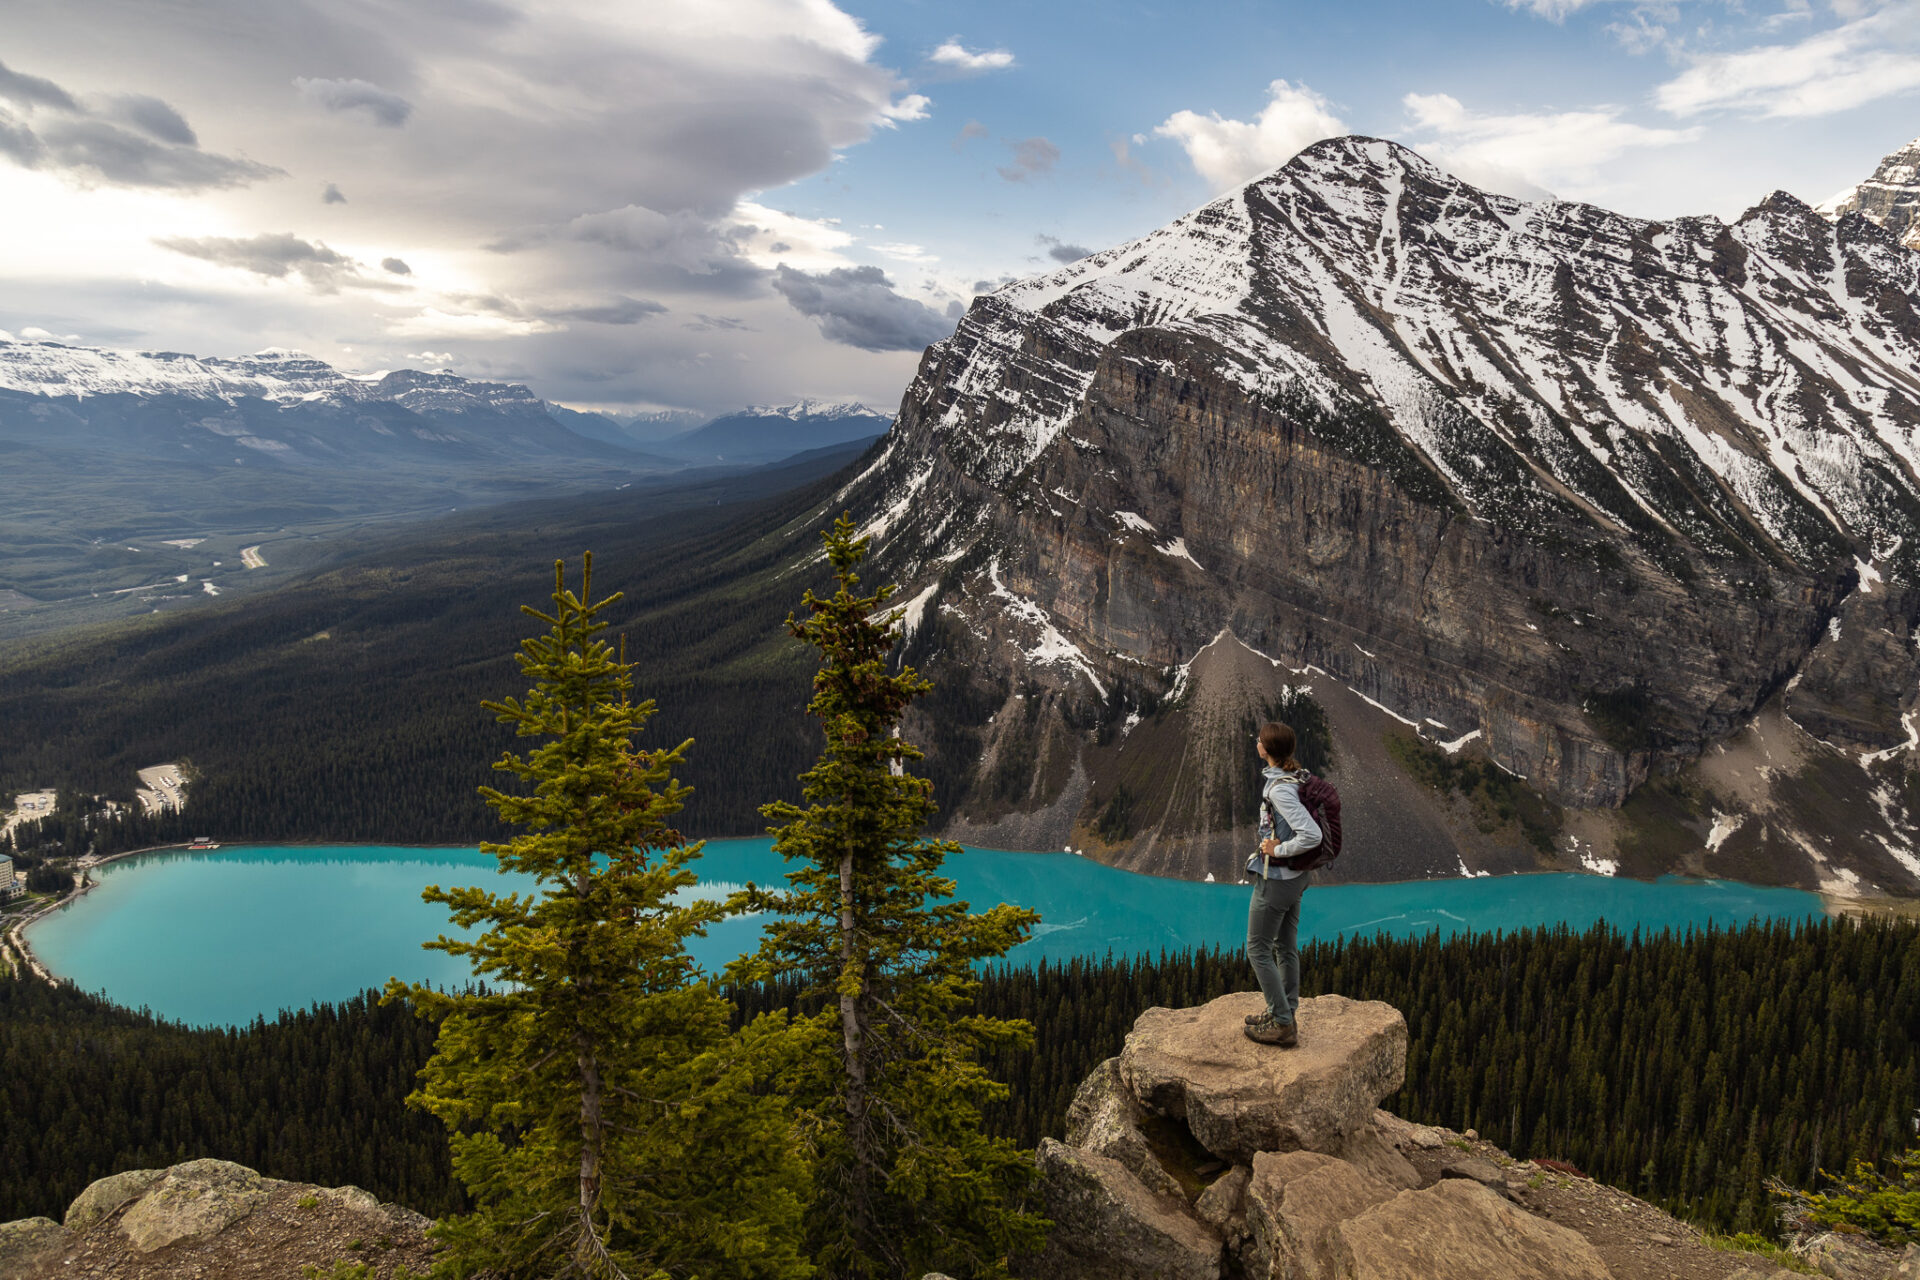
Lake Louise is a mecca for hiking and backcountry adventure. From quick half an hour hikes to multi-day backcountry adventures, Lake Louise hikes offer something for everyone – no matter your age, fitness level, or previous hiking experience.
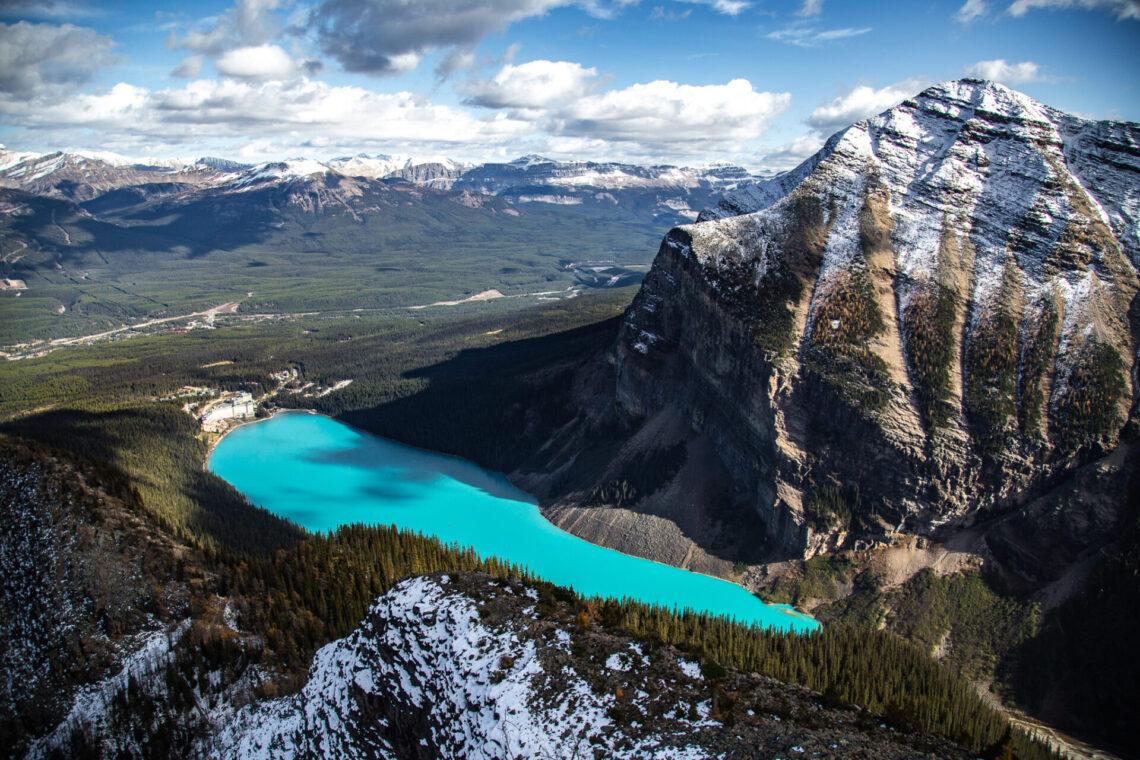
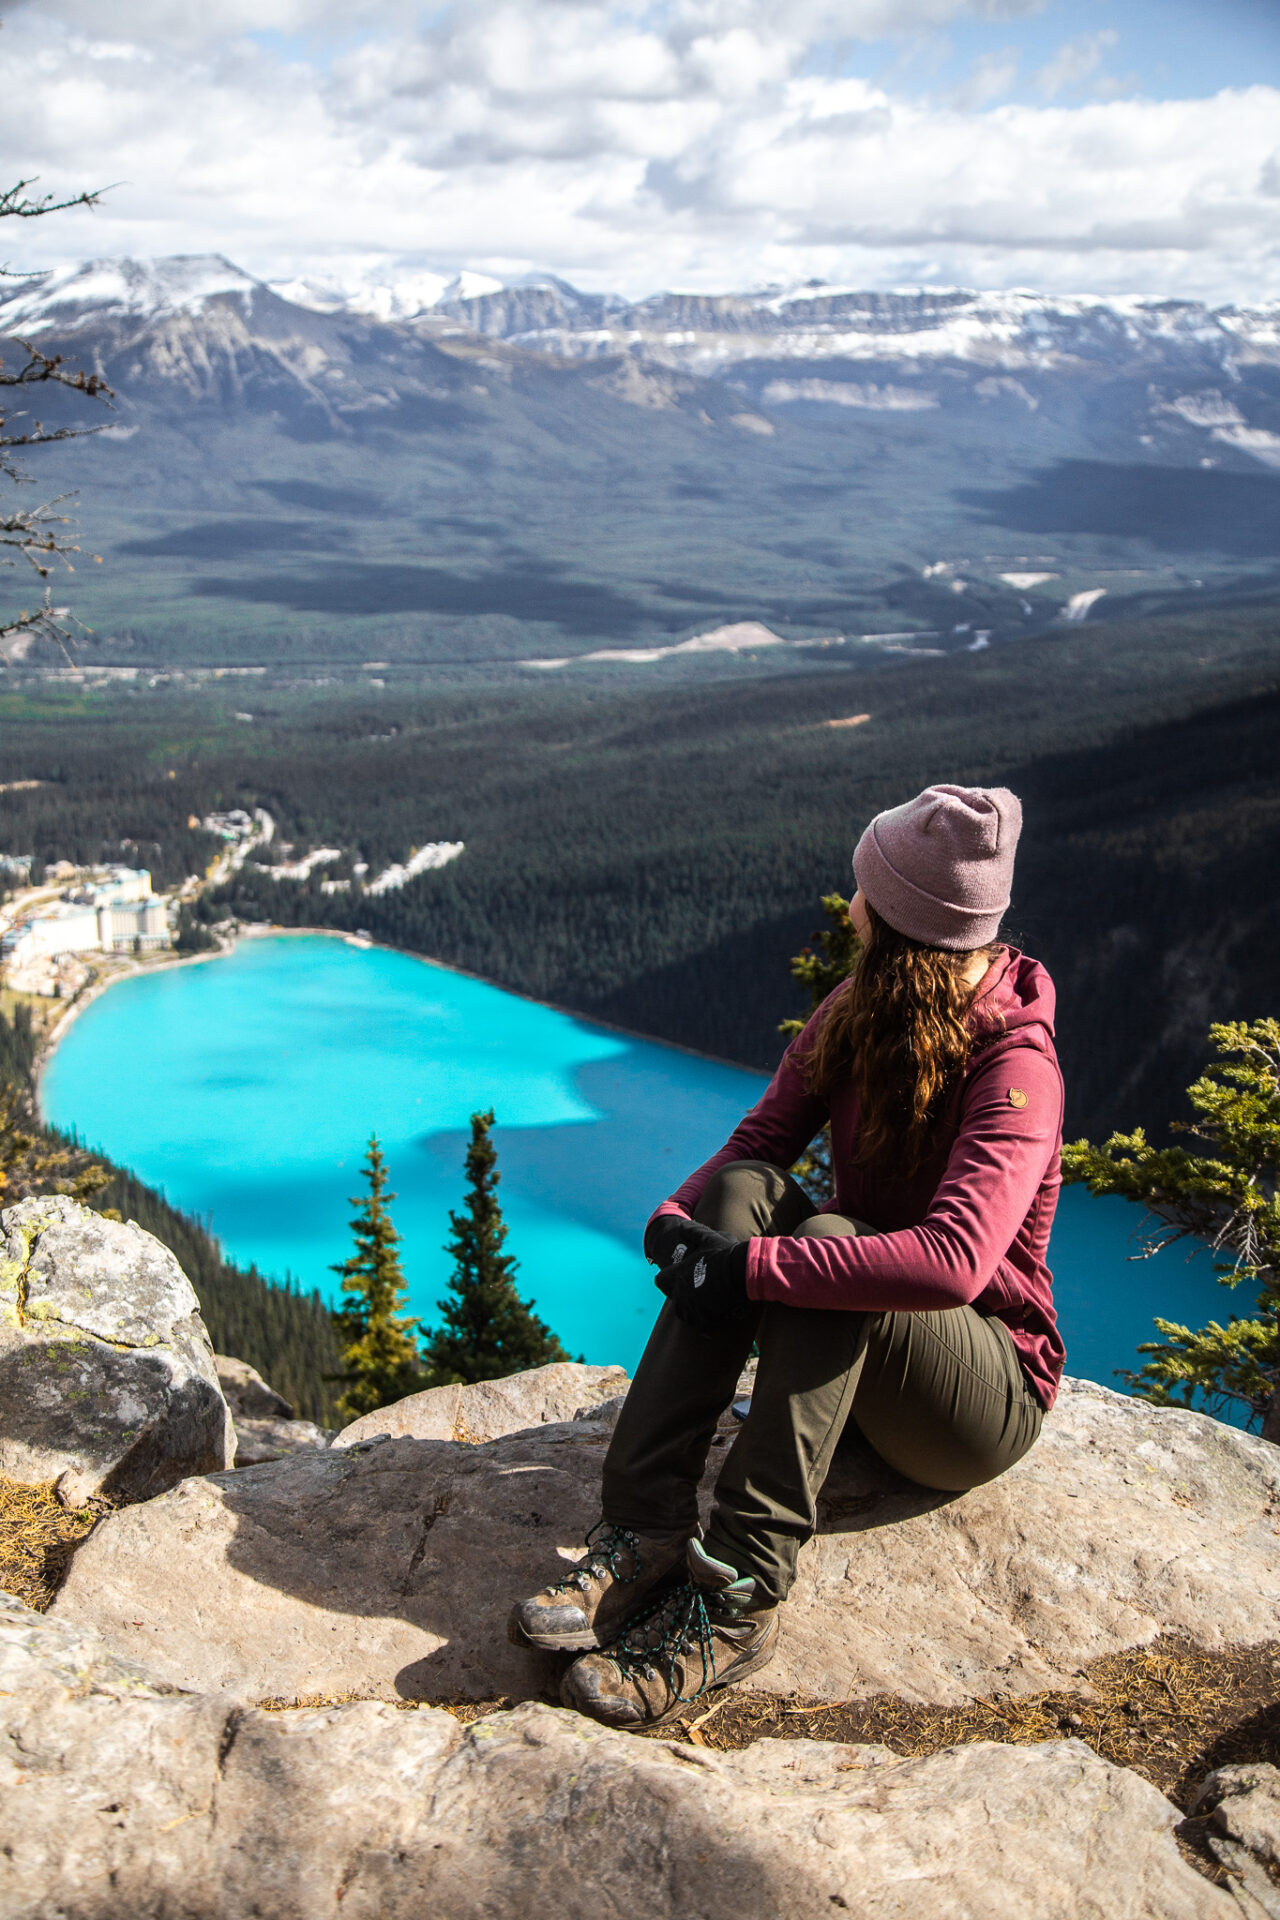
Lake Louise gets a lot of hype via social media, advertising, and word of mouth. The trails are busy and the parking fees are (very) expensive. However based on my own personal experiences hiking the trails listed below, I can confirm – Lake Louise IS worth all the hype! And yes, Lake Louise really is just as blue as it looks in the pictures.
ps – I’ve marked every hike mentioned in this post on this map of Banff & Lake Louise. Each pin has photos, descriptions, and Alltrails links – readily accessible at your fingertips!
Skip Ahead:
- How to get to Lake Louise
- Where to stay in Lake Louise
- About Hiking in Lake Louise & FAQ’s
- Recommended hiking gear for the Rockies
- Lake Louise teahouse information
- How to hike the Lake Louise Circuit
- Easy hikes in Lakes Louise
- Moderate hikes in Lake Louise
- Difficult Hikes in Lake Louise
- Backcountry Hikes in Lake Louise
- Hikes at Moraine Lake
- Canadian Rockies Hiking tips
Lake Louise hikes
As you read this post, please consider clicking the links throughout. These are affiliate links which means when you book a hotel or purchase a product, I make a small commission at no additional cost to you (full disclosure). These commissions fund The Holistic Backpacker and help me write more blog posts.
Thank you for supporting my work!
Lake Louise hikes
Downloadable Banff Map – from a LOCAL
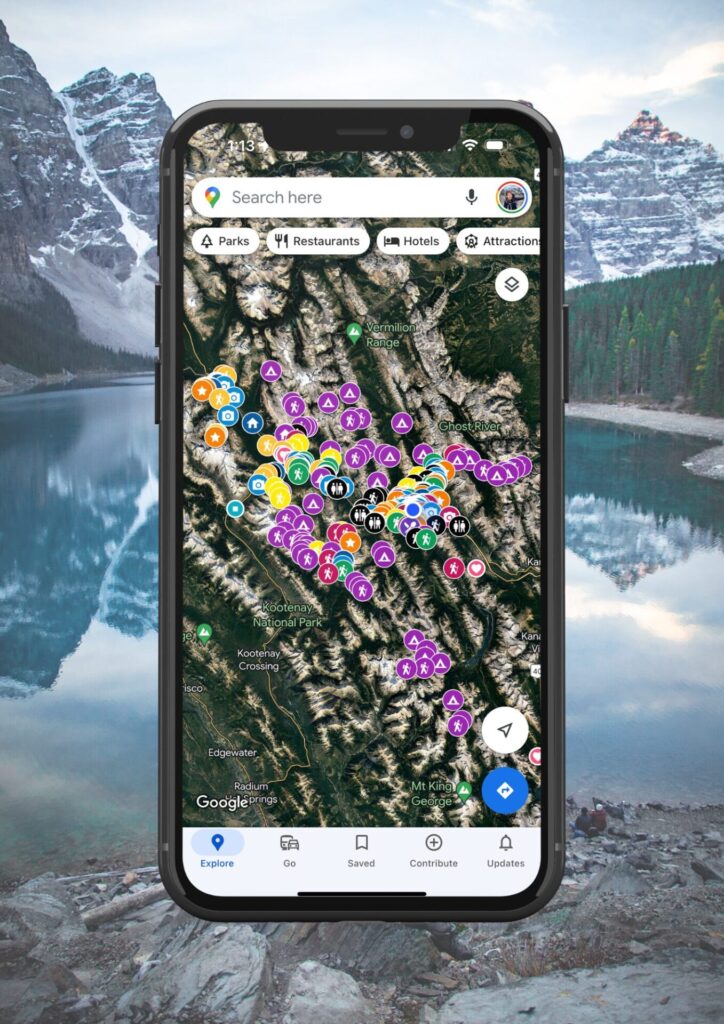
Get my 600+ local Banff recommendations saved to your Google Maps app
I’ve lived in Banff for years & know all the best spots!
Outdoors: 100+ hiking trails, scrambles, backcountry routes, waterfalls & lakes
Planning: lodging, parking, restaurants, public washrooms, transit hubs, shopping & services
Things to do: tours, viewpoints, unique activities, & local secrets
My Featured Banff Blogs
Travel Guides
Banff Activities
Quick Banff Guide
First time visiting Canada? This page outlines all my travel tips for those new to Canada.
When to visit: this post breaks down each month in Banff with average temperatures and corresponding activities.
How to get to Banff: fly into Calgary International Airport. From here, rent a car (what I recommend), RV, or take one of the following shuttles to Banff:
- Budget: On-It runs during the summer months and Pop-a-Ride is a ride-share program. You can use my Poparide link to save $5 on your first trip.
- Professional shuttles: Banff Airporter and Brewster.
- Car rental: having access to a car is the best way to travel to/from/within Banff. This site compares the best local rates.
Best Activities in Banff: here are all my recommendations for the best tours, activities, and unique experiences in Banff & beyond.
Moraine Lake or Lake Louise: read my guide for how to get there with the new road closures. If you want to see Moraine Lake at sunrise, you can book a shuttle here.
Lodging & Camping: Here’s my guide for hotels in Banff (Organized by Category). If you’re visiting during peak summer (mid June to early September), make your lodging reservations FAR in advance. Front country and backcountry camping reservations must be made on the Parks Canada reservation system. The system typically opens in January and it’s recommended you make reservations then.
Reservations: for activities and restaurants should be made well in advance during summer. Get Your Guide and Viator are popular tour booking platforms whereas OpenTable is used for restaurants.
Parks Pass: You’ll need a National Park Pass for your vehicle for each day you’re in Banff. Passes can be purchased at the East Parks Gates, the Visitor Centre, or online. If you’ll be in any of Canada’s National Parks for more than 7 days in a 365 day period, an annual Discovery Pass offers a better rate than purchasing individual day passes.
Roam Transit: once you arrive in Banff, use the local transit service as much as possible to avoid parking issues. There are bus lines within town, plus lines to popular spots like Lake Louise and Johnston Canyon. The bus to Lake Louise should be reserved in advance.
Parking: the best spot to park is the free lot next to the train station. More information about parking in town can be found here and parking fees can be paid here. Bylaw is strict, so ensure you’re following parking rules exactly.
Wildlife Safety: 11 ways to stay safe from wildlife, bear safety, & bear basics.
Lake Louise Hikes
How to Get to Lake Louise
As of 2024 Lake Louise charges $36.75 for daily parking, however the lot fills up quick so it’s recommended to take the bus.
The 8X with Roam Transit goes directly to the lake for $20 roundtrip. Reservations for this bus are highly recommended, but walk-ons are permitted (subject to availability).
The best way to get to Lake Louise is to park at the Lake Louise Ski Resort (GPS coordinates) and take the Parks Canada connector shuttle. Reservations for this bus are recommended, however walk-ons with exact cash are accepted subject to availability. As of 2024, the bus cost $8 per person to reserve plus a $3 booking fee if you reserve online.
To make a reservation, click this link, filter to the “Day Use” tab, select “Shuttle to Lake Louise and Moraine Lake,” and choose “Banff-Lake Louise” as your park. Scroll down and select the “list” tab, then choose the Lake Louise shuttle time that best suits your needs.
I highly recommend reading the post linked below as I go into more detail regarding the options for how to get to Lake Louise and Moraine Lake.
Connect via socials:
STAY CONNECTED
Sign up for emails to receive a 25% discount on my travel maps.
Taylor ♡
Where to Stay in Lake Louise
If you plan to hike at Lake Louise or Moraine Lake, there are plenty of lodging options available nearby. Staying directly in Lake Louise will save you driving the 1.5hrs to and from Banff each day.

Luxury Stays – the Fairmont Chateau Lake Louise is the most iconic hotel in Banff. Staying here gives you direct access to Lake Louise, local hiking trails, and on-site parking. The Moraine Lake Lodge is a hard-to-book, but beautiful cabin stay located directly next to Moraine Lake. Staying here gives you the ability to drive your own car to the lake, meals are included and so are the pricey canoe rentals. Book this hotel as far in advance as possible.
Mid-range stays – Paradise Lodge & Bungalows is located a mere 500m from Lake Louise, but it comes in at a much lower price point than the Fairmont Chateau. Alternatively, the Lake Louise Inn offers the best value stay in town.
Budget stays – HI Lake Louise is the only hostel in Lake Louise.
Camp – reservation info.
Where to Lodge in Nearby Banff
Budget Hostels – HI Banff, Banff International, and the Samesun Banff (my top pick).
Budget stay – Bow View Lodge and Irwin’s Mountain Inn.
Mid-range stay – Banff Park Lodge, Banff Caribou Lodge & Spa, and the High Country Inn.
Luxury stay – the Fairmont Banff Springs and the RimRock Resort.
Here’s my breakdown of the best Banff hotels, organized by category
About Hiking in Lake Louise & FAQ’s
Hiking in Lake Louise differs from hiking in other areas of the Rockies due to elevation and the nearby glaciers. Because of this, the best time of year to hike in Lake Louise is from the end of June to September. Outside these times snow can be found in surprisingly large quantities on the trails.
There are hikes that are accessible year round in Lake Louise, but please always do your research as winter hiking in the Canadian Rockies can be dangerous. I’ve noted some winter hiking tips and recommended winter gear above. Any trail that is a safe winter hike at Lake Louise is noted in this post.
The Lake Louise hikes are all sign posted and easy to follow. You do not have to worry about getting lost at Lake Louise as hiking in this area is straight forward and set up for tourism.
How hard is the Lake Louise hike to the teahouse?
There are 2 teahouses at Lake Louise: the Lake Agnes Teahouse and the Plain of Six Glaciers Teahouse. I’ve noted more information about these hikes below, however both teahouse trails are beginner & family friendly.
Can dogs hike at Lake Louise?
Yes, dogs can hike at Lake Louise. Your furry friends must remain on a leash at all times.
Is there a Lake Louise map for hikes?
This paper Lake Louise map has every official hike in the area marked. Although paper is great, I always recommend downloading Alltrails+ – I never hike in the Rockies without first downloading maps through this app.
I’ve also put together this Banff & Lake Louise map (downloadable to Google Maps on your phone) where I’ve marked every official and unofficial trail in Banff/Lake Louise with photos, descriptions, and links.
How long are the Lake Louise hikes?
The Lake Louise hikes vary in length. Some trails take half an hour or less whereas other hikes may take multiple days to complete.
Can I hike alone at Lake Louise?
Hiking in groups is always recommended for safety, however you can definitely hike alone at Lake Louise. The Lake Louise trails are popular which means there are always other people around if you run into trouble.
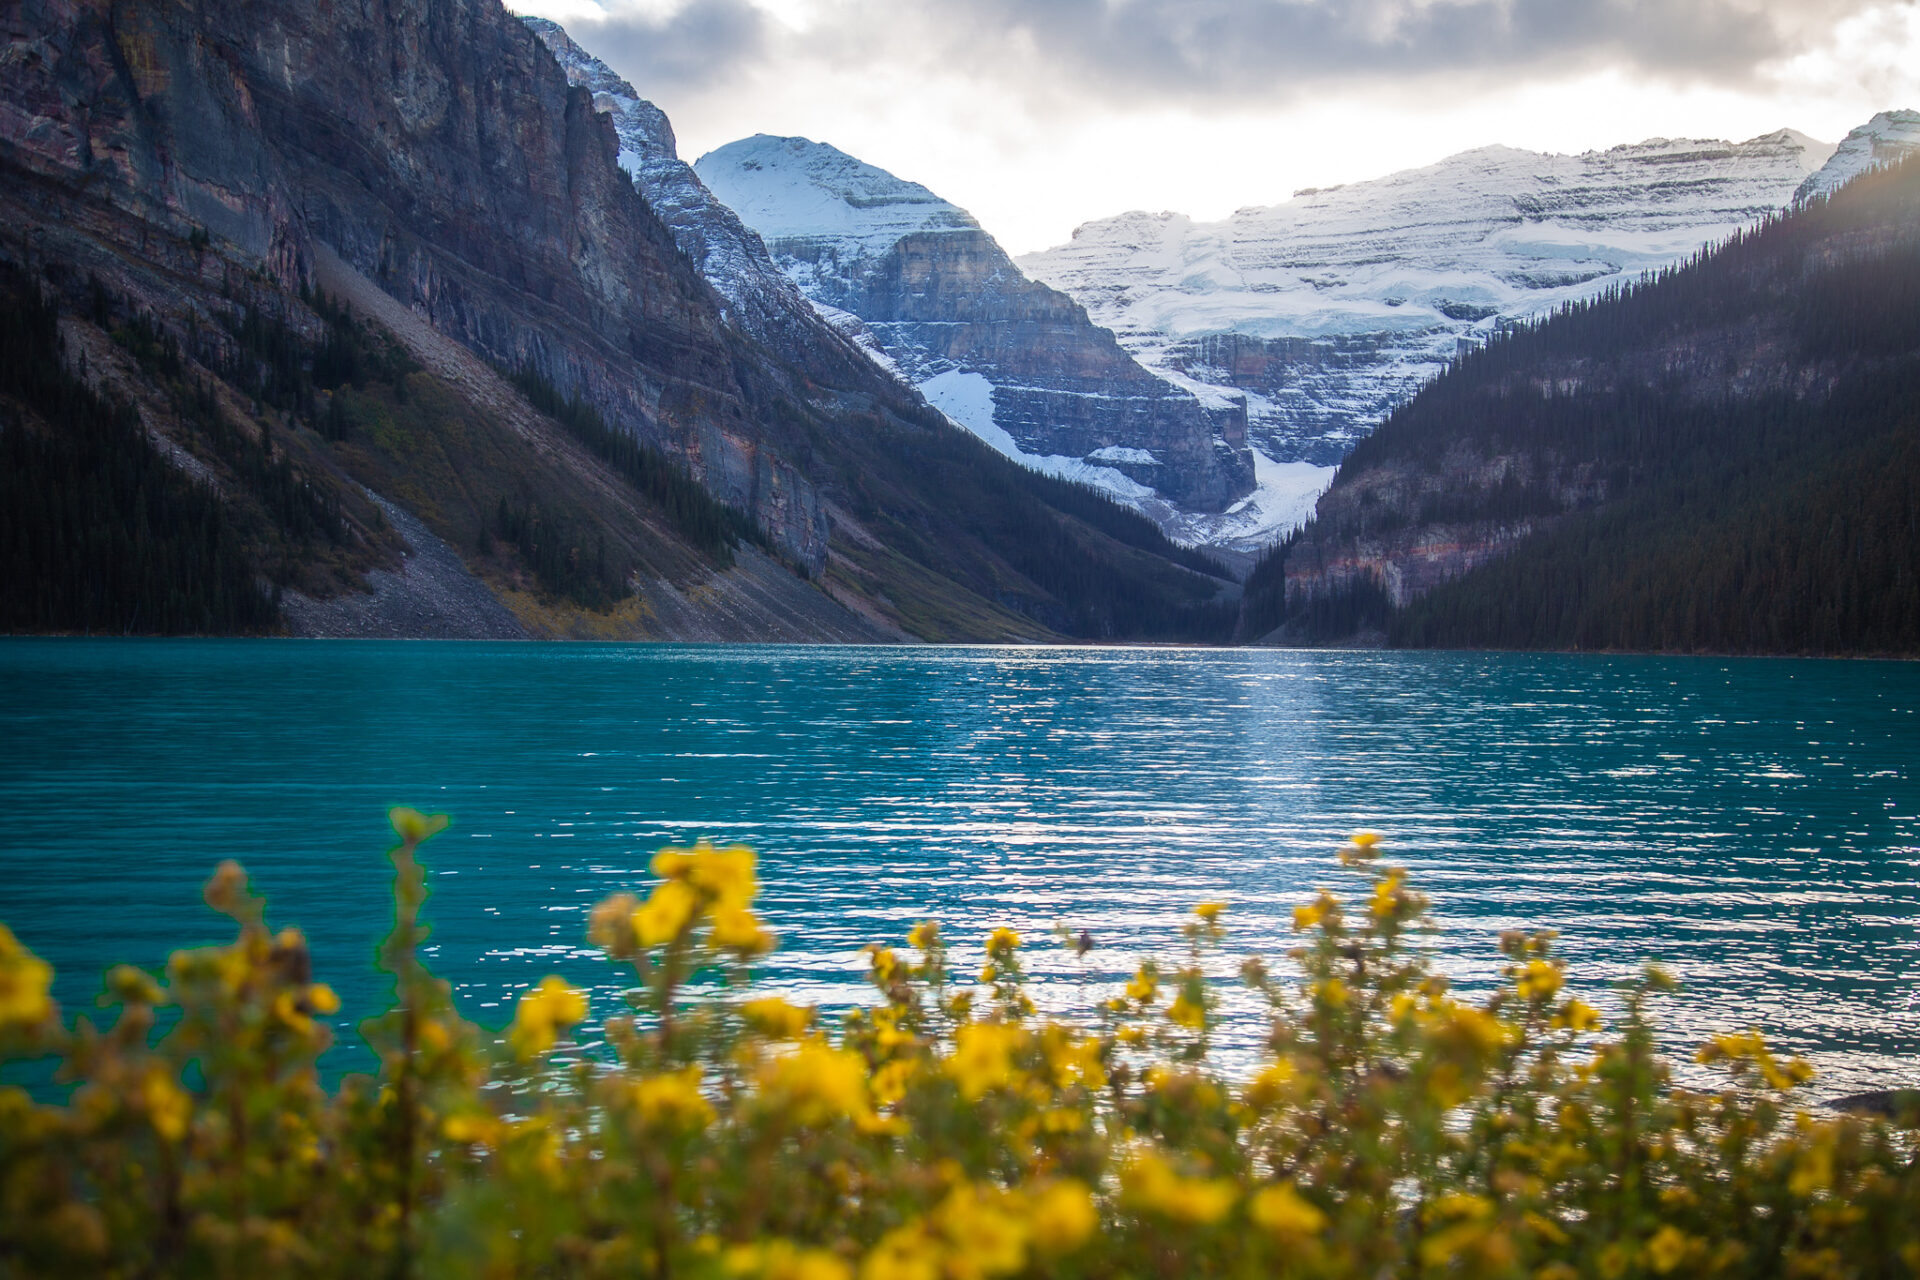
Why is Lake Louise so blue?
Contrary to popular belief – no, the bottom of the lake isn’t “painted blue.” Lake Louise is blue because the nearby glaciers melt. The meltwater carries sediments which creates a suspension in the water and scatters light – causing it to appear blue
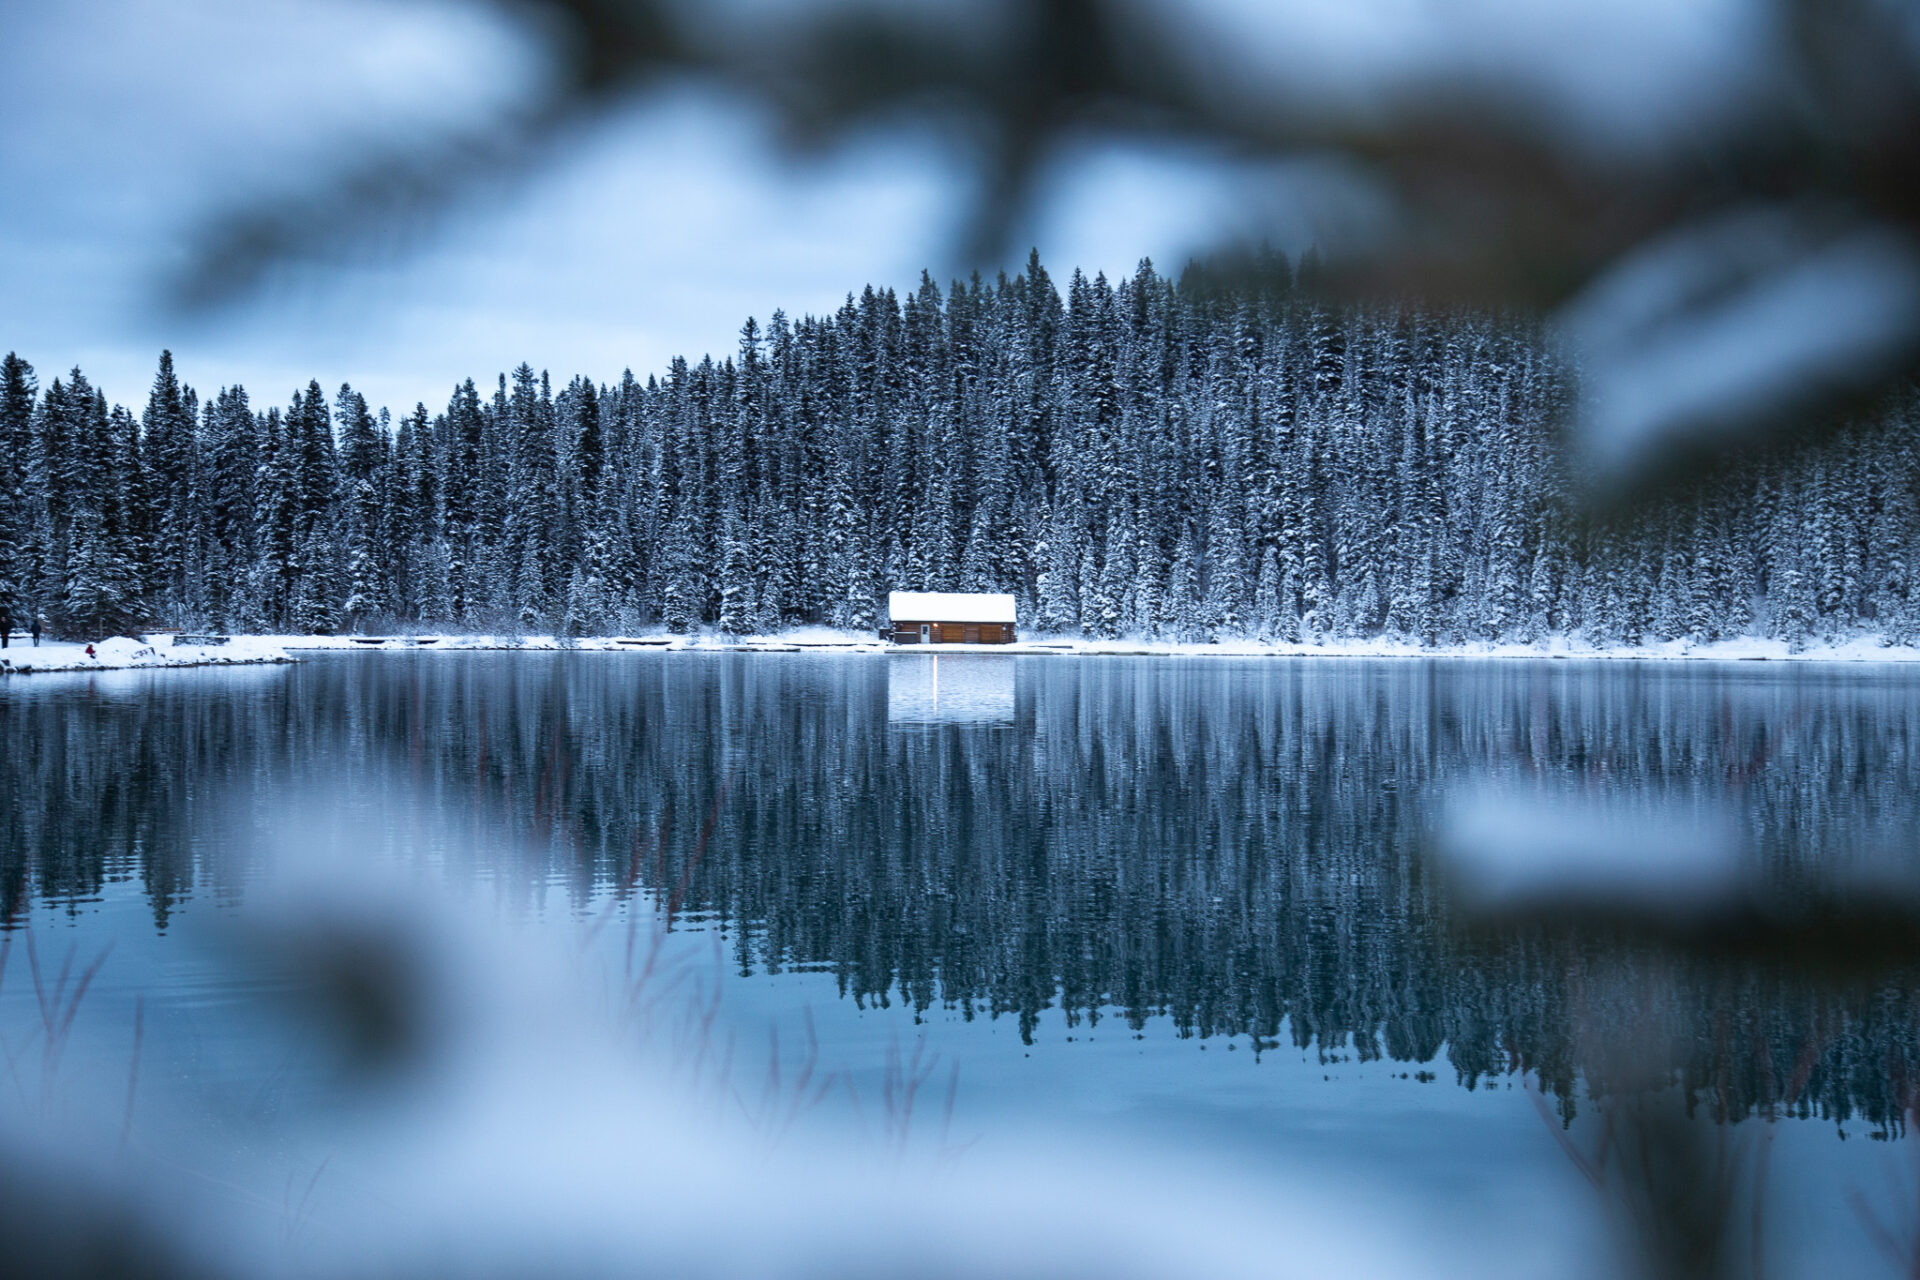
When does Lake Louise freeze and when does Lake Louise thaw?
Lake Louise typically freezes late November/early December. Lake Louise typically thaws late May/early June.
How do I get to Lake Louise from Banff?
I’ve listed information for how to get to Lake Louise below, however you can access detailed information about Lake Louise transportation options in this post.
Lake Louise Teahouse Information
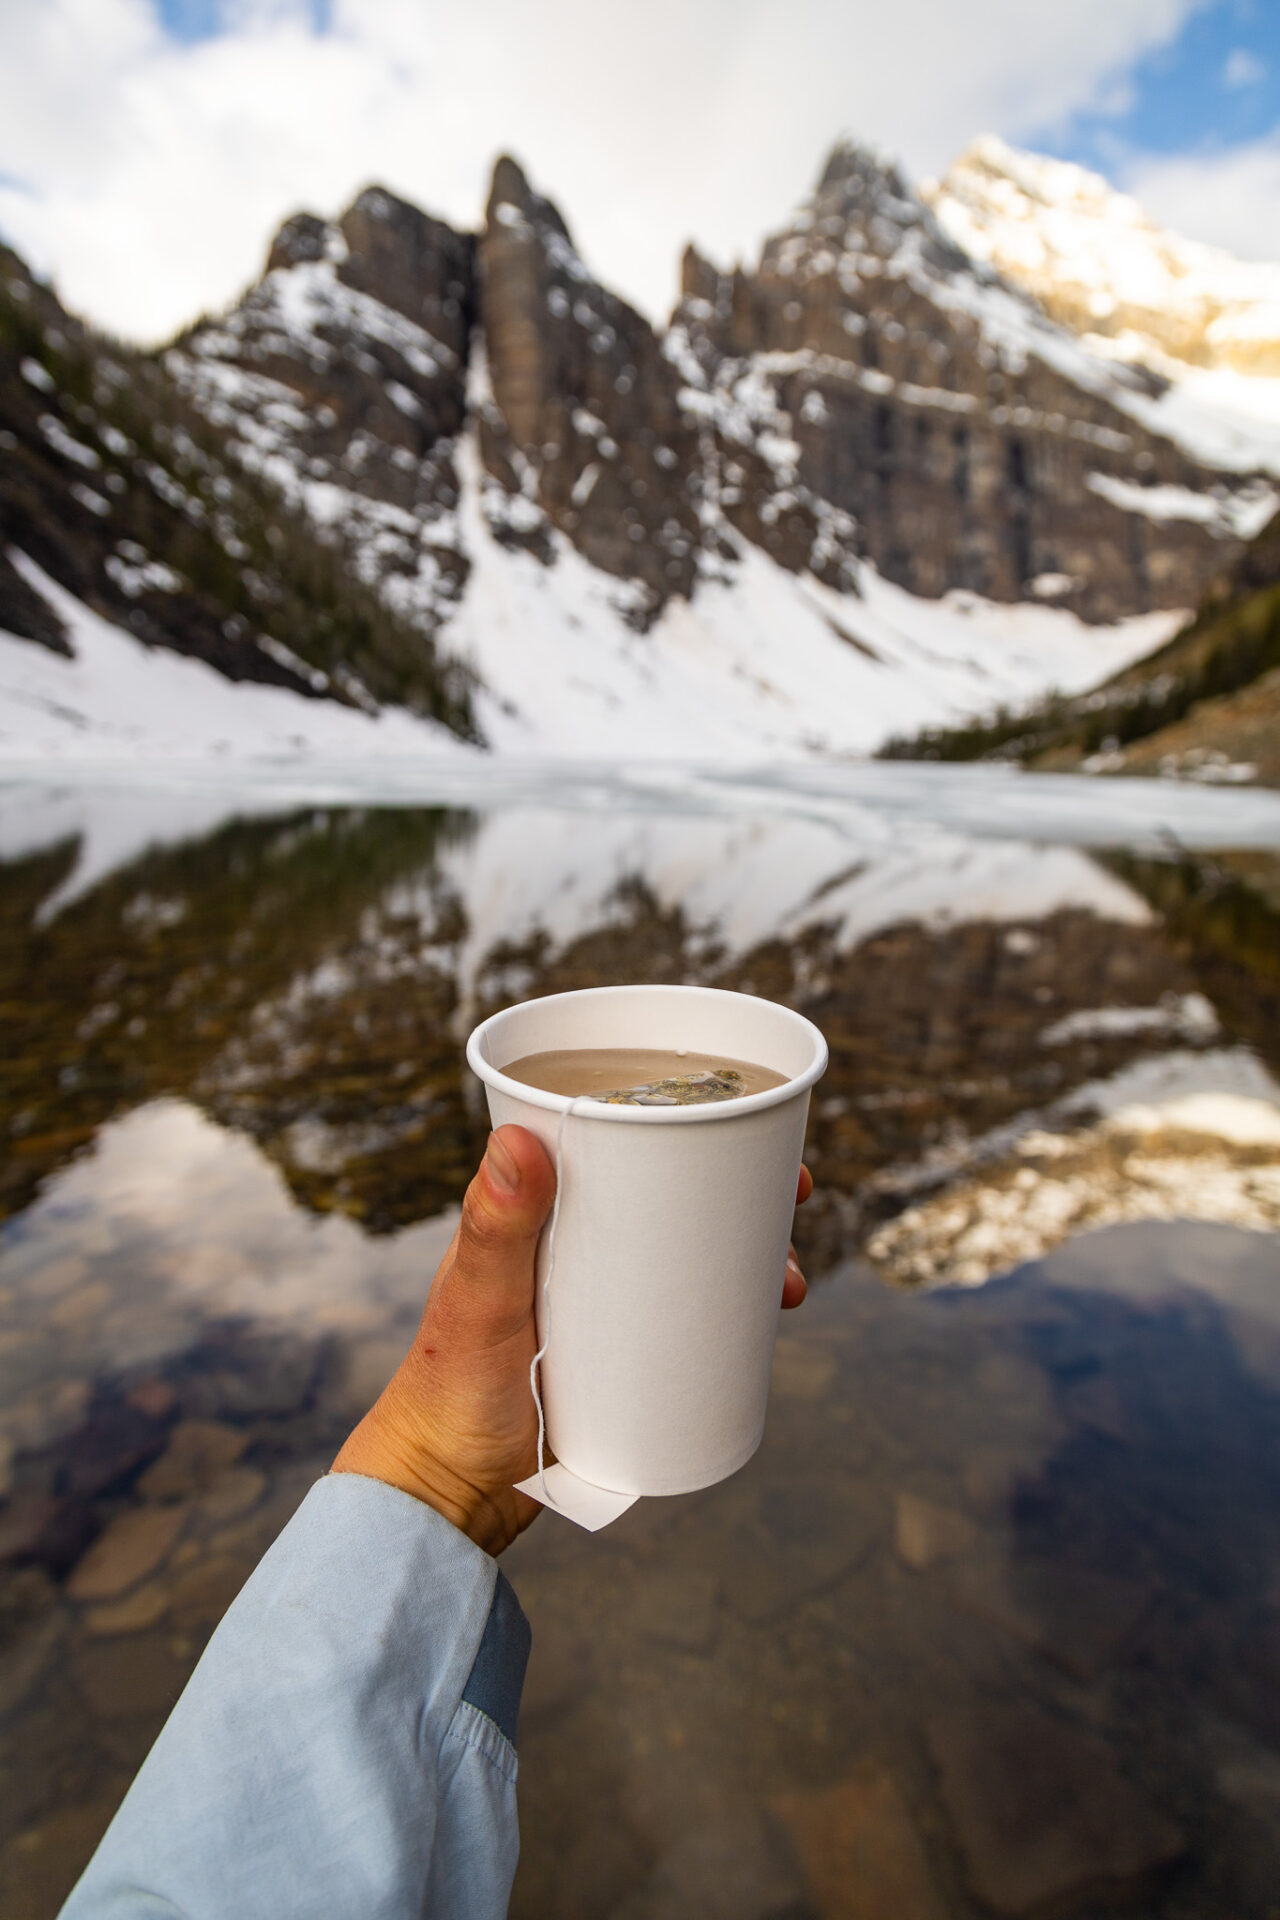
Canada’s hiking trails are very remote in the sense that they don’t have “facilities” – which may be unusual for hikers coming from Europe. The Lake Louise teahouses are special in the sense that they are two of the very few Canadian mountain trails with food and bathrooms available.
Both teahouses offer a delicious selection of local teas and coffee in addition to sweet treats and some more hardy food options like sandwiches and soup.
The Lake Agnes Teahouse typically runs from early June to Canadian Thanksgiving weekend (early October). Its operating hours are 8:00am-5:00pm daily.
The Plain of Six Glaciers Teahouse has variable opening dates as the trail there is more susceptible to snow. Typically the opening dates are mid June to early October and the hours of operations are 9:00am-5:00pm.
Both the Lake Agnes and the Plain of Six Teahouses accept card and Canadian/American dollars. There’s an additional charge for paying with card ($1-$4), so bringing cash is recommended.
There’s no garbage at either teahouses, so be prepared to hike your garbage out.
Skip ahead: Lake Agnes trail information
Skip ahead: Plain of Six Glaciers trail information
Lake Louise hikes – easy to hard
Recommended Hiking Gear for the Rockies
Below are my personal recommendations and favourite products for Canadian Rockies specific hiking gear.
Backpack: I use the Osprey Sirrus 24L (men’s edition) for quick day hikes and the Osprey Sirrus 36L (men’s edition) for longer hikes requiring more gear.
Hydration: I use the 3L Hydrapak to carry water and always have aquatabs on-hand if I need to filter water.
Footwear: I currently use the Scarpa Kailesh (men’s version) and full cushion crew Smartwool socks.
Safety: I always carry the Garmin Inreach Mini 2 as my satellite device.
Here are my detailed posts for Canadian Rockies hiking gear
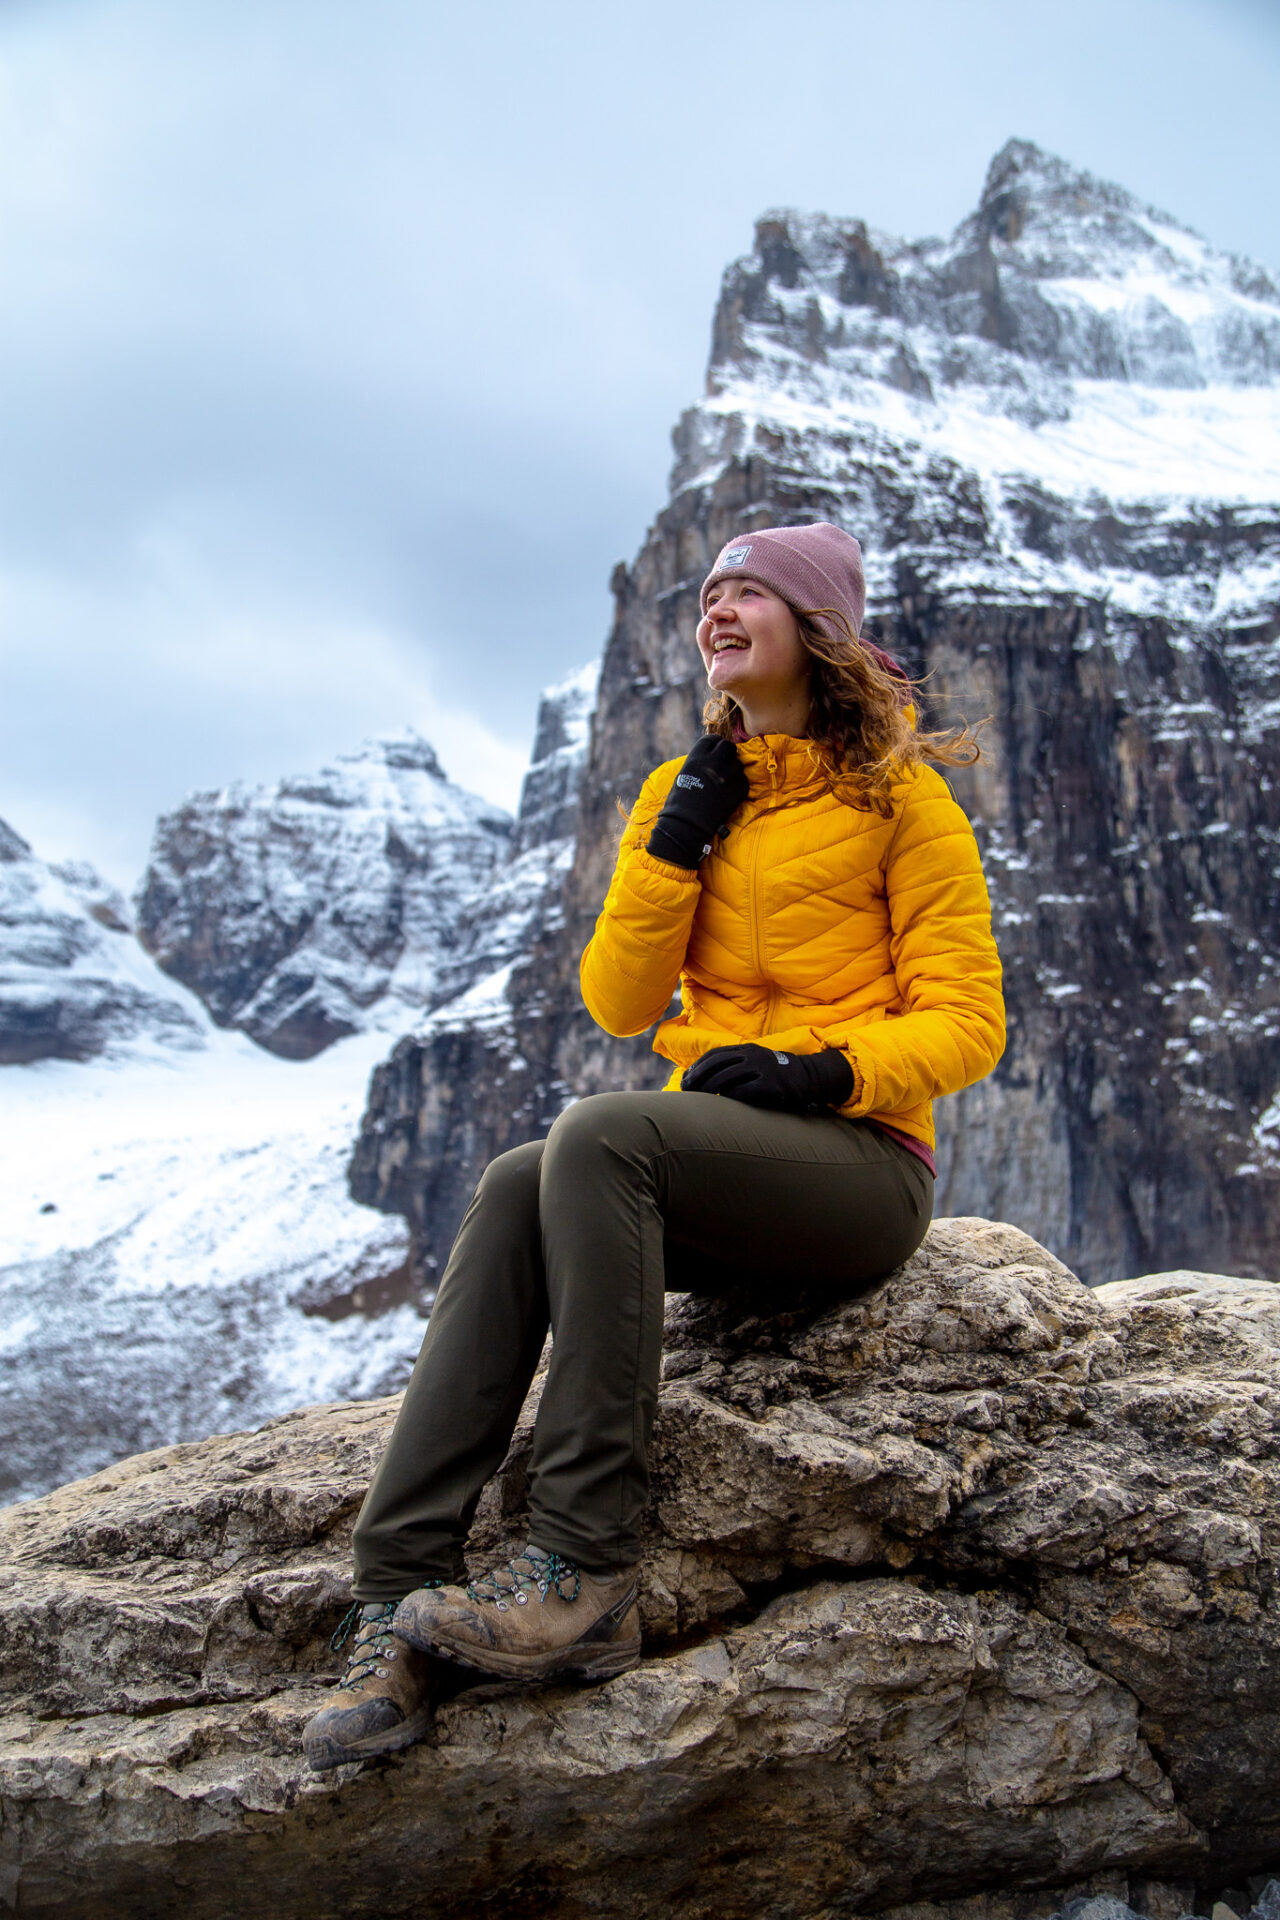
Rockies Hiking Gear: Winter
If you’re planning to hike the Rockies in winter, you’ll need to add a few more items to your gear arsenal.
The items below are what I use.

Spikes: I love Hillsound’s trail crampon which provides killer traction and long-lasting durability.
Snowshoes: I use TSL’s sustainable Symbioz Hyperflex snowshoe, however any snowshoe from TSL is top of the line. This one is their midrange model which offers similar features at a light weight and better price point.
Gaiters: this is my top pick for gaiters which are great for keeping water and snow out of your boots. If you’re on a budget, these ones are a little more cost effective and have plenty of great reviews.
Warmth: I use Aurora Heat’s reusable hand + ultra foot warmers for both hiking and skiing. They’re made of beaver pelt by Indigenous women in Canada’s Yukon.
Softshell Pants: these are my favourite pants (men’s sizing) for cold weather hiking. They’re water resistant, wind resistant, and warm. If you’re reading from the USA, these REI pants are equivalent: women’s sizing | men’s sizing.
Lake Louise hikes
How to Hike the Lake Louise Circuit
Before I go into detail regarding every hike in Lake Louise, I wanted to make note of the “Lake Louise Circuit.”
Most of the trails at Lake Louise interconnect and pass one another. If you’re short for time or don’t enjoy repeating the same trail over and over, you can hike the Lake Louise Circuit.
The Lake Louise Circuit starts at the lake’s shoreline, then hits the following in this order: Mirror Lake, Little Beehive, Lake Agnes, Big Beehive, Devil’s Thumb, Plain of Six Glaciers – or vice versa.
The Lake Louise Circuit is around 26kms (if you hit everything mentioned above) and it’s the most efficient way to hike everything at Lake Louise in 1 day. You can click the button below for my detailed Lake Louise Circuit guide.
The Lake Louise Circuit is best hiked from July to September as this is when there will be the least amount of snow.
Top Tours & Excursions in Banff
Banff Gondola – epic views from the top of Sulphur Mountain.
Banff Hop on Hop off – explore the park at your own pace.
Lake Minnewanka Cruise – take a scenic boat ride down the largest lake in Banff.
Moraine Lake sunrise – chartered bus to see alpenglow on Canada’s most beautiful lake.
Norquay via ferrata – epic beginner friendly climbing route across iron bars on Mt Norquay.
Sunshine Meadows Gondola – find wild alpine flowers and hike around pristine alpine lakes.
Click here for a complete list of the Banff tours I recommend:
Easy Hikes in Lake Louise
The following easy Lake Louise hikes are quick, family friendly, and don’t have much elevation gain.
ps – all these hikes are marked on my Banff & Lake Louise map.
Downloadable Banff Map – from a LOCAL
Get my 600+ local Banff recommendations saved to your Google Maps app
I’ve lived in Banff for years & know all the best spots!
Outdoors: 100+ hiking trails, scrambles, backcountry routes, waterfalls & lakes
Planning: lodging, parking, restaurants, public washrooms, transit hubs, shopping & services
Things to do: tours, viewpoints, unique activities, & local secrets
Lake Louise Lakeshore Trail
Distance: 4.5kms
Elevation Gain: 37m
Estimated Time: 1hr
First on this list of Lake Louise hikes is the Lake Louise Lakeshore Trail. This trail is relatively flat, easy to follow and as you can imagine loops the shore of the lake. It’s a great trail for families or for those with mobility issues as there’s nothing technical or strenuous about it.
At the back of the lake you’ll find a stream that feeds Lake Louise as well as climbers who frequent the slabs.
The Lake Louise Lakeshore trail can be hiked year round.
Download my Banff & Lake Louise map
Fairview Lookout
Distance: 2.3kms
Elevation Gain: 156m
Estimated Time: 45mins
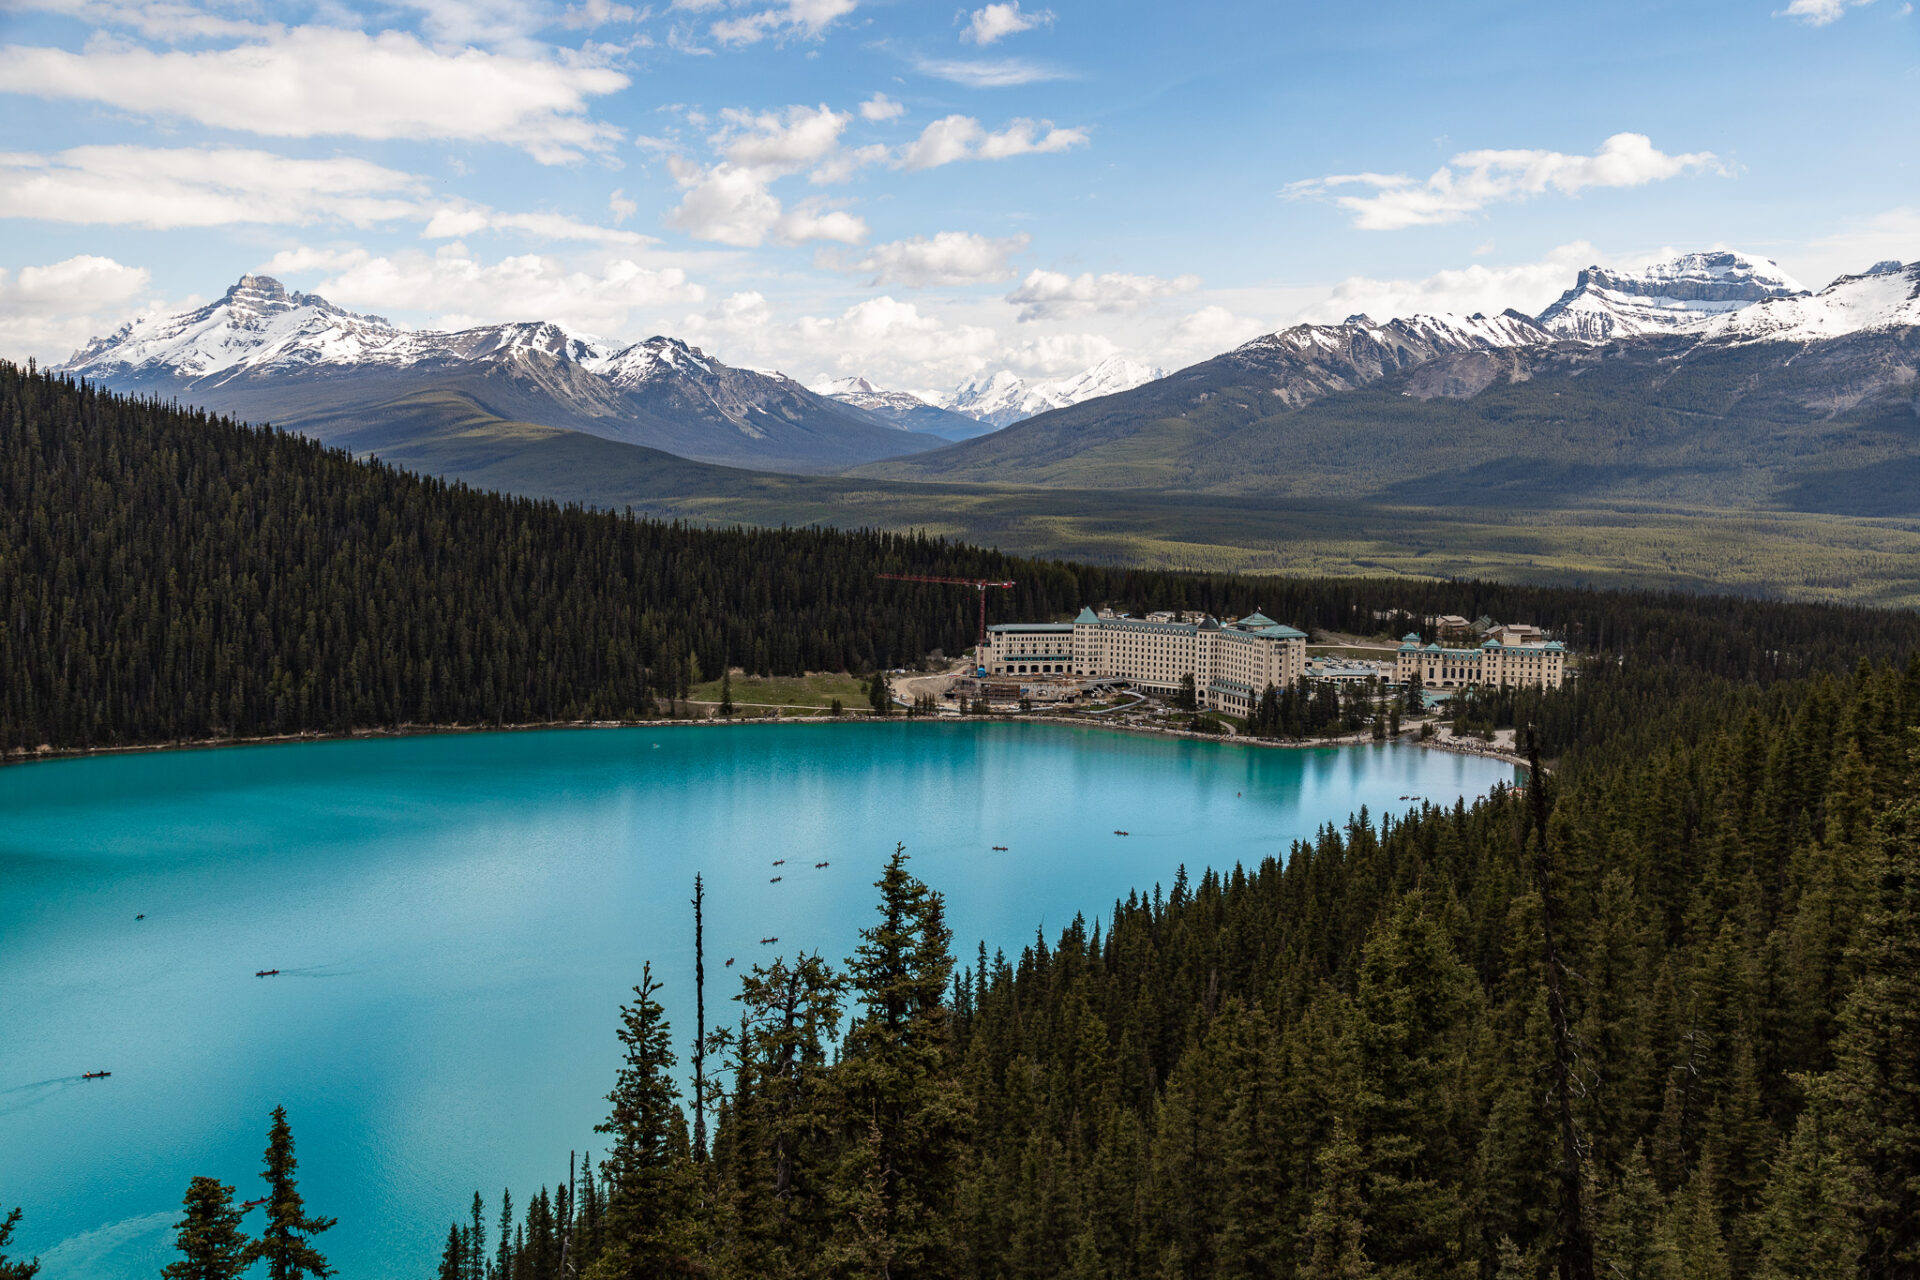
Fairview Lookout is a decently steep, but easy Lake Louise hike. It’s great for families or for those new to hiking. The trail follows a wooded, packed path until reaching a viewpoint facing the Fairmont Chateau Lake Louise – one of the most “bucket list” hotels in Canada.
The viewpoint is small and can often be crowded (especially during summer and on weekends) so it’s recommended to hike early or late in the day if you want to find some solitude here.
Fairview Lookout is a popular snowshoe trail during the winter months. The trail does not cross avalanche terrain as long as you don’t venture past the viewpoint.
Download my Banff & Lake Louise map
Pipestone Loop
Distance: 7.7kms
Elevation Gain: 242m
Estimated Time: 2hrs 15mins
The Pipestone Loop doesn’t necessarily offer beautiful alpine views like some of the other Lake Louise hikes mentioned in this post, however it’s a great spot for cross country skiing, hiking, and mountain biking.
The trail does not cross avalanche terrain so it can be used year round.
The regular Pipestone Loop on Alltrails is linked below, however if you’re looking to extend this hike you can venture on the Pipestone Loop Long Route which nearly doubles this trail’s length.
Download my Banff & Lake Louise map
Mirror Lake
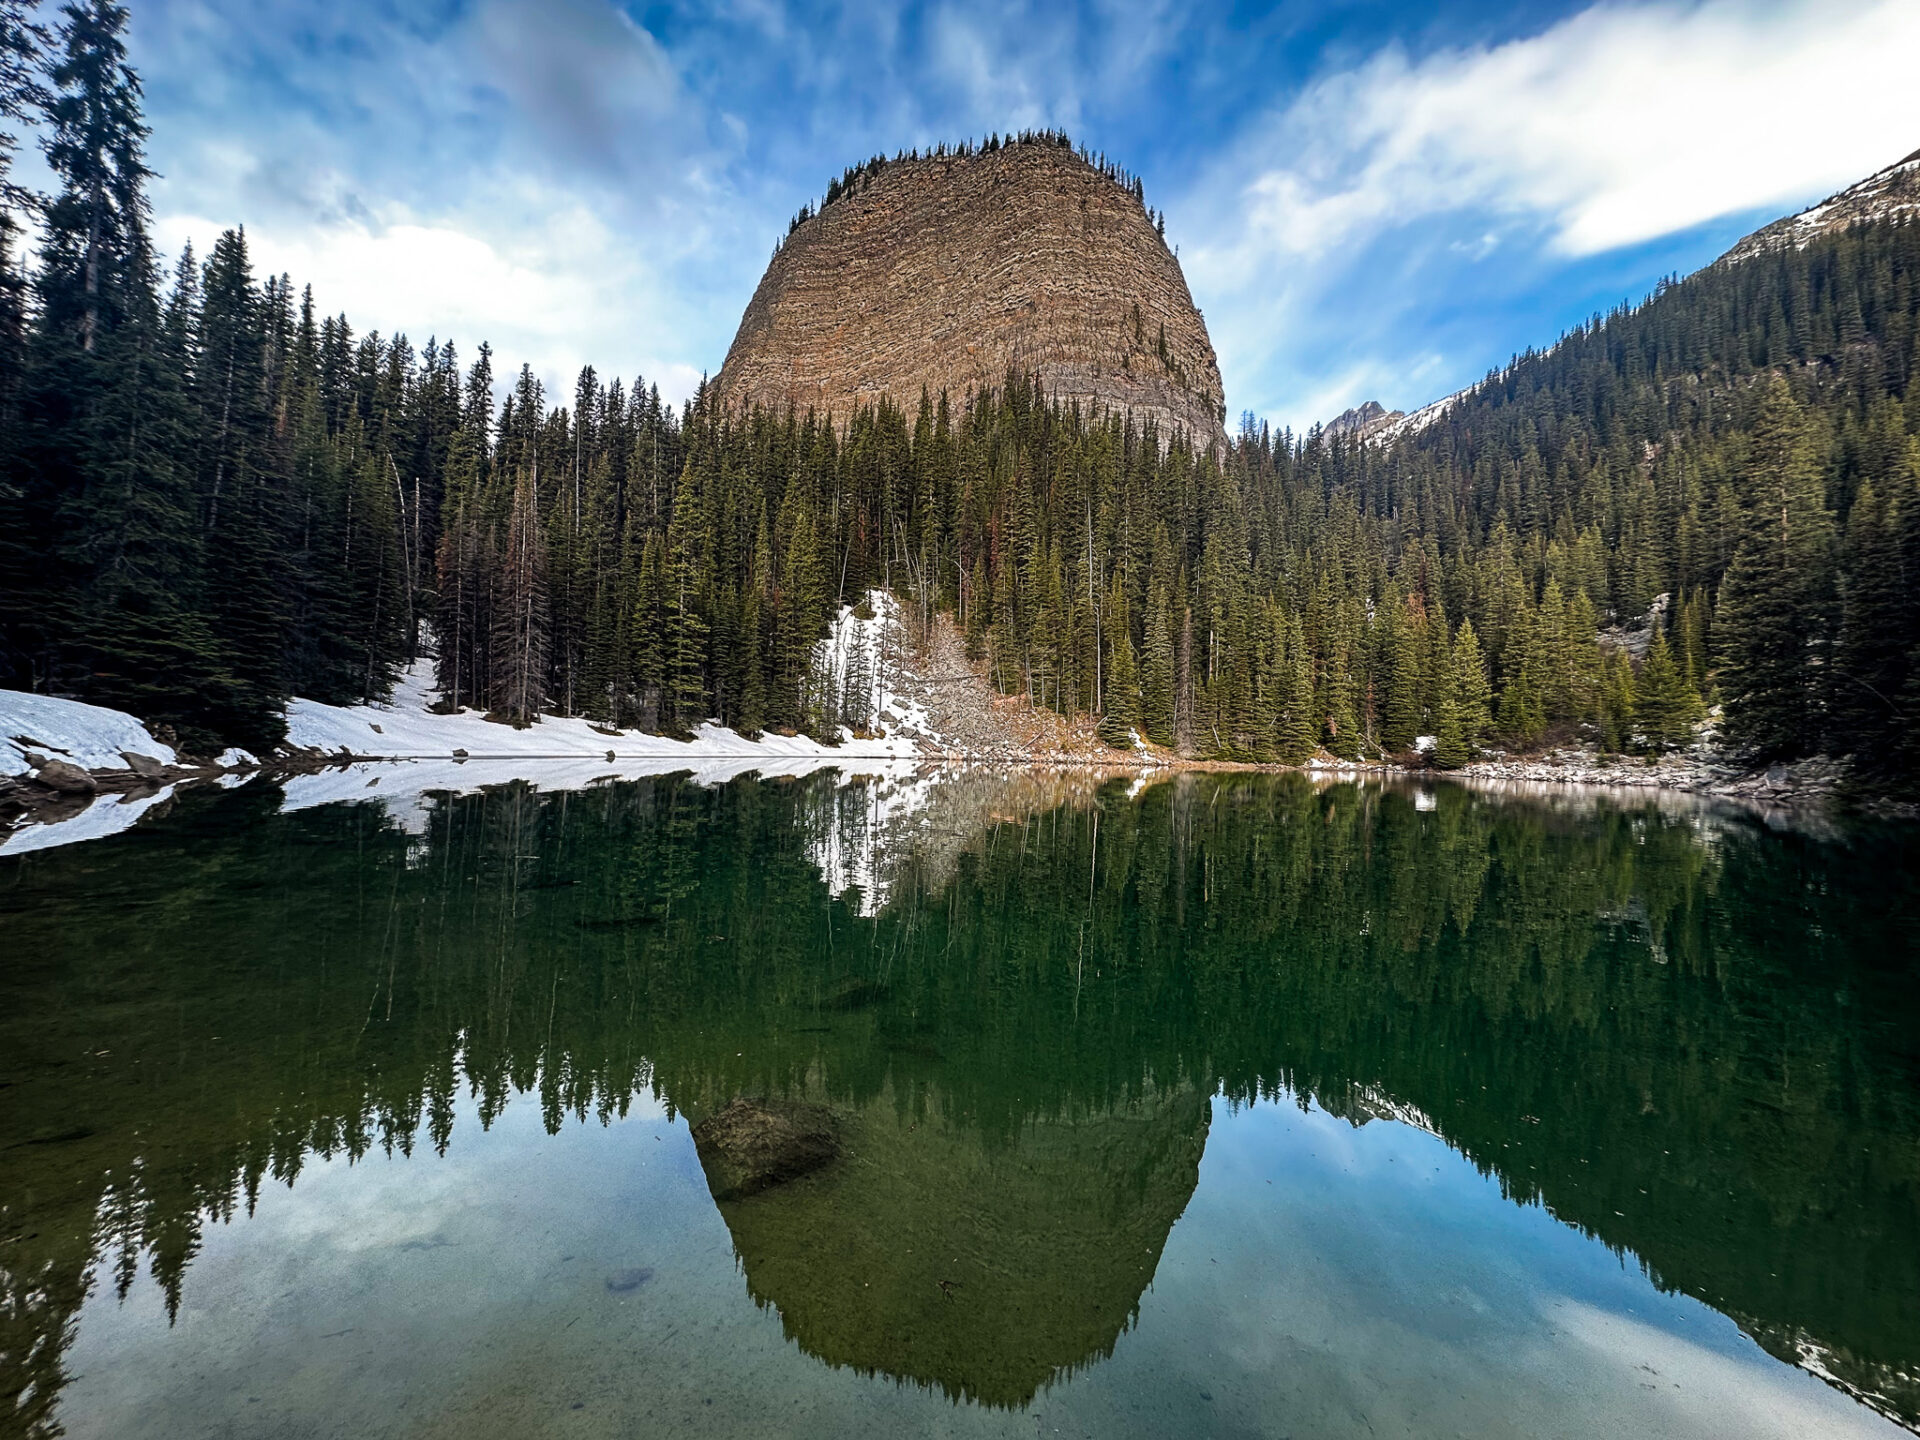
Distance: 4.8kms
Elevation Gain: 270m
Estimated Time: 1hr 45mins
Mirror Lake is the first “attraction” you’ll pass along the Lake Louise Circuit hike. It’s named after the perfect reflection it “mirrors” of the Big Beehive above.
The trail up to Mirror Lake is wide, packed, and well sign posted. From here it’s recommended hikers continue onto at least Lake Agnes to visit the teahouse, however everything along the Lake Louise Circuit hike can be accessed from this point.
The Alltrails map linked below ventures over to Lake Agnes, but passes Mirror Lake along the way. This route is a popular snowshoeing trail in the winter months. It follows the summer horse trails and has almost zero risk for avalanche exposure – however still always attention to the avalanche bulletin for good measure.
Download my Banff & Lake Louise map
Ptarmigan Viewpoint Trail
Distance: 2.7kms
Elevation Gain: 284m
Estimated Time: 1.5hrs
The Ptarmigan Viewpoint Trail starts at the top of the Glacier Express chairlift – you can book a summer sightseeing ticket at the Lake Louise Ski Resort which gives you instant access to this hiking trail opposed to having to hike the whole mountain.
This easy Lake Louise trail is short, but steep. Typically during July the trail meanders through fields of wildflowers and toward the end of September/early October you’ll find vibrant yellow Larch trees around.
Since this trail runs through the ski resort, it’s only hike-able outside of ski season – typically mid June to early October.
Download my Banff & Lake Louise map
Kicking Horse Viewpoint
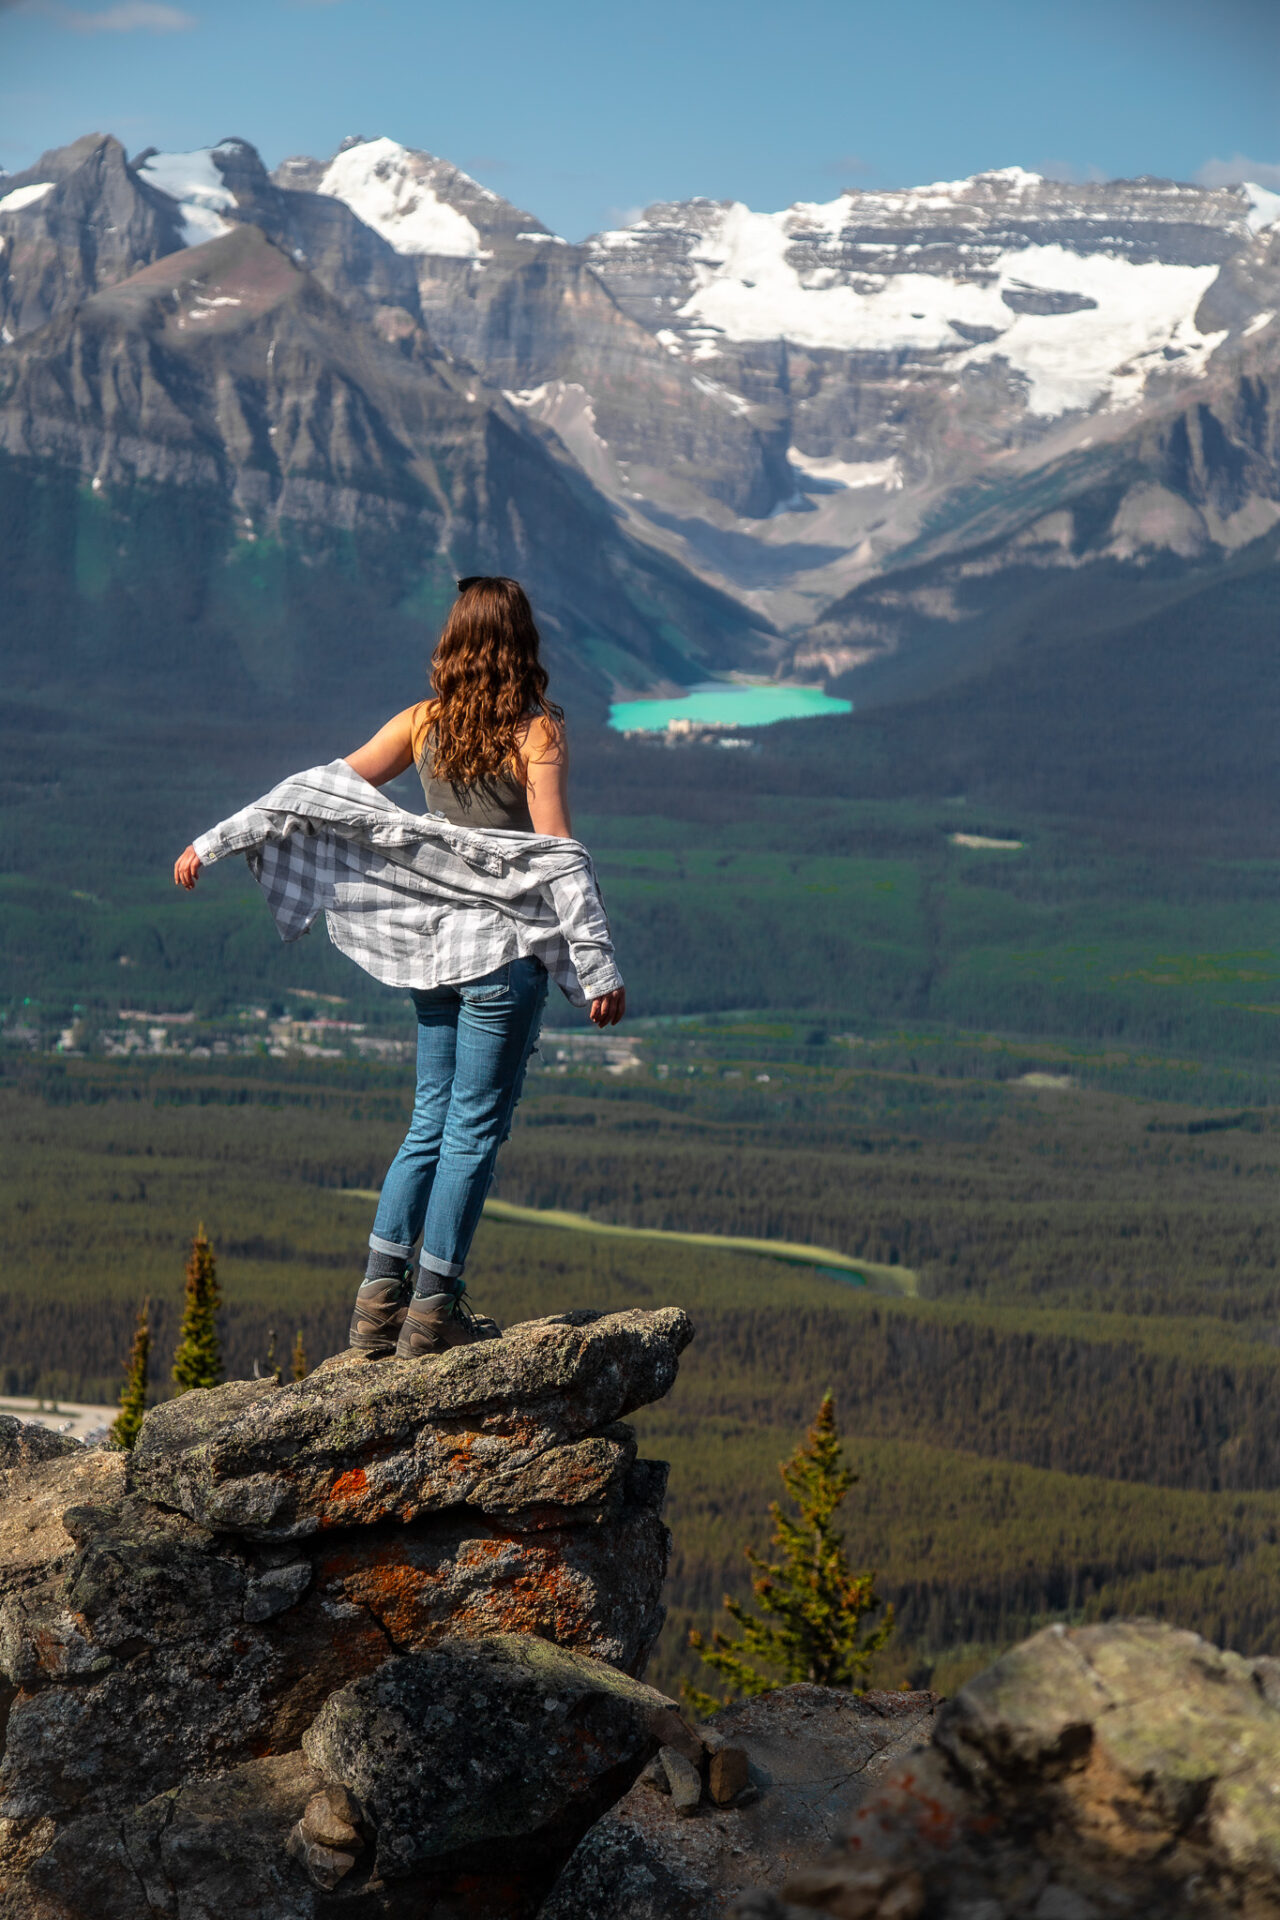
Distance: 1.7kms
Elevation Gain: 109m
Estimated Time: 1hr
Like the Ptarmigan Viewpoint trail, the hike up to the Kicking Horse Viewpoint begins by taking a chairlift at the Lake Louise Ski Resort. You can book your ticket here.
My favourite thing about this easy Lake Louise hike is the low effort that’s required for such a big reward. The birds-eye view of Lake Louise from here is super unique, plus further west you can see right down the Kicking Horse Valley in the direction of Golden.
This trail is quick, easy, and suitable for the whole family. It is hike-able only during the summer months (mid June to early October) as this route does pass through ski terrain at the resort.
Download my Banff & Lake Louise map
Moderate Hikes in Lake Louise
The following Lake Louise hikes are still beginner friendly, but pose more of a challenge in terms of distance and elevation gain.
ps – all these hikes are marked on my Banff & Lake Louise map.
Lake Agnes Teahouse
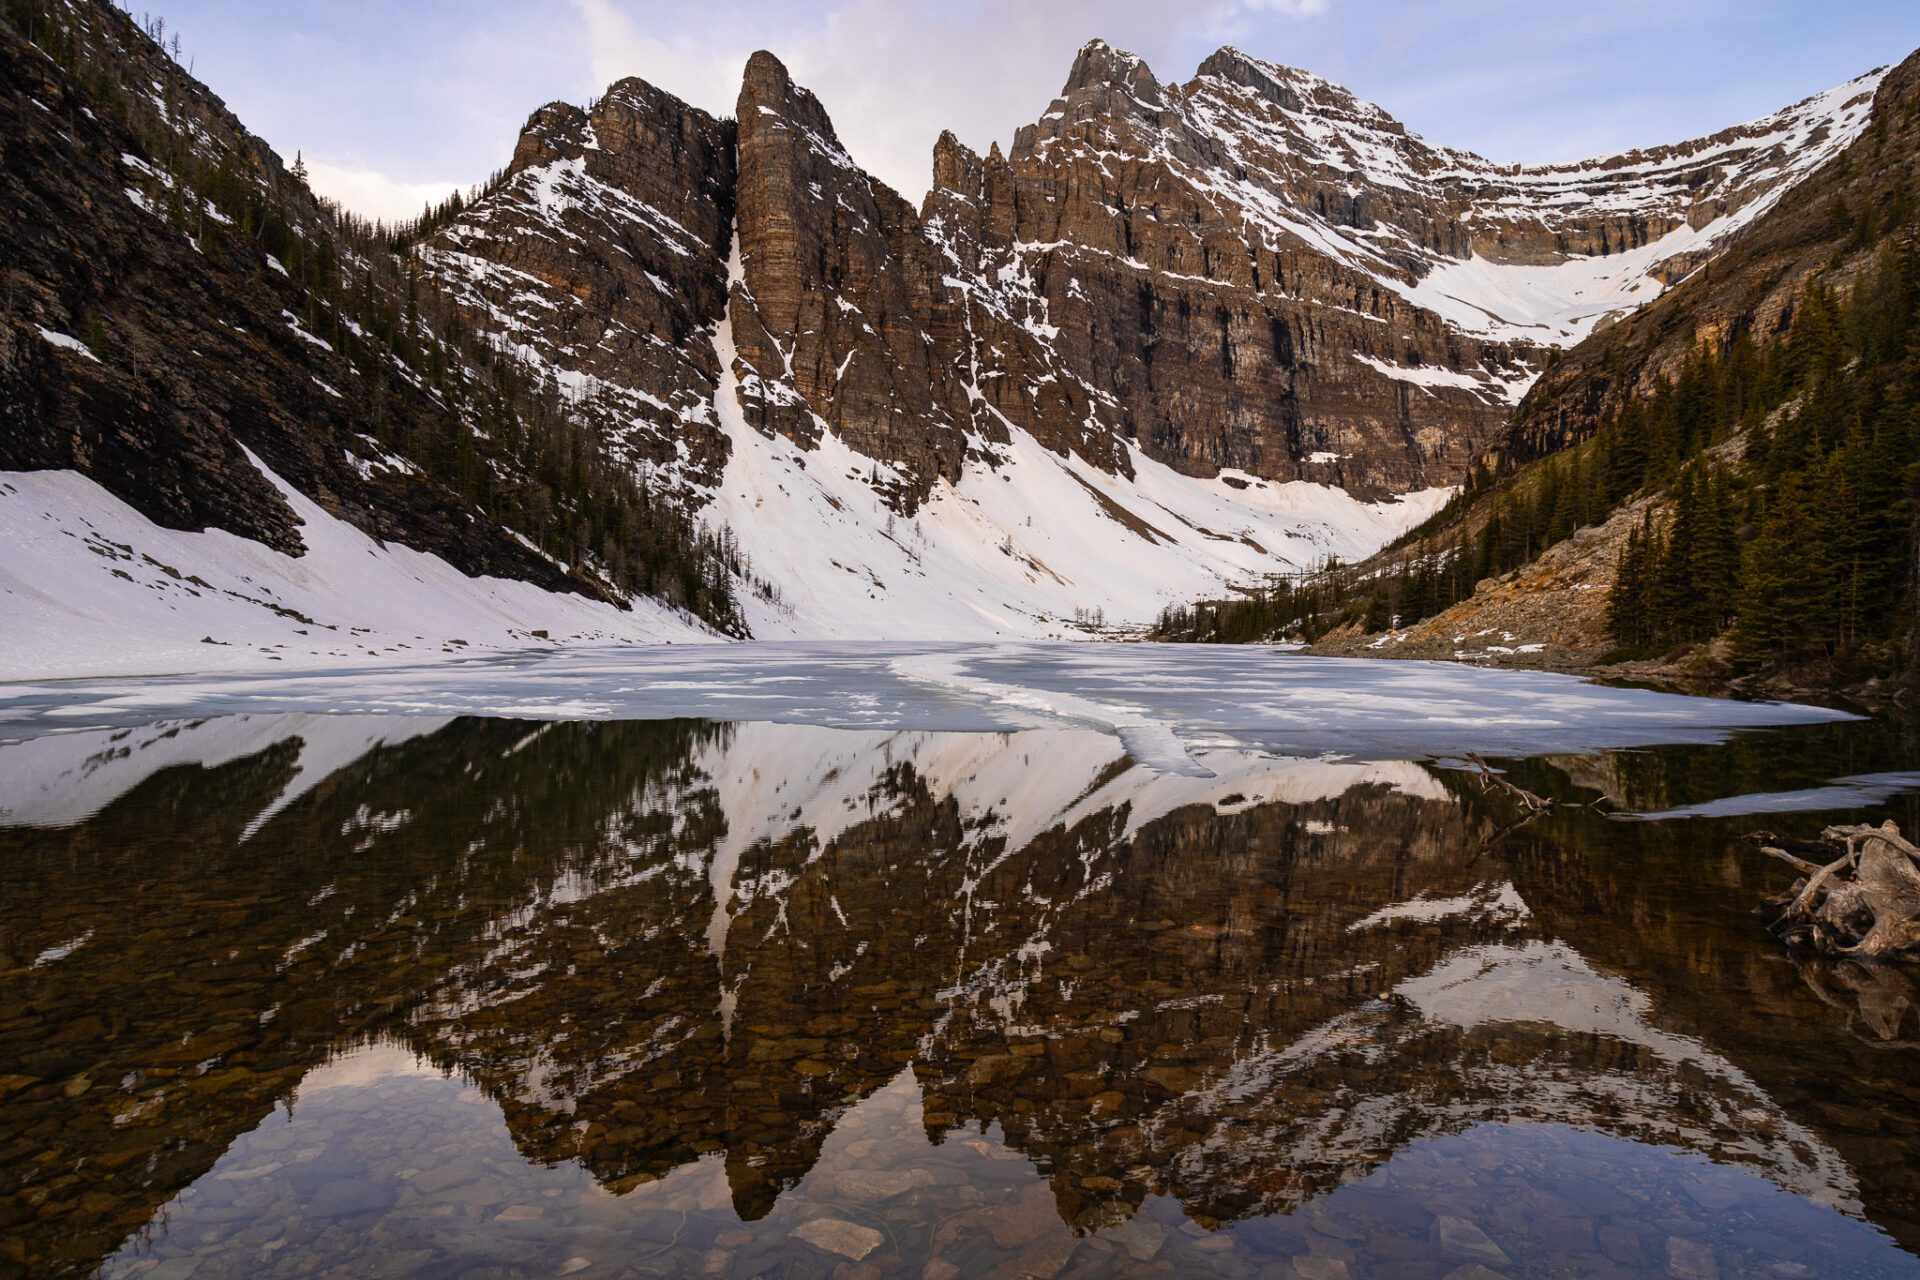
Distance: 7.4kms
Elevation Gain: 384m
Estimated Time: 2.5hrs
The Lake Agnes teahouse is arguably one of the most famous things about Lake Louise and definitely the busiest hike in Lake Louise too. This trail is suitable for all hikers regardless of past experience.
The trail to Lake Agnes is only 1.5kms past Mirror Lake with around 115m additional elevation gain. From here it’s recommended hikers visit the Big Beehive and/or the Little Beehive.
Lake Agnes is often frozen until early/mid June and the Lake Agnes teahouse is typically open 8:00am-5:00pm from early June to early October – I have more information about the teahouse written here.
There’s a small waterfall nearby draining from the lake and the dramatic, pointed mountains you see from the shore are Devil’s Thumb and Mount Whyte.
Lake Agnes can be hiked year round, however the trail does cross some avalanche terrain. It’s highly recommended you check the avalanche report prior to hiking and bring proper winter hiking gear if you plan to complete this hike from November-May.
Download my Banff & Lake Louise map
Little Beehive
Distance: 9.2kms
Elevation Gain: 586m
Estimated Time: 3hrs 40mins
The Little Beehive is my favourite Lake Louise hike for sunrise. If you’re a quick hiker it takes less than an hour to reach the viewpoint and the views are immaculate.
To get to the Little Beehive you’ll follow the Lake Agnes trail, then venture right once you see the first Little Beehive signpost. There’s one famous large rock where everyone takes their photos, it’s located hikers right off the main trail on the way up to the “summit.”
The Little Beehive is commonly hiked year round, but from November to May the trail is exposed to avalanche terrain. Always check the avalanche report prior to hiking and bring proper winter hiking gear.
Download my Banff & Lake Louise map
Big Beehive
Distance: 10.8kms
Elevation Gain: 718m
Estimated Time: 3.5hrs
The Big Beehive offers similar views as the Little Beehive and it marks the halfway point of the Lake Louise Circuit Hike. The Big Beehive is just past Lake Agnes and at the base of Devil’s Thumb.
There’s a shelter at the top of the Big Beehive and you’ll have a great vantage point of Lake Louise. I definitely recommend continuing on to the Big Beehive from Lake Agnes as it’ll only add an extra hour (maximum) to the hike.
The Big Beehive trail crosses avalanche terrain in the winter so it’s not recommended past early October or prior to mid June. I’ve visited the beginning of the final ascent for the Big Beehive mid June and found plenty of snow to still be on the trail.
Download my Banff & Lake Louise map
Plain of Six Glaciers Teahouse
Distance: 14.6kms
Elevation Gain: 514m
Estimated Time: 4.5hrs
The Plain of Six Glaciers is a fan favourite Lake Louise hike. It’s a straightforward trail, not overly strenuous, and offers up-close views of the – you guessed it – 6 glaciers at the back of the lake.
There are plenty of wildflowers along the trail which typically bloom in July and you’ll find the Plain of Six Glaciers Teahouse near the end of the trail. The teahouse is a great spot to grab a hot drink and sweet treat while soaking in the views. I’ve written more info about the teahouse here.
Hikers are advised to not go off the main trail here as the surrounding glacial terrain can be dangerous and unpredictable. I once witnessed an avalanche coming from one of the glaciers.
This hike is not suitable during the winter (November to May) as snow levels are high on the trail and avalanche risk is prevalent.
Download my Banff & Lake Louise map
Saddleback Pass
Distance: 7.6kms
Elevation Gain: 590m
Estimated Time: 3hrs
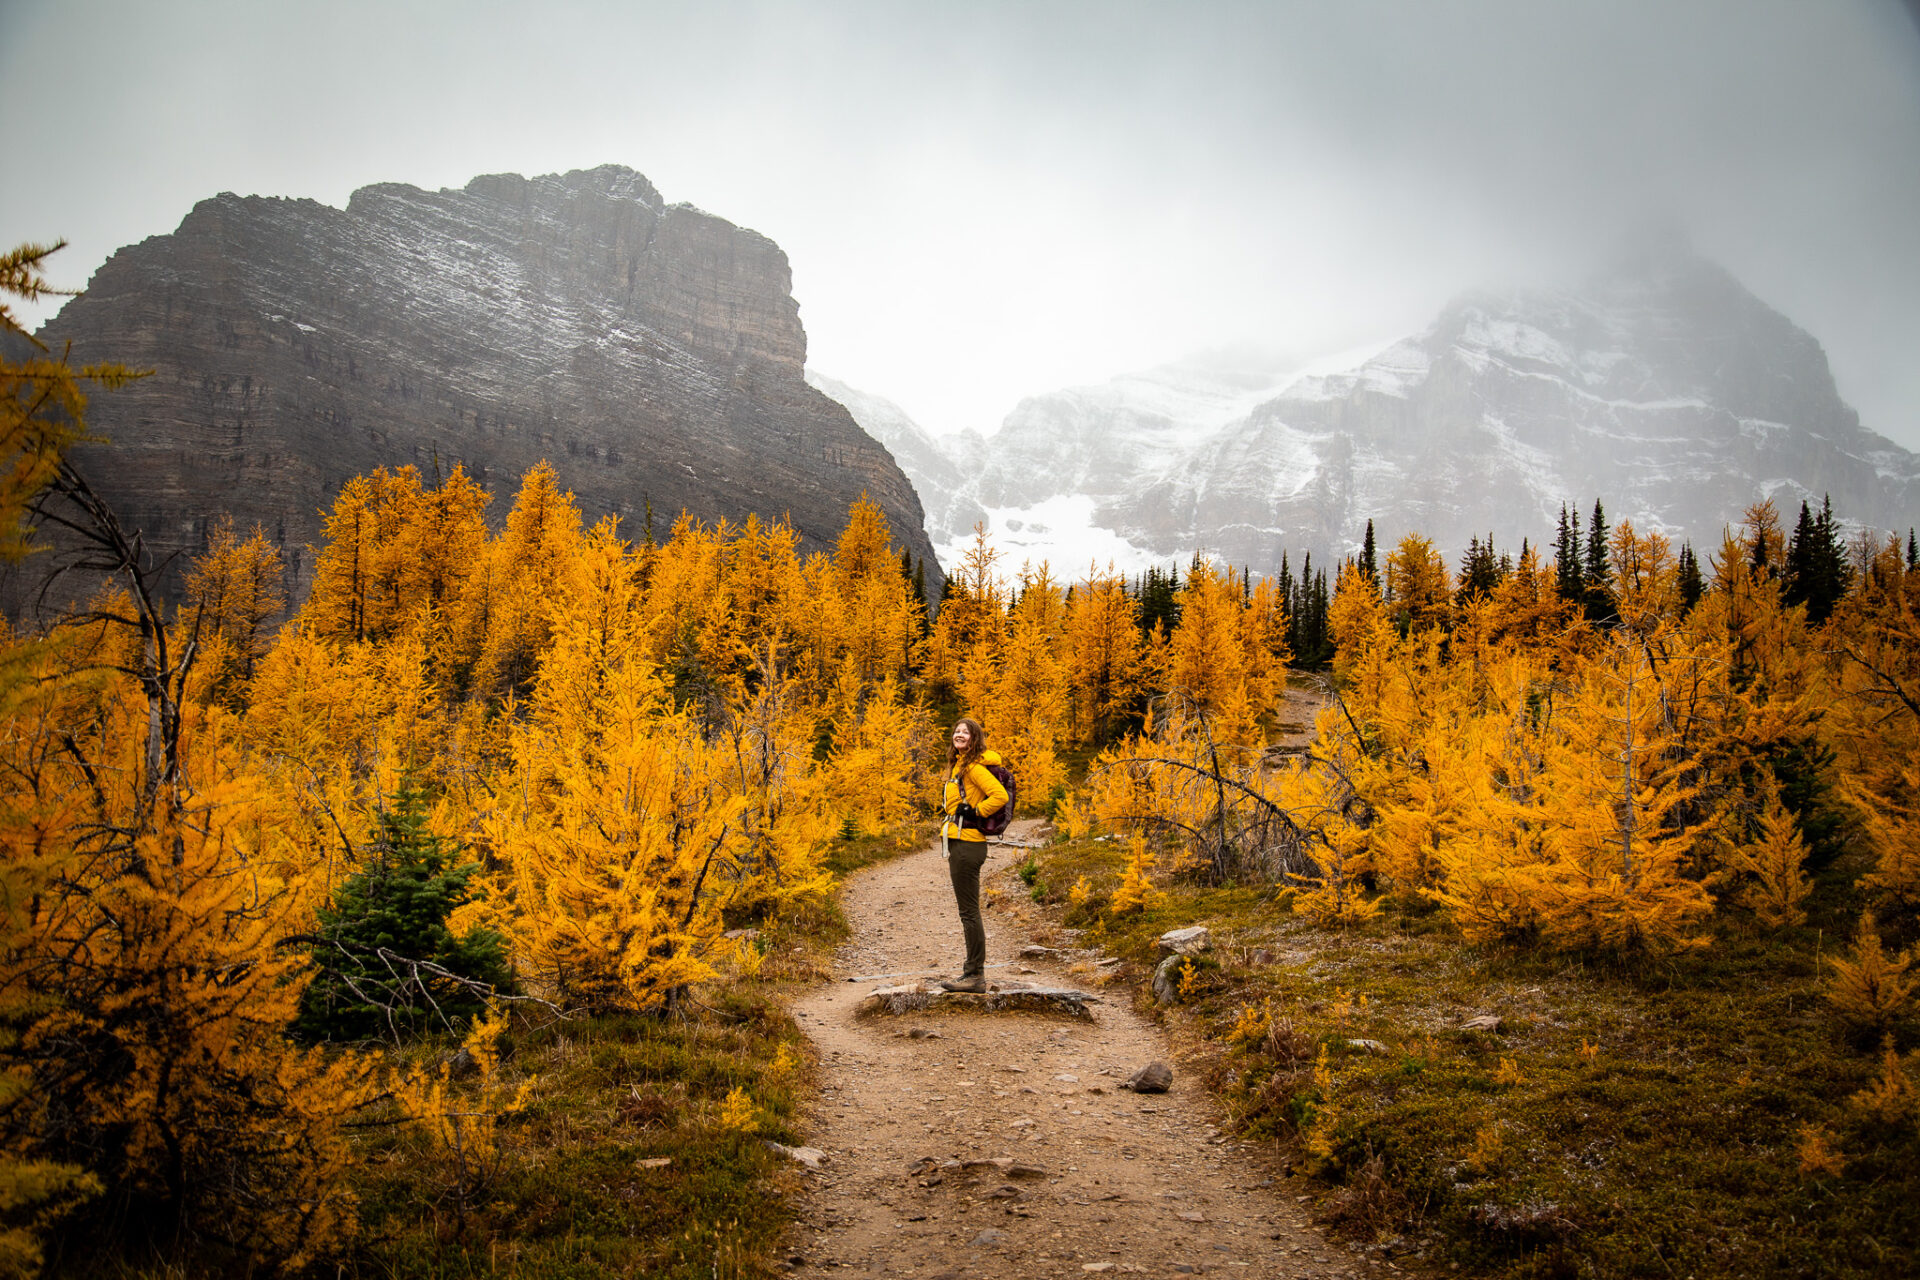
Saddleback pass is one of the most epic hikes in Lake Louise to see the Larch trees turn vibrant yellow and orange which happens at the end of September-early October. This trail is quieter than some of the other famous hikes in Lake Louise.
The route to Saddleback Pass follows the Paradise Valley trail on the opposite side of the lake from the Lake Louise Circuit hike. The trail meanders through a forested area with switchbacks that eventually open up views of the Bow Valley below. Once hikers reach the pass they’ll find views of the Sheol Mountain, Sheol Glacier, and Haddo Peak.
This trail is not recommended in winter as it passes avalanche terrain. The best time of year to hike Saddleback Pass is from mid June to mid October. Outside this timeframe the pass can be very snowy and dangerous to access.
The Alltrails map linked below ends at Saddle Mountain Peak (scramble route for experienced hikers). If you’re only hiking the pass, do not go any further than the “end” of the trail. The “end” splits in two directions – one trail going up to Saddle Mountain, the other up to Mount Fairview.
Download my Banff & Lake Louise map
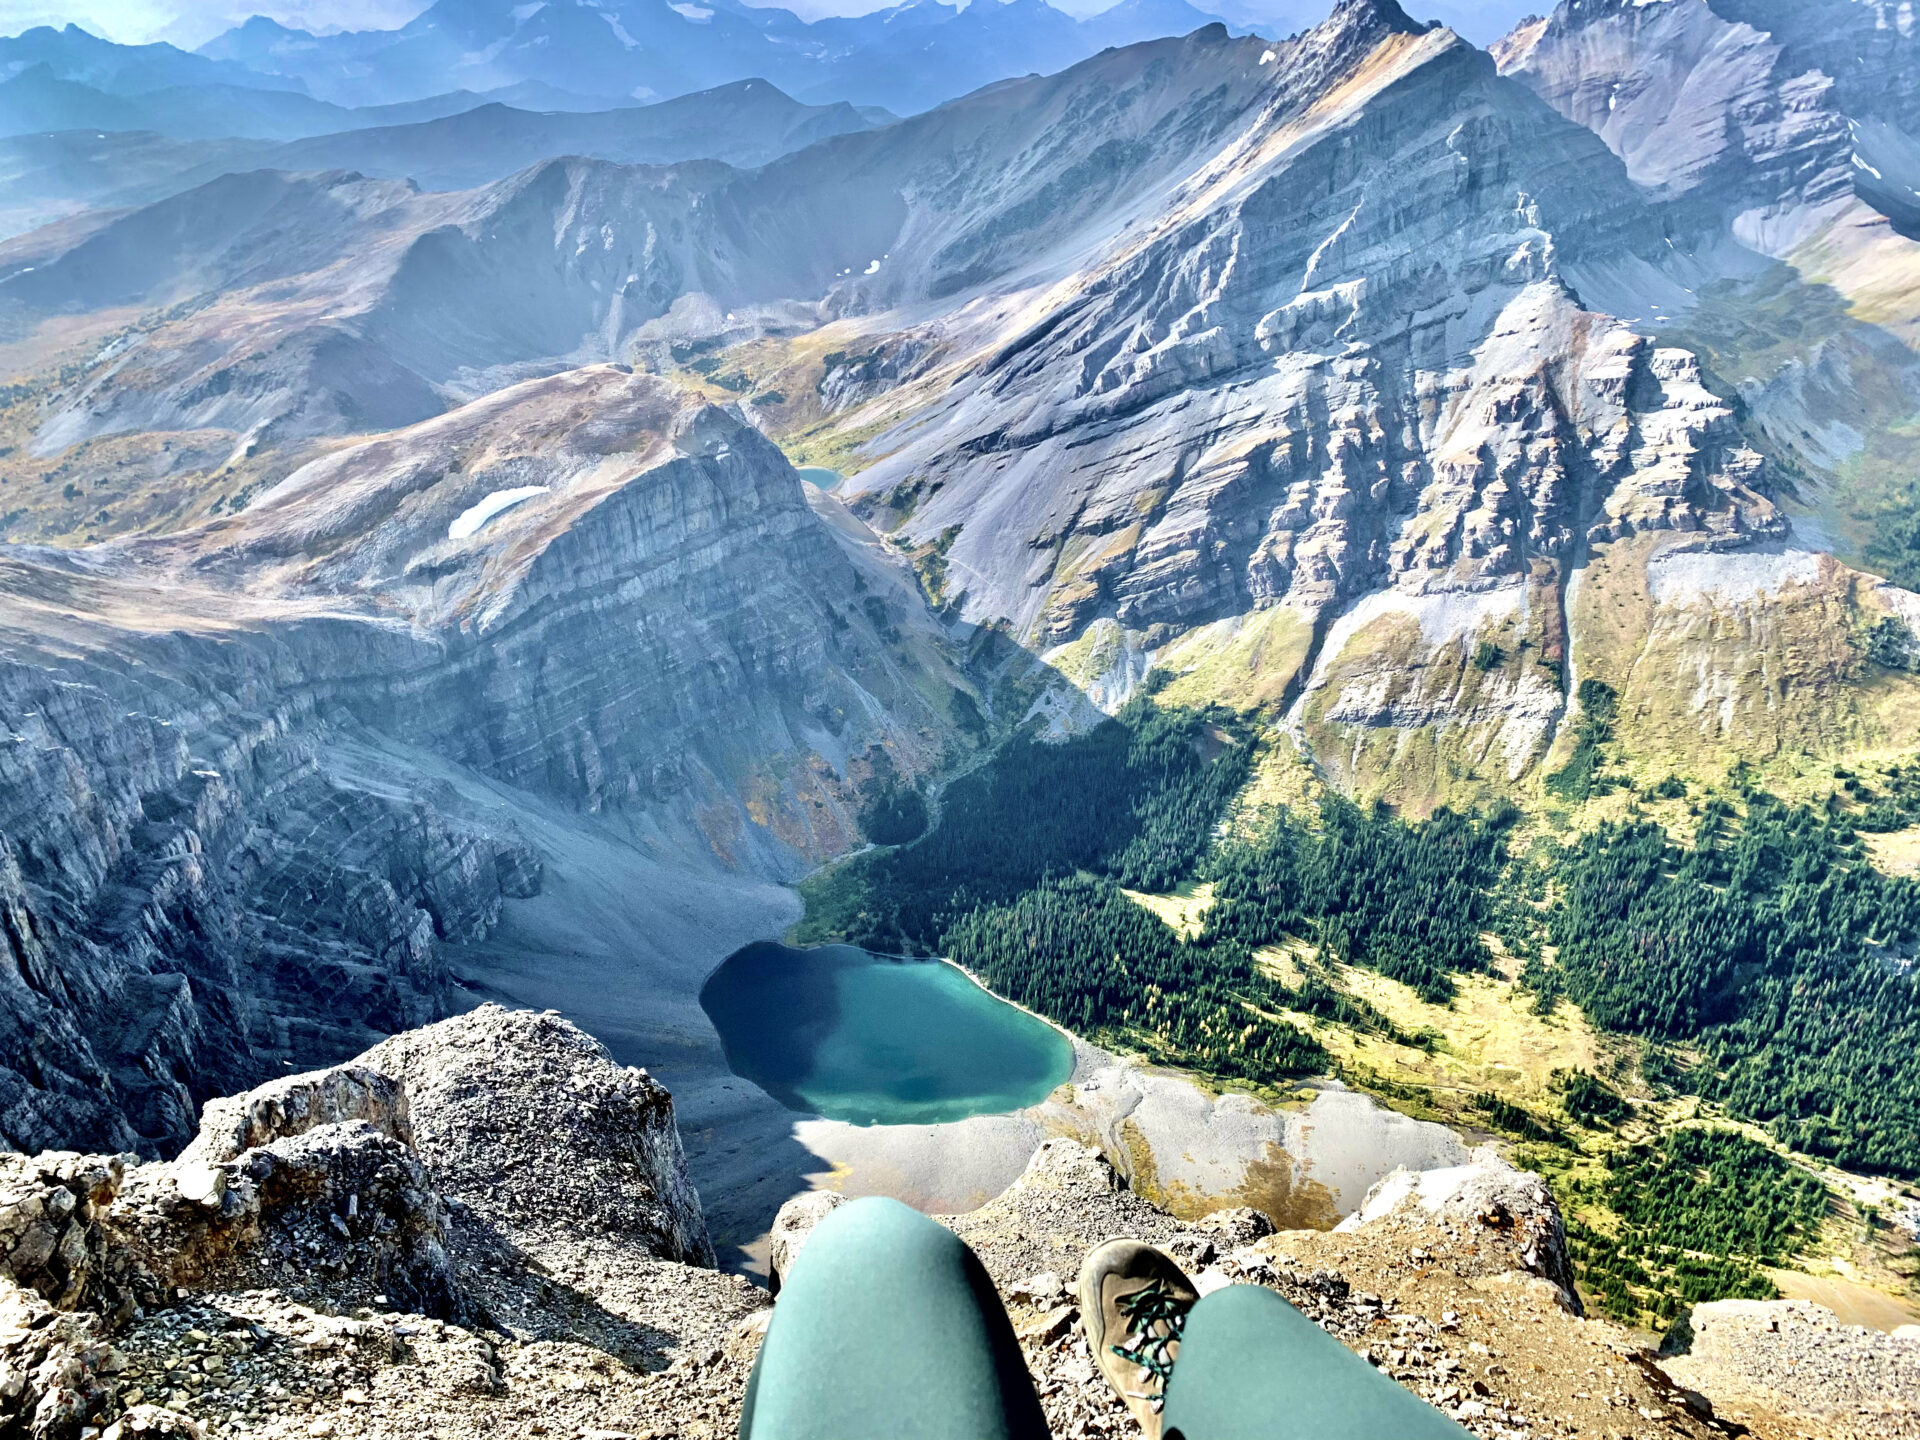
Mount St. Piran
Distance: 13kms
Elevation Gain: 899m
Estimated Time: 4.5hrs
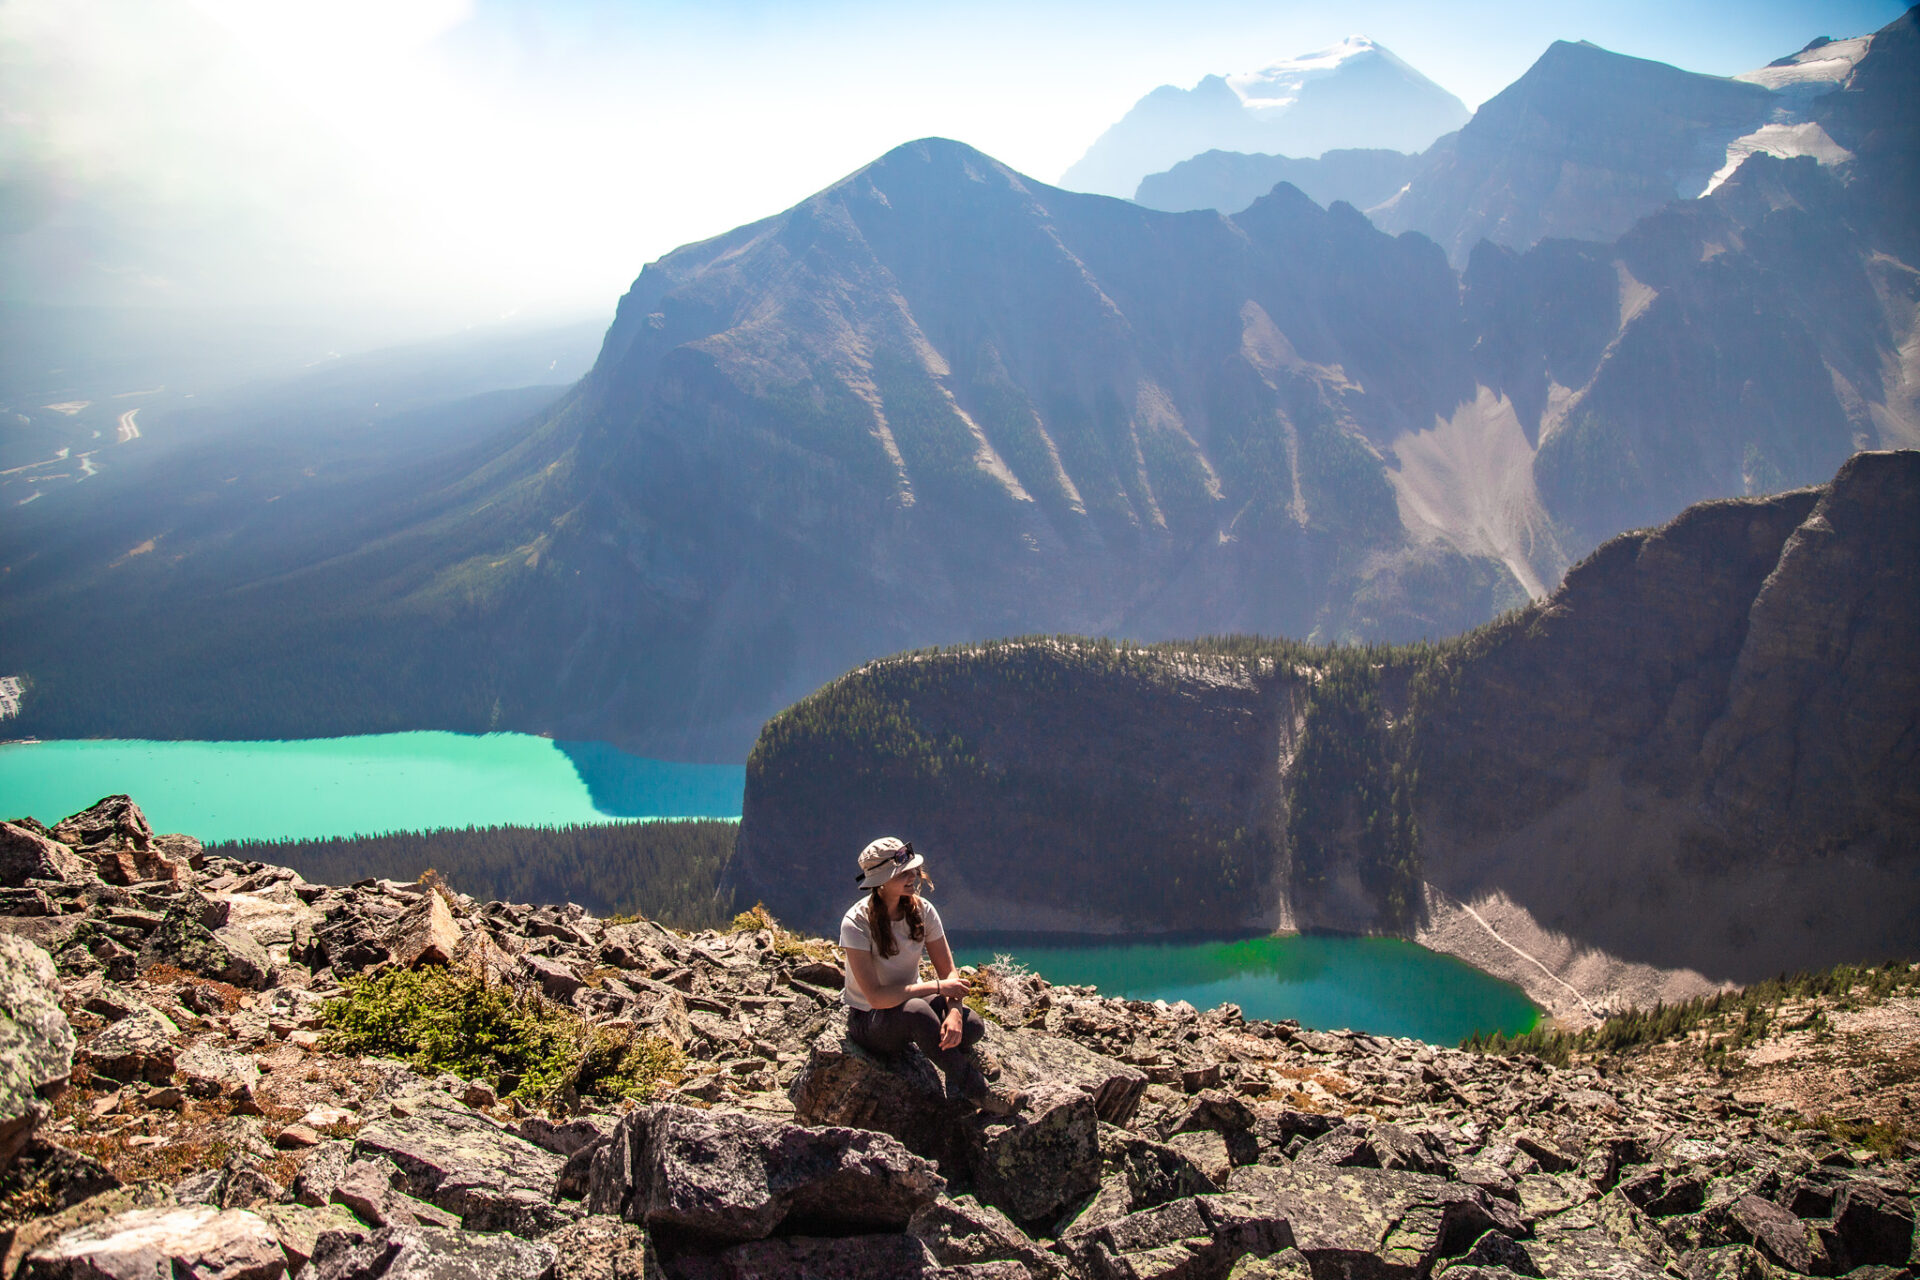
Mount St Piran is my favourite hike in Lake Louise and it’s totally underrated. Mount St Piran offers similar views as Devil’s Thumb, but traverses much easier terrain to summit. Although relatively steep, there’s nothing technical about this trail.
Like Devil’s Thumb, you can see both Lake Louise and Lake Agnes from the top, but the summit is very quiet in comparison. I hiked Mount St Piran in good weather on a Sunday in July and saw only a handful of people on the trail past the Little Beehive.
This is a great hike for sunrise as it’s fairly quick to the summit.
Mount St Piran should NOT be attempted during winter (October to June) as the whole trail follows massive avalanche terrain. It’s very risky to attempt this summit when there’s still snow visible on the south face.
Download my Banff & Lake Louise map
Difficult Hikes in Lake Louise
The following Lake Louise hikes are much longer and higher than those mentioned before. They may also require more technical skills like scrambling. Some of these hikes are not beginner friendly and will be marked as such.
ps – all these hikes are marked on my Banff & Lake Louise map.
Devil’s Thumb
Distance: 12.7kms
Elevation Gain: 815m
Estimated Time: 4hrs 15mins
Devil’s Thumb is one of the more difficult hikes in Lake Louise – it’s a scramble route and should only be attempted by experienced hikers.
The Devil’s Thumb hike is popular because you can see both Lake Louise and Lake Agnes from the top. The final ascent to Devil’s Thumb starts at the Big Beehive. Experienced hikers can expect to reach the summit from here in 30ish minutes.
The terrain is very steep and somewhat loose to the point where you have to use your hands; hence being labeled as a scramble. It’s recommended that hikers wear sturdy shoes and bring poles. Do not attempt Devil’s Thumb in poor weather or wet/snowy conditions.
This is one of the Lake Louise hikes that crosses some pretty major avalanche terrain in the winter. Devil’s Thumb should therefore only be attempted from July to September.
Download my Banff & Lake Louise map
Mount Niblock & Mount Whyte
Distance: 15.4kms
Elevation Gain: 1,391m
Estimated Time: 8-12hrs
Mount Niblock and Mount Whyte are the two summits directly next to Lake Louise that pose some of the most technical terrain in the area. It makes the most sense to complete these mountains as a double summit since they follows the same route up and down.
The trail is typically completed in a loop – starting from the back of Lake Agnes and exiting at the Plain of Six Glaciers. Although Mount Niblock is said to be much easier than Whyte, both summits require scrambling up loose rock and feature varying levels of exposure.
Sturdy footwear is a must and trekking poles/helmets are recommended for this Lake Louise hike. Only very experienced hikers should attempt this trail – do not underestimate its difficulty.
These two summits should not be attempted outside July-September as avalanche risk is very high.
Download my Banff & Lake Louise map
Saddle Mountain
Distance: 8.4kms
Elevation Gain: 716m
Estimated Time: 4hrs
Saddle Mountain is less than 1km past Saddleback Pass, but requires scrambling to access the peak. The final 400m of this trail is kind of a “choose your own adventure” situation in the sense there’s no established route.
To reach the summit hikers will have to scramble up large boulders. In addition to Mount St Piran, Saddle Mountain is one of my favourite Lake Louise hikes because the scramble does not have any loose rock. It’s minimally challenging and a trail I’d consider more fun than anything.
At the top hikers are rewarded with views down Paradise Valley, overlooking Annette Lake and Sheol Mountain.
The Saddle Mountain hike should not be attempted outside July-September as avalanche risk and snow levels are both high in this area.
Download my Banff & Lake Louise map
Fairview Mountain
Distance: 9.5kms
Elevation Gain: 1,025
Estimated Time: 5.5hrs
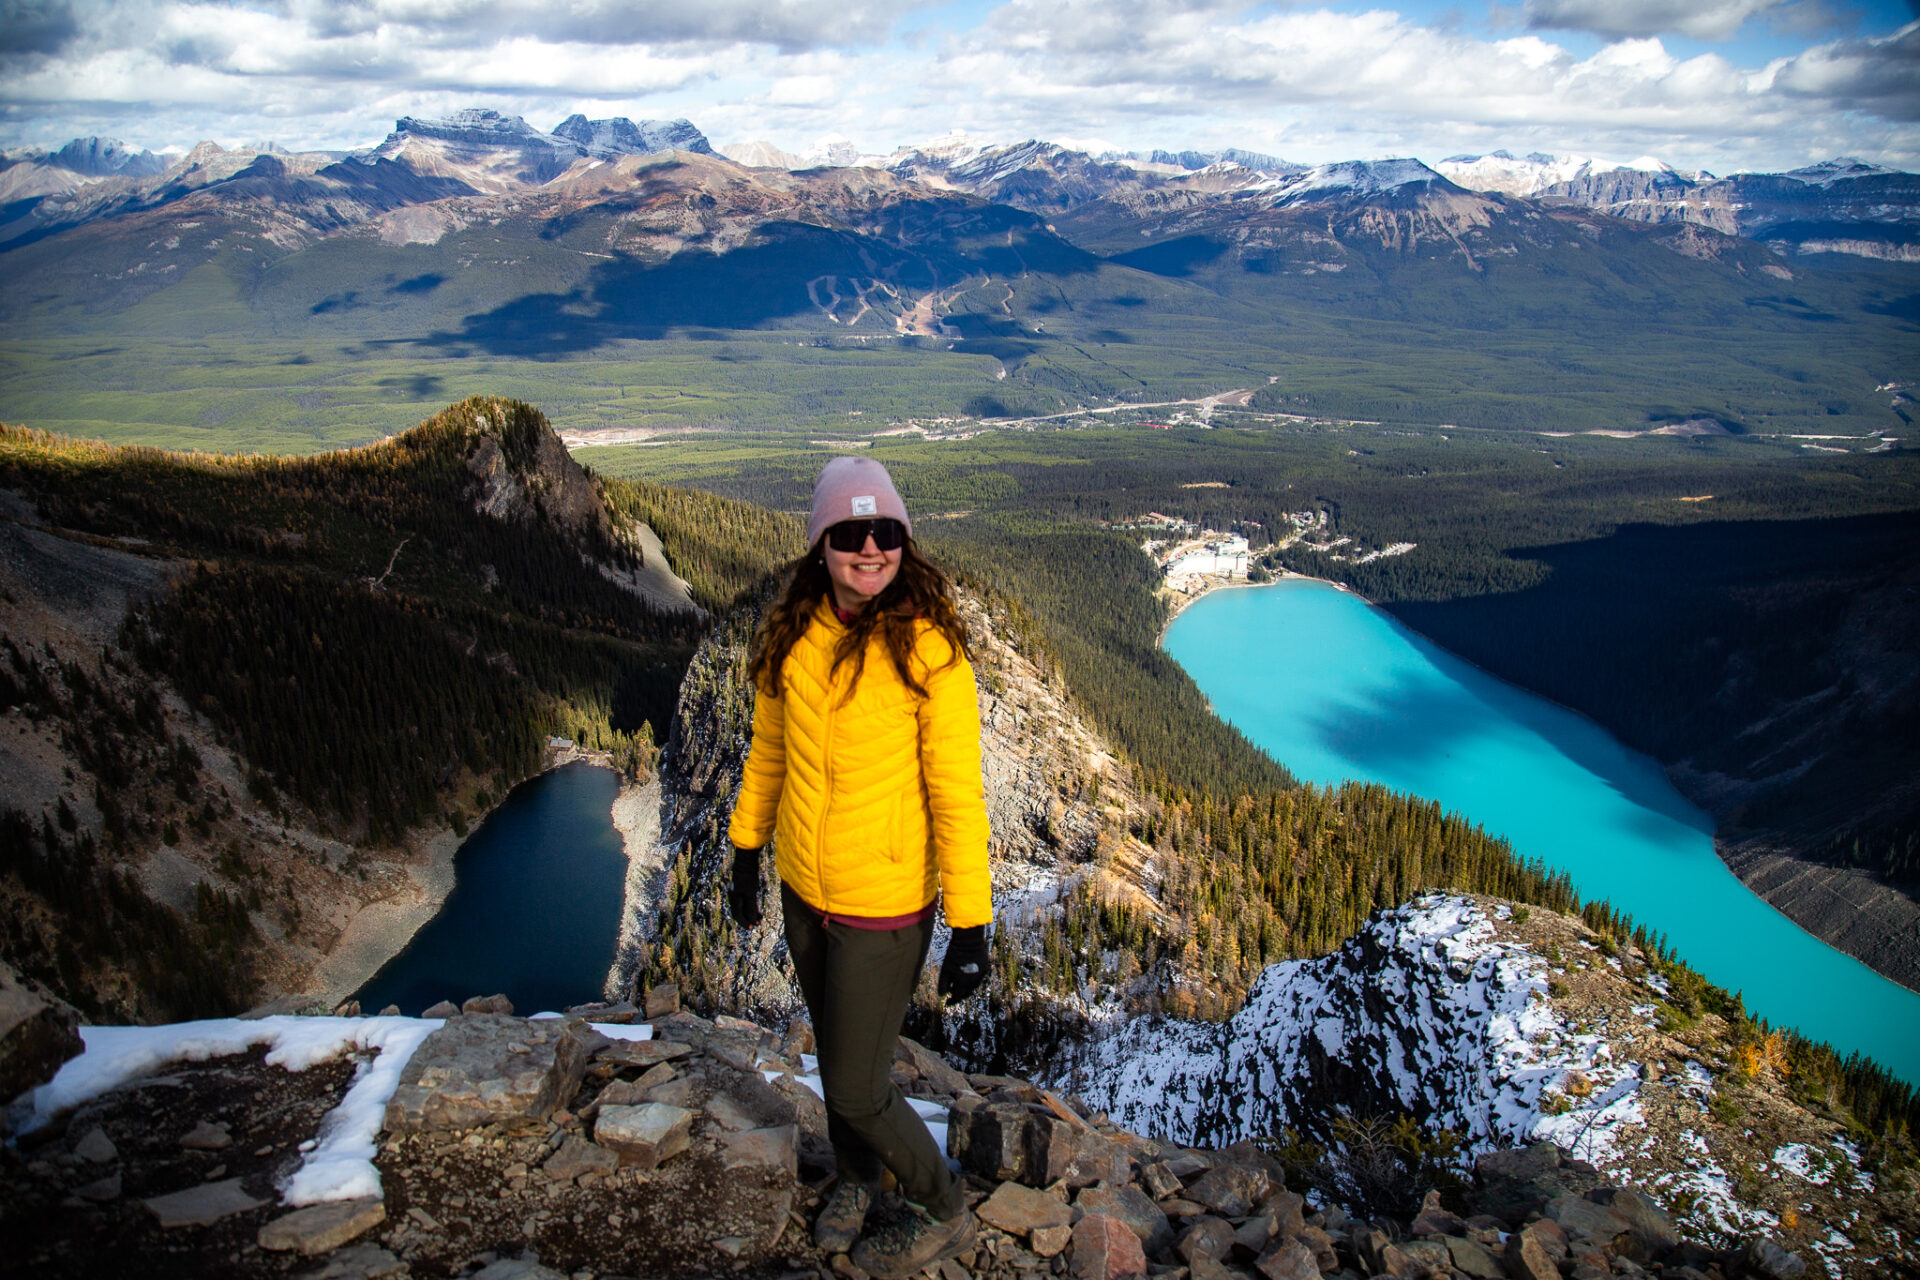
Fairview Mountain is one of the hikes in Lake Louise that’s a bit “misconceived.” It’s often referred to as a scramble, however I did not find any scrambling sections when I summited – only (very) steep terrain.
With that being said, Fairview Mountain is a burner as you gain 200m+ elevation per kilometre and even more so near the top. Speaking of the top, hikers can see a small section of Lake Louise below but the star of the show is more the mountain views: Sheol Mountain, Haddo Peak, and Mount Aberdeen are striking from this vantage point.
Fairview Mountain is not suitable to hike during winter as avalanche risk is extreme. Hike this trail only from July-September and pay attention to snow conditions closer to the shoulder seasons.
Downloadable Banff Map – from a LOCAL
Get my 600+ local Banff recommendations saved to your Google Maps app
I’ve lived in Banff for years & know all the best spots!
Outdoors: 100+ hiking trails, scrambles, backcountry routes, waterfalls & lakes
Planning: lodging, parking, restaurants, public washrooms, transit hubs, shopping & services
Things to do: tours, viewpoints, unique activities, & local secrets
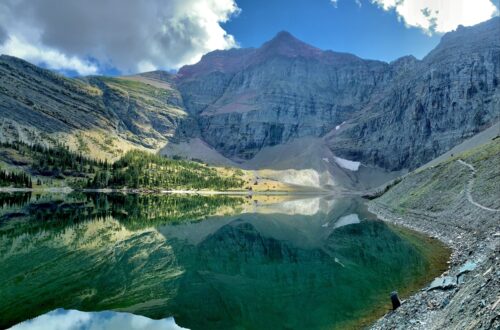
Ross Lake

Distance: 18.2kms
Elevation Gain: 511m
Estimated Time: 5hrs
Ross Lake is actually located in Yoho National Park, but it can be accessed from the Lake Agnes trail at Lake Louise. Mountain bikers can use the trail inked below, however it’s technical, long, frequented by horses, and not overly scenic. It should only be attempted by those with plenty of mountain biking experience or hikers who are prepared for a long day.
It’s better to access Ross Lake via this trail which starts at the Lake O’Hara parking lot. From the Lake O’Hara area the Ross Lake hike is quick, mostly flat, and for the majority follows the abandoned highway 1A. If you walk a little further past the Ross Lake turnoff you’ll find an old day use area with info boards about the nearby Great Divide.
Download my Banff & Lake Louise map
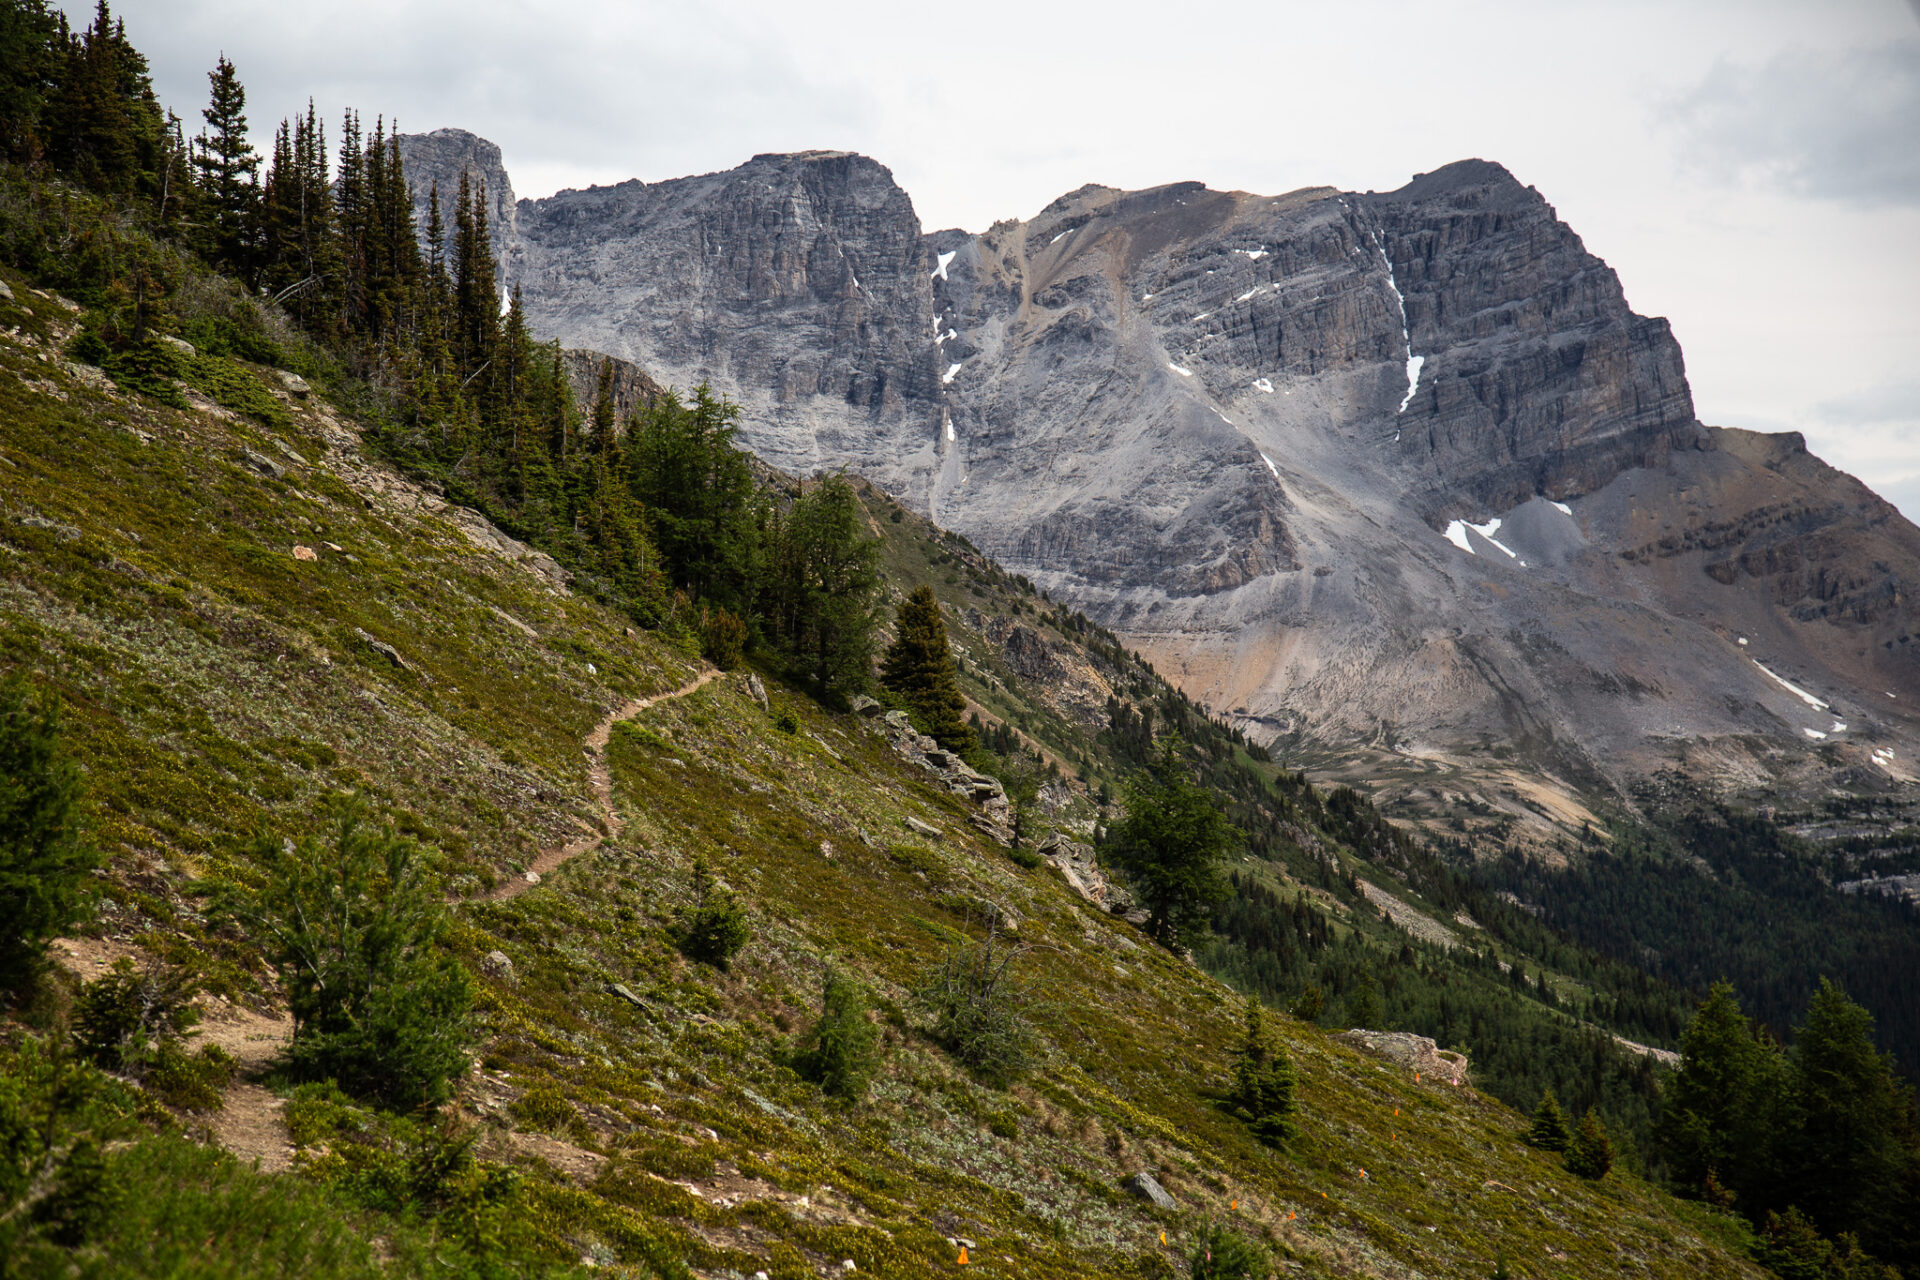
Ptarmigan Lake
Distance: 15kms
Elevation Gain: 947m
Estimated Time: 5.5hrs
Ptarmigan Lake is located along the Banff Skoki Loop (which I talk about next). This is the furthest point I’d recommend hiking to on the Skoki Loop unless you’re planning to camp overnight.
The trail to Ptarmigan Lake first follows the Lake Louise ski out – meaning this isn’t one of the most “exciting” Lake Louise hikes. Past the ski out hikers will get to cross Boulder Pass and shortly after they’ll find Ptarmigan Lake. The lake is beautiful, but it’s often very cold and windy here so extra layers are recommended.
This area often receives lots of snow so it’s recommended to hike this trail from July-September.
The Alltrails map linked below continues past Ptarmigan Lake to Baker Lake. You can disregard whatever trail comes after Ptarmigan Lake.
Download my Banff & Lake Louise map
Backcountry Hikes in Lake Louise
The following Lake Louise hikes enter more remote areas and require multiple days of hiking/camping to complete. These hikes cannot be done in 1 day.
ps – all these hikes are marked on my Banff & Lake Louise map.
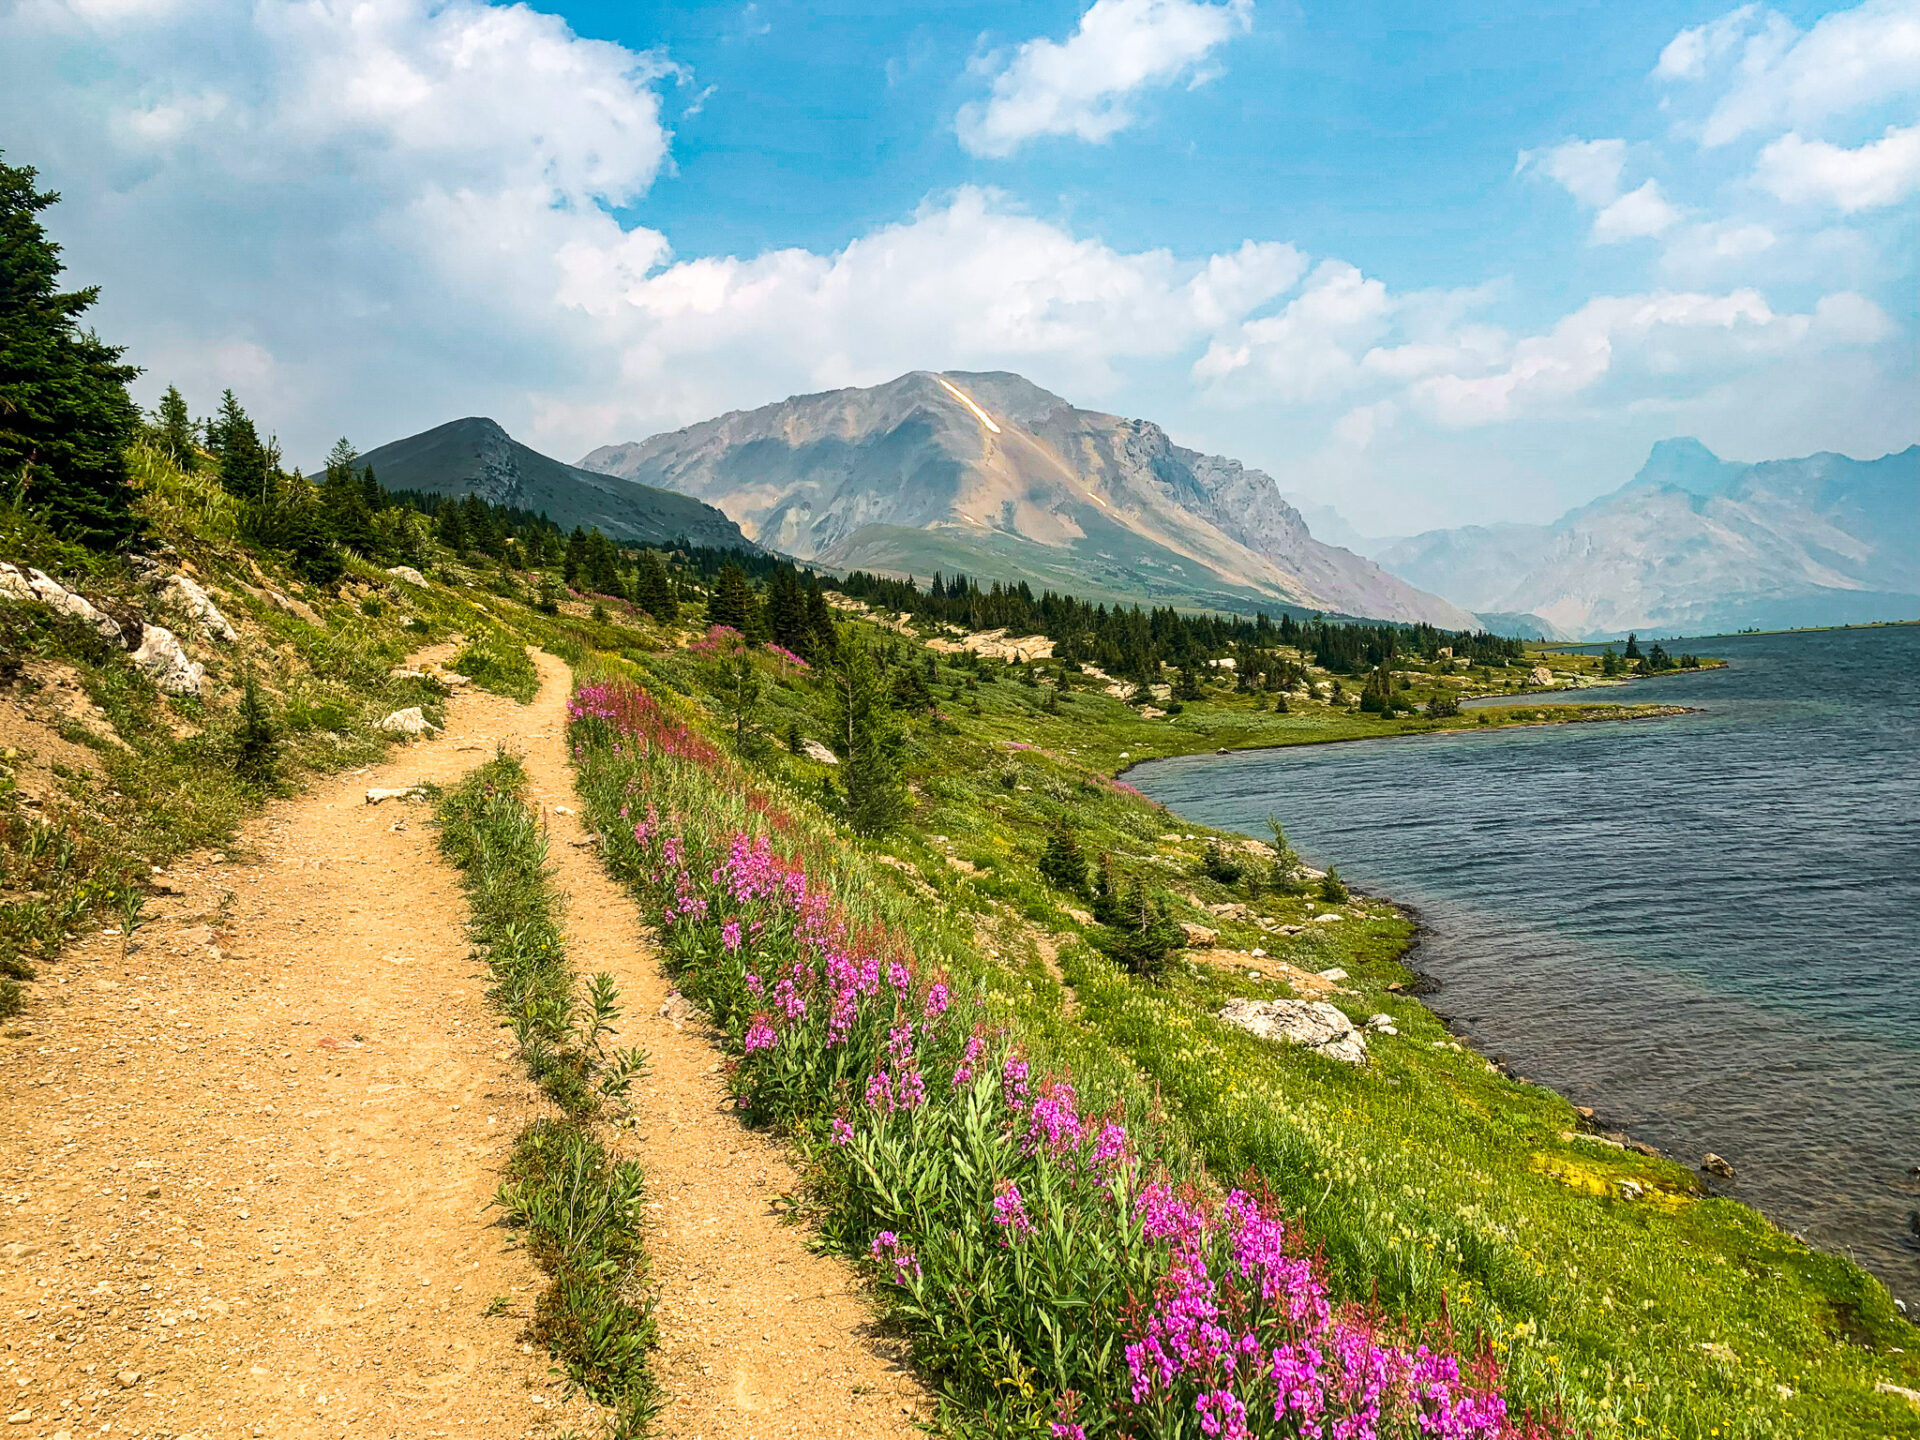
Banff Skoki Loop
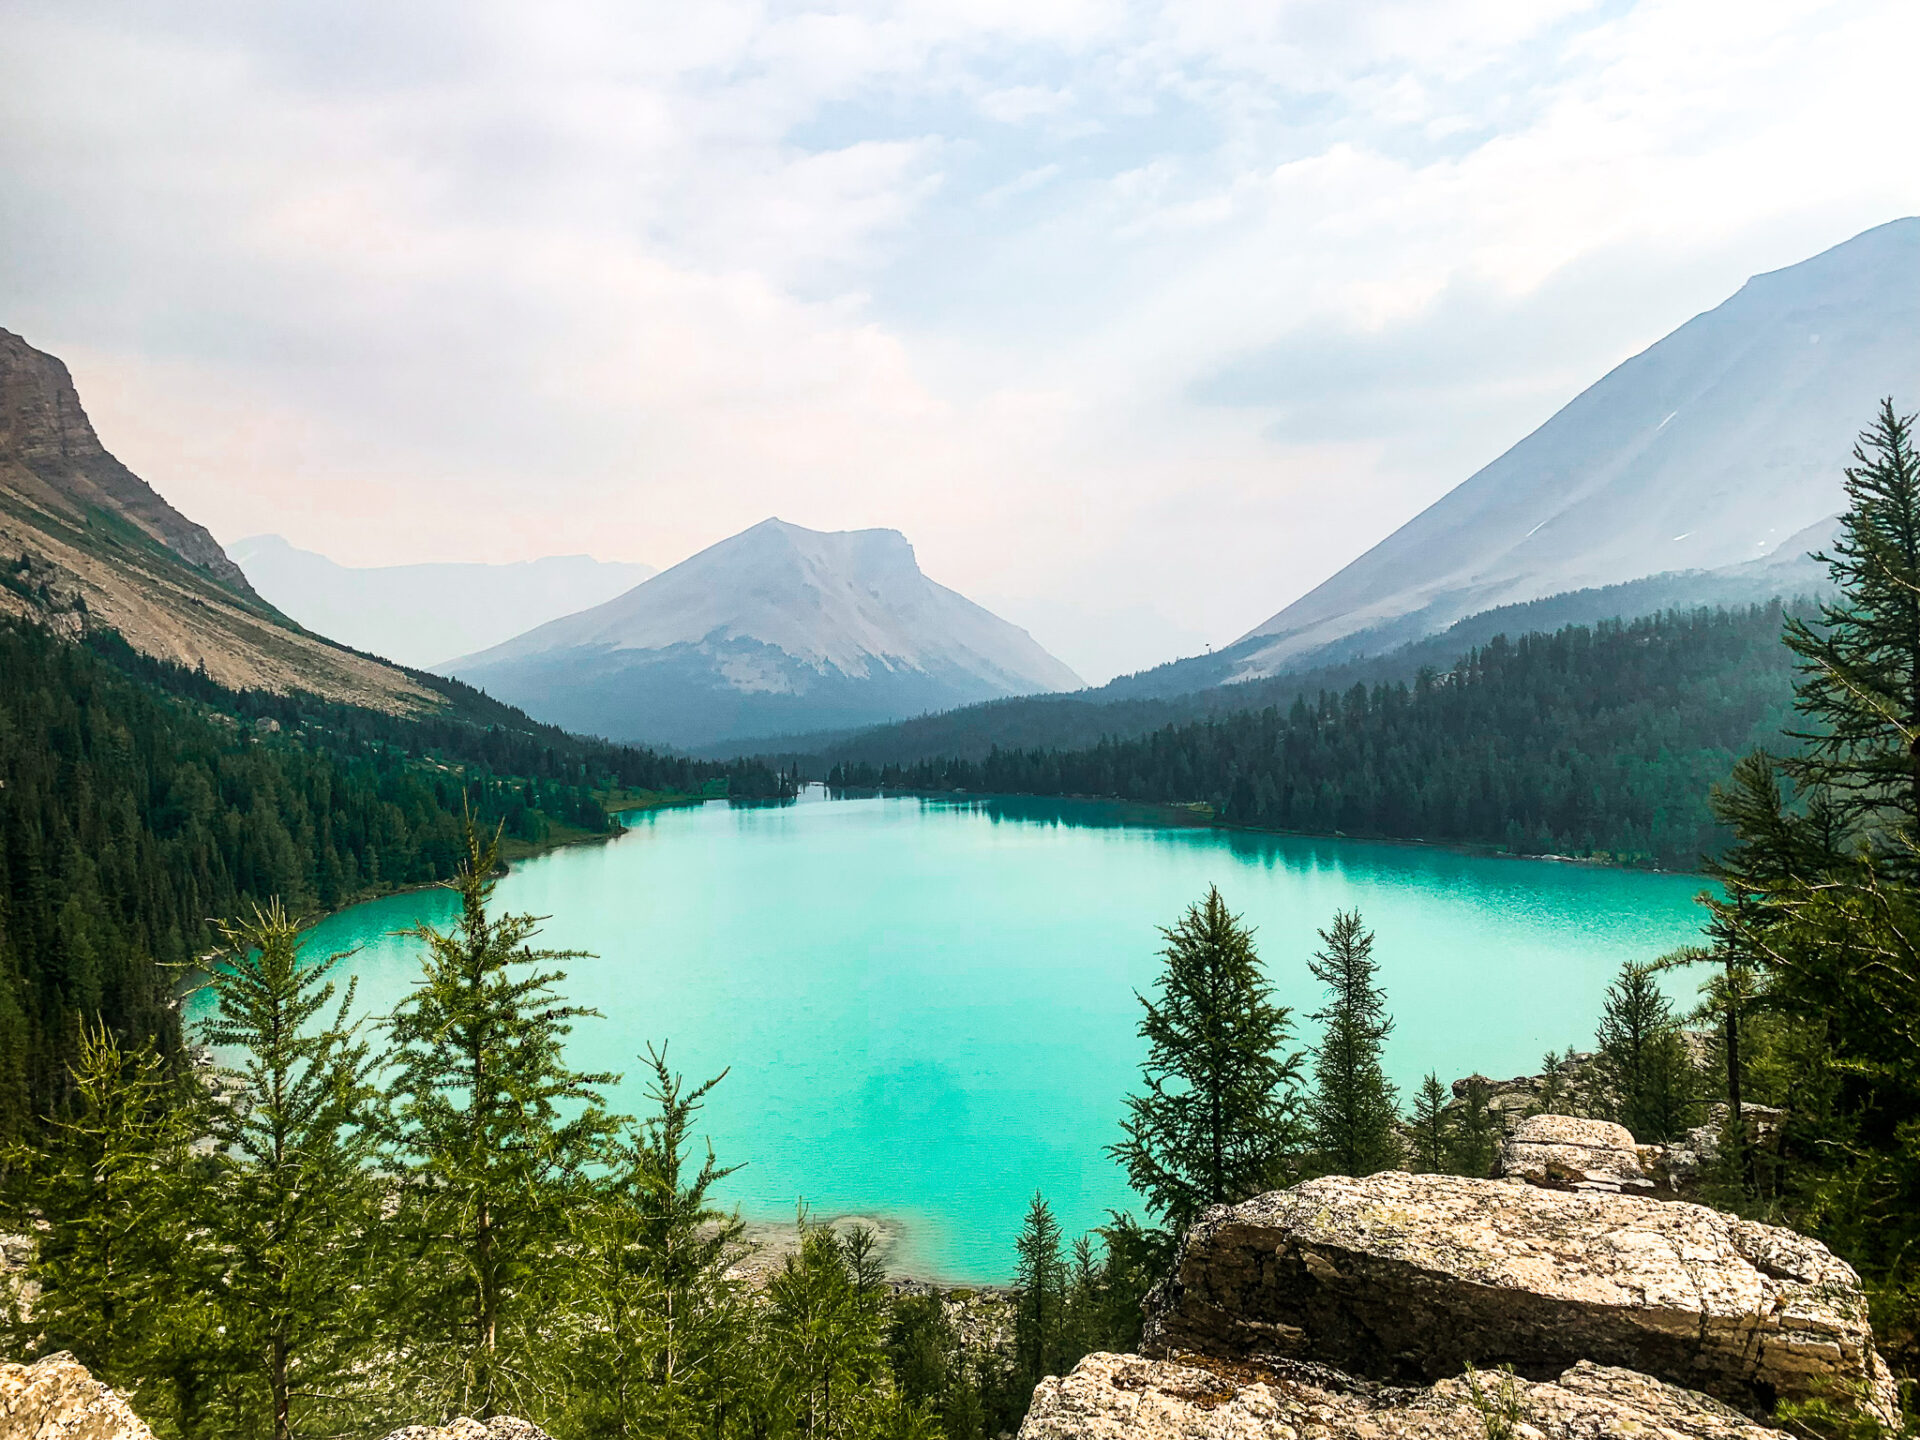
Distance: 39.4kms
Elevation Gain: 1,330m
Estimated Time: 2 nights, 3 days (11.5hrs total moving time)
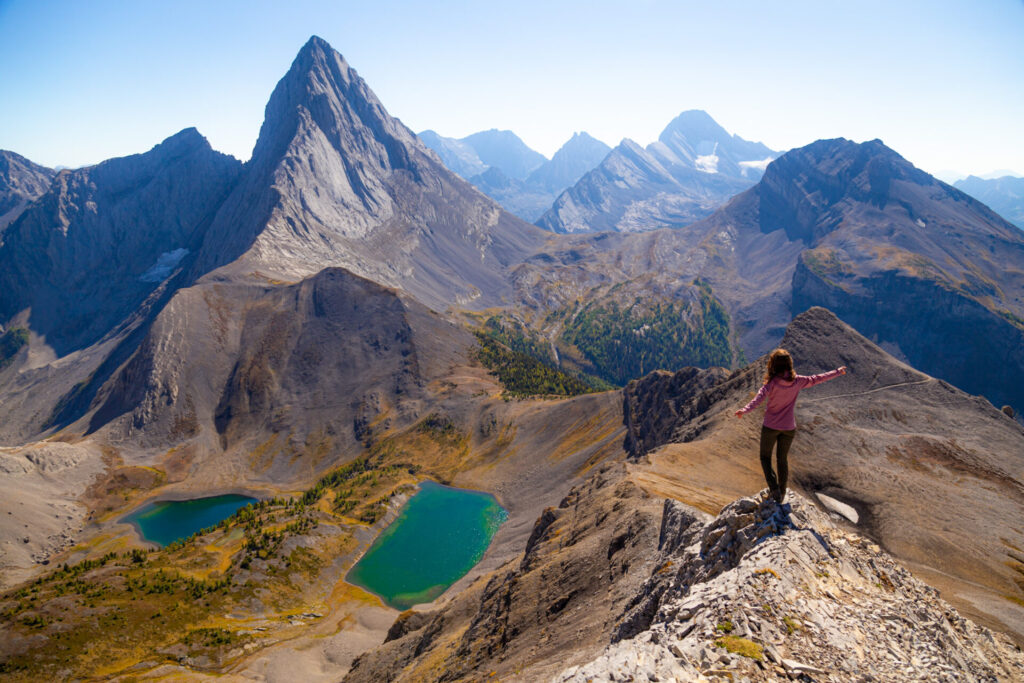
To date, the Banff Skoki Loop is one of my favourite Lake Louise hikes. Heck, this might be one of my favourite hikes ever. The trail spans 3 days and features some of the bluest and most beautiful lakes I’ve ever seen. They literally just keep getting better the further you hike.
In addition to lakes there are beautiful wildflowers here, epic mountains, and even a waterfall. What more could you ask for on a backpacking trip?
This trail is best hiked from July to September as outside this period temperatures can be very cold and snow is prevalent.
If you’re planning to hike the Skoki Loop, campsites must be booked far in advance. I’ve linked my complete guide below which explains the booking process, directions, and trail info in detail. I highly recommend giving it a read before attempting the Skoki Loop.
Download my Banff & Lake Louise map
Hidden Lake
Distance: 16.7kms
Elevation Gain: 633m
Estimated Time: 5hrs
Hidden Lake can absolutely be hiked in a day. I’ve however listed it as a Lake Louise backcountry hike because you can base camp here and double summit the nearby Mount Richardson and Ptarmigan Peak.
The trail here is very straightforward and relatively easy, especially if you’re basecamping and not completing the whole trail in a day.
If you plan to camp here you’ll need to make camping reservations far in advance. It’s recommended to do this on opening day for reservations which typically occurs in February.
Download my Banff & Lake Louise map
Giant Steps via Paradise Valley Trail
Distance: 20kms
Elevation Gain: 712m
Estimated Time: 6hrs
The Giant Steps is another Lake Louise hike that can be completed in a day, however I’ve listed it as a backcountry hike because there’s a campground (Pa10) right next to the Giant Steps.
This hike meanders through the floor of Paradise Valley and can be accessed from 3 trailheads: Lake Louise, Moraine Lake, or Paradise Valley. The most common way to complete this hike is from Paradise valley to Moraine Lake. If you detour slightly from the trail you can pass by Annette Lake as well.
The Giant Steps trail is best hiked from July-September. Outside this timeframe avalanche and falling rock risk is high
My guide for how to get to Moraine Lake explains how to access Moraine with the new road closures.
Download my Banff & Lake Louise map
Hikes at Moraine Lake
The following hikes are still in the Lake Louise area, but are accessed via Moraine Lake or the Paradise Valley Trailhead. Visitors are no longer able to drive to Moraine Lake in their personal vehicles and must instead book a shuttle. This post outlines everything you need to know regarding how to get to Moraine Lake.
I’ve written about every hike at Moraine Lake in this post
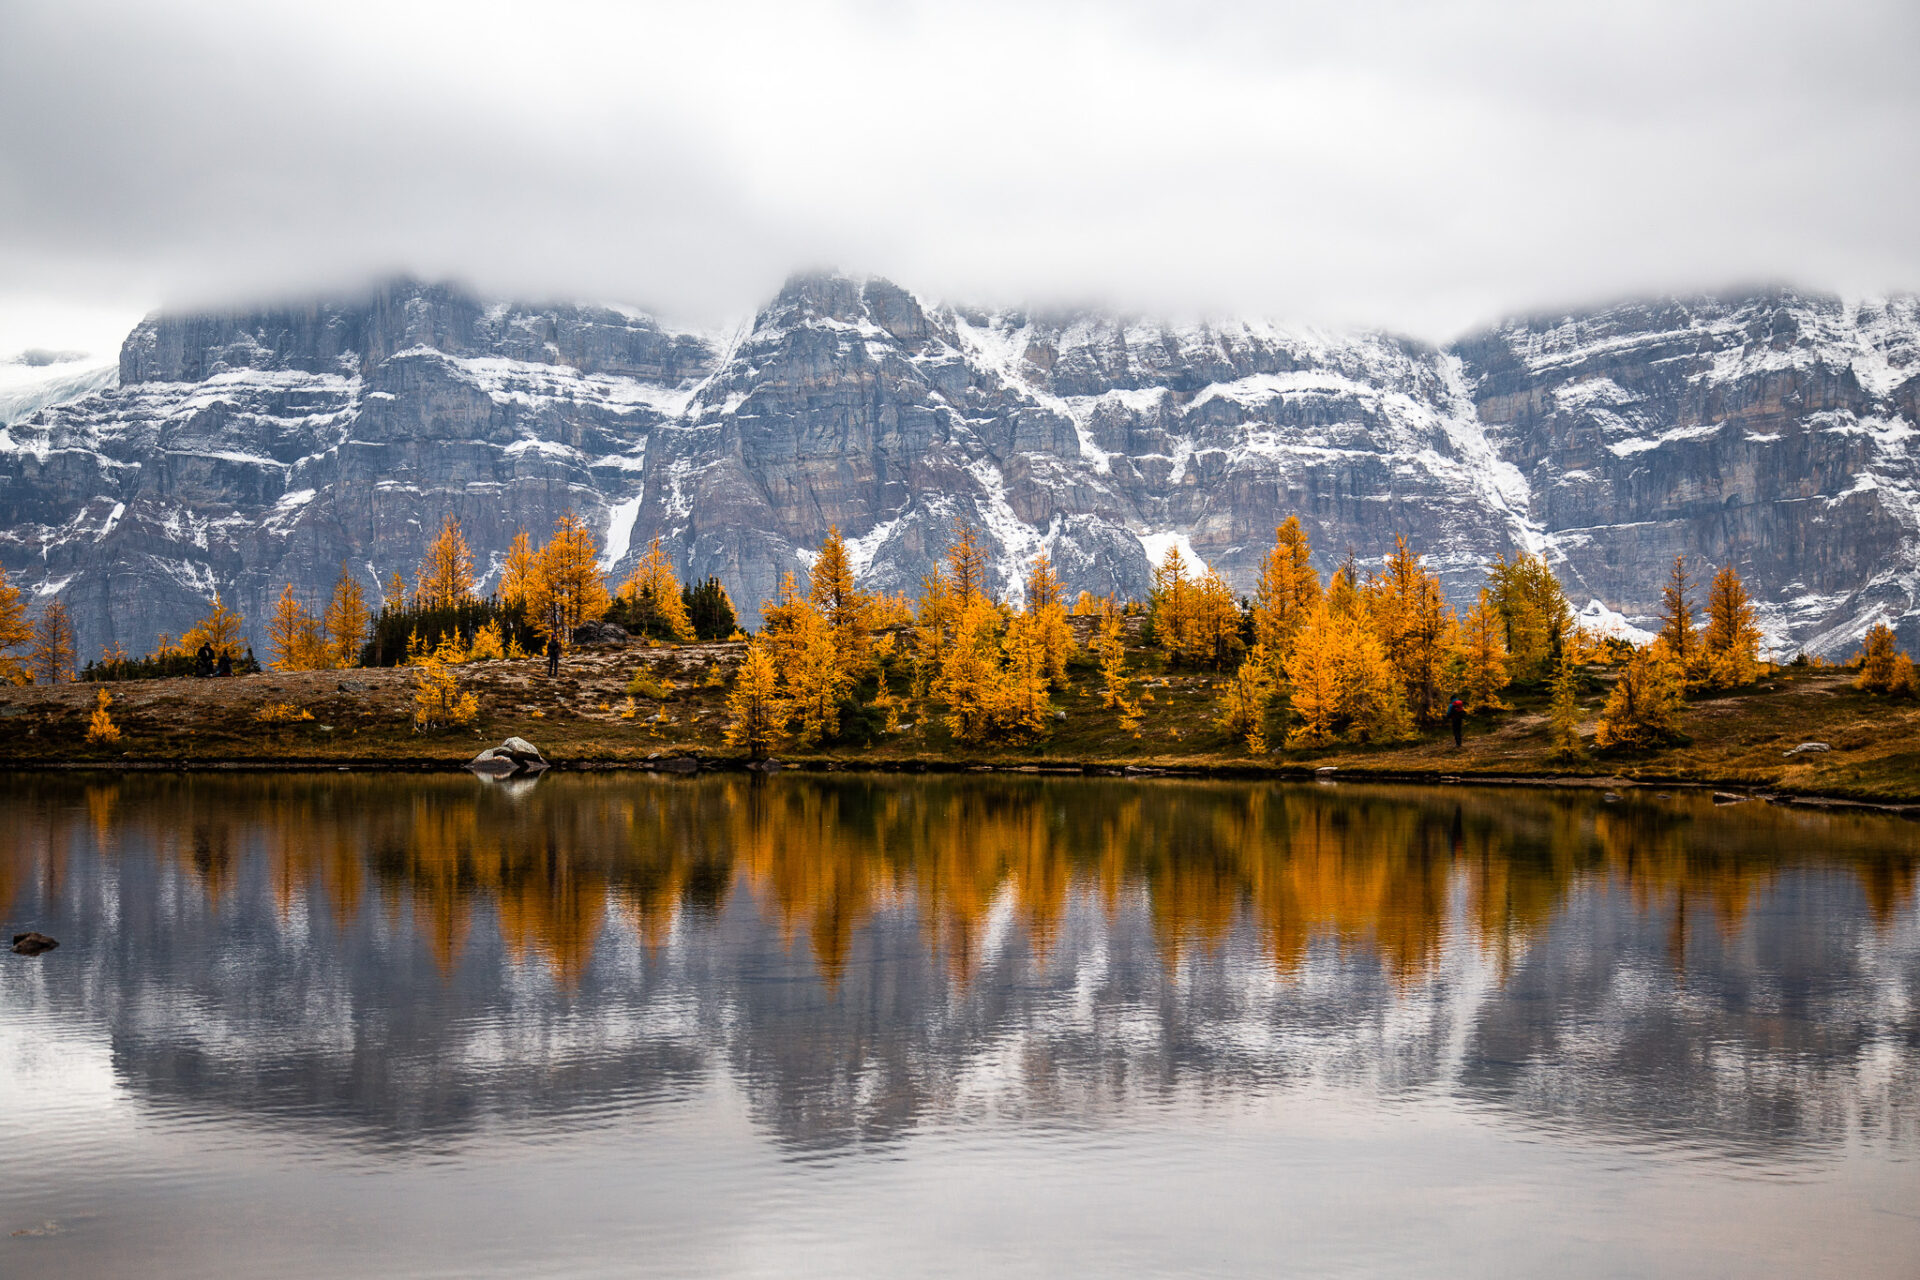
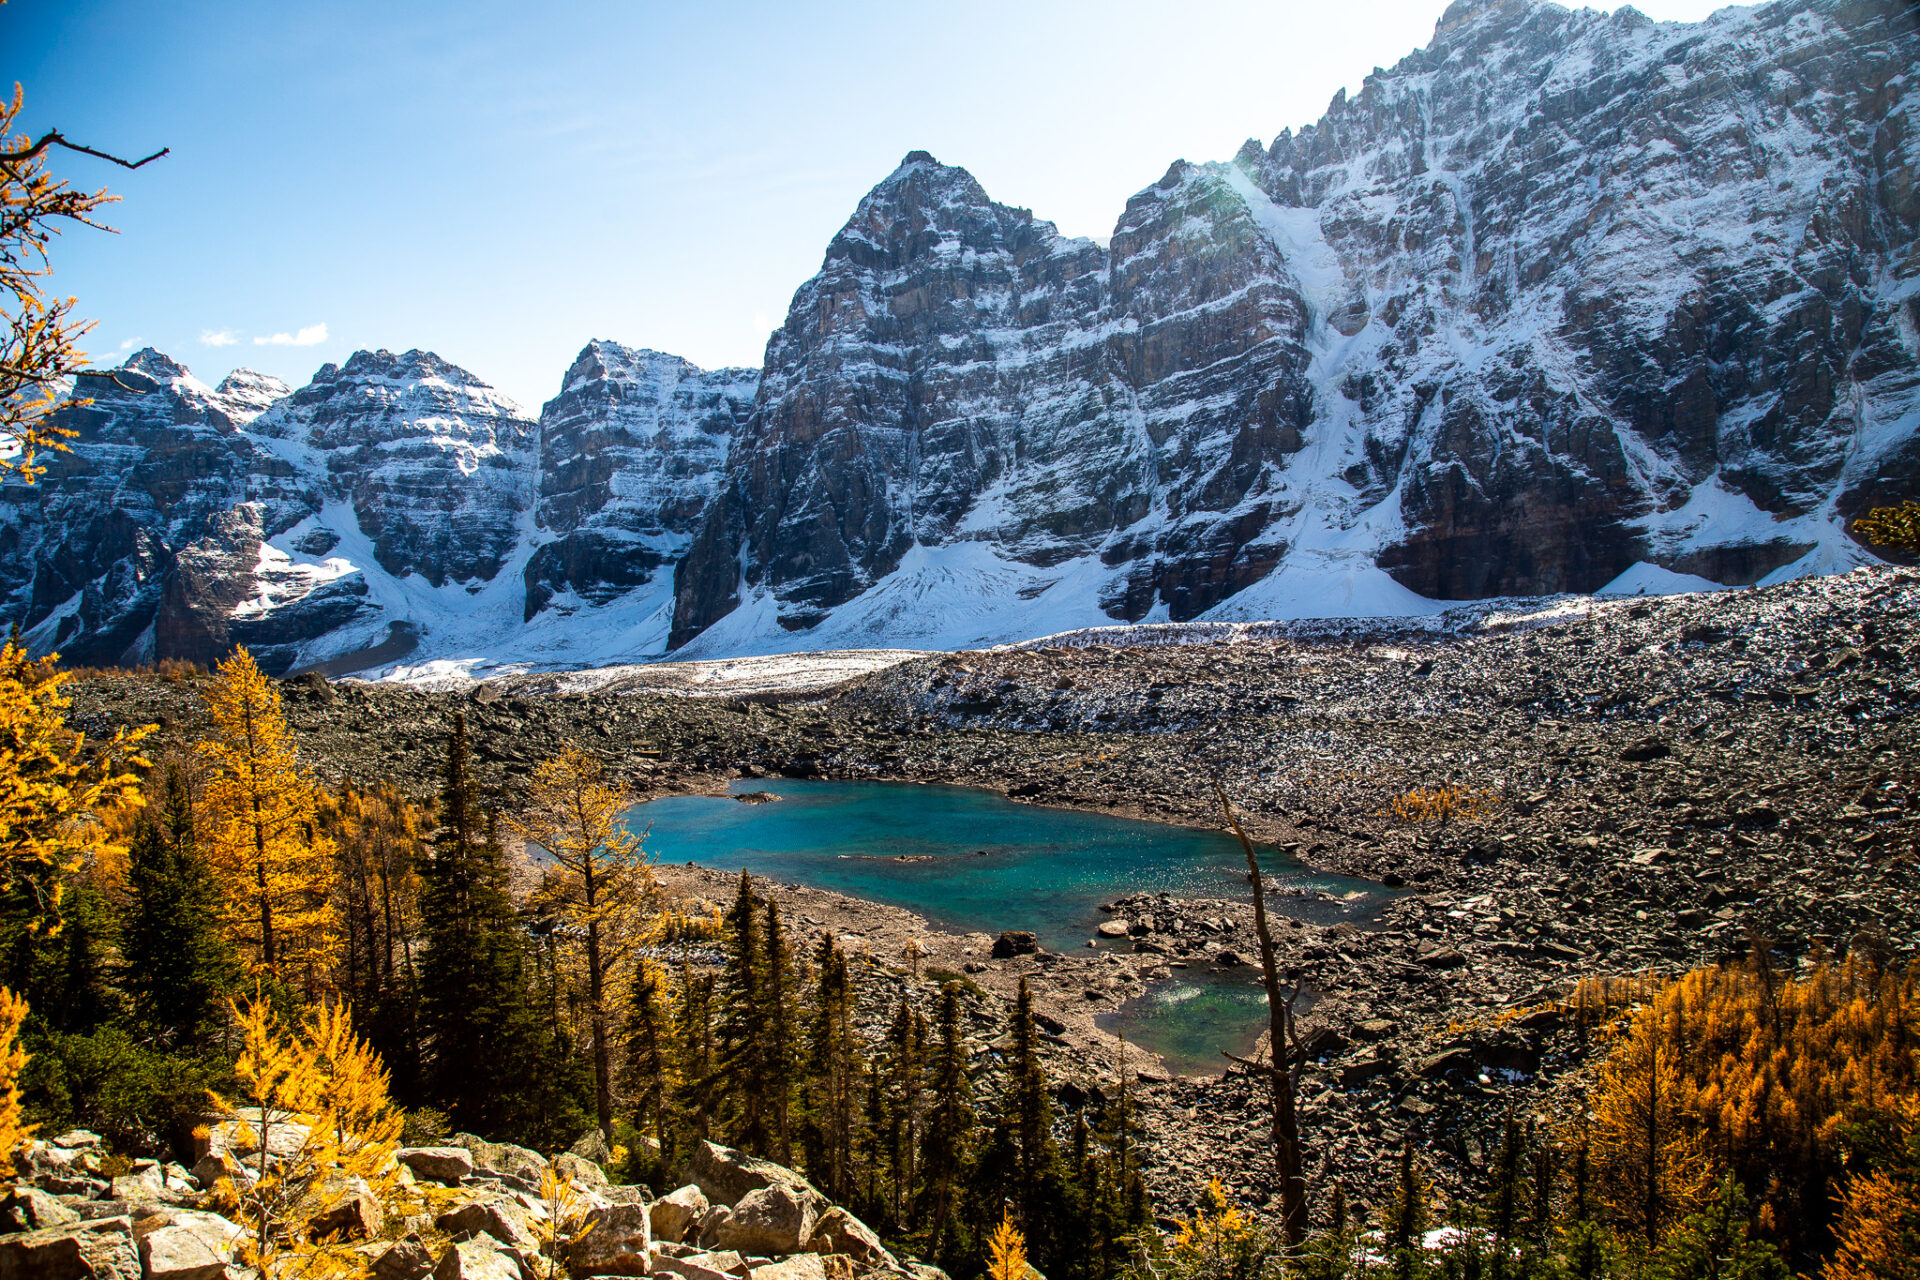
Larch Valley & Sentinel Pass
Distance: 11.1kms
Elevation Gain: 749m
Estimated Time: 5hrs
Larch Valley is the most famous fall hike in Canada and the most trafficked hike at Moraine Lake. The trail meanders through a Larch forest which – if you time it right – turns entirely bright yellow and orange at the end of September/early October. Taking photos at Minnestima Lakes here is highly recommended during the morning as you’ll often find a perfect reflection of the Valley of the Ten Peaks lined by colourful trees.
The trail up to Larch Valley is beginner friendly as long as you have an average level of fitness. Experienced hikers can easily make it up to the forest in an hour, whereas it’ll take new hikers a bit longer.
This trail is extremely busy no matter the time of year so arriving early is recommended to beat the crowds.
Lake Louise hikes
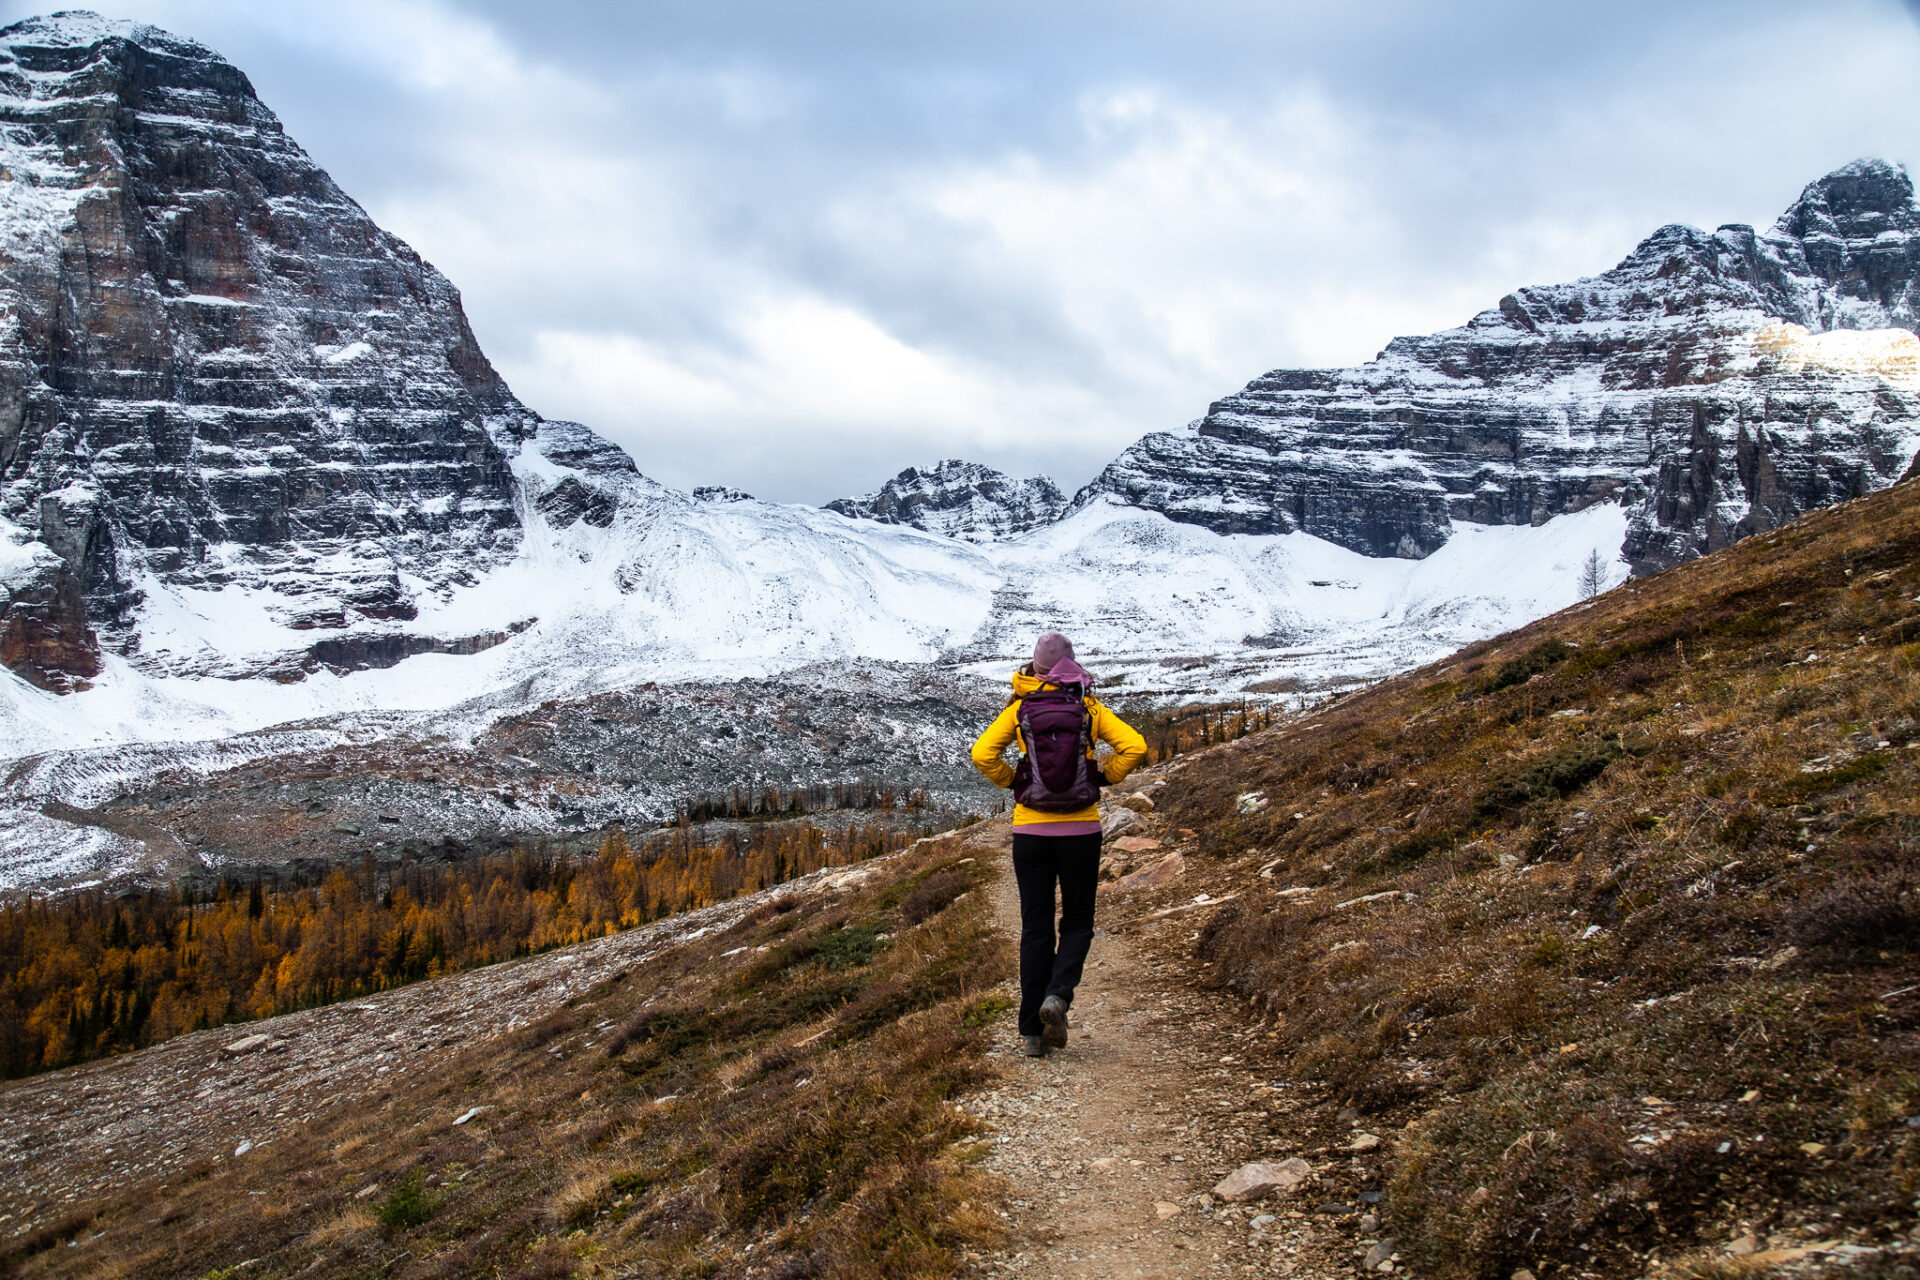
From Larch Valley, you’ll see a steep trail going up Sentinel Pass. I highly recommend reaching the top of the pass as the views down both Paradise and Larch Valley are epic. The final push up to Sentinel Pass is 1km of switchbacks past the furthest Minnestima Lake with 190m elevation gain. It typically takes no longer than 30-60 minutes to complete (one-way).
The trail up to Sentinel Pass often has snow on it until July so hiking this trail from July to early October is the best time of year.
Here’s my complete Larch Valley & Sentinel Pass trail guide.
Download my Banff & Lake Louise map
Consolation Lakes
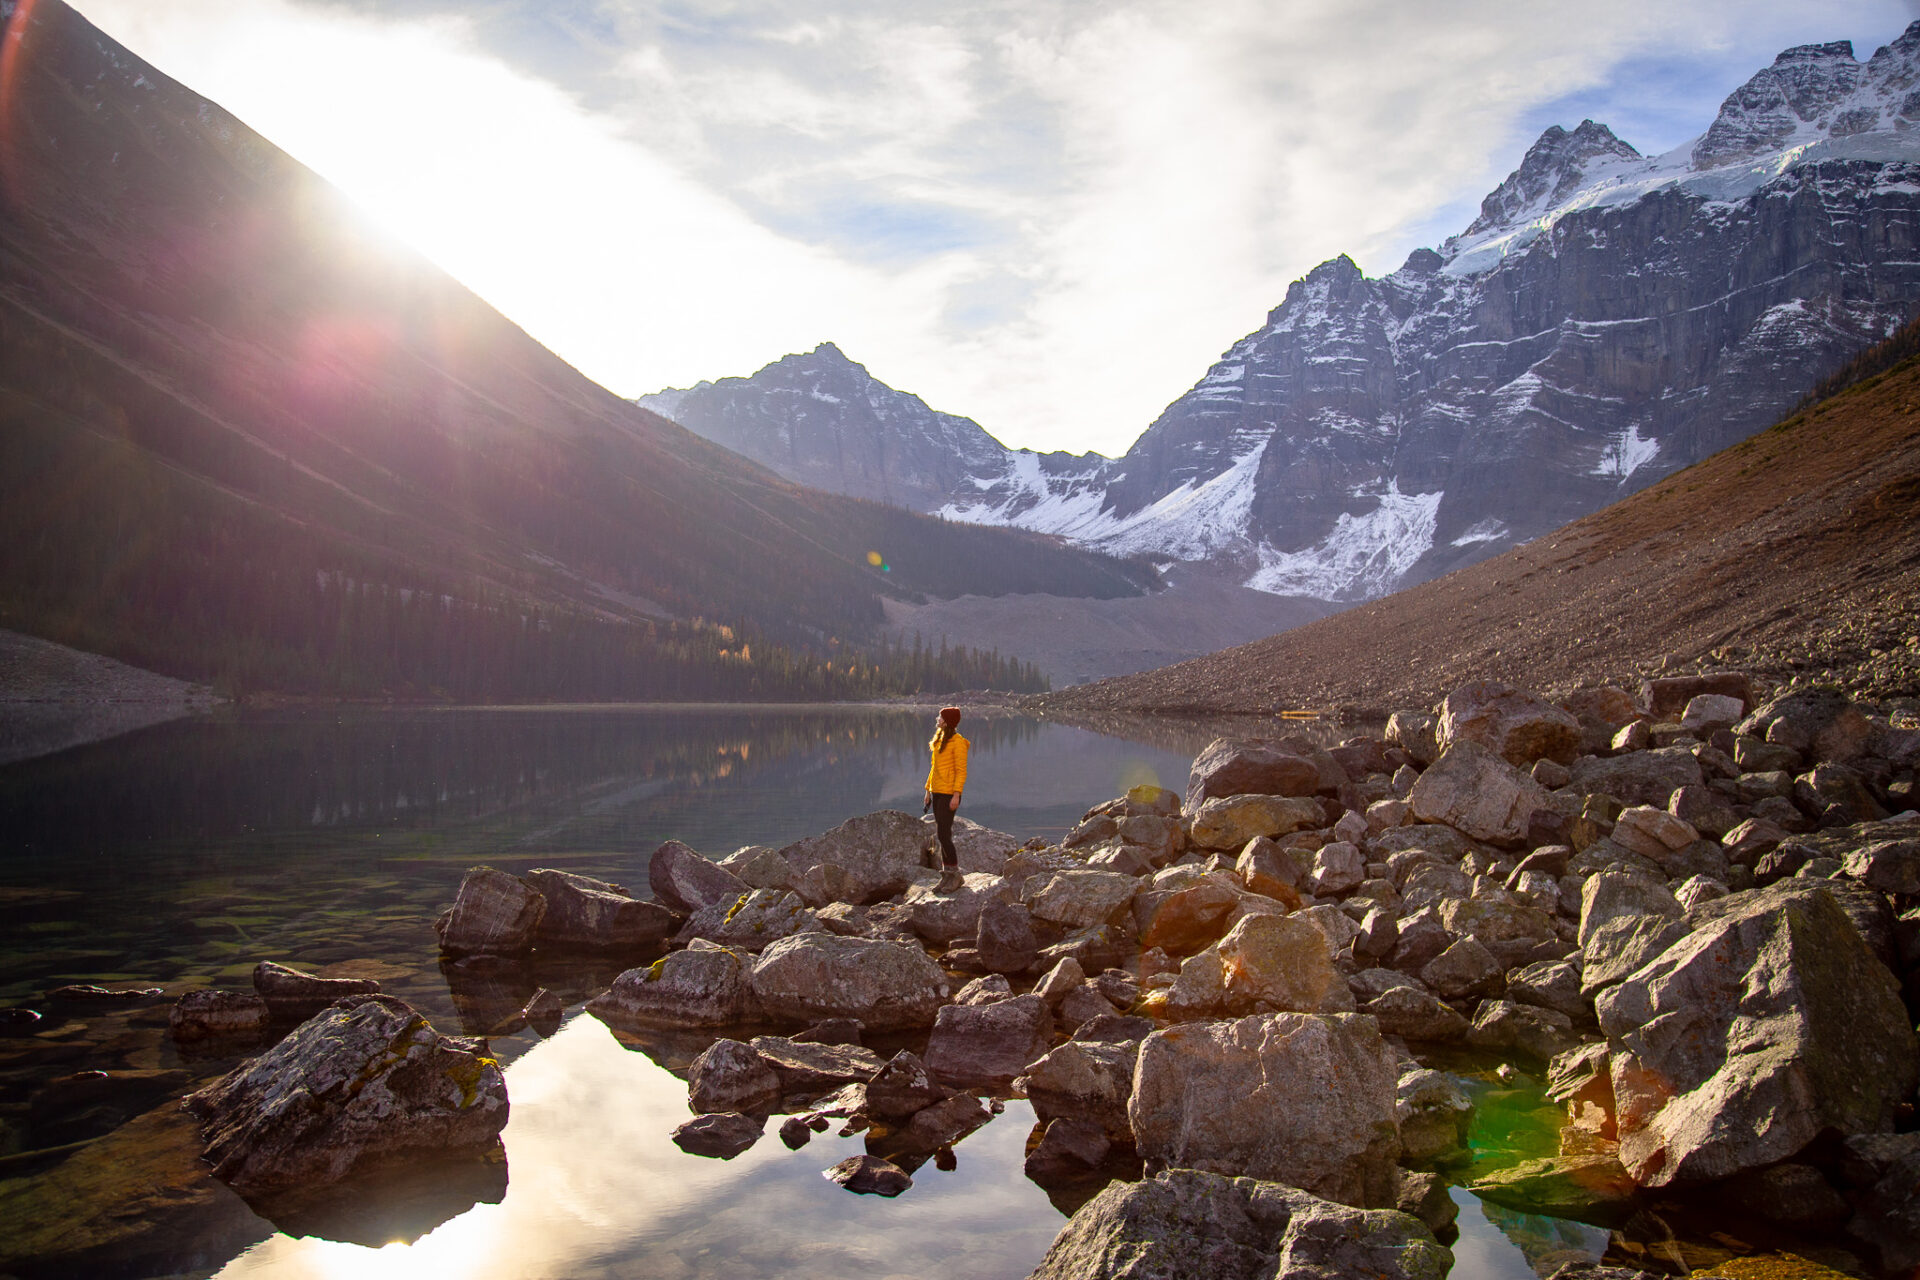
Distance: 7.9kms
Elevation Gain: 331m
Estimated Time: 2.5hrs
Consolation Lakes is the easiest hike at Moraine Lake and one of the most scenic hikes in the Lake Louise area. The hike is suitable for families and new hikers, however the trail does pass through Grizzly territory so hiking in groups of 4+ is highly recommended. Always carry bear spray on the Consolation Lakes trail.
The trail is wide and packed until the end where you’ll have to scramble over a large field of boulders. This scramble is very doable and doesn’t have any elevation gain, but sturdy shoes and attention to footing are required.
There’s a trail that loops around the lake to a viewpoint overlooking both lakes, but the trail is not maintained. On one side of the lake you’ll have to bushwhack and on the other you’ll have to risk exposure to frequently falling rock. The viewpoint is mediocre, so I recommend ending your hike at the first lake – this is where the best views are.
Download my Banff & Lake Louise map
Lake Annette
Distance: 11.4kms
Elevation Gain: 370m
Estimated Time: 3hrs, 15mins
Lake Annette is a blue lake in the Paradise Valley. The trail is accessed via multiple trailheads and can be done as a day hike or as part of a longer backpacking route. The Lake Annette hike is best completed from July-September.
The Alltrails map linked below begins at the Paradise Valley trailhead, however Lake Annette can also be reached via the Moraine Lake Highland Trail from Lake Louise or down from Saddleback Pass.
Download my Banff & Lake Louise map
Tower of Babel
Distance: 2.9kms
Elevation Gain: 516m
Estimated Time: 3hrs
Tower of Babel, accessed from Moraine Lake, is one of the great scrambles of Lake Louise. The trail follows a gully full of loose rock and toward the top genuine scrambling is required to reach the summit.
At the Tower of Babel summit you’ll find a perfect birds-eye view of Moraine Lake down below as well as over the Consolation Lakes and Consolation Valley on the other side. This trail can be completed as a sunrise hike.
This Lake Louise hike is for advanced hikers only. Sturdy footwear is required and helmets are highly recommended as the risk of falling rock is high.
Here’s my complete guide for scrambling up the Tower of Babel.
Download my Banff & Lake Louise map
Eiffel Lake & Wenkchemna Pass
Distance: 18.3kms
Elevation Gain: 881m
Estimated Time: 6.5hrs
Eiffel Lake is one of my favourite Lake Louise hikes for Larch trees. The trail is longer which means not as many people do it – aka it’s way quieter than Larch Valley or the other hikes around Moraine Lake.
The first part of the trail follows a forested area before opening up to the Valley of the Ten Peaks. Here you’ll be up close and personal with the beautiful mountains and glaciers you see behind Moraine Lake.
The trail is simple and mostly packed until the last section where it becomes rocky. Aside from the length of the trail, the terrain on this hike is suitable for hikers of all ability levels.
Past Eiffel Lake, hikers can opt to continue up Wenkchemna Pass. The trail up the pass is steep and usually covered in snow. Oftentimes the snow will not melt entirely during the summer. Spikes may be helpful no matter the season.
The trail is easy to follow as long as there’s no fresh snowfall – if this is the case having the Alltrails map downloaded is very valuable. The grade of the pass is steep too so there’s always the possibility of avalanches.
The final push to the top of the pass is a brief, but steep scramble. At the top of the pass you’ll find a signpost which makes for a great photo-op, views down the next valley into Yoho National Park, and a birds-eye view of the valley you hike through to get up the pass.
Lake Louise hikes
Download my Banff & Lake Louise map
Eiffel Peak
Distance: 11.3kms
Elevation Gain: 1,214m
Estimated Time: 8-10hrs
Eiffel Peak is a class 4 scramble and should only be attempted by very experienced hikers. The hike follows the Larch Valley trail, then cuts up on the west side of the valley.
Some of the mountains visible from this peak are Temple, Castle, Fairview, Tower of Babel, the Ten Peaks, and Panorama Ridge.
Sturdy footwear, poles, and helmets are highly recommended for the Eiffel Peak trail.
Download my Banff & Lake Louise map
Little Temple
Distance: 6kms
Elevation Gain: 750m
Estimated Time: 4-7hrs
Little Temple is a smaller objective than its higher peak, Mount Temple. The trail ventures through Paradise Valley. It’s a mostly forested route until the top where the trail transforms into rocky terrain with exposure.
Although there’s currently no recorded map for Little Temple, the trail can be accessed from the Paradise Valley trailhead or Lake Annette if you’ve hiked in from Lake Louise.
Lake Louise hikes at Moraine Lake
Download my Banff & Lake Louise map
Mount Temple
Distance: 15.1kms
Elevation Gain: 1,633m
Estimated Time: 10-14hrs
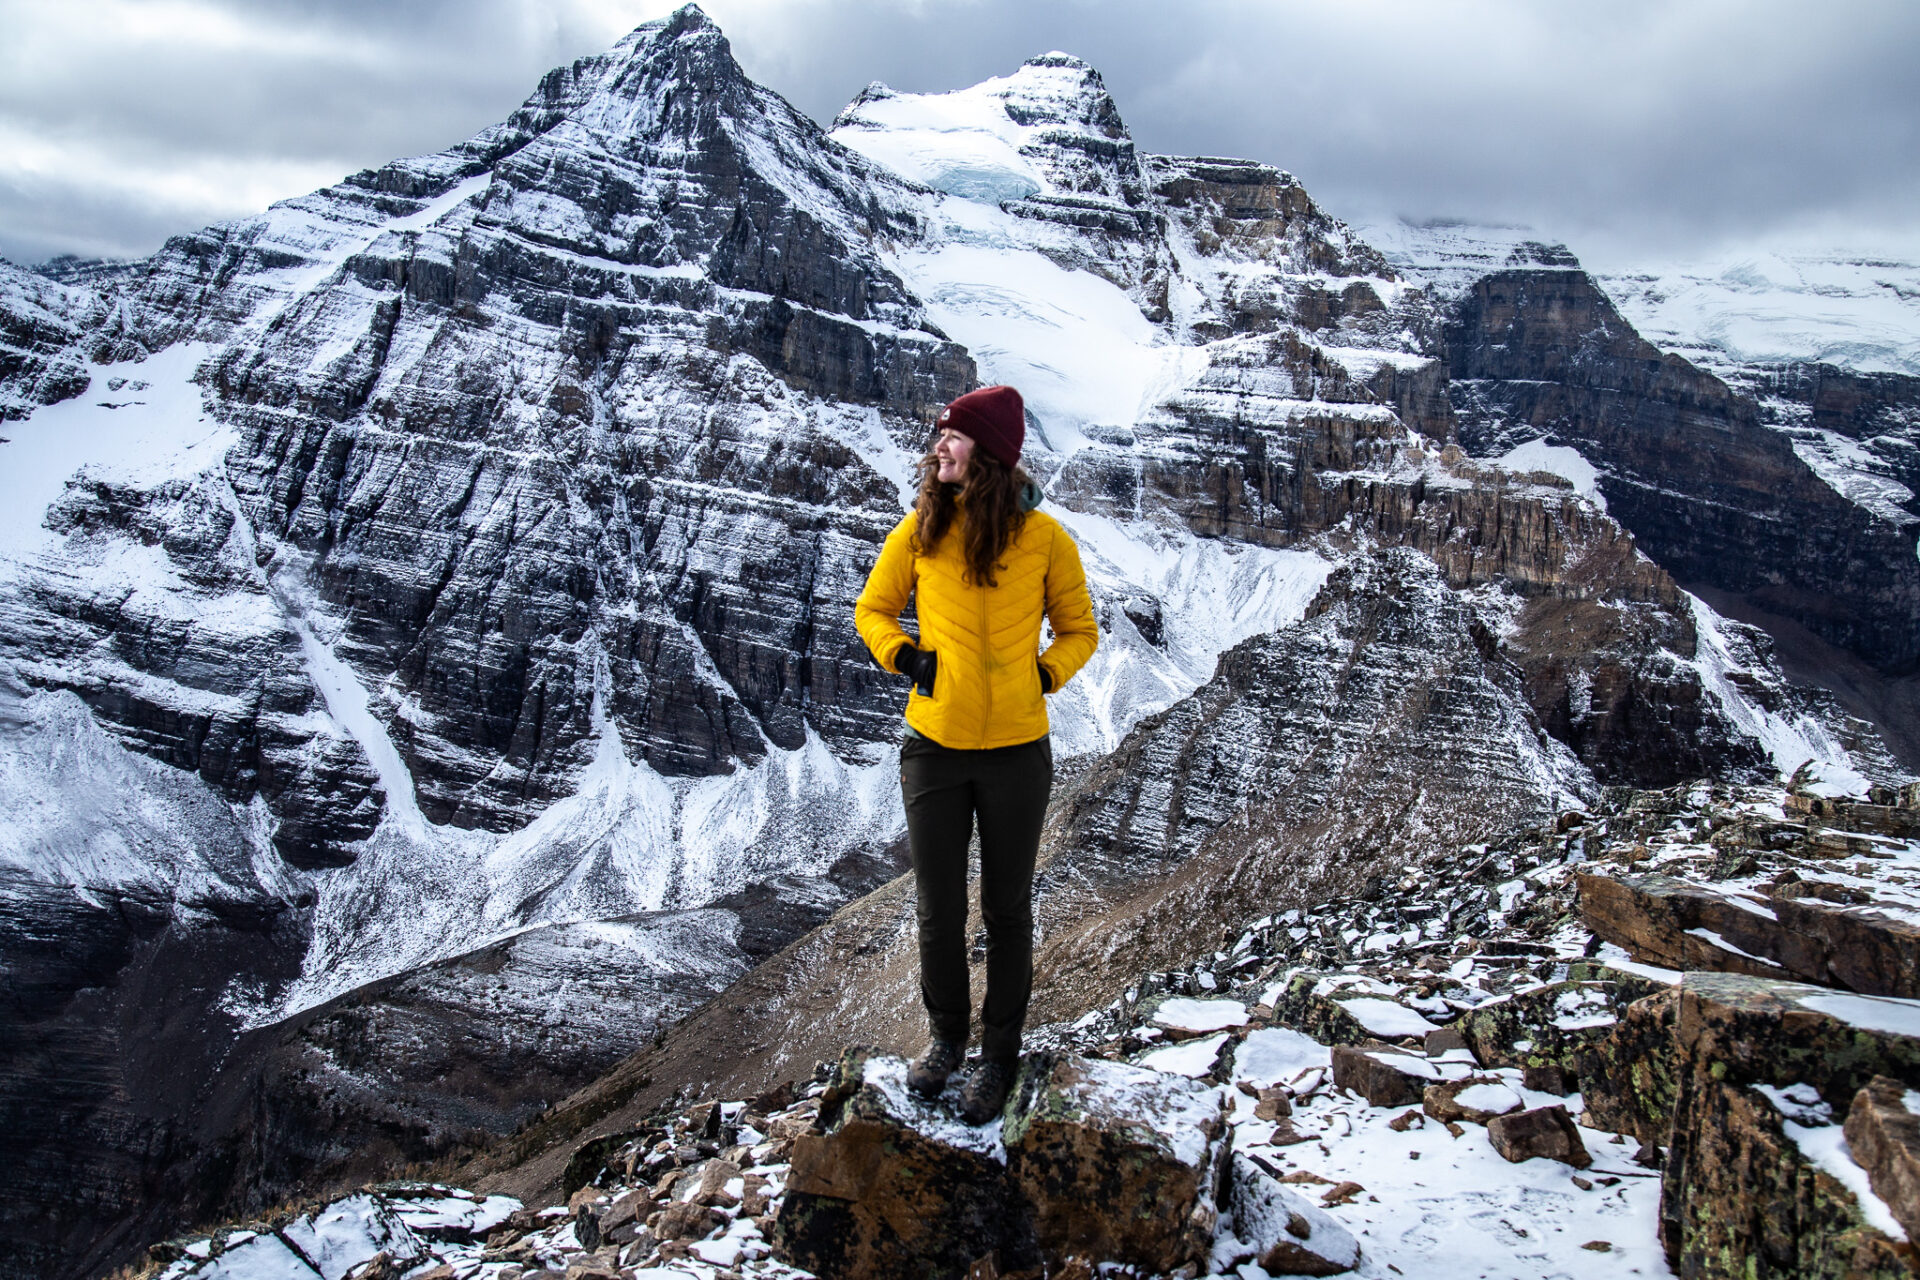
Mount Temple is the 11th tallest mountain in the Canadian Rockies (3,544m or 11,627ft) making this the gnarliest hike in Lake Louise. The trail starts at Moraine Lake, goes through Larch Valley, and up Sentinel Pass. Past Sentinel Pass is where the real ascent begins.
Hikers can expect plenty of scrambling and exposure on this trail. Some hikers opt to use ropes whereas others don’t. There’s usually some snow on the trail no matter the time of year so bringing spikes, poles, and helmets is recommended.
This trail should not be attempted until August. There’s typically a very brief window of 2-4 weeks to complete this hike each summer. Experienced hikers only for this one.
Lake Louis hikes
Download my Banff & Lake Louise map
Canadian Rockies Hiking Tips
Guides for hikes in: Banff | Jasper | Kananaskis | Kootenay | Waterton | Yoho
Approach: take a conservative approach if you’re new to hiking and ensure you have lots of daylight. Trails here are steep, long, and can have challenging terrain.
Best Time of Year: July to early September is the most reliable for weather and minimal snow. This post outlines each month in Banff.
- Hiking in winter? Stick to easy, well-trafficked trails unless you’re knowledgeable about avalanche terrain. I always check the avalanche bulletin and use both Caltopo and Google Maps satellite view to survey terrain before hiking.
Pets: leashed dogs are allowed on all trails in the Rockies unless otherwise stated.
Safety: tell someone where you’re going and when you plan to return. I always carry the Garmin InReach Mini for additional safety as there’s minimal cell service in the Rockies.
Wildlife: carry bear spray and know how to use it. Here are bear safety tips from Parks Canada.
Maps: I purchase the Alltrails+ membership and download my maps before hiking so I always know where I am.
Helpful Canadian Rockies Hiking Posts:
More of my detailed hiking tips can be found here
Canadian Rockies Camping Tips
Plan to go camping in Banff and the Canadian Rockies? Here are some useful things to know.
Unless you’re on some form of public land – random camping and free car camping is not permitted in the Canadian Rockies. If you do plan to “free” camp in the designated areas, you must purchase the Public Lands Camping Pass.
Camping Reservations: reservation day (when bookings go live) usually occurs in January. Most summer camping reservations must be made then as sites fill up instantly.
- National park camping reservations can be made here and Kananaskis reservations can be made here: backcountry | front country.
- Can’t get a reservation? Sign up for cancellation notifications via Schnerp. I use this resource frequently and have found cancellations at the most popular spots in the Rockies like Lake O’Hara.
When to Camp: most campgrounds close for the winter, however a few remain open year round. July-August is best for backcountry camping. Keep in mind, temperatures are typically very cold at night even during peak summer.
Hut Camping: the Alpine Club of Canada has established alpine huts scattered around the Rockies and beyond. These huts must be booked in advance and cater to backcountry skiers, hikers, and climbers.
Packing advice and my personal gear recommendations can be found in my Backcountry Gear Guide.
best hikes in Lake Louise
best hikes in Lake Louise for beginners
Downloadable Banff Map – from a LOCAL
Get my 600+ local Banff recommendations saved to your Google Maps app
I’ve lived in Banff for years & know all the best spots!
Outdoors: 100+ hiking trails, scrambles, backcountry routes, waterfalls & lakes
Planning: lodging, parking, restaurants, public washrooms, transit hubs, shopping & services
Things to do: tours, viewpoints, unique activities, & local secrets
every hike in Lake Louise
Happy adventuring!
Taylor ♡
Like This Post?
Share with friends or save it for later!

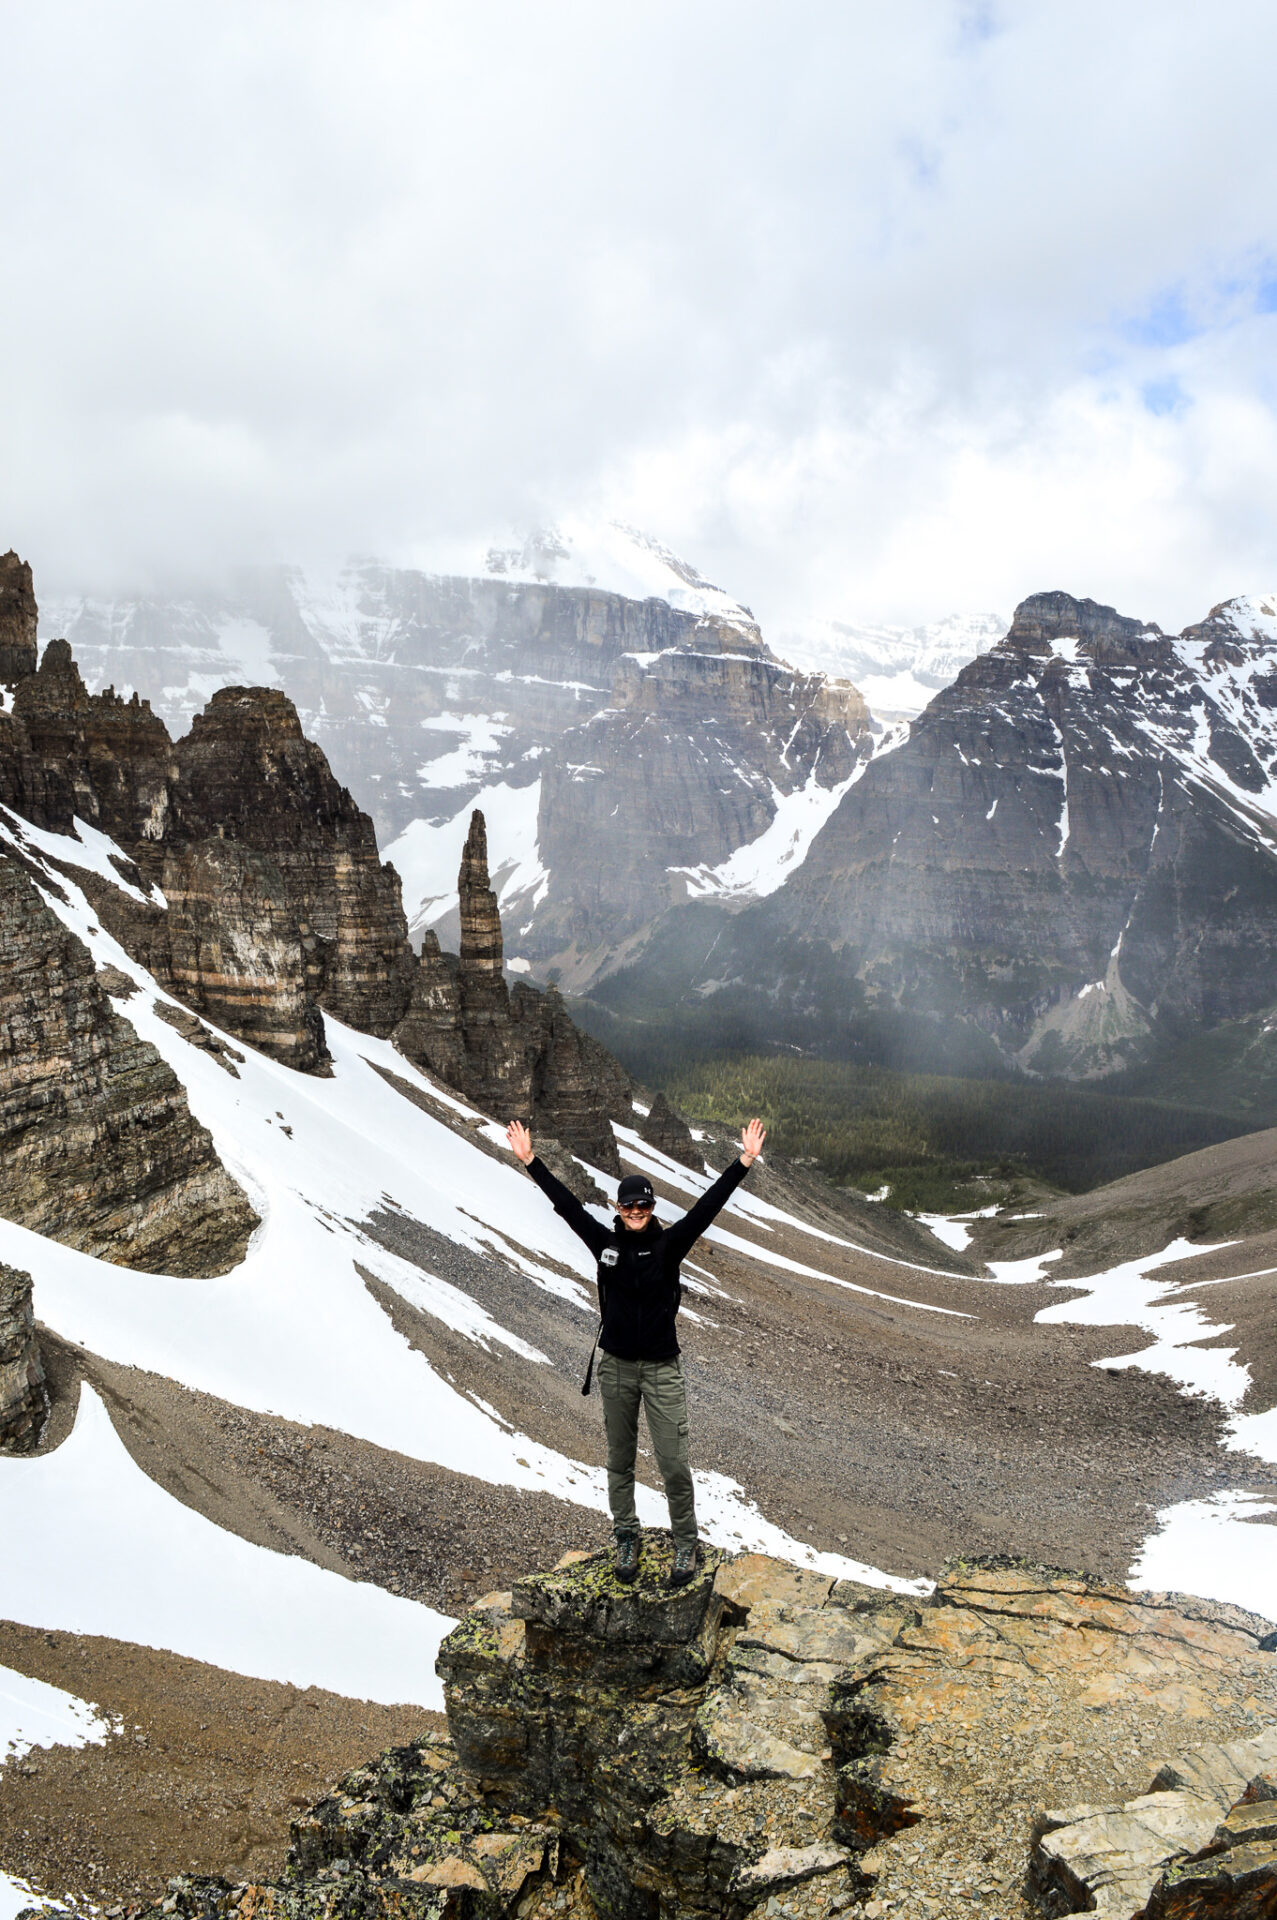
About the Author
HI, I’m Taylor – the voice behind The Holistic Backpacker.
After moving to Banff National Park in 2020 I became an outdoor adventure enthusiast and vowed to never stop exploring.
I now spend my days travelling the world, climbing mountains, and spending nights under the stars in the Canadian Rockies backcountry.
I created The Holistic Backpacker so I could share my adventures and help connect people like you with the same amazing experiences.