How to Find the Paint Pots in Kootenay
The Paint Pots in Kootenay National Park are right next to the quaint mountain town of Banff. The hike to the Paint Pots is quick, easy, suitable for all ability levels and it features some pretty unique geography.
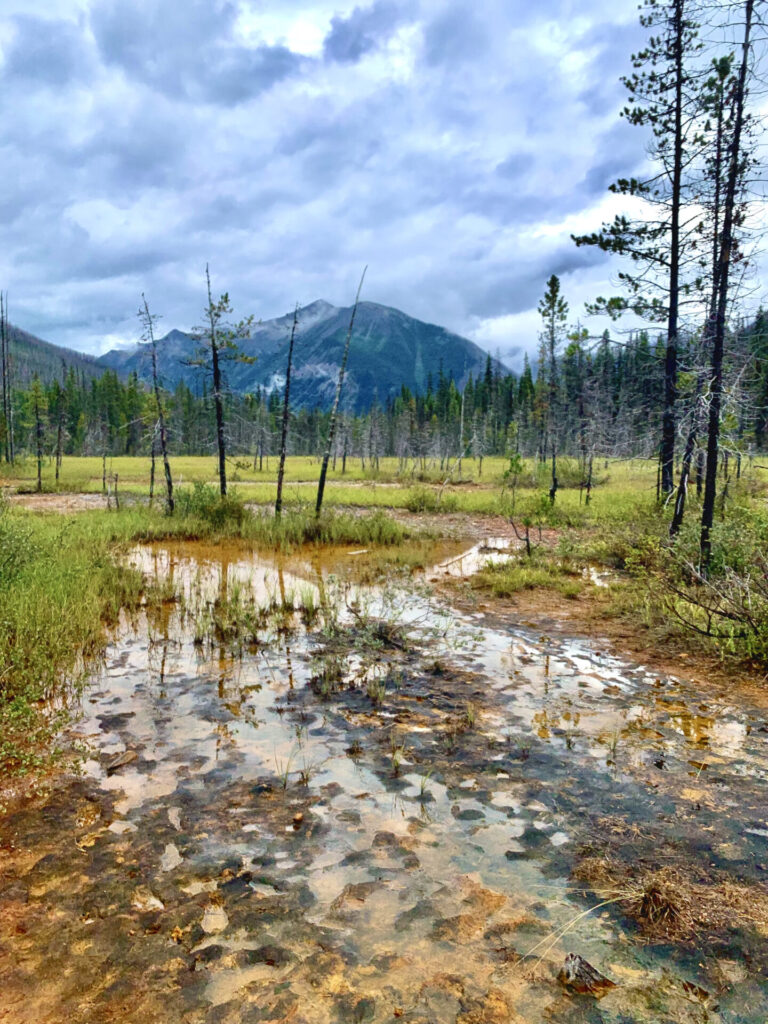
Along the way to the Paint Pots you’ll find vibrant orange clay, marshy landscapes, picturesque mountains, and of course, the colourful Paint Pots.
Want to find more Rocky Mountain hikes? Click here!
Now, let’s go hiking!
Skip Ahead:
- About the Kootenay Paint Pots
- How to get to the Paint Pots trailhead
- Where to stay in Kootenay
- About the trail
- About the hike
- Recommend hiking gear
- What to wear hiking
I have affiliate links in this post which means when you book a hotel or purchase a product, I may make a small commission ~ at no additional cost to you (full disclosure). These funds go back into The Holistic Backpacker and help me create more free content like this!
Thank you for supporting my work!
About the Kootenay Paint Pots
What are they? Mineral rich springs.
Why is the ground orange? The Paint Pots are rich in iron which have stained the surrounding ground: a mix of sand, clay, and soil. The areas of orange clay are actually referred to as “ochre beds.”
Spiritual/historical significance? The Paint Pots are sacred to the Ktunaxa peoples. The Ktunaxa peoples used to harvest the ochre beds (orange clay). The ochre was cleaned, kneaded with water, flattened into cakes, baked, then ground into powder. The powder was mixed with animal or fish oil, then used for body/rock painting, clothes, and tipis.
How to get to the Paint Pots Trailhead
The Paint Pots trailhead in Kootenay is located along Highway 93; the gorgeous highway that connects Banff and Radium Hot Springs. Since the trail is so short and right off the side of the highway, it’s the perfect place to get out and stretch your legs if you’re on a road trip.
The trailhead is located about 40 minutes from Banff and around an hour from Radium. There are no buses or shuttles that will take you to the trailhead, so if you don’t have a car you’ll need to rent one to access the Paint Pots.
Want to find more hikes along Highway 93? Check out my trail guides for Boom Lake, Arnica & Twin Lakes, and Taylor & O’brien Lake.
About the Paint Pots Trail
- Distance: 2.1km
- Elevation gain: 51m
- Rated: easy
- Type of trail: out & back
- Estimated time: 40 minutes
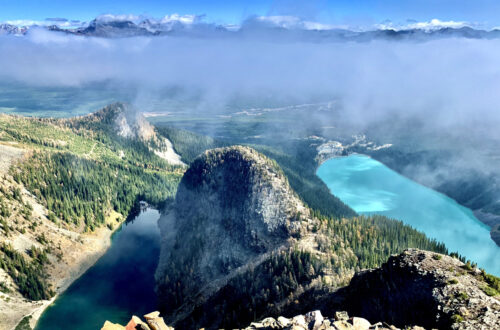
The Paint Pots hike is quick and effortless. The trail experiences minimal elevation gain and winds through a beautiful wooded area with distant views of Vermillion Peak, Tumbling NE5, and Numa NW3.
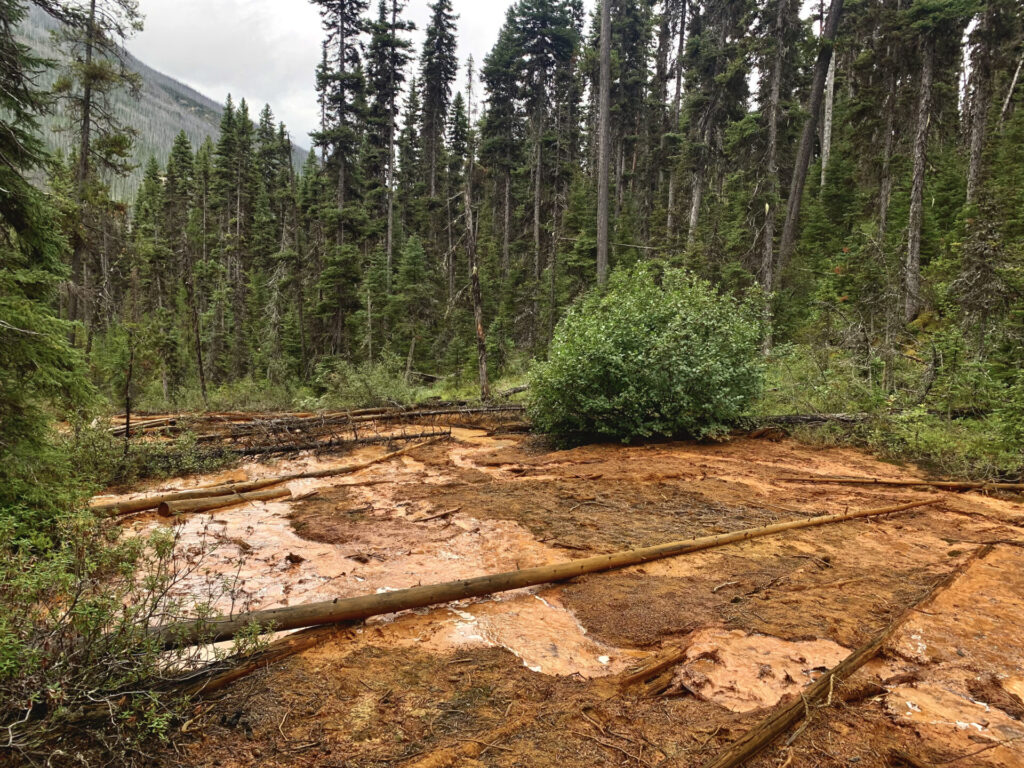
The trail itself crosses over very unique orange clay (aka ochre beds) which are unlike anything I’ve seen in the Rockies. Note that the ochre beds typically flood early/late season. There are pieces of wood and little boardwalks to help you cross the flooded areas, but prepare for your boots to get wet and dirty.
I recommend wearing waterproof hiking boots on this trail. I’m always in my Scarpa Kailash boots (men’s version) in the mountains – if you’re looking to upgrade your hiking boots this season I highly recommend these! A pair of gaiters would also help immensely on this hike.
Fun fact: the Paint Pots are located along The Rockwall; a very popular backpacking trail in the Banff region.
More: Backpacking Trail Guides
More: Backcountry Gear Guide: Everything you Need for Your Next Multi-Day Adventure
Connect via socials:
STAY CONNECTED
Sign up for emails to receive a 25% discount on my travel maps.
Taylor ♡
Where to Stay in Kootenay National Park
- Budget – HI Castle Mountain Hostel
- Mid-range – Johnston Canyon Lodge & Bungalows,
- Luxury stay – Storm Mountain Lodge & cabins
- Camp – reservation info.
Most people opt to spend the day in Kootenay and stay overnight in destinations nearby; namely Banff, Lake Louise, and Radium Hot Springs.
- Banff – Fairmont Banff Springs (luxury), Banff Park Lodge (mid-range), High Country Inn (budget), HI Banff, Banff Interntional, and Samesun Banff (hostels).
- Lake Louise – Fairmont Chateau Lake Louise (luxury), Paradise Lodge & Bungalows (500m from the lake), Lake Louise Inn (mid-range), HI Lake Louise (hostel).
- Radium Hot springs – Prestige Radium Hot Springs Resort (luxury), Radium Chalet (luxury), Rocky Mountain Springs Lodge (mid-range), Radium Park Lodge (budget).
Hiking to the Paint Pots
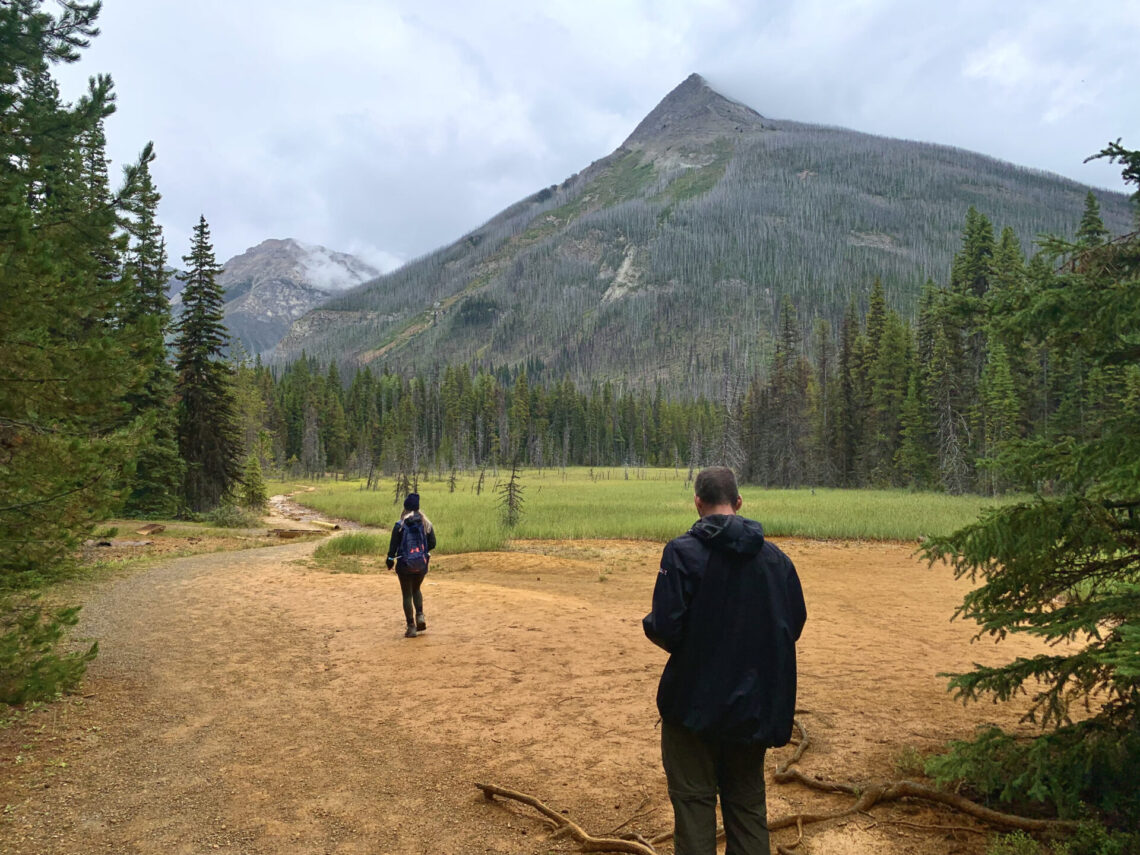
My day actually started out with a hike to Boom Lake in Banff, which happens to be right down the road. Since the hike to the Paint Pots is so short, it’s the perfect “add-on” to other hikes in the area!
The trailhead is located just behind the information board at the parking lot. You’ll enter a wooded section right away and find there are little side trails leading in every direction. Don’t worry – they all lead to the same place.
After 0.3kms of hiking, you’ll find a well built bridge that crosses the Kootenay River.
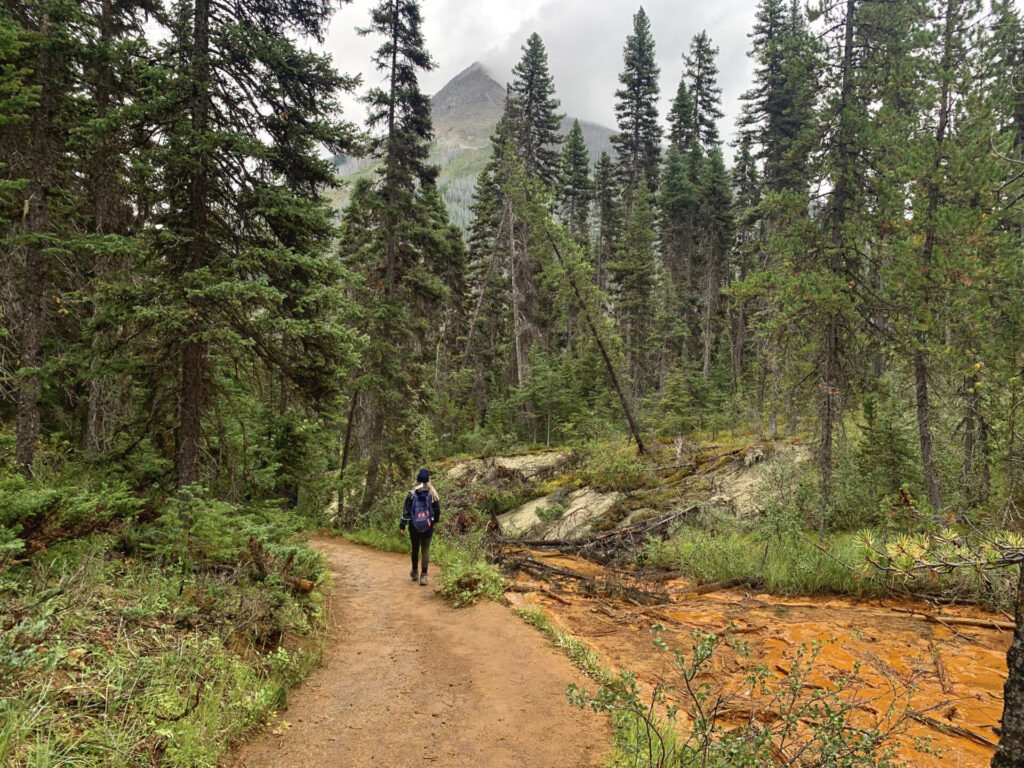
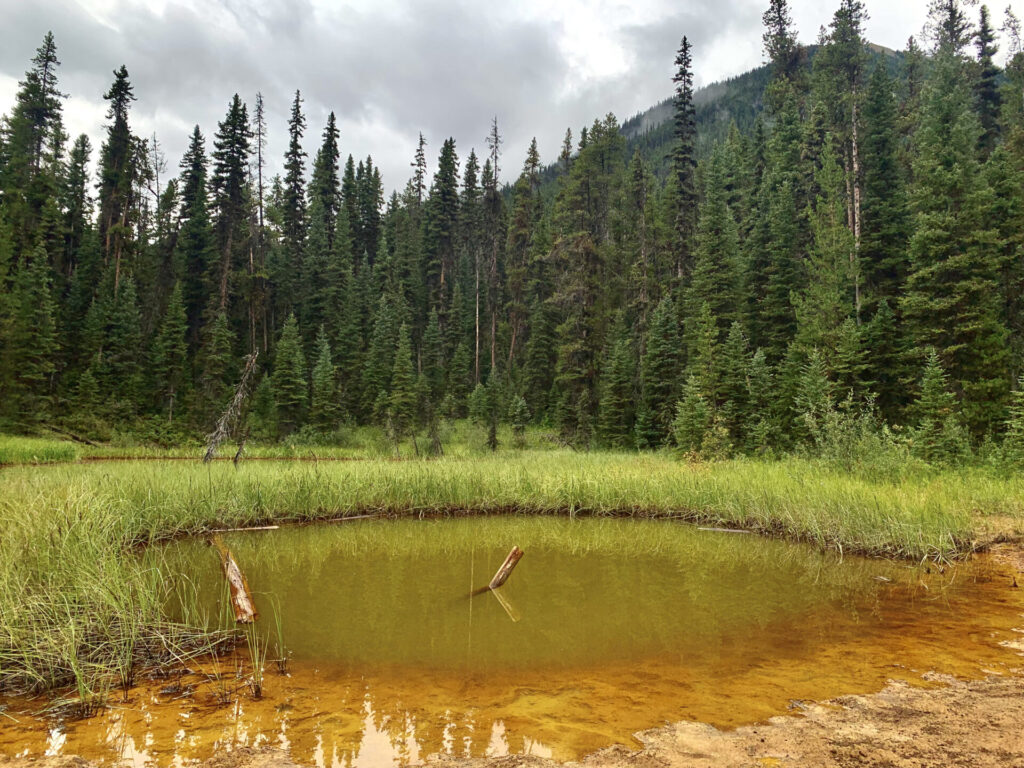
After crossing the Kootenay River you’ll find the orange clay, aka ochre beds. This area will most likely be wet or flooded and you’ll find old mining equipment; in the early 1900’s the ochre beds were commercially mined.
Trekking across the ochre beds and all the little pieces of wood/boardwalks was my favourite part of the hike. I was focused on doing a lot of summit hikes when I lived in Banff which meant I was constantly hiking over rocky terrain with lots of elevation gain.
The marshy areas, creeks, colourful clay, and relatively flat terrain on the hike to the Paint Pots in Kootenay was a nice change!
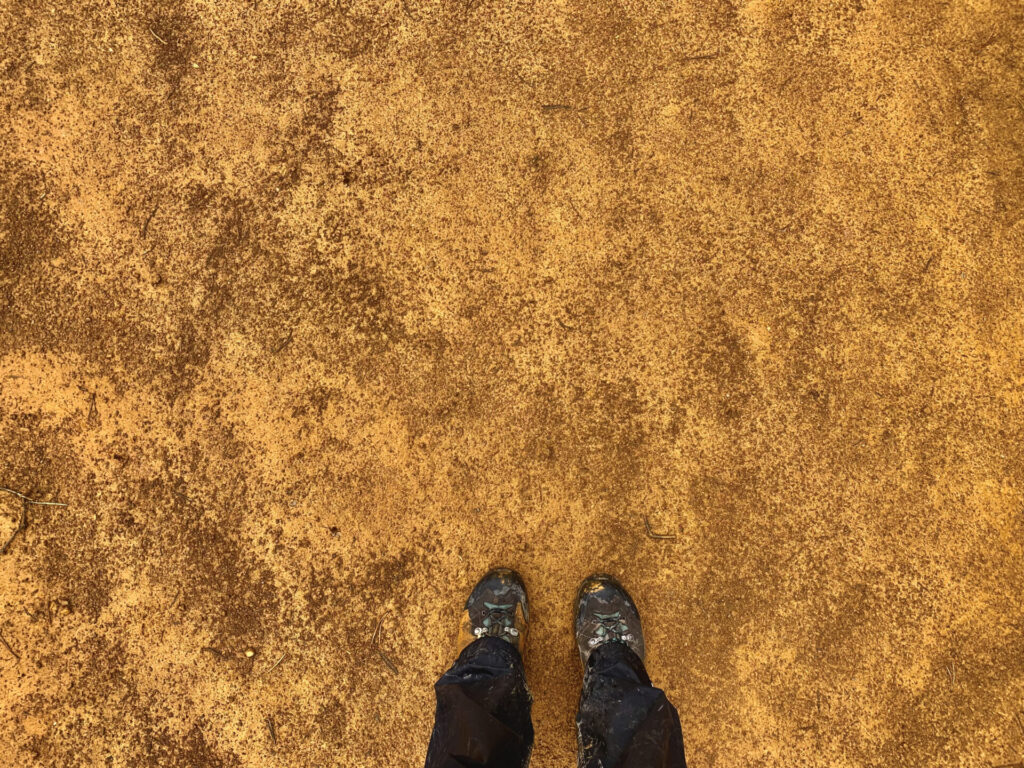
Expect your hiking boots to get super dirty as you walk through the clay.
Ochre Beds to the Paint Pots
After crossing the little bridges and wooden boardwalks over the flooded ochre beds, you’ll re-enter the wooded area. This area is where you’ll find the most elevation gain, but it’s very minimal and non-strenuous.
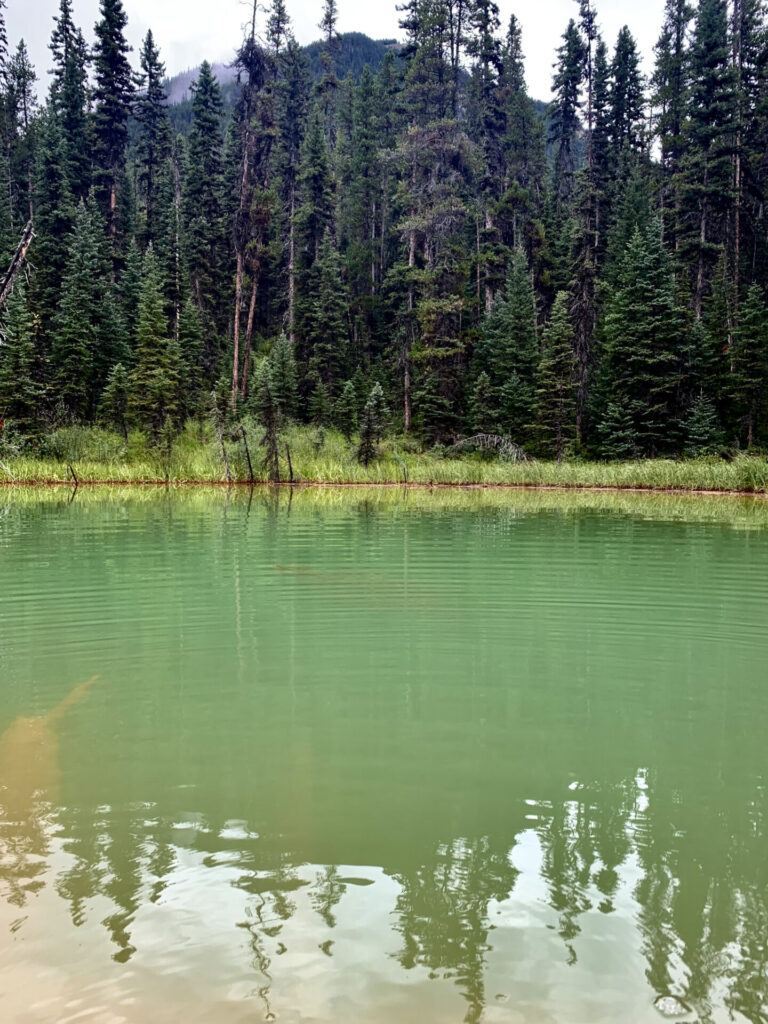
You’ll find the cutest little stream with tiny waterfalls running alongside the trail here too. This is where the ochre beds will be the most vibrant in colour.
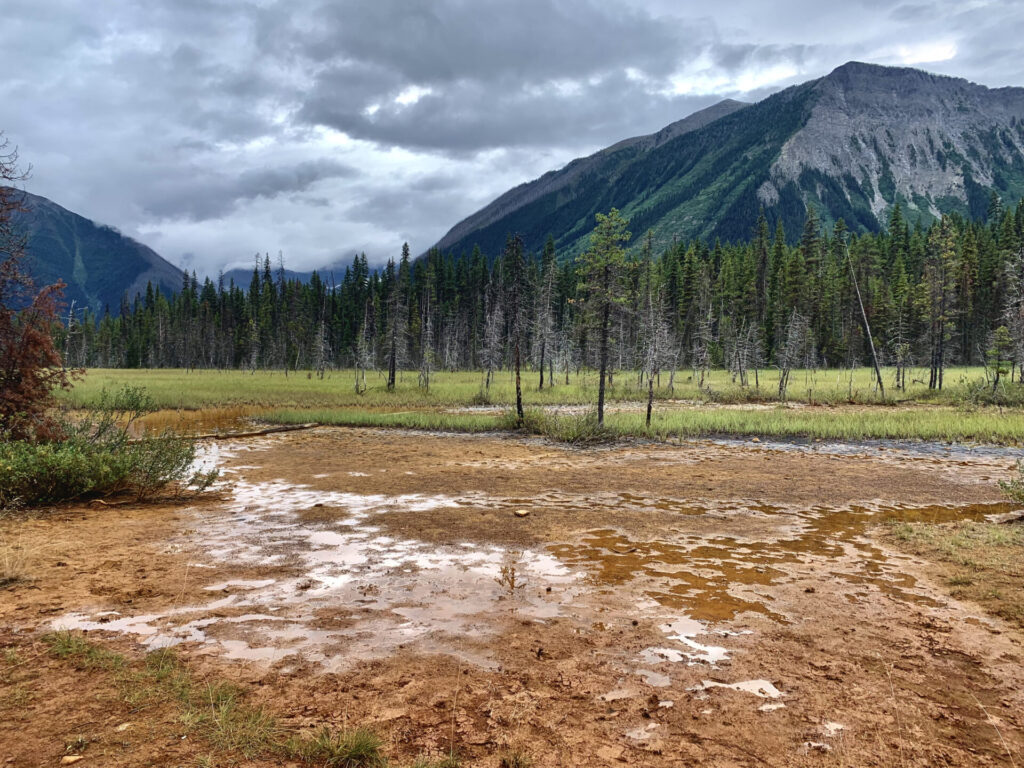
In less than 0.5kms, you’ll reach the Paint Pots!
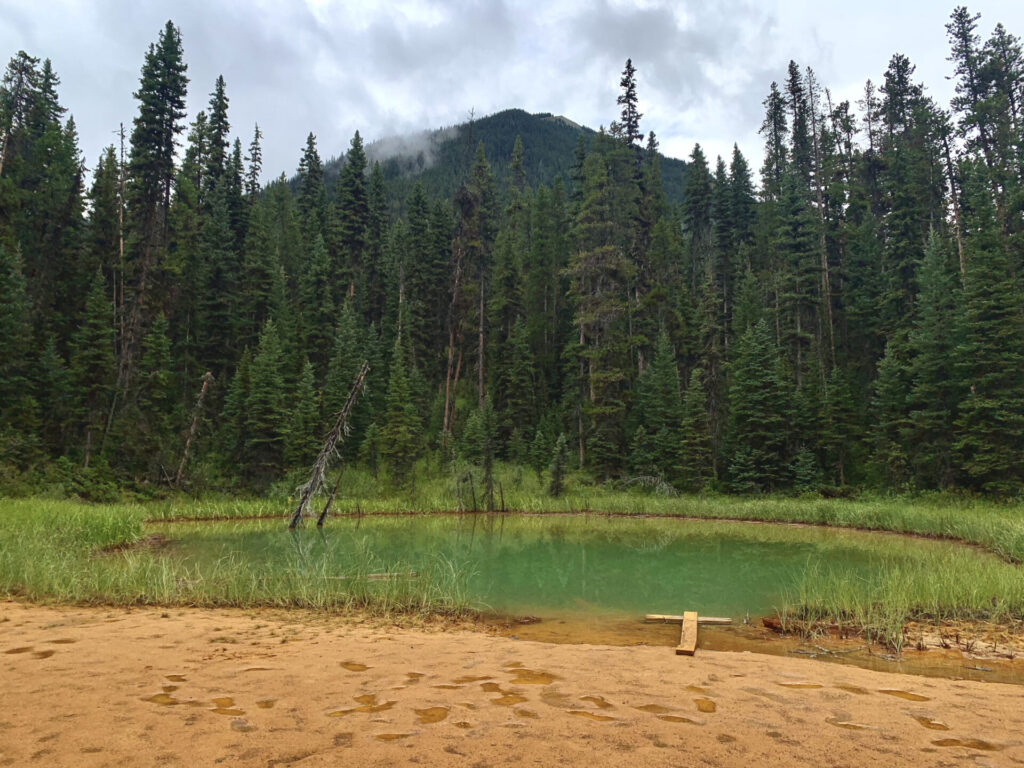

Once my group arrived at the Paint Pots, we thought “this can’t be them.” To be honest we were expecting something a little bigger and bluer in colour, so we thought we had to keep hiking. We ended up taking a trail – which led to Marble Canyon – for half a kilometre before realizing we were headed the wrong way.
SO, when you arrive at the teeny tiny pools of water, you’ve found them!
If you’re looking for something similar to the Paint Pots, but more “wow” consider checking out Johnston Canyon and the Ink Pots in Banff – these pools are bright blue in colour and are located in a picturesque basin!
And of course, don’t forget to explore more of my trail guides and the rest of my BC-based adventures!
Looking for More Adventures in British Columbia?
The Holistic Backpacker is full of hiking and travel resources for destinations all over the Canadian Rockies.
The following are a few of my personal favourites, but you can find all my BC guides here:
- How to spend 1 day in Yoho National Park
- Best ski resorts in British Columbia
- Paget Peak scramble
- Stanley Glacier hike
Explore Alberta
Alberta is British Columbia’s next door neighbour and is home to incredible National Parks and Wildland areas like Kananaskis Country, Banff National Park, Jasper National Park, Waterton National Park, etc.
You can find all my hiking guides and travel resources for Alberta here.
Happy adventuring!
Taylor ♡
Like This Post?
Share with friends or save it for later!

About the Author
HI, I’m Taylor – the voice behind The Holistic Backpacker.
After moving to Banff National Park in 2020 I became an outdoor adventure enthusiast and vowed to never stop exploring.
I now spend my days travelling the world, climbing mountains, and spending nights under the stars in the Canadian Rockies backcountry.
I created The Holistic Backpacker so I could share my adventures and help connect people like you with the same amazing experiences.